624
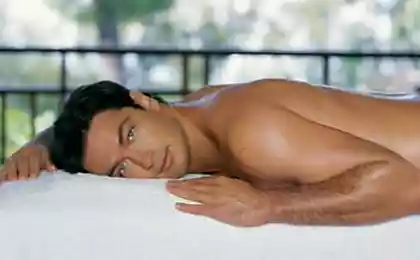
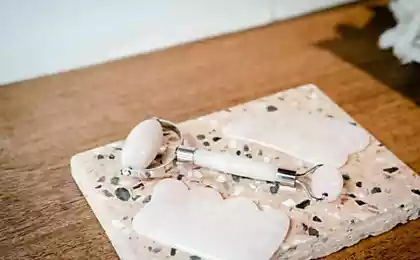
Abhyanga: 9 stage anti-aging treatments
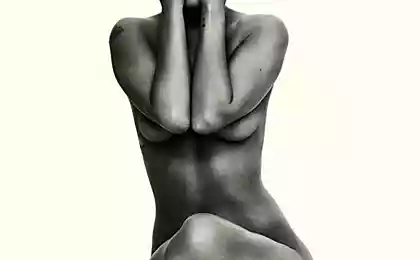
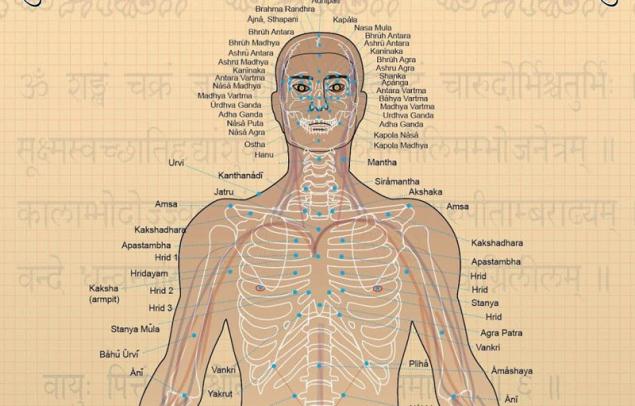
Full self-massage (Abhyanga) includes anointing of all joints of the body and the main marm.
This method helps to achieve a deep balance, because each energy point used in massage, have their mirror image:
Massaging one spot, you are stimulating and different, the corresponding.
The full self-massage procedure consists of nine steps:
Skin massage scalp Massage Massage logmessage hand Massage back Massage belly Massage chest Massage of the neck and face"Lift" the skin.
There are also self massage techniques reduced based on certain elements of the complete procedure. Reduced self-massage can be used with special purposes, as well as if you have just a little time.
Techniques to reduced Abhyanga for up to three minutes, include:
As you will see, each of these techniques serves a special purpose.
But before you begin to massage, read the following General instructions.
Training
Regular massage is beneficial for all constitutional types and is essential for maintaining healthy and youthful skin. However, not everyone is suitable all types of massage, as the proportion of elements in the Constitution of every human individual, and to harmonize each element requires specific herbs, oils, aromas, and touch.
Therefore, all the features of the massage — the frequency and duration of sessions, type of vegetable oil and powder method of applying an oil, the amount of pressure and stimulation — should match your skin type. Otherwise, the massage will do more harm than good.
When and where to massage Best time to get a massage before the morning bath or before bedtime. Be sure to empty your bladder before the massage. In any case do not massage immediately after eating. Conduct self-massage is best in the sitting position, on a large towel or Mat easily otstiryvaniya. Try to choose a warm, quiet and cozy place. If desired, you can turn on soft music and light incense sticks.
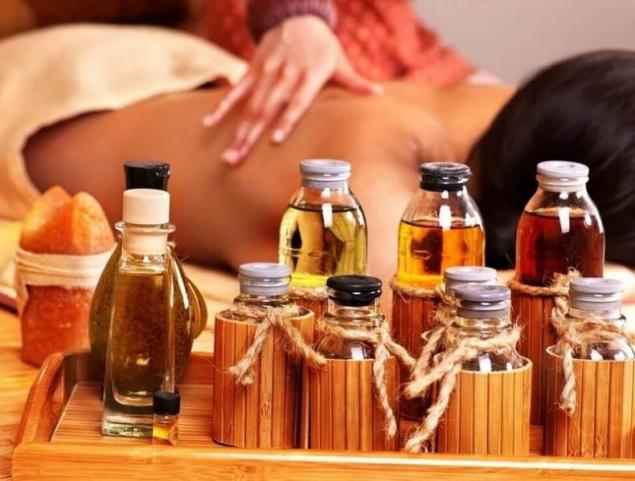
How to apply oil
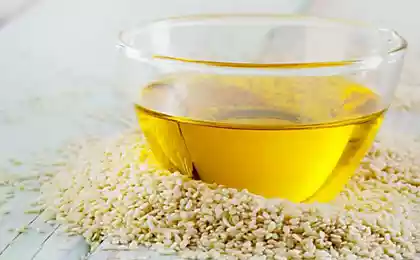
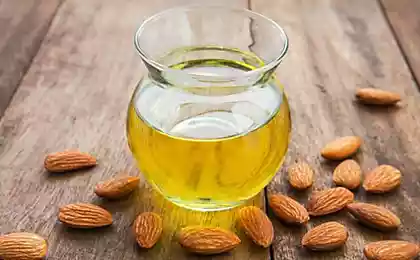
Use warm oil for the face and body with ingredients suitable for your skin type. To heat oil, you can just substitute the jar under hot water (be careful that the lid was on tight!).
On the face, apply the oil to the face, not the body.
After the massage I had to wash my hair, dots on the skin of the scalp lubricate with the same oil for the face – it is not as greasy as body oil.
Each marma and for each joint, apply at least a few drops of massage oil. Lubricate each point directly before the massage, applying oil by hand or dripping directly from the vessel.
Dry skin needs more oil, for sensitive — less and fat — less.
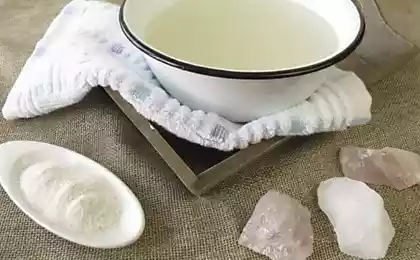
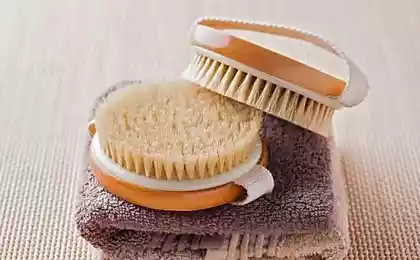
If you have very oily skin, do not use oil. Better to use dry pea flour and a loofah or powder for the body.
How to perform the massage correctly to do self-massage, you should learn different types of touch and different degrees of pressure. When self-massage apply three main types of touch depending on what body part you are working.
During the massage marm and joints RUB the skin with your fingers or hands, making circular movements in a clockwise direction (if not cite any other recommendations). For particularly sensitive areas of skin should only point to press, but in some cases, for the awakening of subtle energy requires tapping.
— The skin of the limbs between the joints RUB movements up and down.
— The skin of the hands and feet RUB only movements from the bottom up.
— The skin of the neck and face softly stroking movements, directed only upwards or sideways.
Deep kneading of muscles in the Ayurvedic massage not applicable, since the purpose of this massage is to stimulate the subtle energies of mA and Nadi. The touch should be light but confident. The degree of pressure depends on skin type:
Sattvic touch is gentle, but confident and unhurried. Usually it is used for dry skin or in situations where the person needs to calm down. It should be remembered that too much pressure increases the air element. Too deep and vigorous kneading can bring people Vata Constitution more harm than good, causing uncertainty and excitement.
Rajasic touch is to moderate the pressure and speed. It is good for sensitive skin. It should be remembered that excessive stimulation increases Pitta.
Tamasic touch is the most profound and energetic. It is beneficial for oily skin, because the thick, slow-moving Kapha need enhanced stimulation.
To accurately measure these differences in the degree of pressure is determined only empirically.
The duration of the massage
Traditionally in Ayurveda, it is recommended to make a 7-11 massage movements in the field each point. Full massage for compliance with this rule takes 15-20 minutes.
If there is little time, spend a shortened massage session, limiting points on the skin of the scalp and feet. Especially effective is this massage:
Attention!
* To the toxins have not penetrated into deeper tissue, in any case do not perform massage during menstruation, with severe weakness, exhaustion, constipation or fever.
* In any case do not massage the abdomen during pregnancy, ulcer of the stomach or heart disease.
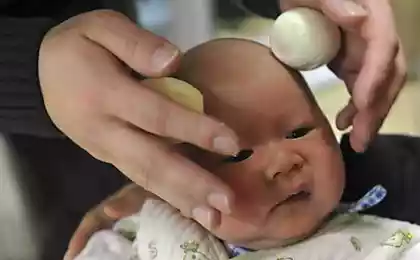
Now, we step-by-step instructions to complete a session of self-massage Stage 1: the skin of the scalp
Each point massage in three stages. First of all, grease your palm with oil and Pat on the spot, pressing lightly. Then, massage the point clockwise (the point corresponding to the medulla, massage the middle finger, not the palm), And finally, take a strand of hair that grow above the point, wrap it on finger, once hard pull, to stimulate the nerves and then release.
Step 2: foot
First perform massage the right foot and the entire foot, then left foot and leg.
Points of the foot massage in the following order:
1) Floridia. Thumb massage the point located in the center of the instep of the foot. Massage this point is good for the heart.
Big toe. Thumb massage the point located in the center of the big toe from the plantar side. Massage this point regulates hormonal activity.
2) the Toes. Massage the joints at the base of the toes from the plantar side. Move sequentially from the thumb to the little finger. Then do the same sequence of massage the fingers themselves, carefully sipping up each finger, from base to tip.
Each toe corresponds to one of the internal organs: brain, lungs, gastrointestinal tract, kidneys, and heart.
3) Materiality. This marma is located on the upper side of the foot in the hollow between the big and second toes. Press this point with the thumbs of both hands simultaneously and gently massage in the direction of the ankle segment with a length of 2-3 cm (to the bone).
4) Stop. Both hands Pro massage foot from the top and bottom side. Massage movements should be directed upwards, from the toes to the ankles.
Step 3: legs
1) the Ankle. Clasp your hands the joint to gently massage it, moving clockwise.
2) the Shin. Massage of the leg from the ankle to the knee on all sides. Alternate ascending movement with descending.
3) the Knee. Massage kneecap palms clockwise. Then in a circular motion gently massage behind the knee.
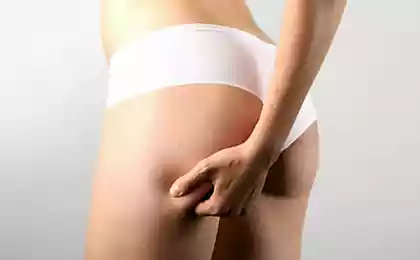
4) Thigh. Massage of the leg from the knee to the groin from all sides. Alternate ascending movement with descending. If you suffer from cellulite also knead the muscles of the thigh.
5) Logiteksa. This marma is located in the upper part of the leg, in the crease between thigh and groin, over the lymph node. Massaging her middle finger in a clockwise direction.
Step 4: shoulders
Follow the same procedure as in the massage of feet and legs. First perform the massage of the right hand and entire arm and then the left hand and arm.
1) Floridia. Massage the point in the center of the palm.
2) the Fingers of the hand. Massage the joints at the base of the fingers. Move sequentially from the thumb to the little finger. Then do the same sequence of massage the fingers themselves, carefully sipping up each finger, from base to tip.
3) the Brush. Massage back of hand motions from the fingers to the wrist.
4) the Wrist. Gently squeeze the joint with your fingers and massage his movements clockwise.
5) Forearm. Massage part of your arm from wrist to elbow on all sides. Alternate ascending movement with descending.
6) the Elbow. Grasp the joint with your fingers and massage his movements clockwise.
7) Shoulder. Massage part of your arm from the elbow to the shoulder joint on all sides.
Alternate ascending movement with descending.
8) the Shoulder joint. Massage the whole joint with your palms in a clockwise direction.
9) Casidra. Raise your hand up. The middle finger of the other hand gently massage the point in the center of the armpit, at the location of the lymph node.
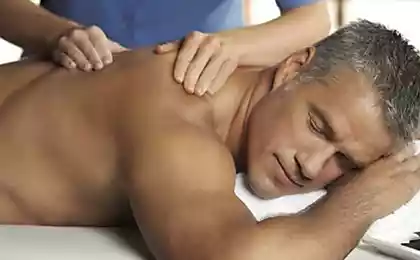
Step 5: back
The back is hard to massage yourself. Not too hard, do as much as you can.
Hands massage the lower back, alternating between ascending movement with the descending and climbing as far up as you can.
Then just massage your upper back, sinking farther down.
Option: take a towel, twist it into a thick harness and the oil massage oil. Throw a towel over the back, as a short rope, and mash them all back.
Stage b: the stomach
Skip this step if you are pregnant or have stomach ulcers or heart disease.
Iahi. This marma corresponds to the navel (second chakra). Pour the navel massage oil and gently massage it with your fingers clockwise.
Then do a circular motion with his palm, gradually expanding circles until you cover the entire area of the abdomen.
Then, change direction and gradually narrow circles, until you return to the point of navel.
Step 7: chest
Marma of the chest correspond to the third, fourth and fifth chakras — energy centers associated with emotions and expression. Massage these points (as, indeed, any other marm) helps to release energy pent-up emotions. The energy output may be accompanied by strong emotions. If it happens to you, continue to gently massage the point for one to two minutes, focusing on your physical sensations. All this time, breathe easily and freely.
1) Arrapata. This marma corresponds to the solar plexus (the third chakra). It is located approximately 12-13 cm above the navel. Massage it with your fingers clockwise.
2) Hridaya — heart (fourth) chakra. In fact, it consists of a system of points located on the chest between the nipples (just to the left of the center line) on the plot with a diameter of about 10 cm. Very gently RUB the area with your palm in a clockwise direction.
Massage hridayi awakens passion for life and contributes to the manifestation of feelings. If you are experiencing anger or frustration, give this area some more time.
3) the Upper part of the chest. Massage the right and left sides of the sternum under the clavicle, acting with one hand on each side.
4) Nile — throat (fifth) chakra. It is located in the depression immediately above the sternum. Massaging her middle finger. This point, which is also referred to as Saraswati chakra — center of expression.
If you often have to speak in public, or if you experience difficulties with expression of thoughts, give this point some time.
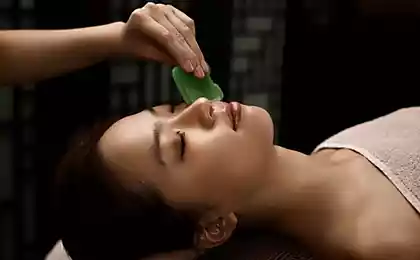
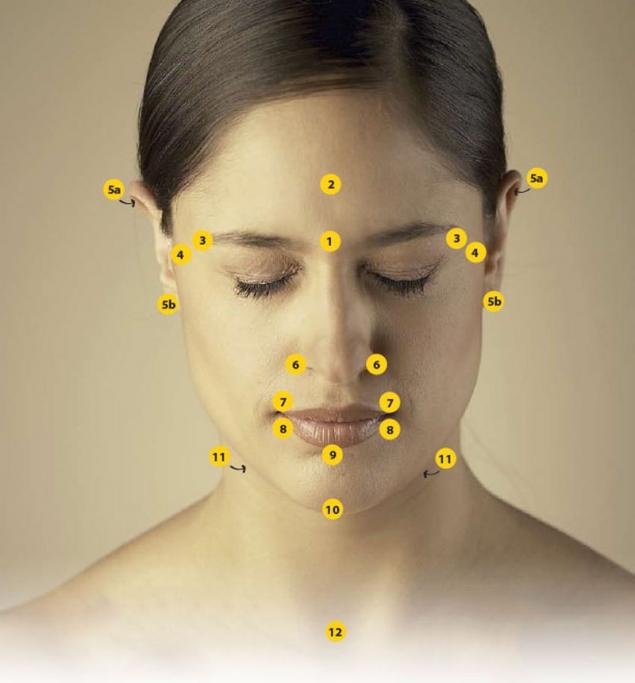
Step 8: neck and face
Massaging these very sensitive areas, use the facial oil.
1) Neck. Both of his hands gently massage the neck. The movement should be upwards, from the base of the neck to the chin.
2) Khan. This marma is located in the depression between chin and lower lip. Turning the right hand palm to his, your fingers apart like open scissors. Index finger apply to the point Khan, and an average tuck your chin from below. These swipe two fingers along the jaw line from chin to right ear. Then just massage the left side of face left hand. Alternating right and left hands, repeat these movements several times.
3) the Creases in the corners of the mouth and cheeks. Forefinger massage the creases in the corners of the mouth from the bottom up, from the chin to the base of the nose. Then open hands massage the cheeks from the bottom up, from the base of the nose to the temples.
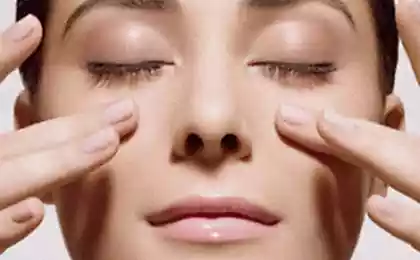
4) Eyes. Press your ring finger to the points where the eyebrows meet at the bridge of the nose. Massage the eye area, moving first along the eyebrows to the outer corner of the eye, and then back under the lower eyelids to the nose.
5) Stepane — the sixth chakra, the so-called "third eye". It is located above the eyebrows in the middle of the forehead. Indian women decorate the place with a red dot (Bindi). Middle fingers massage from the bottom up the line going from the nose to this point.
6) the Forehead. Press the middle and ring fingers of the right hand to the nose and massage the forehead upwards to the hairline. Repeat this movement 6-10 times, alternating right and left hands.
Then press your middle and ring fingers of the right hand to the left temple and a hand lightly across forehead to right temple.
Then press your middle and ring fingers of his left hand to his right temple and hand massage his forehead to his left temple.
Repeat this movement 6-10 times, alternating hands.
This massage technique helps to get rid of forehead wrinkles.
Step 9: "lift" the skin
This procedure can be performed not only after the massage but at any time. Each of the following points, massage movements in a clockwise direction for 20-30 seconds. Unless otherwise stated, follow the middle finger.
1) the Center of the chin. Massage this point helps the common cold.
2) the corners of the mouth.
3) the Center of the groove between the nose and upper lip.
4) the Outer corners of the nose at the nostrils. These points correspond to the small intestine. Massage them helps a blocked nose.
5) center point school. Click on the bone from the bottom up and massage the point.
6) Point on the lower eyelids just above the cheekbones. Gently press these points ring finger. Do not massage.
7) Eyebrows. The bases of the thumbs press upwards on the inner corners of the eyebrows at the bridge of the nose. Then mash both eyebrows, pinching their thumb and forefinger and moving from inner corners to outer. Repeat.
If performed correctly, this technique can cause slight irritation associated with the release of accumulated strain. It helps with headaches and problems with bladder.
8) Whiskey. Gently massage with fingers straightened.
9) the "Third eye". Coronal chakra. Push the crown both palms and vigorously RUB the skin of the scalp movements back and forth.
This self-massage may be over.published
P. S. And remember, only by changing their consumption — together we change the world! ©
Source: //www.ayurvedaplus.ru/articles/29749/257579/
This method helps to achieve a deep balance, because each energy point used in massage, have their mirror image:
- points on the hands and feet which correspond to the seven chakras,
- points on the head — points on the feet and fingers,
- points on the neck — the points on the ankles and wrists,
- points on the chest points on the calves of the legs,
- the dots on the belly spots on knees and elbows,
- points in the lower back — points on the hips
- the point of the pelvic girdle — points on the shoulders and sides.
Massaging one spot, you are stimulating and different, the corresponding.

The full self-massage procedure consists of nine steps:
Skin massage scalp Massage Massage logmessage hand Massage back Massage belly Massage chest Massage of the neck and face"Lift" the skin.
There are also self massage techniques reduced based on certain elements of the complete procedure. Reduced self-massage can be used with special purposes, as well as if you have just a little time.
Techniques to reduced Abhyanga for up to three minutes, include:
- massage skin scalp and foot massage (phases 1 and 2),
- massage of the abdomen (stage 6),
- "lift" the skin(step 9).
As you will see, each of these techniques serves a special purpose.
But before you begin to massage, read the following General instructions.
Training
Regular massage is beneficial for all constitutional types and is essential for maintaining healthy and youthful skin. However, not everyone is suitable all types of massage, as the proportion of elements in the Constitution of every human individual, and to harmonize each element requires specific herbs, oils, aromas, and touch.
Therefore, all the features of the massage — the frequency and duration of sessions, type of vegetable oil and powder method of applying an oil, the amount of pressure and stimulation — should match your skin type. Otherwise, the massage will do more harm than good.
When and where to massage Best time to get a massage before the morning bath or before bedtime. Be sure to empty your bladder before the massage. In any case do not massage immediately after eating. Conduct self-massage is best in the sitting position, on a large towel or Mat easily otstiryvaniya. Try to choose a warm, quiet and cozy place. If desired, you can turn on soft music and light incense sticks.
How to apply oil
Use warm oil for the face and body with ingredients suitable for your skin type. To heat oil, you can just substitute the jar under hot water (be careful that the lid was on tight!).
On the face, apply the oil to the face, not the body.
After the massage I had to wash my hair, dots on the skin of the scalp lubricate with the same oil for the face – it is not as greasy as body oil.
Each marma and for each joint, apply at least a few drops of massage oil. Lubricate each point directly before the massage, applying oil by hand or dripping directly from the vessel.

Dry skin needs more oil, for sensitive — less and fat — less.
If you have very oily skin, do not use oil. Better to use dry pea flour and a loofah or powder for the body.
How to perform the massage correctly to do self-massage, you should learn different types of touch and different degrees of pressure. When self-massage apply three main types of touch depending on what body part you are working.
During the massage marm and joints RUB the skin with your fingers or hands, making circular movements in a clockwise direction (if not cite any other recommendations). For particularly sensitive areas of skin should only point to press, but in some cases, for the awakening of subtle energy requires tapping.
— The skin of the limbs between the joints RUB movements up and down.
— The skin of the hands and feet RUB only movements from the bottom up.
— The skin of the neck and face softly stroking movements, directed only upwards or sideways.
Deep kneading of muscles in the Ayurvedic massage not applicable, since the purpose of this massage is to stimulate the subtle energies of mA and Nadi. The touch should be light but confident. The degree of pressure depends on skin type:
Sattvic touch is gentle, but confident and unhurried. Usually it is used for dry skin or in situations where the person needs to calm down. It should be remembered that too much pressure increases the air element. Too deep and vigorous kneading can bring people Vata Constitution more harm than good, causing uncertainty and excitement.
Rajasic touch is to moderate the pressure and speed. It is good for sensitive skin. It should be remembered that excessive stimulation increases Pitta.
Tamasic touch is the most profound and energetic. It is beneficial for oily skin, because the thick, slow-moving Kapha need enhanced stimulation.
To accurately measure these differences in the degree of pressure is determined only empirically.
The duration of the massage
Traditionally in Ayurveda, it is recommended to make a 7-11 massage movements in the field each point. Full massage for compliance with this rule takes 15-20 minutes.
If there is little time, spend a shortened massage session, limiting points on the skin of the scalp and feet. Especially effective is this massage:
- before you sleep if you suffer from insomnia,
- in the morning - if you are experiencing anxiety and concern.
Attention!
* To the toxins have not penetrated into deeper tissue, in any case do not perform massage during menstruation, with severe weakness, exhaustion, constipation or fever.
* In any case do not massage the abdomen during pregnancy, ulcer of the stomach or heart disease.
Now, we step-by-step instructions to complete a session of self-massage Stage 1: the skin of the scalp
Each point massage in three stages. First of all, grease your palm with oil and Pat on the spot, pressing lightly. Then, massage the point clockwise (the point corresponding to the medulla, massage the middle finger, not the palm), And finally, take a strand of hair that grow above the point, wrap it on finger, once hard pull, to stimulate the nerves and then release.
Step 2: foot
First perform massage the right foot and the entire foot, then left foot and leg.
Points of the foot massage in the following order:
1) Floridia. Thumb massage the point located in the center of the instep of the foot. Massage this point is good for the heart.
Big toe. Thumb massage the point located in the center of the big toe from the plantar side. Massage this point regulates hormonal activity.
2) the Toes. Massage the joints at the base of the toes from the plantar side. Move sequentially from the thumb to the little finger. Then do the same sequence of massage the fingers themselves, carefully sipping up each finger, from base to tip.
Each toe corresponds to one of the internal organs: brain, lungs, gastrointestinal tract, kidneys, and heart.
3) Materiality. This marma is located on the upper side of the foot in the hollow between the big and second toes. Press this point with the thumbs of both hands simultaneously and gently massage in the direction of the ankle segment with a length of 2-3 cm (to the bone).
4) Stop. Both hands Pro massage foot from the top and bottom side. Massage movements should be directed upwards, from the toes to the ankles.
Step 3: legs
1) the Ankle. Clasp your hands the joint to gently massage it, moving clockwise.
2) the Shin. Massage of the leg from the ankle to the knee on all sides. Alternate ascending movement with descending.
3) the Knee. Massage kneecap palms clockwise. Then in a circular motion gently massage behind the knee.
4) Thigh. Massage of the leg from the knee to the groin from all sides. Alternate ascending movement with descending. If you suffer from cellulite also knead the muscles of the thigh.
5) Logiteksa. This marma is located in the upper part of the leg, in the crease between thigh and groin, over the lymph node. Massaging her middle finger in a clockwise direction.
Step 4: shoulders
Follow the same procedure as in the massage of feet and legs. First perform the massage of the right hand and entire arm and then the left hand and arm.

1) Floridia. Massage the point in the center of the palm.
2) the Fingers of the hand. Massage the joints at the base of the fingers. Move sequentially from the thumb to the little finger. Then do the same sequence of massage the fingers themselves, carefully sipping up each finger, from base to tip.
3) the Brush. Massage back of hand motions from the fingers to the wrist.
4) the Wrist. Gently squeeze the joint with your fingers and massage his movements clockwise.
5) Forearm. Massage part of your arm from wrist to elbow on all sides. Alternate ascending movement with descending.
6) the Elbow. Grasp the joint with your fingers and massage his movements clockwise.
7) Shoulder. Massage part of your arm from the elbow to the shoulder joint on all sides.
Alternate ascending movement with descending.
8) the Shoulder joint. Massage the whole joint with your palms in a clockwise direction.
9) Casidra. Raise your hand up. The middle finger of the other hand gently massage the point in the center of the armpit, at the location of the lymph node.
Step 5: back
The back is hard to massage yourself. Not too hard, do as much as you can.
Hands massage the lower back, alternating between ascending movement with the descending and climbing as far up as you can.
Then just massage your upper back, sinking farther down.
Option: take a towel, twist it into a thick harness and the oil massage oil. Throw a towel over the back, as a short rope, and mash them all back.
Stage b: the stomach
Skip this step if you are pregnant or have stomach ulcers or heart disease.
Iahi. This marma corresponds to the navel (second chakra). Pour the navel massage oil and gently massage it with your fingers clockwise.
Then do a circular motion with his palm, gradually expanding circles until you cover the entire area of the abdomen.
Then, change direction and gradually narrow circles, until you return to the point of navel.
Step 7: chest
Marma of the chest correspond to the third, fourth and fifth chakras — energy centers associated with emotions and expression. Massage these points (as, indeed, any other marm) helps to release energy pent-up emotions. The energy output may be accompanied by strong emotions. If it happens to you, continue to gently massage the point for one to two minutes, focusing on your physical sensations. All this time, breathe easily and freely.
1) Arrapata. This marma corresponds to the solar plexus (the third chakra). It is located approximately 12-13 cm above the navel. Massage it with your fingers clockwise.
2) Hridaya — heart (fourth) chakra. In fact, it consists of a system of points located on the chest between the nipples (just to the left of the center line) on the plot with a diameter of about 10 cm. Very gently RUB the area with your palm in a clockwise direction.
Massage hridayi awakens passion for life and contributes to the manifestation of feelings. If you are experiencing anger or frustration, give this area some more time.
3) the Upper part of the chest. Massage the right and left sides of the sternum under the clavicle, acting with one hand on each side.
4) Nile — throat (fifth) chakra. It is located in the depression immediately above the sternum. Massaging her middle finger. This point, which is also referred to as Saraswati chakra — center of expression.
If you often have to speak in public, or if you experience difficulties with expression of thoughts, give this point some time.
Step 8: neck and face
Massaging these very sensitive areas, use the facial oil.
1) Neck. Both of his hands gently massage the neck. The movement should be upwards, from the base of the neck to the chin.
2) Khan. This marma is located in the depression between chin and lower lip. Turning the right hand palm to his, your fingers apart like open scissors. Index finger apply to the point Khan, and an average tuck your chin from below. These swipe two fingers along the jaw line from chin to right ear. Then just massage the left side of face left hand. Alternating right and left hands, repeat these movements several times.
3) the Creases in the corners of the mouth and cheeks. Forefinger massage the creases in the corners of the mouth from the bottom up, from the chin to the base of the nose. Then open hands massage the cheeks from the bottom up, from the base of the nose to the temples.
4) Eyes. Press your ring finger to the points where the eyebrows meet at the bridge of the nose. Massage the eye area, moving first along the eyebrows to the outer corner of the eye, and then back under the lower eyelids to the nose.
5) Stepane — the sixth chakra, the so-called "third eye". It is located above the eyebrows in the middle of the forehead. Indian women decorate the place with a red dot (Bindi). Middle fingers massage from the bottom up the line going from the nose to this point.
6) the Forehead. Press the middle and ring fingers of the right hand to the nose and massage the forehead upwards to the hairline. Repeat this movement 6-10 times, alternating right and left hands.
Then press your middle and ring fingers of the right hand to the left temple and a hand lightly across forehead to right temple.
Then press your middle and ring fingers of his left hand to his right temple and hand massage his forehead to his left temple.
Repeat this movement 6-10 times, alternating hands.
This massage technique helps to get rid of forehead wrinkles.
Step 9: "lift" the skin
This procedure can be performed not only after the massage but at any time. Each of the following points, massage movements in a clockwise direction for 20-30 seconds. Unless otherwise stated, follow the middle finger.
1) the Center of the chin. Massage this point helps the common cold.
2) the corners of the mouth.
3) the Center of the groove between the nose and upper lip.
4) the Outer corners of the nose at the nostrils. These points correspond to the small intestine. Massage them helps a blocked nose.
5) center point school. Click on the bone from the bottom up and massage the point.
6) Point on the lower eyelids just above the cheekbones. Gently press these points ring finger. Do not massage.
7) Eyebrows. The bases of the thumbs press upwards on the inner corners of the eyebrows at the bridge of the nose. Then mash both eyebrows, pinching their thumb and forefinger and moving from inner corners to outer. Repeat.
If performed correctly, this technique can cause slight irritation associated with the release of accumulated strain. It helps with headaches and problems with bladder.
8) Whiskey. Gently massage with fingers straightened.
9) the "Third eye". Coronal chakra. Push the crown both palms and vigorously RUB the skin of the scalp movements back and forth.
This self-massage may be over.published
P. S. And remember, only by changing their consumption — together we change the world! ©
Source: //www.ayurvedaplus.ru/articles/29749/257579/