1411
How to make a simple motor with your hands. It's not that hard!
If you're bored and you do not know what a good time, you can try to create an electronic motor by hand. You will be surprised, thinking that it's almost impossible to do at home. Today .cc offers to your attention a simple scheme, following which, it will do is not difficult! This design can easily make one, because all the necessary tools for this engine will find in any home. And the time for such an experiment will take quite a bit. Forget about what you said on the lessons of physics: perpetual motion does exist!
Tools:
sandpaper; Clippers; staples; wire; Battery; < adhesive tape; a pencil; magnet. Production technique:
1. Take the wire and wrap it around the battery. It will be enough to make the coils 10-15.
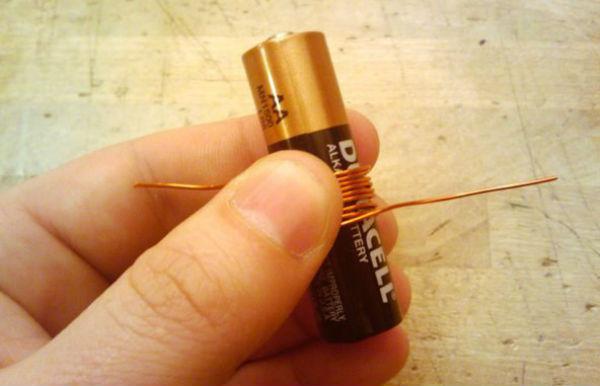
2. Carefully remove the batteries. You should get here this rotor. Secure the ends of the wires on the edges of the coil, as shown in the photo below, this wire can be tied to the site.
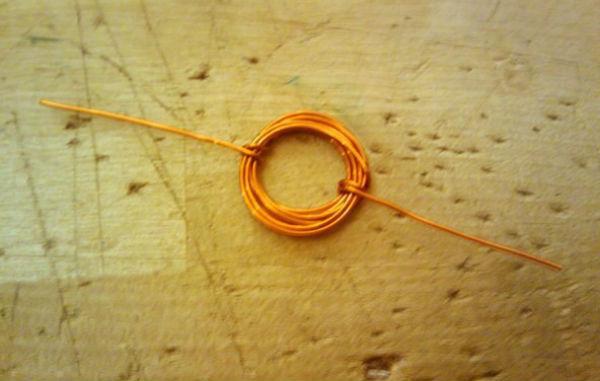
3. Take the sandpaper and smooth out its two ends of the wire.
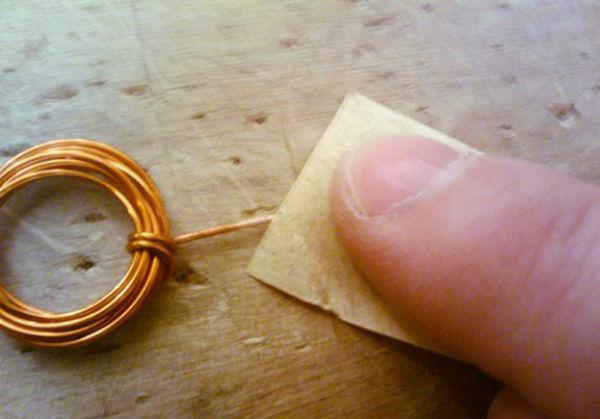
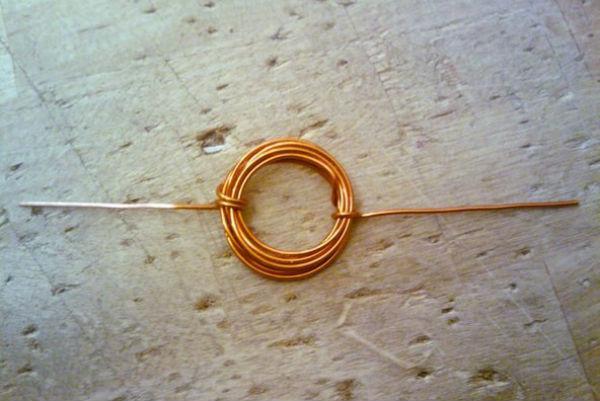
4. You should get something like this (for contrast in the photo one free end of the wire rubbed with sandpaper, and the second - is not present).
5. For the next step you will need a pencil and a paper clip.
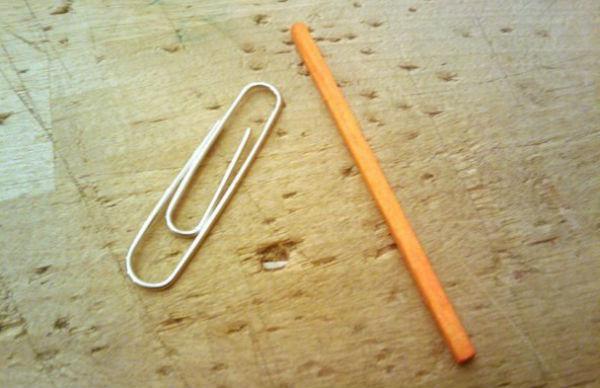
6. Use the pencil bend the clip that's so, and attach to the battery, as shown in the photo.
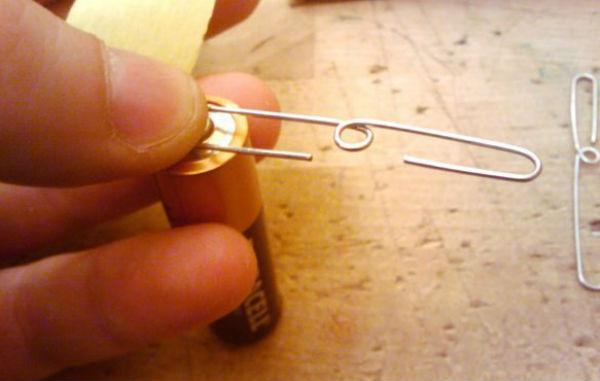
7. Similarly, the second clip to attach the other side of the battery and unite all in a single structure with adhesive tape.
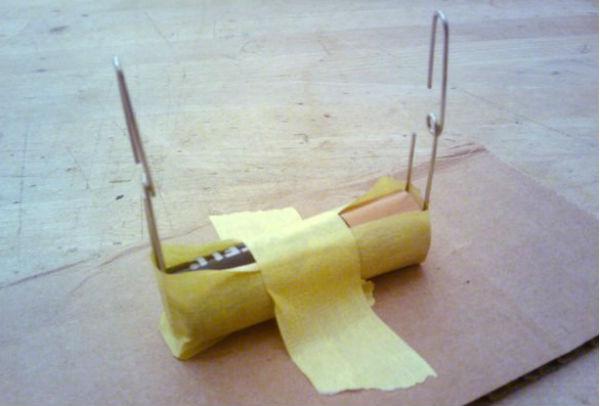
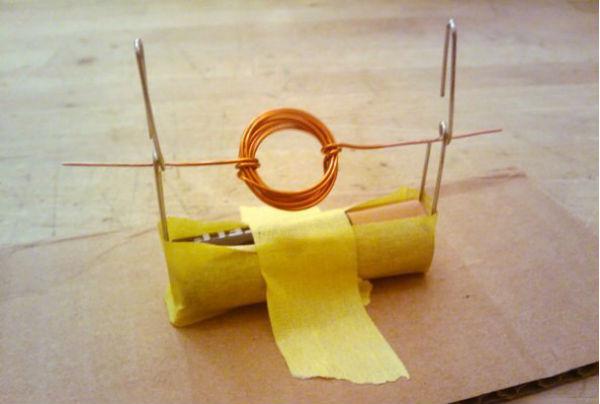
8. Then, attach the wire to the structure as depicted in the photograph. The free ends of the wires have to get through the "ears" in the middle of staples.
9. Put a magnet on top of the battery, it should "stick" to the battery. The rotor must quickly twist, if it did not happen - try to push him a little finger.
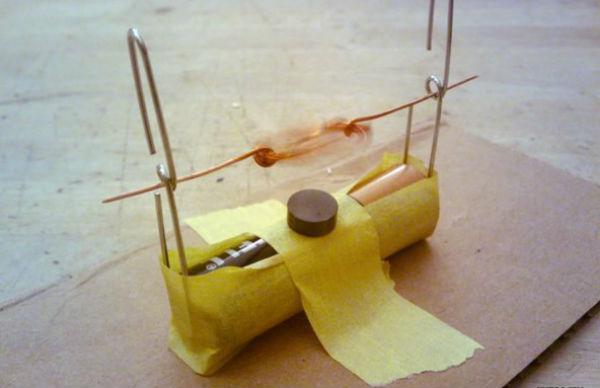
That's all, your original invention is ready. By the way, be careful: you can not permanently leave the rotor stationary, battery and coil will be very hot!
Surprise all your friends - show them how easy it is to create a motor with your hands improvised!
via takprosto cc
Tools:
sandpaper; Clippers; staples; wire; Battery; < adhesive tape; a pencil; magnet. Production technique:
1. Take the wire and wrap it around the battery. It will be enough to make the coils 10-15.

2. Carefully remove the batteries. You should get here this rotor. Secure the ends of the wires on the edges of the coil, as shown in the photo below, this wire can be tied to the site.

3. Take the sandpaper and smooth out its two ends of the wire.

4. You should get something like this (for contrast in the photo one free end of the wire rubbed with sandpaper, and the second - is not present).

5. For the next step you will need a pencil and a paper clip.

6. Use the pencil bend the clip that's so, and attach to the battery, as shown in the photo.

7. Similarly, the second clip to attach the other side of the battery and unite all in a single structure with adhesive tape.

8. Then, attach the wire to the structure as depicted in the photograph. The free ends of the wires have to get through the "ears" in the middle of staples.

9. Put a magnet on top of the battery, it should "stick" to the battery. The rotor must quickly twist, if it did not happen - try to push him a little finger.

That's all, your original invention is ready. By the way, be careful: you can not permanently leave the rotor stationary, battery and coil will be very hot!
Surprise all your friends - show them how easy it is to create a motor with your hands improvised!
via takprosto cc
Minus 5 kg for 7 days! The ideal meal plan to help you become leaner.
10 surprising claims about the benefits of sugar. Number 5 - deserves attention!


