1213
Master class on decoupage dresser.

Grandma left you an antique furniture Soviet 30s? Parents awarded an old wardrobe from the 60s? Do not rush to get rid of them! In this article you will learn how to perform the restoration of the Soviet furniture with his own hands - or rather, how to update old furniture so that it was again please your eyes. Photo of successful experiments are included.
So ...
What does the conversion of the Soviet furniture with his own hands
Step 1: replacement of furniture accessories
Most of the furniture in the old annoying bad closing doors. If you are going to take up such a thing as a remake of the Soviet furniture with his own hands, first you have to buy new accessories, to find material for sealing frayed holes (you can use putty, dowels or plugs), to get a screwdriver and a screwdriver, and then work hard on repairing doors.
We recommend that you also look at the rest of the fittings. Sometimes the simple replacement of old-fashioned knobs may be sufficient for a radical transformation of the furniture. As for the wobbly legs of chairs and tables, then put them in order to be able to any workshop.
Step 2: Cleaning furniture
Before turning to remaking the Soviet furniture, it should be thoroughly cleaned. Restoration of the Soviet furniture with his own hands begins with plaque removal of dirt and grime that recommended using conventional sponge, soap, made on the basis of any vegetable oil, and warm water. To clean the most problematic areas - corners and cracks - use a soft toothbrush, for narrow cracks - wooden dowel, pointed at one end
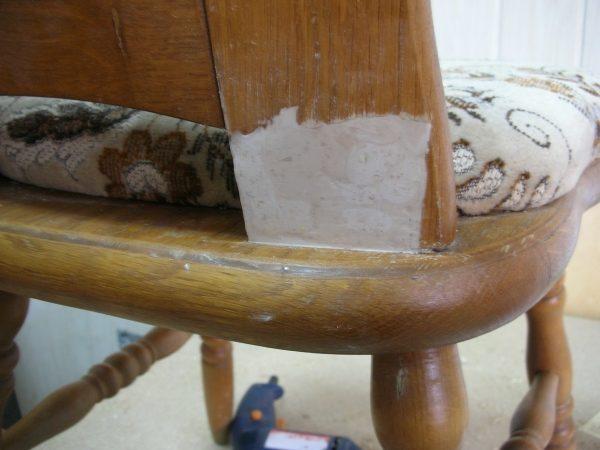
. Step 3: Repair
old furniture Worn and chipped surfaces Soviet furniture must be put in order. For sanding use sandpaper or a special grinding tool (one that is). Any cracks can be repaired with putty gently, after drying, which is the place you need to be sanded once more.
Tip: Before Shpatlevanie and painting the surface is primed - then grip will be better, and to be applied paint or putty lie flatter
.
Step 4: decorating furniture with his own hands
The fourth stage of the restoration of the Soviet furniture with his own hands - a decorative finish. Staining, varnishing, painting, decoupage furniture, decoration stickers - here too you have to dream up and choose the most suitable option. Did you inspire the ideas presented in this article.
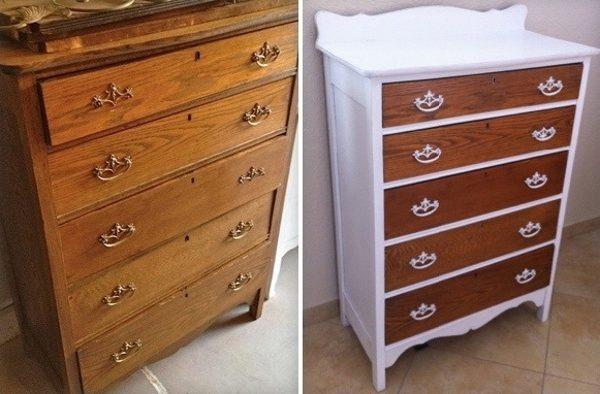
How to update old furniture - painting mebeliNachnem with the most popular and easy way to update old furniture. Here you will learn how to paint furniture Soviet times.
Paint furniture must be performed only if it is made of cheap wood (pine, etc.). If your Soviet furniture is made, for example, oak, then paint it is not recommended, as it will reduce its value for all.
Restoration of the Soviet furniture with his own hands is usually done with oil paint. How to paint furniture:
Apply the paint lightly with a thin layer of along the wood fibers.
Allow to dry for about 12 hours.
Sand the surface with sandpaper, wipe the dust and apply a second coat.
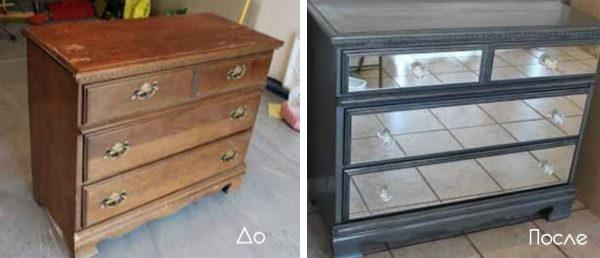
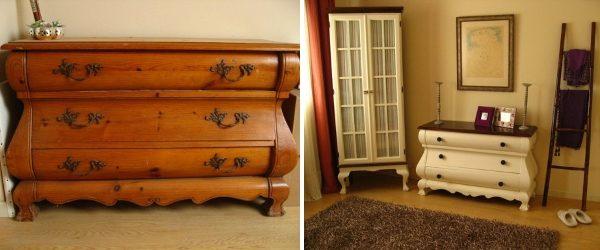
If you restavriruete furniture Soviet 50-70-ies, which were made in a minimalist style, the painting for her perfect black color and pastel light colors. With this finish, it is the perfect accessory for the modern interior.
If you want more creative approach to painting furniture, hand-painted and you do not own, then use templates. They are sold in stores, they can also be printed from the Internet and cut on thick paper. Before applying the stencil pattern on furniture must be secured with adhesive tape.
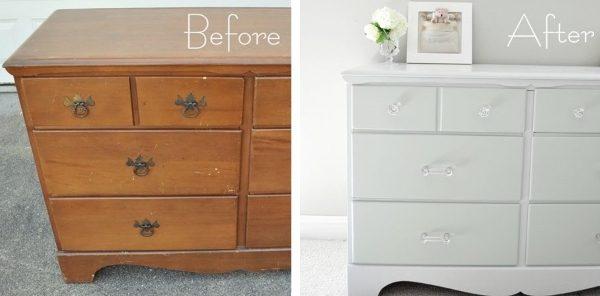
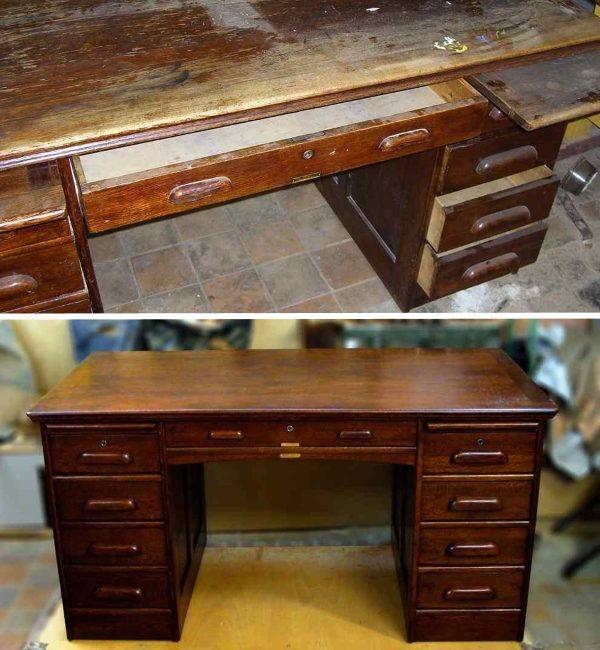
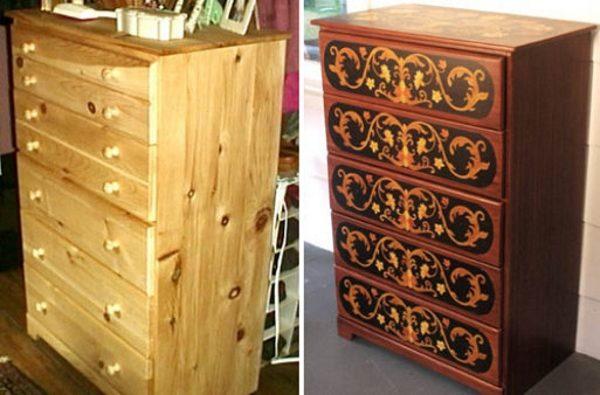
Restoration of the chest with his hands:
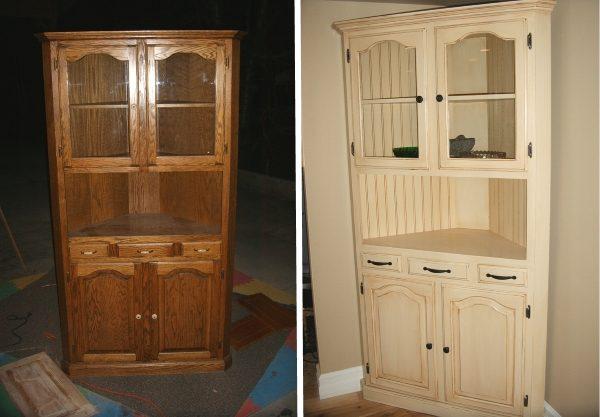
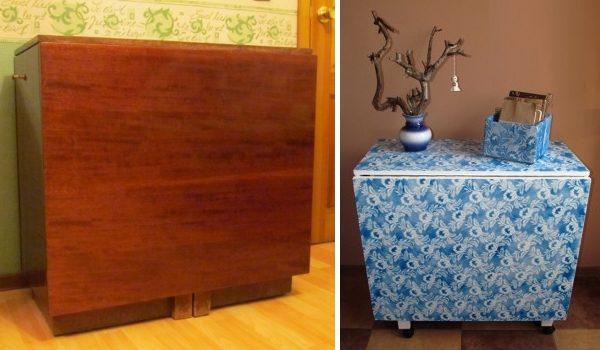
How to update an old wardrobe:
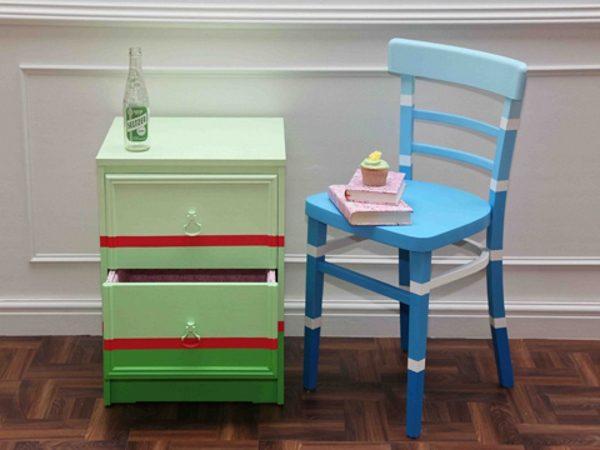
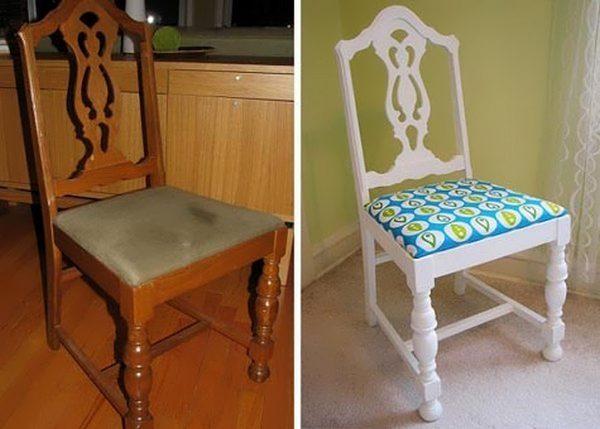
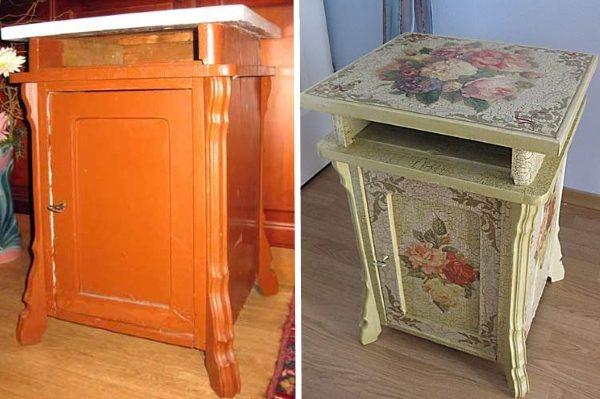
How to convert an old bedside table and chairs:

It became fashionable to paint the furniture with fine lace. Simply fasten the lace fabric on the surface of the Soviet furniture, then apply the paint. The result is amazing!
Modification of old furniture Soviet lakirovanieEsli through furniture made of valuable wood, then as we said above, it is better to cover a fresh coat of varnish, paint than paint. How to update old furniture by varnishing?
Firstly, when a remake or a restoration of the Soviet furniture with his own hands, it is best to use oil paints. They are suited to all types of wood and form a very durable, shiny and water-resistant coating. The only negative - a long dry period (up to 12 hours). For comparison: shellac varnish dries in 1-2 hours, and nitrovarnishes - and at 30-40 minutes
. General rules for conversion of old furniture:
The varnish can be applied with a brush or a piece of thick lint-free cloth, folded in 2-3 times;
The varnish is applied in 3-5 layers, after each new layer should be increased during its drying;
Excess lacquer should be pressing on the edge of the banks, the brush can sometimes be washed in a strong solution.
How to update old furniture using
krakelyurnogo varnish We also want to give you an example of a particular way of painting, which is done with a special varnish - cracelures
. For the alteration of old furniture today, there are many varieties krakelyurnogo lacquer: the effect of patina, gilding, etc. The most common causes thick layer of paint on top of it, and then covered with a different color to highlight the cracks. Also krakelyurny lacquer can consist of two components: the first is applied to the aging of the treated surface, the second - for the creation of decorative cracks
.
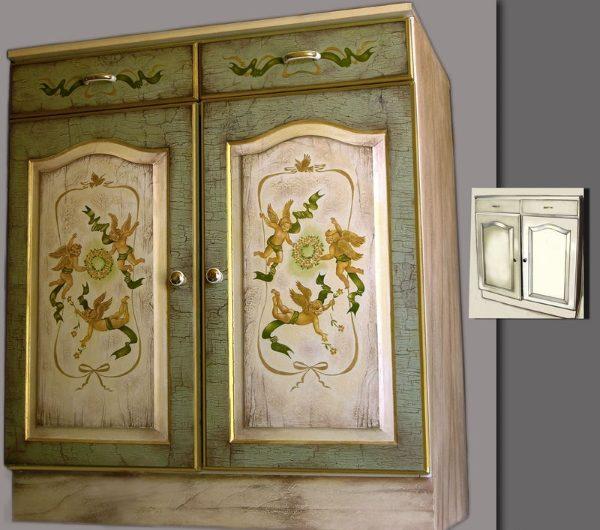
Restoration of furniture with the help of Soviet cracelures perfect for lovers of antiques and country style. As, however, and following our method -. Decoupage
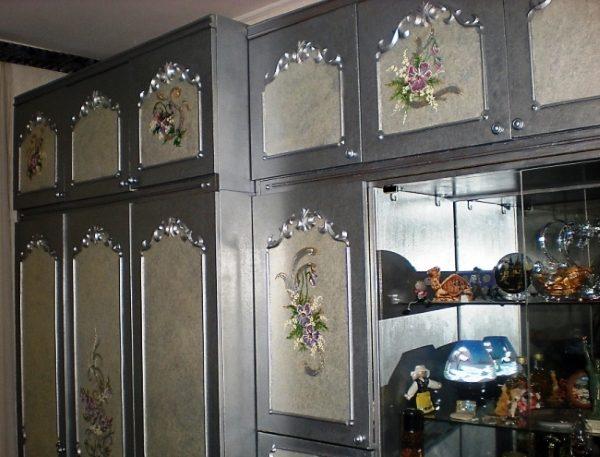
Decoupage Soviet furniture with his own hands
Possession decoupage technique will help you turn the old Soviet furniture in a real design masterpiece. Decoupage old furniture is performed using the following tools:
Sandpaper fine grain;
Strong;
Primer;
Brush and decoupage glue;
Roller or sponge;
Material for decoupage - newspaper clippings, old postcards, letters, drawings, books, pages, etc.
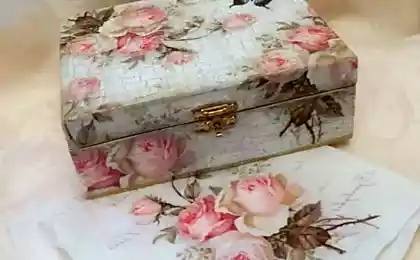
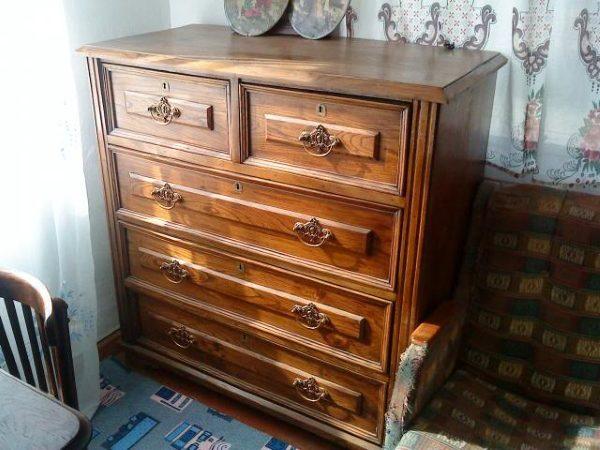
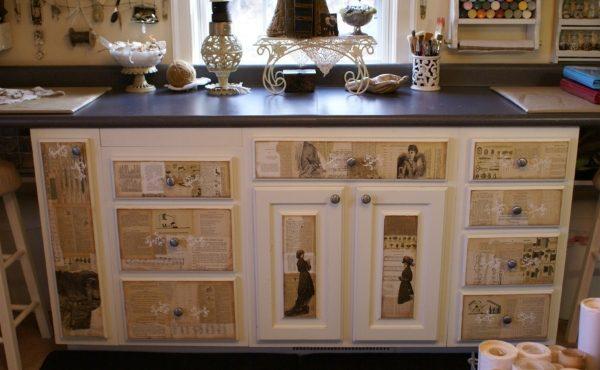
In search of inspirational ideas and materials for decoupage will help you online. For example, we particularly like these two examples of how to update an old chest of drawers decoupage method:
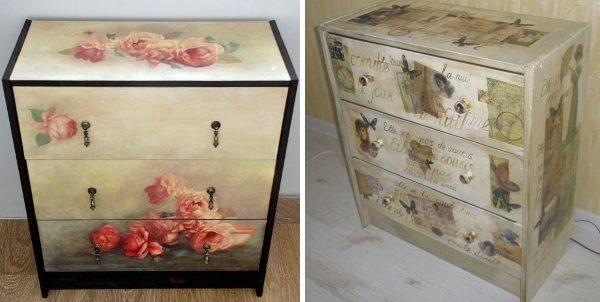
You select the appropriate images? Then you are ready to upgrade Soviet furniture with his own hands decoupage. This process consists of the following stages:
Surface preparation sandpaper;
Cleansing cloth soaked in a strong;
After the surface dries out - priming (3-4 layers);
If materials for decoupage will be applied only in some places, it is necessary to paint furniture, first, to make the background;
If the furniture is completely paste (such as newspapers), it is possible immediately after the primer has dried proceed to spray glue;
Thin paper can immediately be applied to the adhesive, and more dense, you must first thin the sandpaper and soak in water;
Wet the paper towel to get wet on both sides and is superimposed on the adhesive;
After bonding all materials must go through the surface of the roller or sponge to clean the glue residue;
The final stage - applying varnish dried poverhnost.Originalnaya furniture in Provence style or vintage ready
!


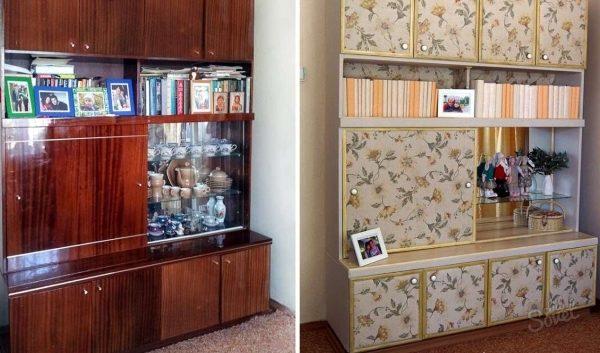
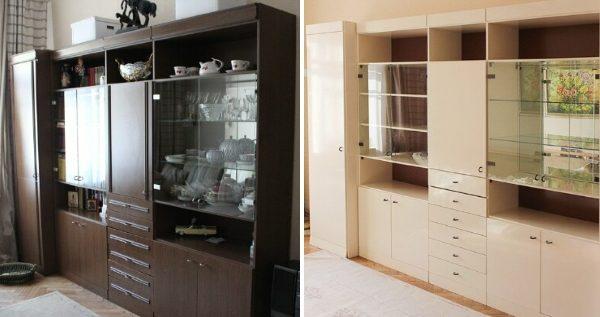
How to update the old wall
Those interested in reworking the furniture with his own hands - here is the idea of how to upgrade the old Soviet wall with decoupage and new paint