888
Repair radio Lexus RX300 MCU35 own hands
The story began with the fact that I bought a Lexus RX300, cassette player that stubbornly refuse to play discs. According to the display, all-changer has been filled to capacity (6 pcs.). Rummaged all relevant forums to Lexus, the most common answer is: This is not repaired, easier to buy a new one.
This alignment naturally did not suit me. Choosing the time I and my fellow rukastym, by the way, a large generalist in various electronic device, do it.
Will be 26 photos.
The process of material removal from the radio torpedo describe not see the point, the most important thing - flexible shaft unscrew the screw 2 hard and carefully disconnect the connectors.
1. Thus, the cassette player removed

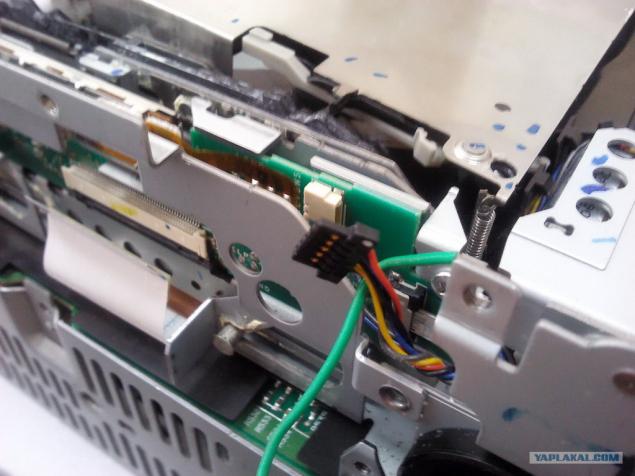
2. Opening 4 side screws front panel and tilting all the latches, carefully remove it by holding, in order not to break the thin trail. Remove the ribbon cable, mount it otschёlknuv
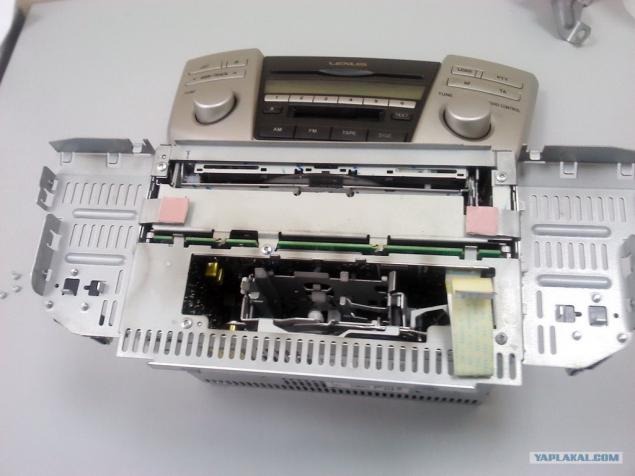
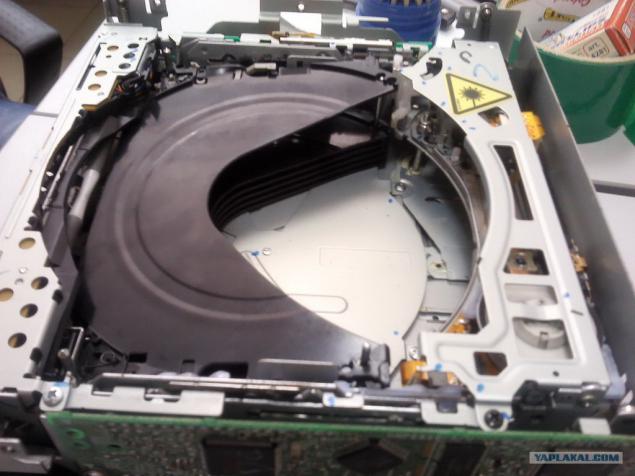
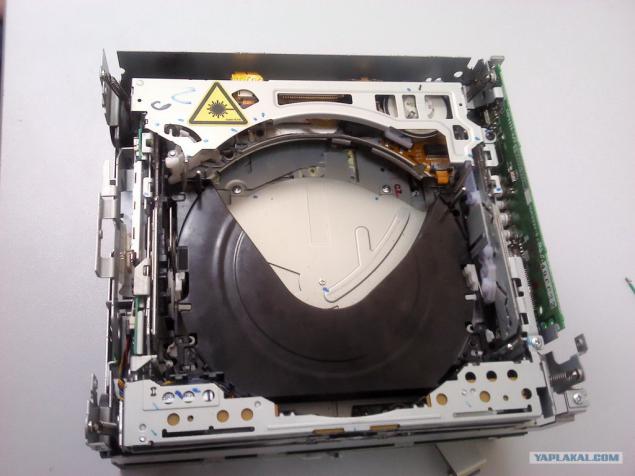
3. Remove the metal frame fixing the front panel by unscrewing the 5 screws. We obtain the following:
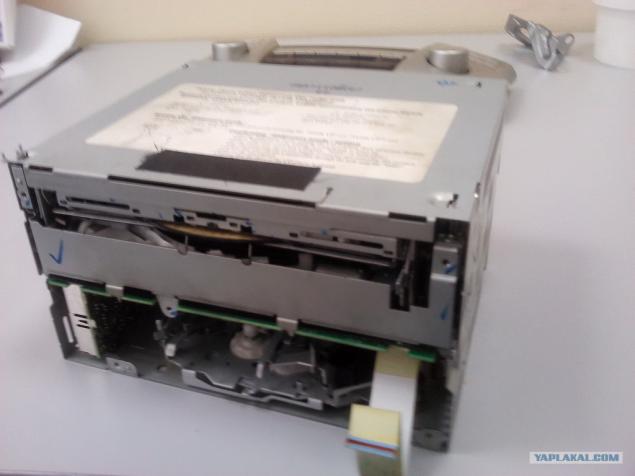
As you can see, the very radio-cassette consists of two units: a cassette mafon (bottom) and a laser player with changer (top)
4. Remove the cover CD-player
It was found, only one disc is stuck. We've got to get it through the feed slot drive. We need to do it very carefully, monitoring effort, as you can easily break any guide mechanism changer, and this - the collapse of the whole! If the disc sits firmly, it is necessary to disassemble itself changer (hereafter).
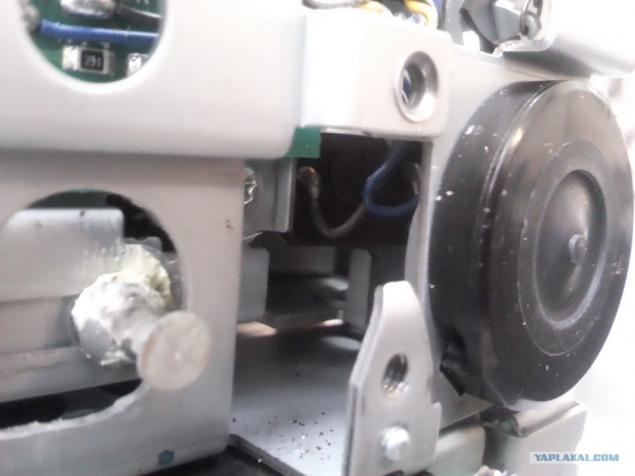
5. I will not describe with some mats and lamentations we tried to understand the principle of work changer - it took a couple of hours. It was decided to keep track of movement mechanisms by simulating operating conditions. To this was found by a motor which controls the drive mechanism for selecting and supplying a scanning beam CD. A motor located on the left side, closer to the front of
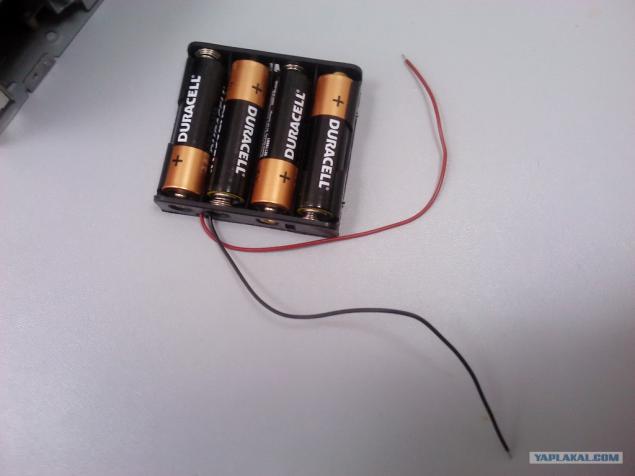
6. For power supply, use a carriage with four 1, 5 V batteries = & gt; Total 6 B.
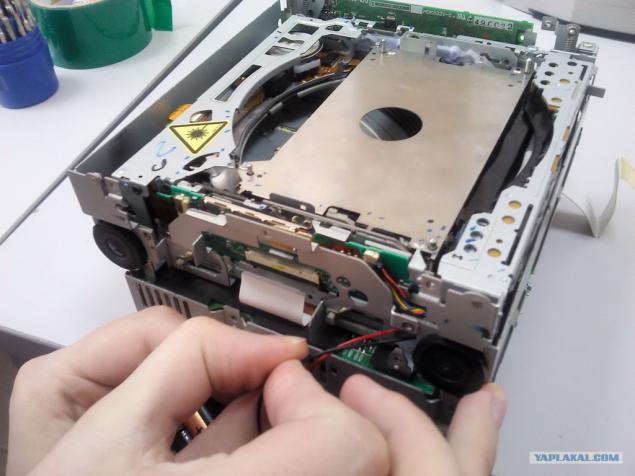
7. Disconnect all cables to prevent voltage supply engines to other kinematic chains through the wiring boards.

and black jack
8. By filing for a motor voltage of different polarities, seeing how the mechanism:
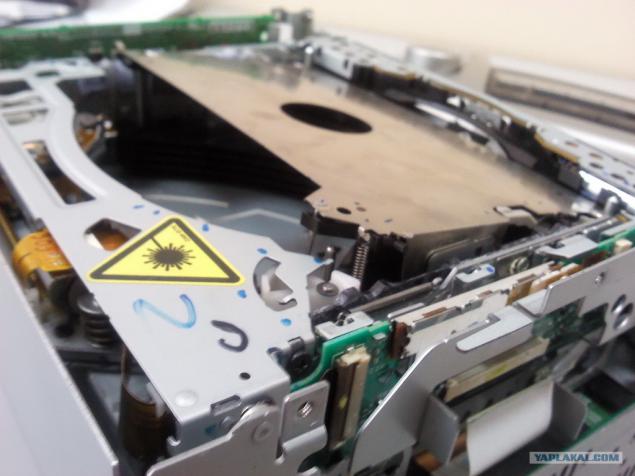
9. We see clear ABNORMAL SITUATION in the trays (see the how twisted changer cover photo).
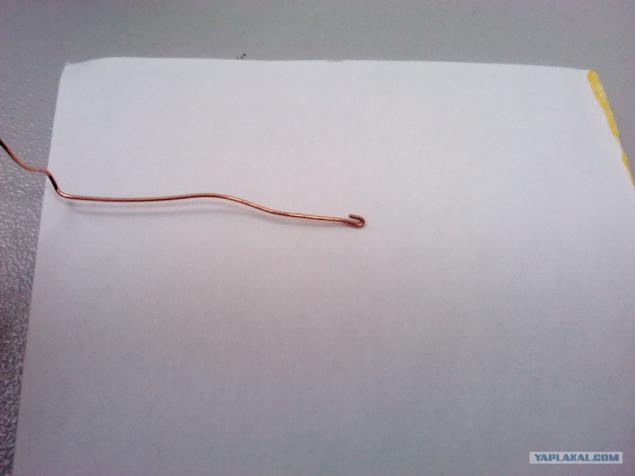
10. We'll have to disassemble the changer. For this we need a thin but strong wire, used to make the hook
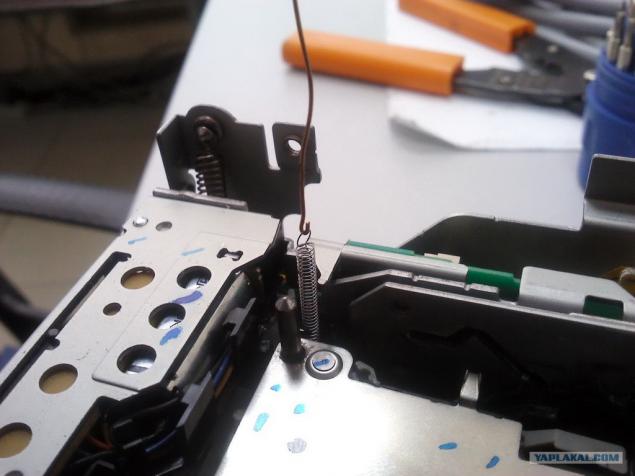
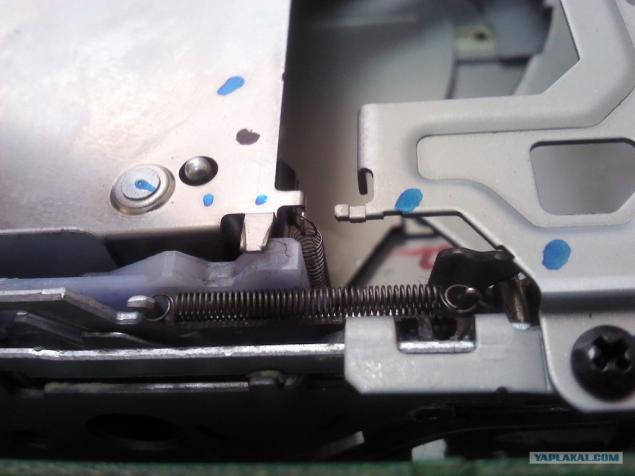
11. Gently pull turn springs (4 pcs.), Attracting changer cover to the shelves. Springs DO not remove completely - then it will be impossible to catch their bottom. Therefore, gently clings spring-loaded hook over the top loop and peretseplyaem it on special metal tabs (smart Japs have provided all the details)
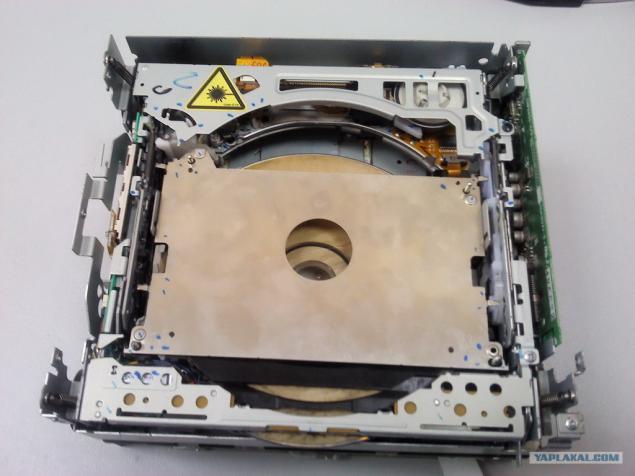
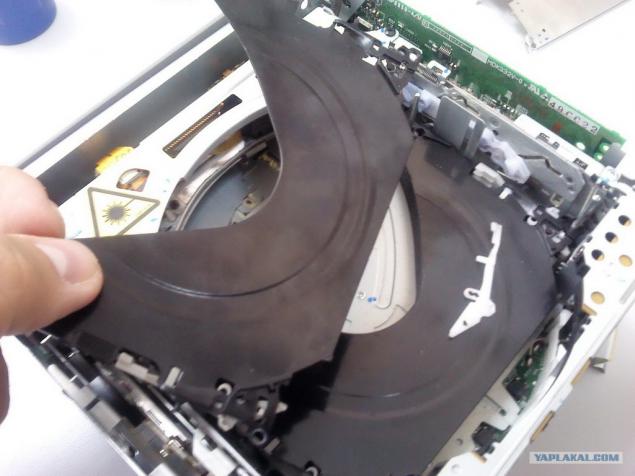
12. Then pull up the metal cover and remove it, noting how it is attached to the side rails. It turns out this way:
It can be seen that the top shelf changer got out of the track and caught on the back of the drive unit supply. Very carefully, without breaking the plastic, slightly bend the tray and pull it up without breaking the ears, put on the vertical axis of the guide trays.
13. In parallel obranuzhili fallen off the lock disk shelf, which put in place, zaschёlknuv his side shelves and wrapped spring tendril.
14. Put the shelf in place, hitting the side guides
15. As previously described, using the battery check operation mechanisms, a motor drive them away from the start to the end point and back again. In the photo - changer operating position and reads the drive
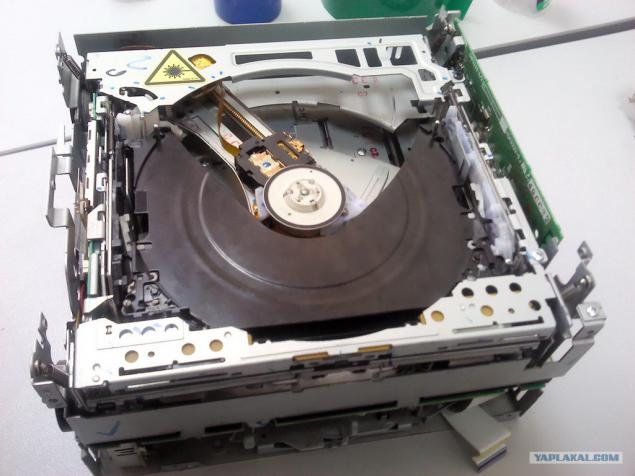
16. Make sure that everything is OK. To prevent grease all guides with grease. The main thing is not to overdo it, to later while the excess lubricant is not thrown to the surface of a disc or reading laser. We have used had we grease MC-sport that I do not remember when and what to buy in the auto shop.

17. Start collecting device in the reverse order: insert the metal cover changer in the guide and to put on her springs

it turns out:
Source:
This alignment naturally did not suit me. Choosing the time I and my fellow rukastym, by the way, a large generalist in various electronic device, do it.
Will be 26 photos.
The process of material removal from the radio torpedo describe not see the point, the most important thing - flexible shaft unscrew the screw 2 hard and carefully disconnect the connectors.
1. Thus, the cassette player removed

2. Opening 4 side screws front panel and tilting all the latches, carefully remove it by holding, in order not to break the thin trail. Remove the ribbon cable, mount it otschёlknuv

3. Remove the metal frame fixing the front panel by unscrewing the 5 screws. We obtain the following:

As you can see, the very radio-cassette consists of two units: a cassette mafon (bottom) and a laser player with changer (top)
4. Remove the cover CD-player

It was found, only one disc is stuck. We've got to get it through the feed slot drive. We need to do it very carefully, monitoring effort, as you can easily break any guide mechanism changer, and this - the collapse of the whole! If the disc sits firmly, it is necessary to disassemble itself changer (hereafter).
5. I will not describe with some mats and lamentations we tried to understand the principle of work changer - it took a couple of hours. It was decided to keep track of movement mechanisms by simulating operating conditions. To this was found by a motor which controls the drive mechanism for selecting and supplying a scanning beam CD. A motor located on the left side, closer to the front of

6. For power supply, use a carriage with four 1, 5 V batteries = & gt; Total 6 B.

7. Disconnect all cables to prevent voltage supply engines to other kinematic chains through the wiring boards.

and black jack

8. By filing for a motor voltage of different polarities, seeing how the mechanism:

9. We see clear ABNORMAL SITUATION in the trays (see the how twisted changer cover photo).

10. We'll have to disassemble the changer. For this we need a thin but strong wire, used to make the hook

11. Gently pull turn springs (4 pcs.), Attracting changer cover to the shelves. Springs DO not remove completely - then it will be impossible to catch their bottom. Therefore, gently clings spring-loaded hook over the top loop and peretseplyaem it on special metal tabs (smart Japs have provided all the details)

12. Then pull up the metal cover and remove it, noting how it is attached to the side rails. It turns out this way:

It can be seen that the top shelf changer got out of the track and caught on the back of the drive unit supply. Very carefully, without breaking the plastic, slightly bend the tray and pull it up without breaking the ears, put on the vertical axis of the guide trays.
13. In parallel obranuzhili fallen off the lock disk shelf, which put in place, zaschёlknuv his side shelves and wrapped spring tendril.

14. Put the shelf in place, hitting the side guides

15. As previously described, using the battery check operation mechanisms, a motor drive them away from the start to the end point and back again. In the photo - changer operating position and reads the drive

16. Make sure that everything is OK. To prevent grease all guides with grease. The main thing is not to overdo it, to later while the excess lubricant is not thrown to the surface of a disc or reading laser. We have used had we grease MC-sport that I do not remember when and what to buy in the auto shop.

17. Start collecting device in the reverse order: insert the metal cover changer in the guide and to put on her springs

it turns out:

Source: