1258
Homemade 3D Printer from older devices
38 photo, 4 video, text
eca3d.blogspot.ru
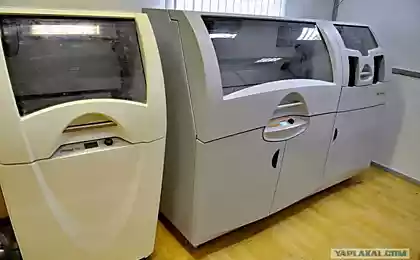
When it is possible to make out some old machine, usually the eyes diverge. Only then, as the years begin to realize that a lot of it will never need, and will forever gathering dust, until you get bored. It is important to know what is really useful, and that only will spam workshop. I was fortunate enough to dispose of the party laser MFP Xerox 4118 and Xerox M15. These devices are very well equipped and quite redundant in terms of a set of parts.
A list of all donors of components used in the manufacture of homemade 3D printer:
1) Steel rails - 6 pieces.
2) Plastic bearings - 3 pieces.
3) MXL toothed belt - 3 pieces.
4) Iron profiles - 13 pieces.
5) Stepping motors:
- 2 engine support microstep,
- 2 powerful motor without microstepping.
6) Driver stepper motor A3977 - 1 piece.
Driver drank from PCB MFP minimum microstep - 1/8. As applied to the number of engines the full 96 steps, I prefer to buy 3 driver A4988. A4988 supports split on 1/16 microstep, so it is best suited for precision positioning.
You can still save money, and had a further 3 pieces A3977.
7) thermistor stove.
8) 3 optical sensor.
9) connecting cables with ferrite cores.
10) High-quality power supply unit 24 and 5B.
11) Plastic parts used in the legs as support structure.
Total for the assembly 3D printer took 7 MFP Xerox 4118 and Xerox M15. Every engineer in the creation of a new device will almost certainly raises the question of finding the optimum varying parts, housings, gears, etc. Accordingly, he starts to lay and to save for the future of all small things, small screws - bolts, boxes, well, just everything. Frequently erase any shtukovinku, but it turns out that she would fit well in the new creation. And later, already thrown out. You have to customize a home-made available.
The surrounding area around the "inventor" is in fact a kind of hi-tech trash. Look into the background in the photos online from home workshops - the vast majority in the background varied chaos.
Also, I have. In the end, the need to minimize the desire to set aside "in reserve", was forced to take more seriously the possibility of manufacturing 3D home printer. The ability to quickly print a desired item, and do not store it for years, taking up precious space, is indispensable.
The whole year I only watched, without taking any steps for the construction of such a device. Basically stopped the need for routine search for specific parts, order them by mail and the associated long wait. But most importantly - the price. The minimum cost of the whole set higher than 350 $.
In order to minimize costs, the design of the apparatus tried to use the maximum available details of its reserves, as well as of the old printers.
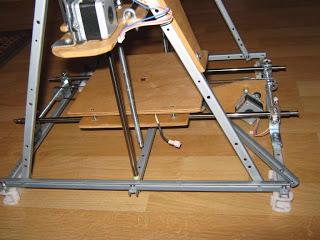
Described done on the concept of printers Reprap Mendel Prusa. Actually got another variation Repstrap.
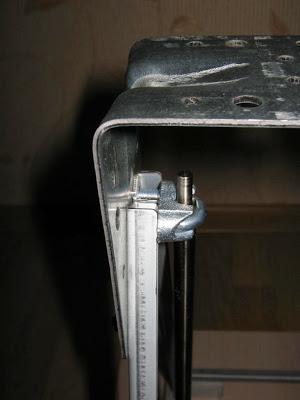
To strengthen the frame using metal profiles on your Xerox 4118 served:
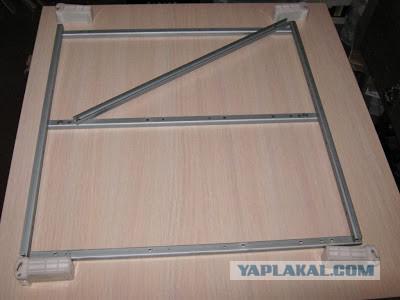
They are very well come in size and have multiple symmetrical stamped holes.
Through Prefabrication mounting places the frame to get done smoother than if most drilling. When the drill itself, especially if in a hurry, almost certainly there will be mistakes. And here is all ready. In the future, all the dimensions of this printer customized profiles and ready holes.
...
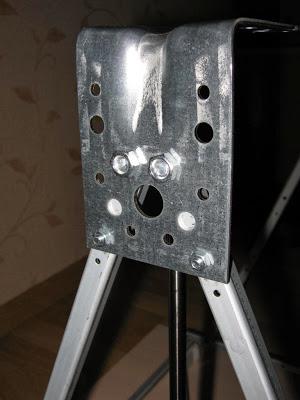
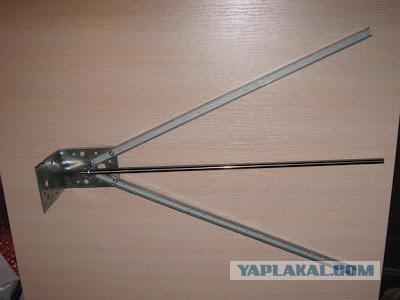
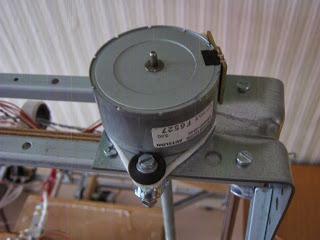
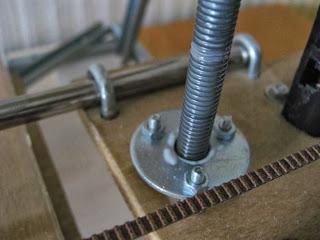
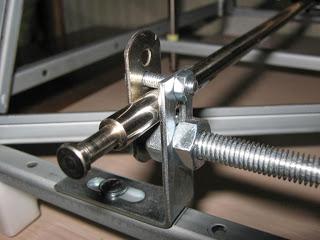
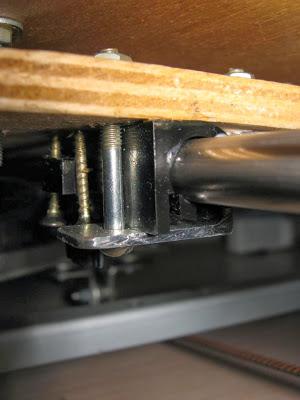
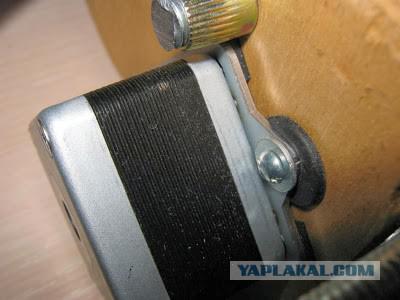
For the Z-axis motor foundation bought the store in the near fixing two hefty metal brackets:
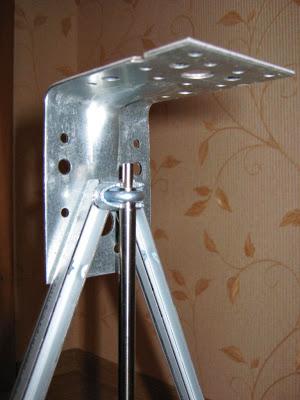
Mounting guide axis Z.
On the Internet, I read a lot about the increased noise 3D printers, so I decided to make him quiet. Engines Z lie on the felt, it insulates very well sound vibrations. In practice, it turned out that the Z axis movement occurs much less frequently than in the X and Y, so it could not soundproof.
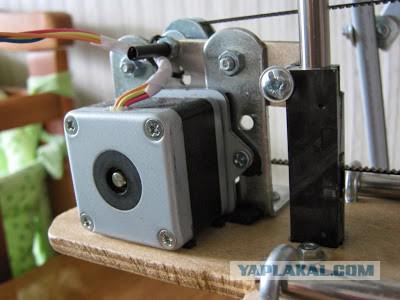
In conventional engines of old 2D printers are quite weak and do not support the microstep, so for a long time looking for a suitable. We had to compromise on the Z-axis set powerful, but total step, and X and Y are weak, but the support microstep.
...
...
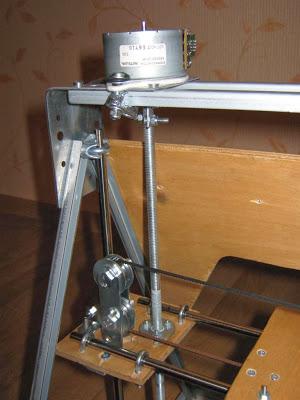
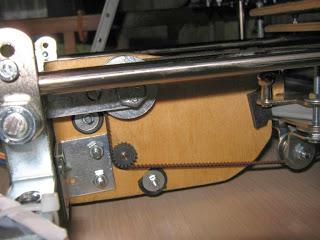
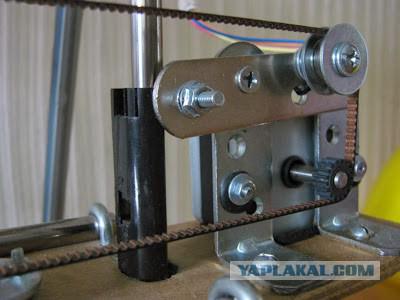
Fixing the axis Y:
In fact, the axis of the frame and is involved in enhancing the rigidity. Strongly tighten fixing nuts early, because you must ensure that they are parallel, and it is better to check, having already moved the table Y.
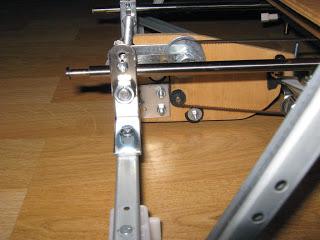
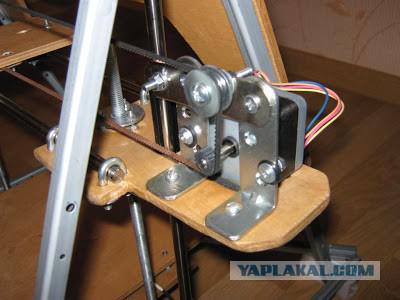
Drive axis Y:
...
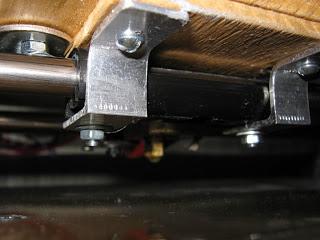
Linear plastic bearings used in all axes:
...
...
On the X axis had to tinker longer than I expected. Inventing the concept of mechanisms have been commensurate with the duration of their implementation and take a long time.
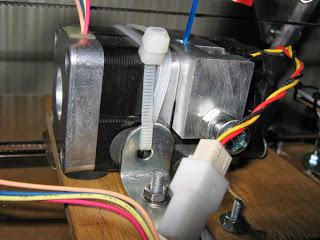
To reduce the vibrations and noise produced by the printer, the X and Y motors are also set through anti-vibration pad.
...
...
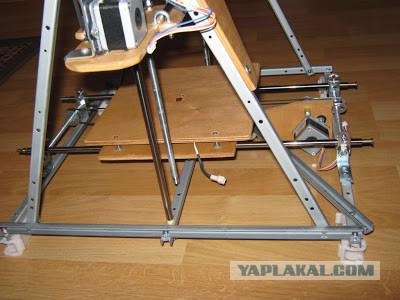
The base of the table, the carriage plate X and lateral stability - of 6mm plywood:
...
...
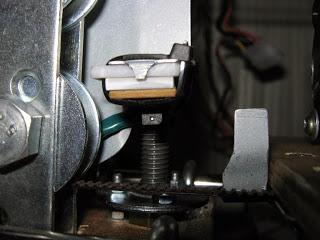
Optical limit switches. On the heels visible silicone grease.
...
Ordered extruder did not come from the engine, which had been promised by the seller, and, in addition to the head of the curve. I had to redo it. Head leveled and added pressure spring to supply plastic. At the same time he regained some of the money for the purchase.
...
Typically, fastening with plastic coils do not pay much attention, but I think the successful design will reduce the load on the engine of the extruder and the axis X.
Coil rotates on bearings, and is oriented to the longitudinal plane of the printhead. To eliminate inadvertent unwinding, bearings smaller than the hole in the bobbin.
Installed and connected electronics: Arduino, RAMPS, microSD, drivers shagovikov (a4988), etc.
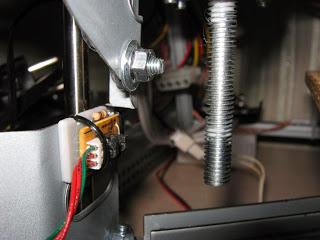
Pay attention to the engine driver Z:
Because the engine is quite weak and had to use them to maximum current. To do this, simply sawed from the circuit board disassembled MFP is ready, unsoldered more powerful driver a3977. Very convenient!
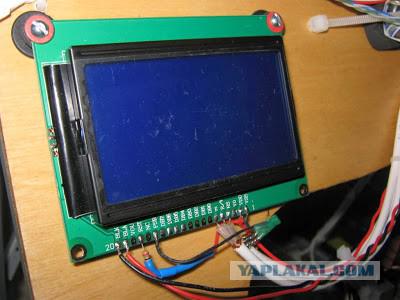
I suffer with a graphical LCD, before he realized that the firmware Marlin working with him on a parallel and serial interface.
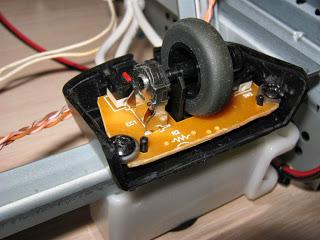
From the old mouse turned control:
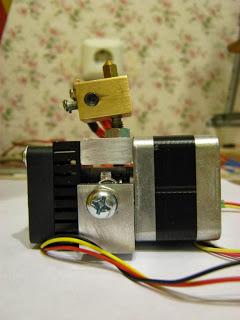
Shagovikov Tests have shown that if the resistance of the windings of 6 ohms, they are much better, more powerful and quieter work of 24 volts.
On the contrary extruder. It turned out to be a low impedance motor 3 ohms at 24 volts which became noisy and very warm. Had his head and a resistor powered from 12V.
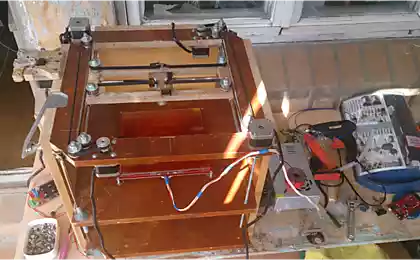
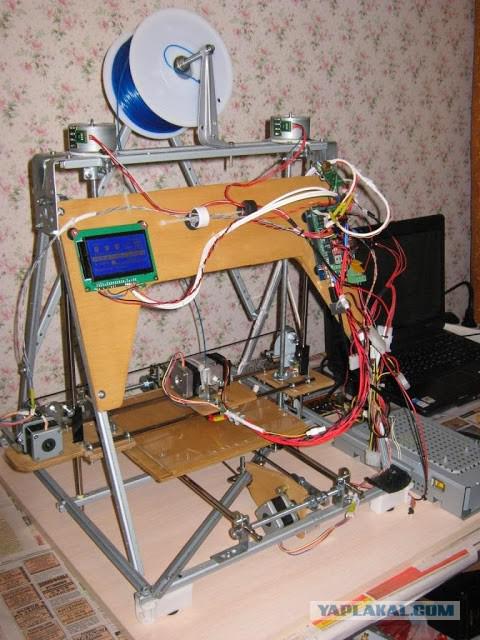
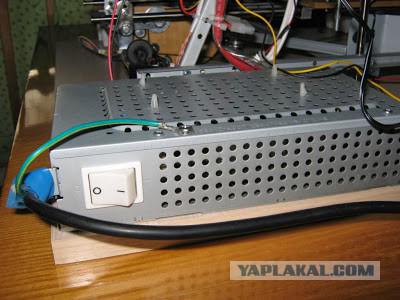
Power supply from XEROX:
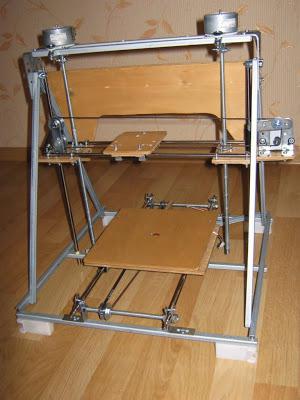
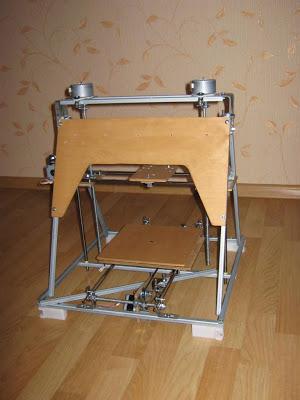
That's it. Ready apparatus in the first iteration:
Posted in [mergetime] 1388852858 [/ mergetime]
Words can not describe the feeling that you experience before the first switching device manufactured. Especially when to complete the manufacture of only a few hours.
Here print:
Posted in [mergetime] 1388852990 [/ mergetime]
Immediately noticeable that efforts to soundproofing borne fruit. The printer is very quiet. By volume it's noticeably quieter than some inkjet printers. Even in the recording louder surrounding background working printer. Print speed of 30 to 40 mm.
Before, I was fond of overclocking the processor, and that if the printer disperse ??!
80mm Speed:
A further increase in speed of up to 120mm, the press is, but there are very resonance. Limited to speed print speed of 80mm and 50mm for quality.
Well, I'm pleased with the result of the acceleration.
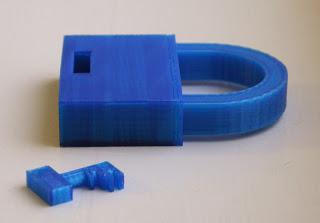
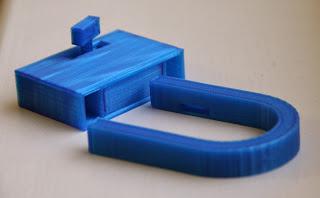
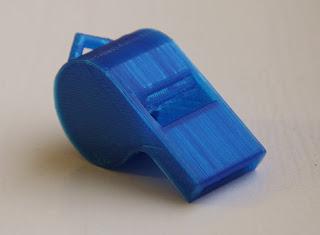
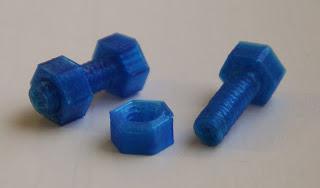
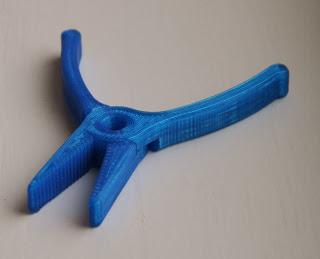
And finally, some printed items (files downloaded from www.thingiverse.com/ ):
...
...
...
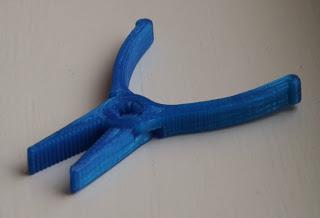
Additive print pliers:
And on the back of the latch to try to see:
Source:
eca3d.blogspot.ru

When it is possible to make out some old machine, usually the eyes diverge. Only then, as the years begin to realize that a lot of it will never need, and will forever gathering dust, until you get bored. It is important to know what is really useful, and that only will spam workshop. I was fortunate enough to dispose of the party laser MFP Xerox 4118 and Xerox M15. These devices are very well equipped and quite redundant in terms of a set of parts.
A list of all donors of components used in the manufacture of homemade 3D printer:
1) Steel rails - 6 pieces.
2) Plastic bearings - 3 pieces.
3) MXL toothed belt - 3 pieces.
4) Iron profiles - 13 pieces.
5) Stepping motors:
- 2 engine support microstep,
- 2 powerful motor without microstepping.
6) Driver stepper motor A3977 - 1 piece.
Driver drank from PCB MFP minimum microstep - 1/8. As applied to the number of engines the full 96 steps, I prefer to buy 3 driver A4988. A4988 supports split on 1/16 microstep, so it is best suited for precision positioning.
You can still save money, and had a further 3 pieces A3977.
7) thermistor stove.
8) 3 optical sensor.
9) connecting cables with ferrite cores.
10) High-quality power supply unit 24 and 5B.
11) Plastic parts used in the legs as support structure.
Total for the assembly 3D printer took 7 MFP Xerox 4118 and Xerox M15. Every engineer in the creation of a new device will almost certainly raises the question of finding the optimum varying parts, housings, gears, etc. Accordingly, he starts to lay and to save for the future of all small things, small screws - bolts, boxes, well, just everything. Frequently erase any shtukovinku, but it turns out that she would fit well in the new creation. And later, already thrown out. You have to customize a home-made available.
The surrounding area around the "inventor" is in fact a kind of hi-tech trash. Look into the background in the photos online from home workshops - the vast majority in the background varied chaos.
Also, I have. In the end, the need to minimize the desire to set aside "in reserve", was forced to take more seriously the possibility of manufacturing 3D home printer. The ability to quickly print a desired item, and do not store it for years, taking up precious space, is indispensable.
The whole year I only watched, without taking any steps for the construction of such a device. Basically stopped the need for routine search for specific parts, order them by mail and the associated long wait. But most importantly - the price. The minimum cost of the whole set higher than 350 $.
In order to minimize costs, the design of the apparatus tried to use the maximum available details of its reserves, as well as of the old printers.
Described done on the concept of printers Reprap Mendel Prusa. Actually got another variation Repstrap.
To strengthen the frame using metal profiles on your Xerox 4118 served:

They are very well come in size and have multiple symmetrical stamped holes.
Through Prefabrication mounting places the frame to get done smoother than if most drilling. When the drill itself, especially if in a hurry, almost certainly there will be mistakes. And here is all ready. In the future, all the dimensions of this printer customized profiles and ready holes.

...

For the Z-axis motor foundation bought the store in the near fixing two hefty metal brackets:

Mounting guide axis Z.

On the Internet, I read a lot about the increased noise 3D printers, so I decided to make him quiet. Engines Z lie on the felt, it insulates very well sound vibrations. In practice, it turned out that the Z axis movement occurs much less frequently than in the X and Y, so it could not soundproof.
In conventional engines of old 2D printers are quite weak and do not support the microstep, so for a long time looking for a suitable. We had to compromise on the Z-axis set powerful, but total step, and X and Y are weak, but the support microstep.

...

...

Fixing the axis Y:

In fact, the axis of the frame and is involved in enhancing the rigidity. Strongly tighten fixing nuts early, because you must ensure that they are parallel, and it is better to check, having already moved the table Y.
Drive axis Y:

...

Linear plastic bearings used in all axes:

...

...

On the X axis had to tinker longer than I expected. Inventing the concept of mechanisms have been commensurate with the duration of their implementation and take a long time.

To reduce the vibrations and noise produced by the printer, the X and Y motors are also set through anti-vibration pad.

...

...

The base of the table, the carriage plate X and lateral stability - of 6mm plywood:

...

...

Optical limit switches. On the heels visible silicone grease.

...

Ordered extruder did not come from the engine, which had been promised by the seller, and, in addition to the head of the curve. I had to redo it. Head leveled and added pressure spring to supply plastic. At the same time he regained some of the money for the purchase.

...

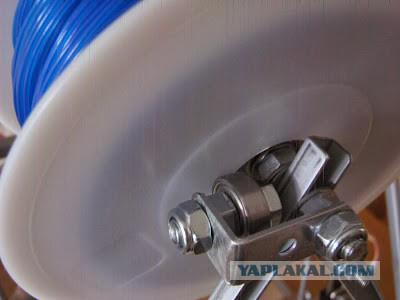
Typically, fastening with plastic coils do not pay much attention, but I think the successful design will reduce the load on the engine of the extruder and the axis X.

Coil rotates on bearings, and is oriented to the longitudinal plane of the printhead. To eliminate inadvertent unwinding, bearings smaller than the hole in the bobbin.
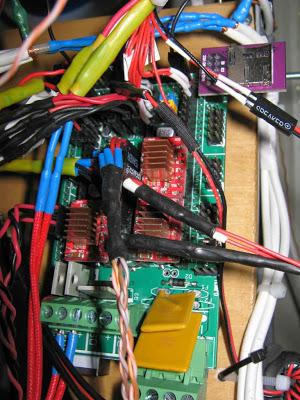
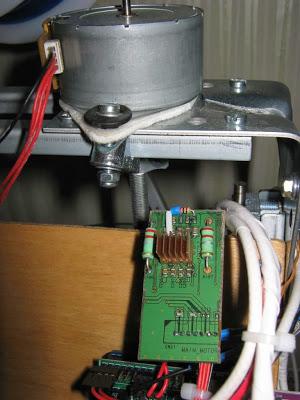
Installed and connected electronics: Arduino, RAMPS, microSD, drivers shagovikov (a4988), etc.

Pay attention to the engine driver Z:

Because the engine is quite weak and had to use them to maximum current. To do this, simply sawed from the circuit board disassembled MFP is ready, unsoldered more powerful driver a3977. Very convenient!
I suffer with a graphical LCD, before he realized that the firmware Marlin working with him on a parallel and serial interface.

From the old mouse turned control:

Shagovikov Tests have shown that if the resistance of the windings of 6 ohms, they are much better, more powerful and quieter work of 24 volts.
On the contrary extruder. It turned out to be a low impedance motor 3 ohms at 24 volts which became noisy and very warm. Had his head and a resistor powered from 12V.
Power supply from XEROX:

That's it. Ready apparatus in the first iteration:
Posted in [mergetime] 1388852858 [/ mergetime]
Words can not describe the feeling that you experience before the first switching device manufactured. Especially when to complete the manufacture of only a few hours.
Here print:
Posted in [mergetime] 1388852990 [/ mergetime]
Immediately noticeable that efforts to soundproofing borne fruit. The printer is very quiet. By volume it's noticeably quieter than some inkjet printers. Even in the recording louder surrounding background working printer. Print speed of 30 to 40 mm.
Before, I was fond of overclocking the processor, and that if the printer disperse ??!
80mm Speed:
A further increase in speed of up to 120mm, the press is, but there are very resonance. Limited to speed print speed of 80mm and 50mm for quality.
Well, I'm pleased with the result of the acceleration.
And finally, some printed items (files downloaded from www.thingiverse.com/ ):

...

...

...

Additive print pliers:

And on the back of the latch to try to see:

Source: