2327
"How can I, as an ordinary schoolboy, designed and built their model 3D printer"
Many of us are accustomed to see the progress and the latest achievements of science and technology as a little side - already evaluating specific products and not the process itself. However schoolboy from Volgograd Michael Kozenko not one of them. It is precisely these who personally prefers to go all the way from the idea to the final result. And the result of his search was a 3D printer, which brought the young inventor (in May he was 15 years old) for several awards.
Misha, we met by chance - news of his printer appears on multiple sites, followed by an invitation to the radio, it was a couple of posts in the entertainment groups (this publication Misha, incidentally, brought many disappointments because of too ironic comments of the public). In our group "VK» about Misha was also news. And, surprisingly, the author himself without our invitation to enter into a dialogue with readers Public "Simple Science" explains prompted and taught. He, like us his books for children 5-12 years "Simple Science» , advance science is not just words but concrete actions. So we have with him and the idea to make a detailed post for the "Dummies" (I mean those under himself and not respected habrovchan) how to make a 3D printer from scratch.
Then - with the words of the author, who gladly will take part in the discussion under this post. And if the text will be useful and interesting, he tells about the creation of a "second version" of the printer.


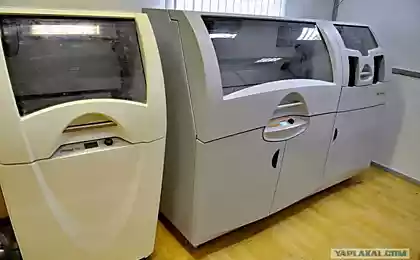
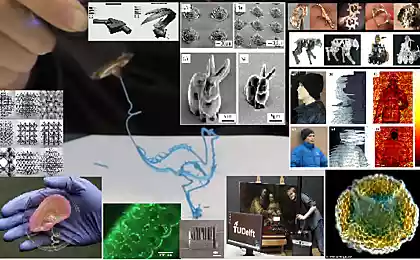
So, I'll start my story by saying that I love tinkering and create interesting things. And a few years ago I was seriously interested in 3D printing, because the 3D printer - a device for the rapid manufacture of artifacts, and in the hands of a man who has imagination - the whole factory. I became interested in this technology, learned about the project RepRap , whose main task was to make 3D printing available, precisely because it appeared most of the cheaper models. I saw that people collect printers, and, in principle, there is nothing complicated. Then I decided that I simply must buy or build yourself a device!
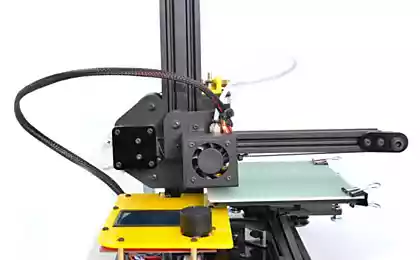
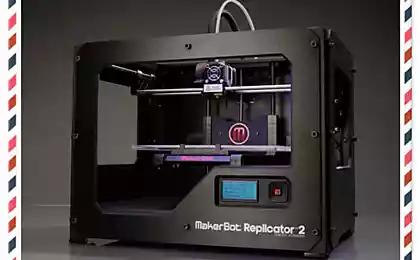
Thus, I had only the desire and financial support to parents, whom I told about my goal. About a year I needed to understand the technology of printing, design and some designs. Now was the most important thing. To begin, I decided that I needed a printer that works on technology FDM (Fused deposition modeling), it is the most common and simple, material and parts are easy to find, besides already have experienced people in this business. Then he should determine in what form do I buy a printer can be bought ready-made device or a complete set of parts, or maybe gather your? I do not like ready-made solutions, so I decided to buy electronics and mechanics, to gather first temporal frame and get the device to print the details already to a normal printer.
I decided that for the "null model" will guide shafts of old printers, 8mm diameter, the benefit that we have in the garage, there were many, and the sleeve can be cut from aluminum tube 8/10, in which the inner diameter slightly less than 8, and then just consume them, that they fit snugly and easily slid. In the garage was a lot of chipboard, and I decided to make a frame from it. Everything else (namely, electronics and mechanics), I decided to buy on EBay in China. I chose the Arduino Mega 2650, Ramps v1.4, 4 drivers A4988 (although I bought 5 and then this not withheld), 5 stepper motors NEMA 17 form factor, with a torque of 4 kg * cm (took with power reserve just in case) , power supply 400 watts at 12 volts and 33 amperes heating panel Mk2A, with glass, which, unfortunately, did not get the whole, all-metal type thermal head Bowden Hot End, Teflon tube 1 m for the thermal head, the monitor is already for the second printer, and more Clutter on two tooth pulley 29 of the belt and a pair of feet gt2, a pair of couplings, a feed wheel having teeth extruder, a pair of small fans 30x30 couple pnevmofittingov for tubes with an external diameter of 4, 3, limit switches, as well as 20 pieces of bearings 608, since it is cheaper than in Volgograd. All it cost about 20k.
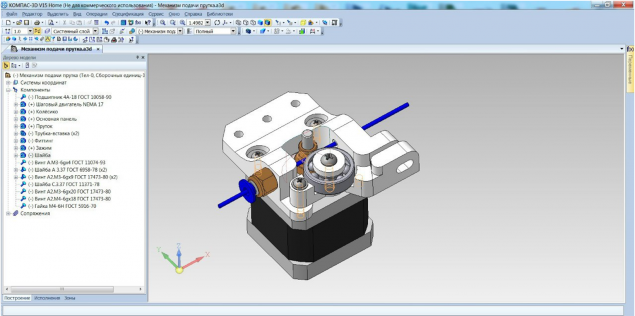
While the details were, I started designing, not trying to detailed study and using only the dimensions, I created a project for the week of their printer models, which, without hesitation, called VolgoBotom.
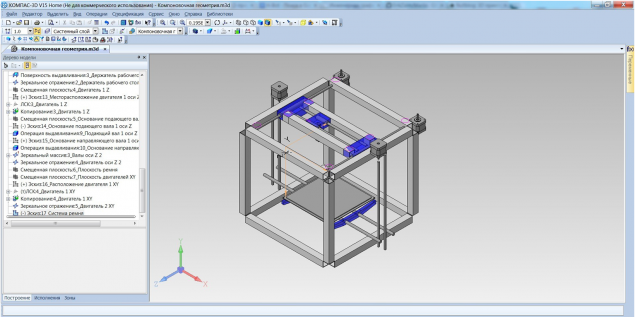
Outline project my printer made in CAD KOMPAS 3D Home i>
I decided that it would be a cube assembled from chipboard. Electronics is placed on the right side wall and a reel with plastic and feed mechanism - on the left side. In it will be three tiers: the bottom will only perform the function of the carrier, the average the same - the carriage Z, and on the top will focus all the mechanics, motors, and the Z-axis positioning mechanism H-Bot, which I chose because of its obvious advantages. As it is only one belt, and, therefore, also need a tensioner, belt anchorages all you need only 2, and in general, in this mechanism, all engines are on the frame, which facilitates the carriage, and as for the firmware, the standard Marlin for its activation need only one line to uncomment #define CoreXY, well and correctly invert the axis.

Wiring electronics to Ramps v1.4, as you can see nothing complicated i>
When I became confident in your project, all hell broke loose for all who live there, since about two weeks I worked jigsaw, electric drill, hand tools on the balcony. Every day, from morning till evening. Some parts just did not get the first time, had to make some changes in the design and remodel them. And then, finally, all original parts for a printer ready!
Wasting no time, I started setting up the firmware. I will not take up much space here setting instruction, I will say that I enjoyed this article, it's all very clear, clear and understandable described. Only need to pay attention to the fact that it is for my printer must uncomment the line #define CoreXY, which I have already spoken.
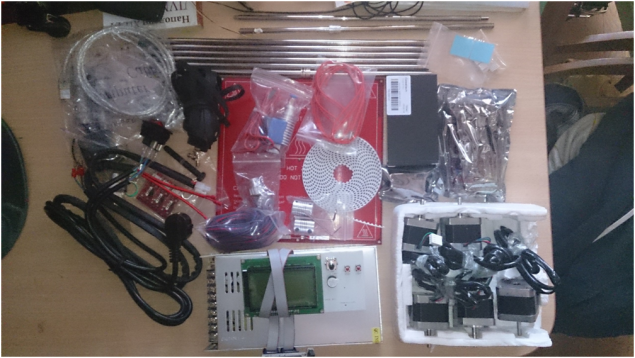
And here came accessories from China, as it turned out, not very well, did not come Teflon tube, but instead sent another two pulleys and a belt 3 meters GT5, I did not find out the relationship. And so we had to order in the local stores.
Almost all of the assembly have i>
And as she walked up, I began to collect all the pieces together, especially in this complex was not the most important - is to fulfill some requirements that everything was fixed very tightly and securely, and guides are parallel, so that are not stuck in the carriage, and, generally implies that the axes themselves are perpendicular. So, the printer was ready except Teflon tube.
Assembled H-Bot i>
In the process ... i>
So, wait bowden tube i>
I could not wait to try it and I decided to set up the system, and then print when the handset is. When you first connect everything almost burned down, I found that it was a faulty driver stepper motor on it was bad soldering.
Lubricated soldering almost ruined the whole thing i>
I replaced it, and then everything was connected well, then, of course correct defects on this driver and left him to spare, but remained the case for the setting! I've downloaded the firmware already prepared via Arduino IDE in your printer, connect to it via Repetier-Host, and filed the first team. It turned out some axes were confused and had to be inverted in the firmware. It was evening, and I did not do it, but in the morning, with a clear head, quickly sorted out the problem, already properly configured and reflash again tried to file command. At this time, all more or less worked well, but sometimes lacked power of the engine, then I adjusted the strength of the current by using variable resistors on the driver stepper motors. And lo! All the teams were well turned out even on the first attempt to count steps correctly engines, their speed, and everything, everything! It only remained to try popechatat, but the tube was not all. So we had to go to a very stupid decision: let the printer prints, but I will submit a plastic rod manually, about as much as submits extruder. Even though it is very silly, but the first seal washers and kulonchik for parents as a keepsake to be not so bad after several such samples I trained and served quite handily.
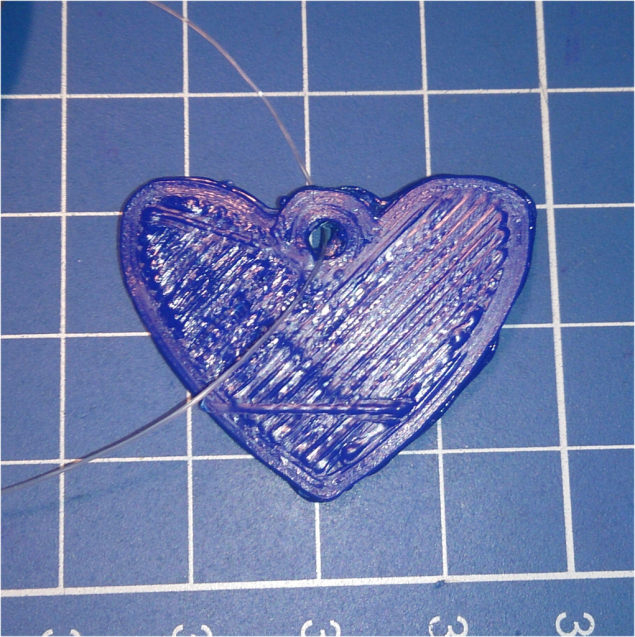
The first printing. Parents are asked to make a keepsake i>
Hooray! The tube came, I put it, but the print is not in any wanted to move. The fact is that instead of a gear wheel, I decided to use a rubber, and it just slipped, the benefit that I was a real, and I quickly drafted another feeder, spent approximately an hour to print. Again: Your printer prints, but I gave the plastic, this time through a tube, but everything turned out well. I easily put together a new extruder, reflash the printer under the new feed wheel, and this time it worked just fine!
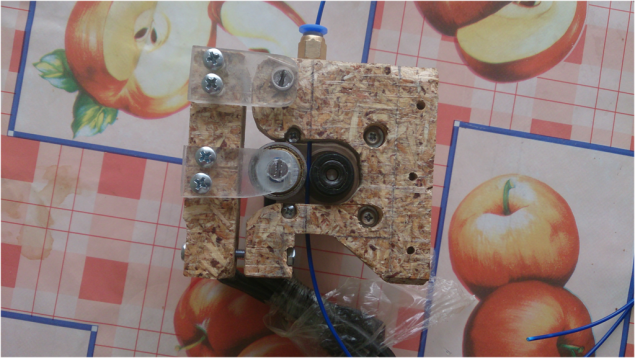
The first extruder. Dinosaur, is not it? I>
Version # 2 extruder is usually served Wheeled i>
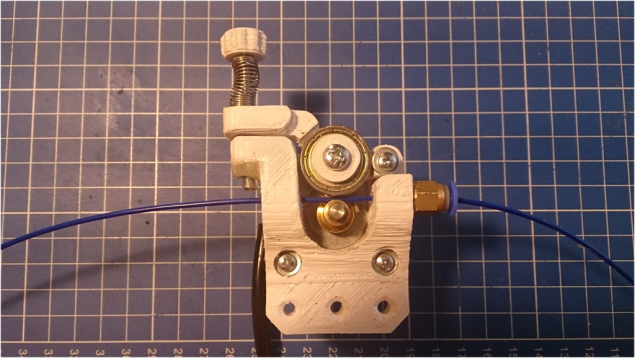
The second extruder. As it turned out, the spring the extra i>
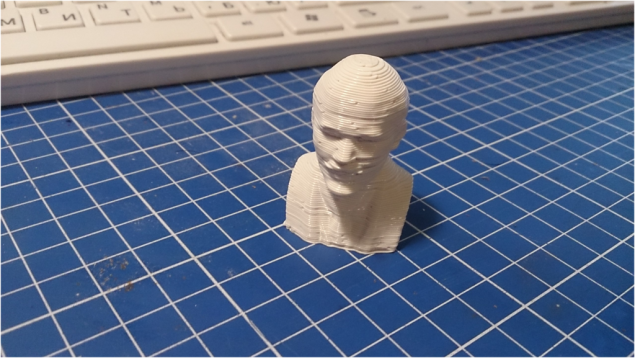
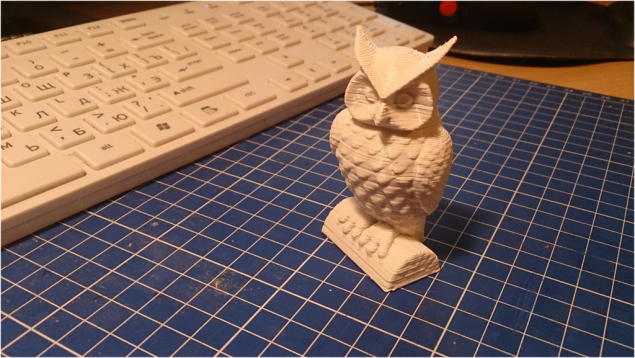
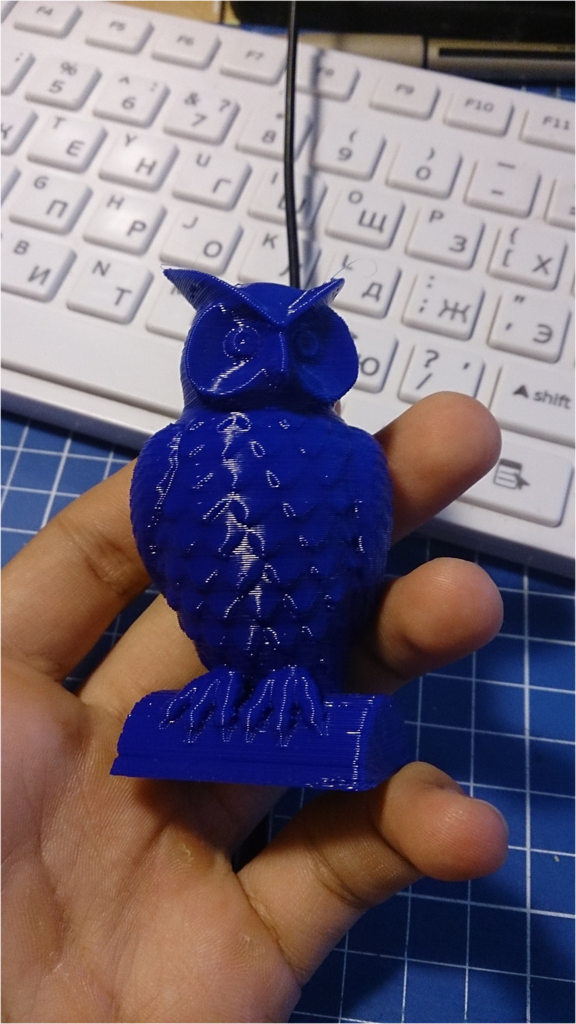
First of all try to print a bust of Lenin, then - the notorious model owls, now slightly tweaked settings and typed another owl, this time I was completely arranged quality!
The first real printing, nozzle 0.5, thickness 0.4 i>
two of this printing, nozzle 0.5, thickness 0.4 i>
Reprinted owl, this time 0.5 nozzle layer 0.3 i>
Thus VolgoBot 0.0 proved Completed and ready to print items to VolgoBot 0.1, which I have already wasted no time, began designing!
That, incidentally, video on VolgoBot 0.0:
My article - rather, it is not a story about a school genius who invented the wheel, but just proof that if there is a desire and a bit of funds, the 3D printer will be able to gather everyone! To implement my project I needed:
1. Desire and a clear goal to get in the end 3D printer
2. Time to study topics and open project RepRap (I spent a year)
3. Certain amount of money (for my project took about 23 thousand rubles)
4. Good CAD and ability to work in it (I used a homemade version of KOMPAS 3D)
5. Time for the design (I needed a week)
6. The time to create the printer itself (it took me 2 weeks)
7. Time to configure the printer itself (I needed a week)
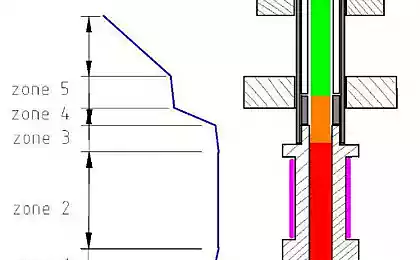
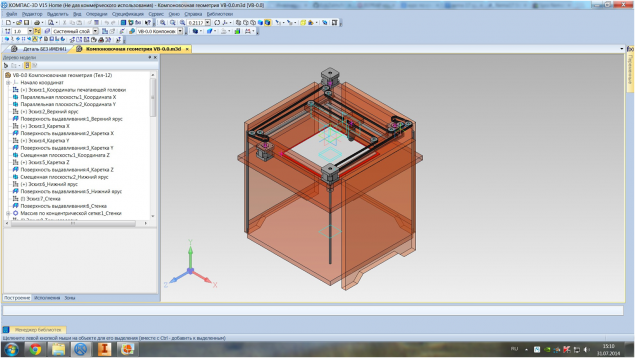
If this article will be of interest, then in the next part I will talk about creating already VolgoBota 0.1. If there is objective comments and criticism, I would be glad to hear, since I write stuff for the first time Habrahabr. In the meantime, here's the layout geometry for the second printer model:
It's still not finished layout geometry printer VolgoBot 0.1 i>
Source: habrahabr.ru/company/gtv/blog/233559/
Misha, we met by chance - news of his printer appears on multiple sites, followed by an invitation to the radio, it was a couple of posts in the entertainment groups (this publication Misha, incidentally, brought many disappointments because of too ironic comments of the public). In our group "VK» about Misha was also news. And, surprisingly, the author himself without our invitation to enter into a dialogue with readers Public "Simple Science" explains prompted and taught. He, like us his books for children 5-12 years "Simple Science» , advance science is not just words but concrete actions. So we have with him and the idea to make a detailed post for the "Dummies" (I mean those under himself and not respected habrovchan) how to make a 3D printer from scratch.
Then - with the words of the author, who gladly will take part in the discussion under this post. And if the text will be useful and interesting, he tells about the creation of a "second version" of the printer.


So, I'll start my story by saying that I love tinkering and create interesting things. And a few years ago I was seriously interested in 3D printing, because the 3D printer - a device for the rapid manufacture of artifacts, and in the hands of a man who has imagination - the whole factory. I became interested in this technology, learned about the project RepRap , whose main task was to make 3D printing available, precisely because it appeared most of the cheaper models. I saw that people collect printers, and, in principle, there is nothing complicated. Then I decided that I simply must buy or build yourself a device!
Thus, I had only the desire and financial support to parents, whom I told about my goal. About a year I needed to understand the technology of printing, design and some designs. Now was the most important thing. To begin, I decided that I needed a printer that works on technology FDM (Fused deposition modeling), it is the most common and simple, material and parts are easy to find, besides already have experienced people in this business. Then he should determine in what form do I buy a printer can be bought ready-made device or a complete set of parts, or maybe gather your? I do not like ready-made solutions, so I decided to buy electronics and mechanics, to gather first temporal frame and get the device to print the details already to a normal printer.
I decided that for the "null model" will guide shafts of old printers, 8mm diameter, the benefit that we have in the garage, there were many, and the sleeve can be cut from aluminum tube 8/10, in which the inner diameter slightly less than 8, and then just consume them, that they fit snugly and easily slid. In the garage was a lot of chipboard, and I decided to make a frame from it. Everything else (namely, electronics and mechanics), I decided to buy on EBay in China. I chose the Arduino Mega 2650, Ramps v1.4, 4 drivers A4988 (although I bought 5 and then this not withheld), 5 stepper motors NEMA 17 form factor, with a torque of 4 kg * cm (took with power reserve just in case) , power supply 400 watts at 12 volts and 33 amperes heating panel Mk2A, with glass, which, unfortunately, did not get the whole, all-metal type thermal head Bowden Hot End, Teflon tube 1 m for the thermal head, the monitor is already for the second printer, and more Clutter on two tooth pulley 29 of the belt and a pair of feet gt2, a pair of couplings, a feed wheel having teeth extruder, a pair of small fans 30x30 couple pnevmofittingov for tubes with an external diameter of 4, 3, limit switches, as well as 20 pieces of bearings 608, since it is cheaper than in Volgograd. All it cost about 20k.
While the details were, I started designing, not trying to detailed study and using only the dimensions, I created a project for the week of their printer models, which, without hesitation, called VolgoBotom.

Outline project my printer made in CAD KOMPAS 3D Home i>
I decided that it would be a cube assembled from chipboard. Electronics is placed on the right side wall and a reel with plastic and feed mechanism - on the left side. In it will be three tiers: the bottom will only perform the function of the carrier, the average the same - the carriage Z, and on the top will focus all the mechanics, motors, and the Z-axis positioning mechanism H-Bot, which I chose because of its obvious advantages. As it is only one belt, and, therefore, also need a tensioner, belt anchorages all you need only 2, and in general, in this mechanism, all engines are on the frame, which facilitates the carriage, and as for the firmware, the standard Marlin for its activation need only one line to uncomment #define CoreXY, well and correctly invert the axis.

Wiring electronics to Ramps v1.4, as you can see nothing complicated i>
When I became confident in your project, all hell broke loose for all who live there, since about two weeks I worked jigsaw, electric drill, hand tools on the balcony. Every day, from morning till evening. Some parts just did not get the first time, had to make some changes in the design and remodel them. And then, finally, all original parts for a printer ready!
Wasting no time, I started setting up the firmware. I will not take up much space here setting instruction, I will say that I enjoyed this article, it's all very clear, clear and understandable described. Only need to pay attention to the fact that it is for my printer must uncomment the line #define CoreXY, which I have already spoken.
And here came accessories from China, as it turned out, not very well, did not come Teflon tube, but instead sent another two pulleys and a belt 3 meters GT5, I did not find out the relationship. And so we had to order in the local stores.

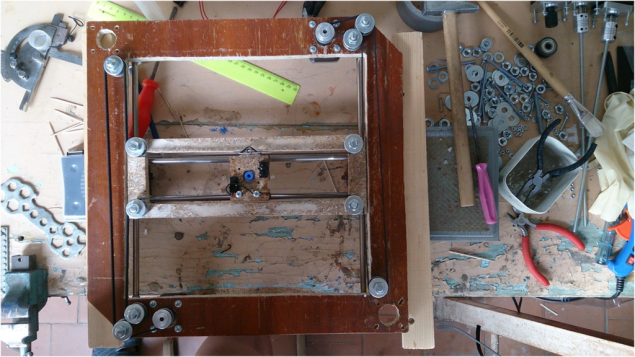
Almost all of the assembly have i>
And as she walked up, I began to collect all the pieces together, especially in this complex was not the most important - is to fulfill some requirements that everything was fixed very tightly and securely, and guides are parallel, so that are not stuck in the carriage, and, generally implies that the axes themselves are perpendicular. So, the printer was ready except Teflon tube.

Assembled H-Bot i>

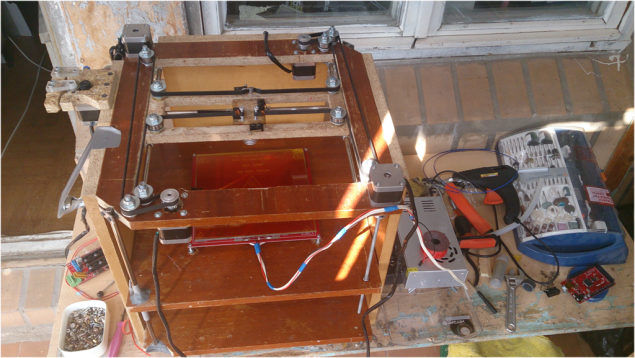
In the process ... i>

So, wait bowden tube i>
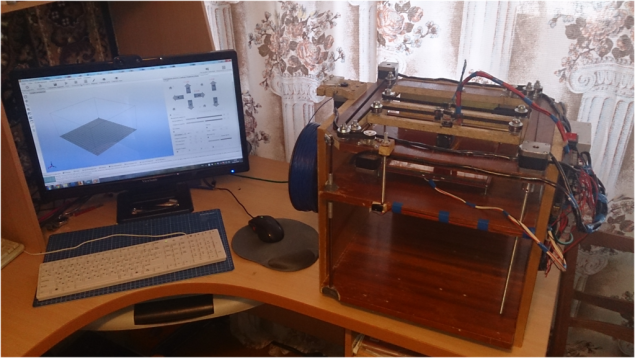
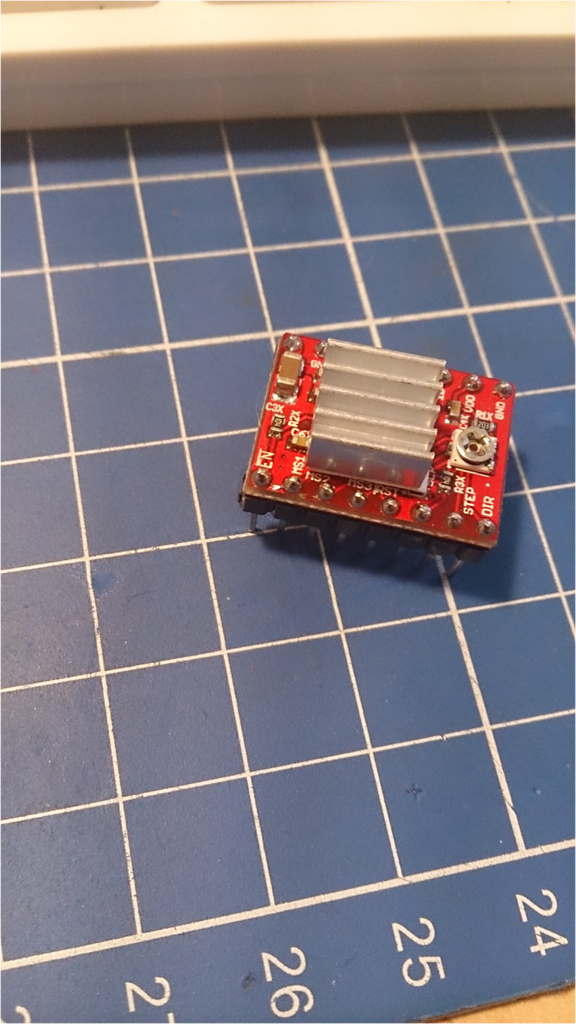
I could not wait to try it and I decided to set up the system, and then print when the handset is. When you first connect everything almost burned down, I found that it was a faulty driver stepper motor on it was bad soldering.

Lubricated soldering almost ruined the whole thing i>
I replaced it, and then everything was connected well, then, of course correct defects on this driver and left him to spare, but remained the case for the setting! I've downloaded the firmware already prepared via Arduino IDE in your printer, connect to it via Repetier-Host, and filed the first team. It turned out some axes were confused and had to be inverted in the firmware. It was evening, and I did not do it, but in the morning, with a clear head, quickly sorted out the problem, already properly configured and reflash again tried to file command. At this time, all more or less worked well, but sometimes lacked power of the engine, then I adjusted the strength of the current by using variable resistors on the driver stepper motors. And lo! All the teams were well turned out even on the first attempt to count steps correctly engines, their speed, and everything, everything! It only remained to try popechatat, but the tube was not all. So we had to go to a very stupid decision: let the printer prints, but I will submit a plastic rod manually, about as much as submits extruder. Even though it is very silly, but the first seal washers and kulonchik for parents as a keepsake to be not so bad after several such samples I trained and served quite handily.

The first printing. Parents are asked to make a keepsake i>
Hooray! The tube came, I put it, but the print is not in any wanted to move. The fact is that instead of a gear wheel, I decided to use a rubber, and it just slipped, the benefit that I was a real, and I quickly drafted another feeder, spent approximately an hour to print. Again: Your printer prints, but I gave the plastic, this time through a tube, but everything turned out well. I easily put together a new extruder, reflash the printer under the new feed wheel, and this time it worked just fine!

The first extruder. Dinosaur, is not it? I>

Version # 2 extruder is usually served Wheeled i>

The second extruder. As it turned out, the spring the extra i>
First of all try to print a bust of Lenin, then - the notorious model owls, now slightly tweaked settings and typed another owl, this time I was completely arranged quality!

The first real printing, nozzle 0.5, thickness 0.4 i>

two of this printing, nozzle 0.5, thickness 0.4 i>

Reprinted owl, this time 0.5 nozzle layer 0.3 i>
Thus VolgoBot 0.0 proved Completed and ready to print items to VolgoBot 0.1, which I have already wasted no time, began designing!
That, incidentally, video on VolgoBot 0.0:
My article - rather, it is not a story about a school genius who invented the wheel, but just proof that if there is a desire and a bit of funds, the 3D printer will be able to gather everyone! To implement my project I needed:
1. Desire and a clear goal to get in the end 3D printer
2. Time to study topics and open project RepRap (I spent a year)
3. Certain amount of money (for my project took about 23 thousand rubles)
4. Good CAD and ability to work in it (I used a homemade version of KOMPAS 3D)
5. Time for the design (I needed a week)
6. The time to create the printer itself (it took me 2 weeks)
7. Time to configure the printer itself (I needed a week)
If this article will be of interest, then in the next part I will talk about creating already VolgoBota 0.1. If there is objective comments and criticism, I would be glad to hear, since I write stuff for the first time Habrahabr. In the meantime, here's the layout geometry for the second printer model:

It's still not finished layout geometry printer VolgoBot 0.1 i>
Source: habrahabr.ru/company/gtv/blog/233559/