890
As I started airbrushing
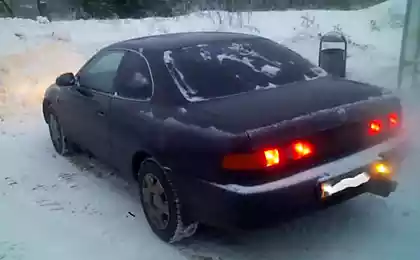
Two years have passed from the time when I painted my car and made easy Toyota Voltz its exclusive purely urban option. For the realization of this creation it took me 4 months. 4 months later I went to work 2 km away from the stop - on foot. Now I remember sodragayus and horror, as much ... brrrr murazhzhzhzhzhzhki (or goose) running through the body. * Stop, stop running, stop * As all this was happening in detail with pictures of the process.
26 photo.
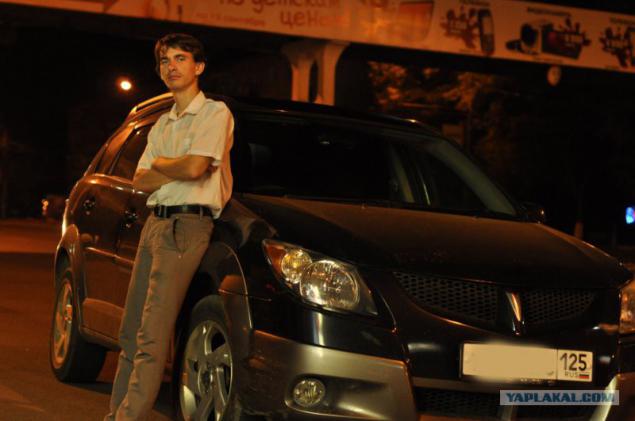
I have a korefan, engaged in professional airbrushing, well, here it happened that orders had at that time was not, and he was consumed by grief and hands demanded something natvorit.Tak he decided to not suffer any garbage to change the appearance of my car. And offered me, they say prepare sketches that you want to do with the car, and I tell you all this is done, so to speak materialization of dreams. The estimated work - 3 weeks peshkohoda and you're the first peppers in the village, as well as the village we wanted to stand out more. Also I pressed on my sick bastard mazol - love of beauty with my long-standing desire to tune the car. The main condition - not all the basic art work will make myself. Agreed, he did not know yet what to subscribe.
For a long time I did not sleep, I kept thinking, what do I want ... It's always the case, that's like you know what you want, but when it comes to the "as of now zababahat" as thoughts immediately begin their Brownian motion, and desires can not adopt a clear plan, and you, as a known substance in the hole, mecheshsya from one idea to another. The results of these flickering below the finished sketch there is no result at the end of article))).
That's actually the first tentative sketches went.
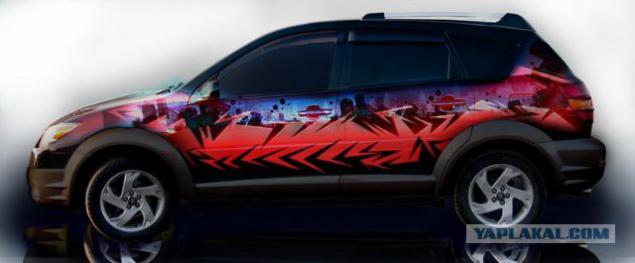
Drawn purely schematic by hand.
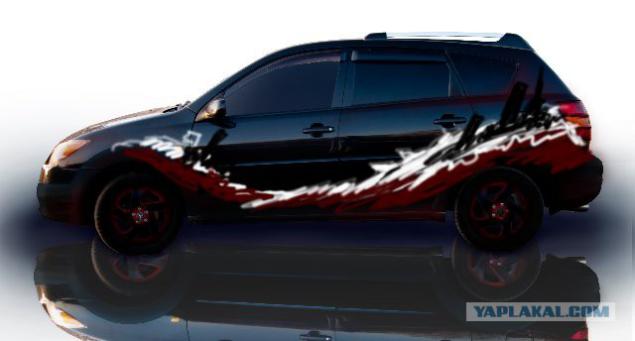
3.
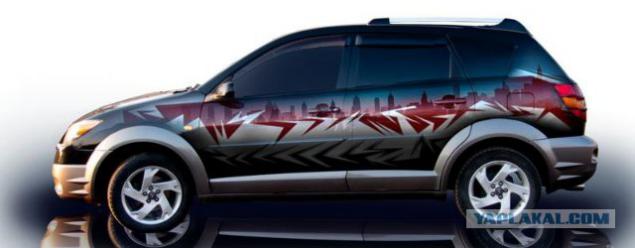
4. As you can see, like, something abstract, but with a sense that both stylish and sell after the machine could.
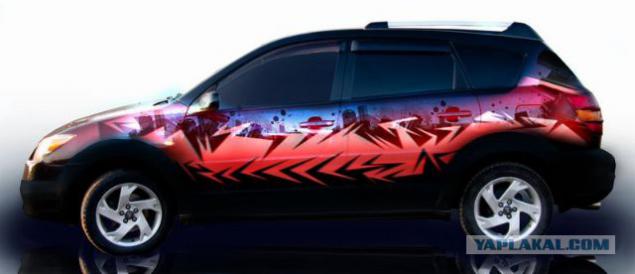
5.
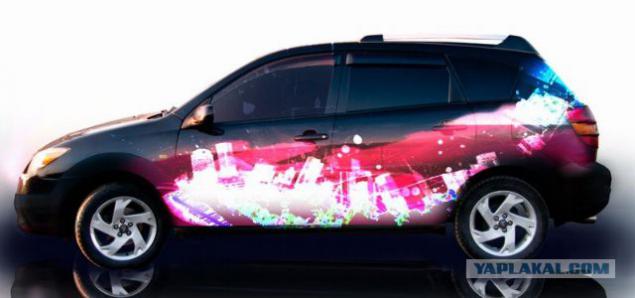
6.
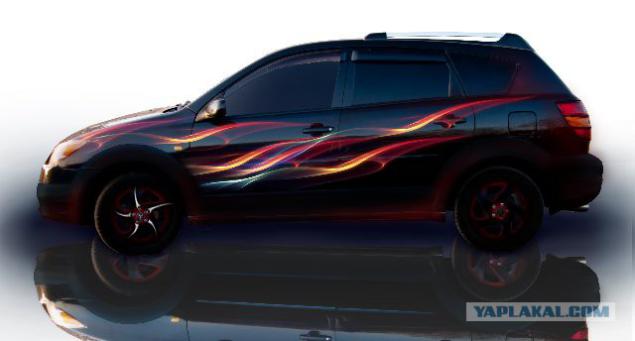
7.
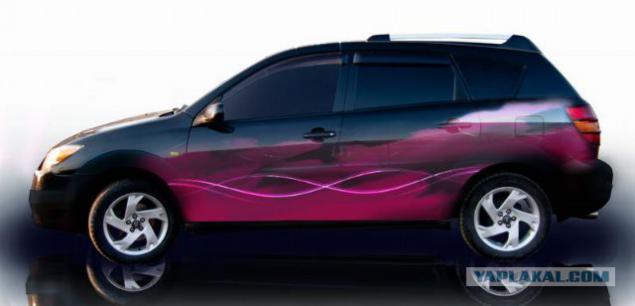
8.
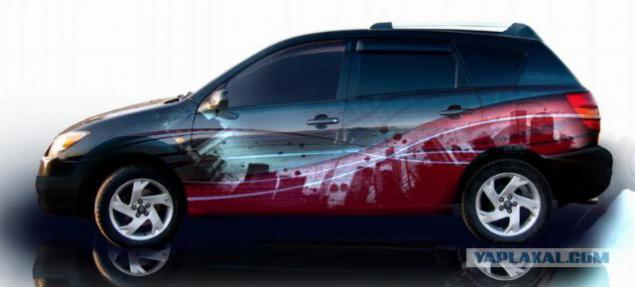
The idea is defined (in the picture above is not of a sketch that was eventually chosen), it's time to deal with the case. I hope, dear reader, do not think that airbrushing - it took airbrush, spat a couple of places in the paint - the machine is ready, you can roll out of the garage. It is also a long, meticulous process of preparing cars for painting, I had no idea how much it is tedious and difficult. If I knew I would never put his car a penalty. Briefly about the process:
- Disassemble the component parts of the machine on which the paint is applied.
- Zamatirovat (removing the top layer of paint, varnish to matt)
- Masking is not painted surfaces from paint hit
- If possible, the primer (if there are defects on the surface)
- Airbrush itself
- Varnishing
- Polishing
- Assembling machines
- Cleaning, interior cleaning of dust and any precipitation from colorants, polishing compounds. The washing.
- You sit down behind the wheel ... and observe the reaction of other motorists.
Day 1 - cleaned and scrubbed the garage, removed all the rubbish cleared by a car. Nadraivat as sailors in the Navy during the general not nadraivat deck. Airbrushing can not tolerate dust, if dust gets on the freshly painted or varnished surfaces it is very difficult to remove, and the car will remain bumps and roughness that the appearance is not very good impact.
Day 2 - dismantling the machine, the most exciting and interesting process that requires maximum accuracy. Breaking, as they say, not to build. What I like Japanese cars - they are easy to understand, I do not AVTOMASTER, and not even the motorist, but the process was easy to disassemble, in principle, no manual consulted, all rivets, bolts, and the heck. The entire outer skin is removed easily, it is only necessary to pull, pull studs from the slots. The only tool that we needed - a key 10 and a screwdriver in the plus. The downside rivets only one - at times it is impossible not to get broken, had to bite, but the rivets sold.
GOOD TO KNOW ... THE FUTURE.
The only shop in Vladivostok, where there are probably ALL KINDS rivets - a company store at the Military Masuma shosse.Ya traveled all the shops and Artem Vlad - and nowhere I have not found the right but the store). If you are doing body work or your own darn car, then you are 100% here, in other stores like the Maritime Territory, and in the regions of Russia they are sold under a franchise from this store and not in such a large range. If anyone needed to be, here is the link. I do not know whether it is possible to lay out, in any case, the store did not advertise.
Directions and address
Since we want to paint the two sides of the car, I had to dismantle almost all, the only thing that has not undergone disassembly - beauty and the fact that under the hood. Dismantled all components of the doors, including locks, even had to hoist glasses disassemble. Very profitable model of my car that at bottom she had a lot of plastic, which must be removed. We killed all day for dismantling until all figured out, the bolts from each parts piled in a separate package.
Free advice ...
You will also advise to work along the same lines, you never know how much time will be delayed repairs, and not always just remember where a bolt, rivet, screw. For example, the right handle of the front door, all the items in one package, on which the marker signed Handle Right. BEFORE. DOORS. Or front bumper - a marker numbered holes for the screws if these holes are the same, they are wrapped in paper tape, it is written under the number interval of the holes that they are suitable, then it all falls into the overall package marking bumpers. The principle is clear thinking, better to zamorochitsya such systematization, than to suffer, schesav until the bald head, trying to remember where these bolts and riveting, because after all, you can polyset prematurely.
A stack of plastic bags worth a penny, paper tape (torn off easy enough adhesive to wrap the item, no trace left after peel - 115 rubles, in any hardware store. Use only brand 3M, tried others leave marks or tear off the surface with paint .
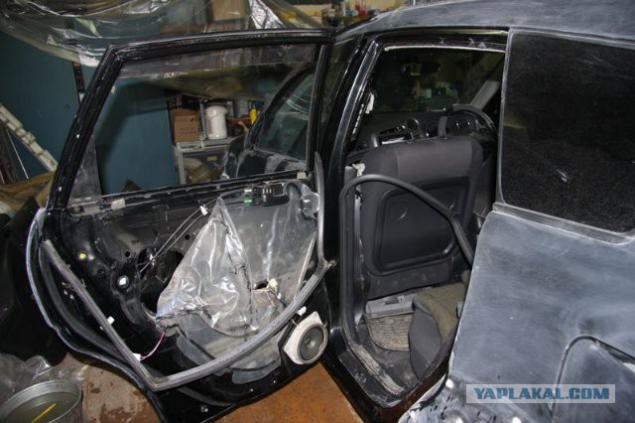
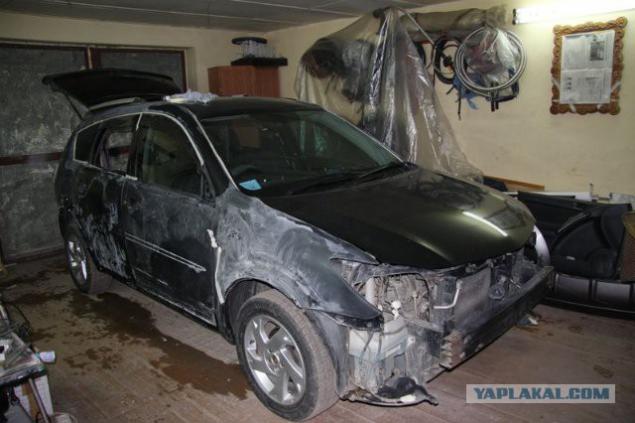
On matting (gloss removal) of the machine took a few days, I felt like a blunt blunt soldier drayaschim toothbrush Platz (recalled his military duties). Brain hung a sign - on vacation. He was engaged in masturbation for the auto body, rubbed, scrubbed, stroked, caressed, rubbed "back" felt, sandpaper, tearing off the top layer of paint, removing a layer of lacquer (a delicate process, it is important not to rub or nedoteret). I remember the old movies about karate, where instructors teach children techniques through labor, forcing to perform routine manual work, bringing their movement to automaticity. So now I know karate. I erased all the palms and knuckles before the bloody blisters. Hells work. Rub the surface of the area is not small. It would have been much easier if the car was not mine, I would not be so diligent. On how zamatiruesh depends how well will hold the paint, of course, I worked on the conscience, then the drawing is not to cry. Earlier, before, when I used the services of avtopokraski, I was indignant: why the hell are they asking for this work in 2500 p. for detail, why it is so expensive. Now I know where the roots of such requests. Besides that consumables are not cheap, so still and time-consuming. Even if you need to touch up portion 5 * 5cm, it is necessary to strip all the detail and color it completely, because as we will see where the boundary of different painted parts. By the way, without the gloss of car looks far more pleasant. I hope my machine humming with pleasure as I felt her sandpaper and rubbing.
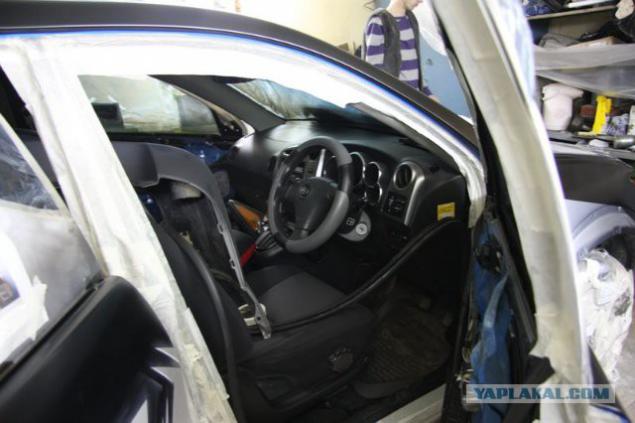
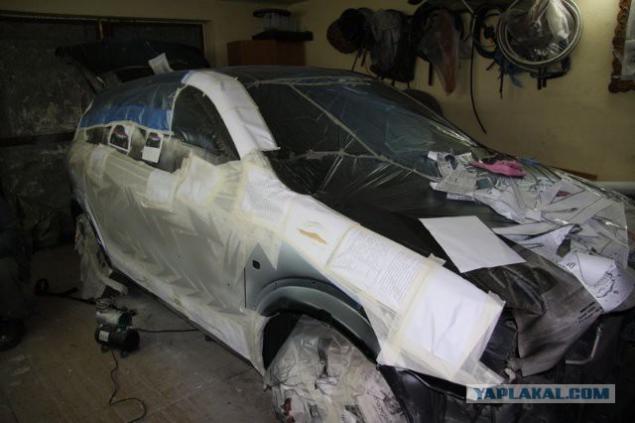
When the matting stage was completed embarked on the next important stage - from the passenger compartment sealing lacquer particles, dust, paint mists. Since the varnish and paint is applied by air spray method, it is easily blown into all the cracks, settles and hardens, which is not horosho.Poetomu all possible areas close newspapers, plain paper, the joints are sealed with paper tape. The roof sheltering special masking tape with a cellophane film, very good thing, especially when doing home repairs, not too expensive and the usefulness of the mass. Sealed all lights, windows, counters and the area where the door and the body of the machine. Nudyatiny, consuming a lot of time.
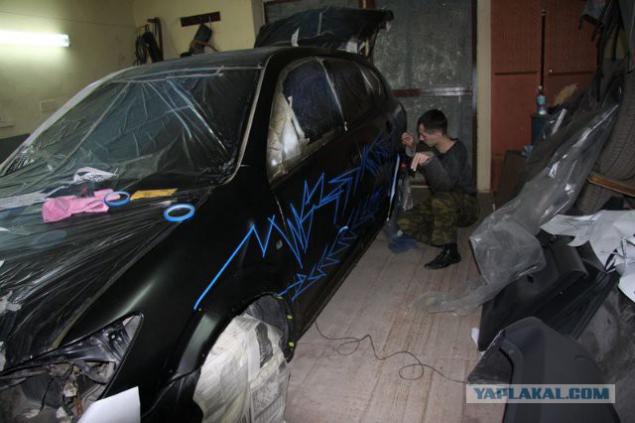
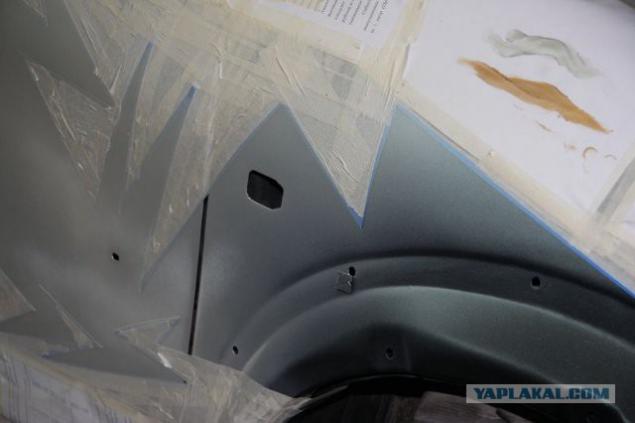
It would all take the airbrush and herach have a square of Malevich, but no ... before it is necessary to remove small defects of the body. Inherited from the previous owner vmyatinki small, chips, bumper general was holed in one place. These problem areas very carefully rubbed, then putty, as you are at home close up the gap, the viscous mixture is overwritten, removing the excess, leave to dry and then sandpaper smoothed. Bumper had to tinker - that there had to be reinforced with a hole, covering the hole fine mesh (50rub. - 20 * 30cm), well by welding to the body with a special paste bumper adhesive composition (200r.), And has applied on top of it "plaster". Keeps dead. Many masters use laktayd, someone just melts the plastic around the surface to be repaired and it as if glued grid until hardens, it is technically not correct (deformed shape of the part and place of adhesions - becomes brittle) and then plastered and painted. Everything is ready and the machine is covered by a first layer of paint, the main component of its color, it is applied drawing. After painting the machine must stand for hours to dry, get over it, you know, to "tan" went well. This item could be and miss, if there were no defects throughout the body color should be solid, so that the repair did not show a pattern. Before the draw, first printed a sketch on paper and cut out the contours of the basic pattern drawing, as a symmetrical pattern on both sides to resort to using a stencil. Attach cut contours of the car magnets (good that the cars are made of metal) and paste contours of a marking tape (analogue very narrow tape, sold in three colors, at least with us, I saw only the green, red and blue - as the practice of blue is the ideal , well kept, not rolled, glued immediately torn off, too, without a trace).
close
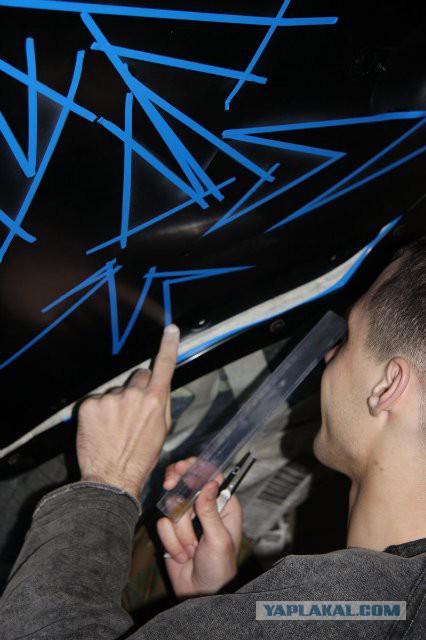
Land pattern, different in color, are sealed with paper, tape, paint does not climbed to the other part of the future picture. It is still a dull dull laborious and careful work that does not require special artistic abilities, but if you have the hands of assholes grow, at this stage can be very important zakosyachit all future work. Shaded - a day to dry. Either with a hairdryer as a scarecrow standing mashesh.
close
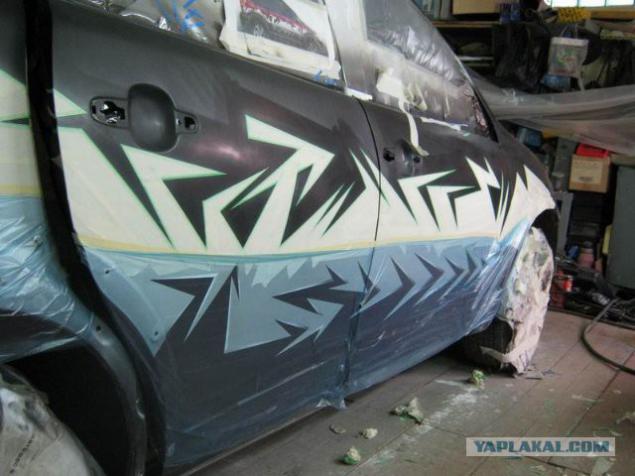
Dried - added another shade over that was smoother color transition - again dries. Now, to rip off a sealed portion, and just as we were sealed with the previous place of the figure, seal the already shaded plot draws shadows Sokhna and again close scotch sketch place.
preparing to paint the top
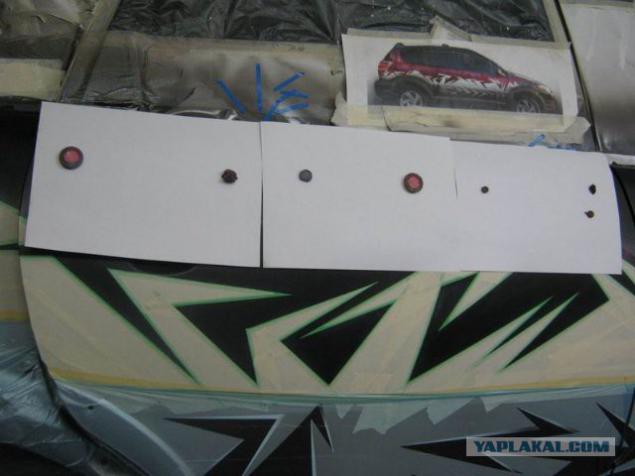
The result of the first stage of painting
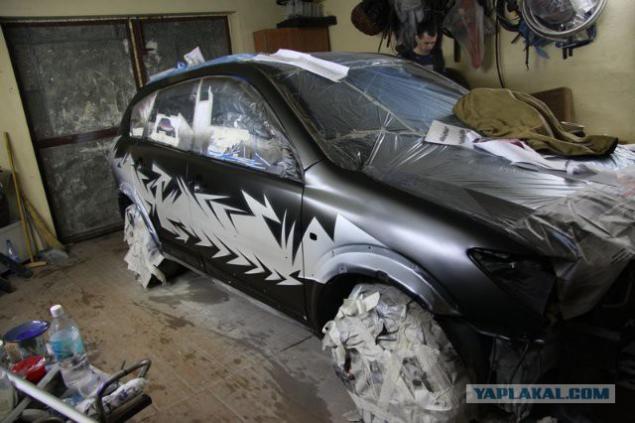
is seen on the edges of the gray transitions, had on old drawings overlap the tape again.
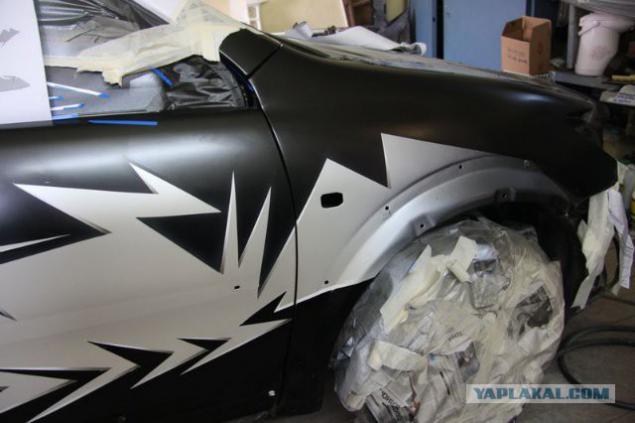
We worked almost every day, except for the time when the sick, or were still some nesrosty. Sometimes the whole day went, happened only worked for two or three hours a day, that was two weeks doing nothing - waiting fluorescent paint from Moscow, without which the whole process was. They wanted to make the background of silhouettes of buildings glowing in the dark or when light is reflected lights, the windows of houses and the contour of the pattern of light in the darkness. Three days were spent experimenting with fluorescent paint looks amazing in the dark, but in daylight, she has a pale milky color, which is at odds with the sketch, as if painted on top of another color, the mixing obtained very much dark and oversaturated colors instead gentle sunset sky turns bloody vampiric evening. I had to re-paint the space experiments, waited in vain paint. When the game Lumi-paint forgot to inform uncle Pasha, we occupied the garage, the car is so powerful that the light was coming out at night on the street, I saw the light in the garage, thinking that we are in the garage forgot to turn off the light. He was awakened by a friend in the night by a phone call and a floor, explaining what he thought of his mental faculties and taught the simple basics of the economy, is not yet opened a garage and oh ... eat our glowing saw an unidentified object. That is how myths are born of UFOs.
After we do the basics, we had to put the city here and start dancing with a tambourine. In carving stencils houses in triplicate (external contours of buildings, windows, inner contours) cut four hands for two days at the fingertips of stationery knife had calluses. Then, the stencils need to build the car in the composition, it resembles a kind of puzzles, collect the pieces, and then connects the edge of the tape is attached by magnets.

Similarly, in the same sequence and then it will be necessary to do a second side of the machine. Please attach stencils outer contours, blown pattern paint background colors. After this layer is removed and the stencil pattern applied to each portion of the stencil with the windows, the most important thing that the edges clearly coincided. Later adjustment of internal circuits, for adding 3D effect. When the first side of the machine is ready, we proceed to the second side and do the same thing.
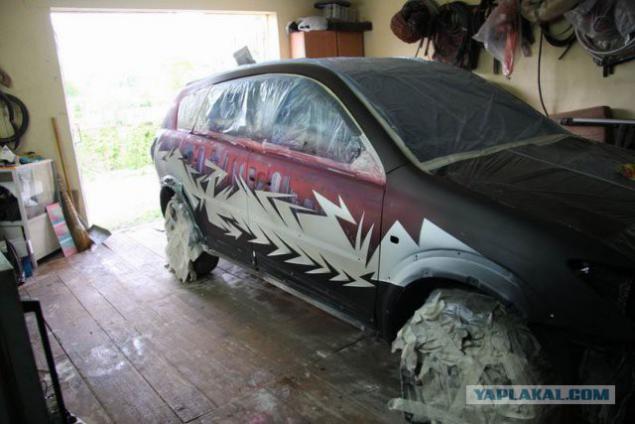
another angle
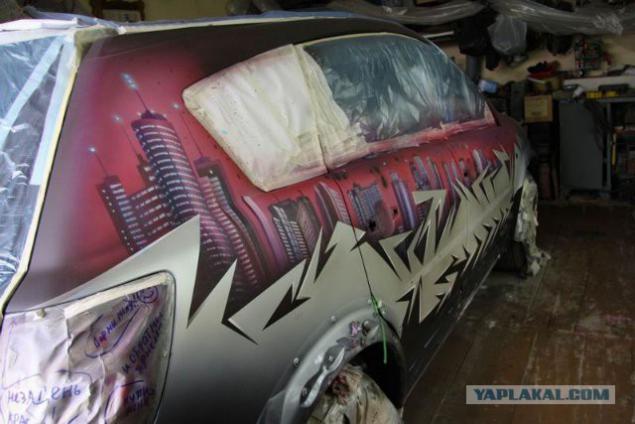
close
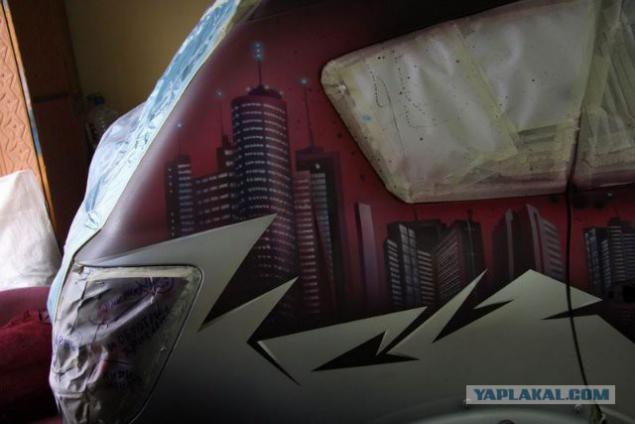
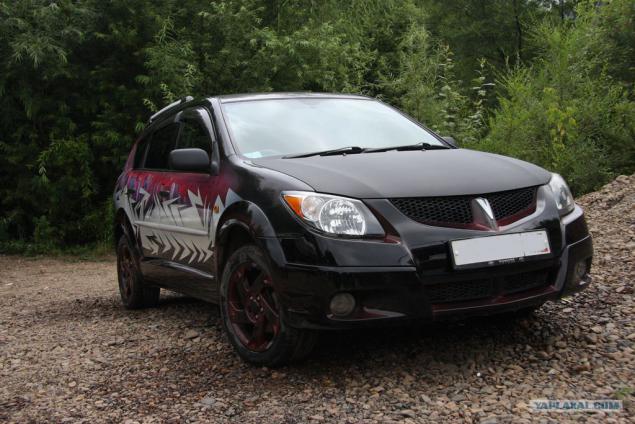
A few days spent on spraying and polishing all the details, but they are not enough in total - 10 + body linings Auto + 4 discs. Twenty-four hours to assemble. When drove the car out of the garage, I could not believe that ... all that I can now ride on this miracle. So, from March to July, disappeared in the garage, even taking in rent a garage we expected maximum monthly spend on a job, Uncle Pasha at the end we had splashed saliva due to the timing. Thank God everything is over and you can safely write about it only with horror remembering those days, and not waking up at night with a longing for a new foot bottom and slave labor.
Posted in [mergetime] 1391499360 [/ mergetime]
After three hours of normal lay pictures of finished machines. Unfortunately the work is not preserved photographs. You can discuss if you do not want to wait for the normal angle of the machine)))
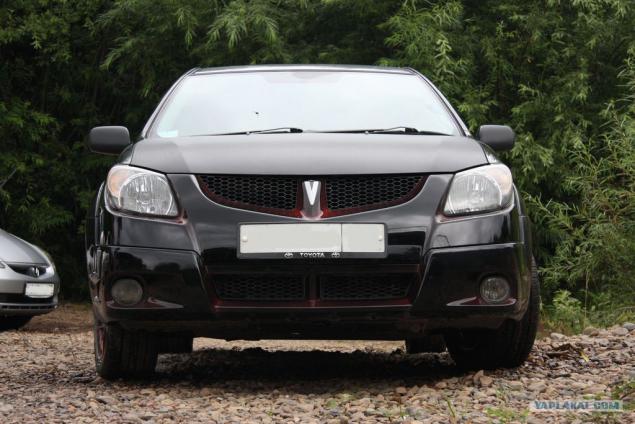
front - hood covered with carboxylic film. Very practical primer on the rocks chipping leave
Source:
26 photo.

I have a korefan, engaged in professional airbrushing, well, here it happened that orders had at that time was not, and he was consumed by grief and hands demanded something natvorit.Tak he decided to not suffer any garbage to change the appearance of my car. And offered me, they say prepare sketches that you want to do with the car, and I tell you all this is done, so to speak materialization of dreams. The estimated work - 3 weeks peshkohoda and you're the first peppers in the village, as well as the village we wanted to stand out more. Also I pressed on my sick bastard mazol - love of beauty with my long-standing desire to tune the car. The main condition - not all the basic art work will make myself. Agreed, he did not know yet what to subscribe.
For a long time I did not sleep, I kept thinking, what do I want ... It's always the case, that's like you know what you want, but when it comes to the "as of now zababahat" as thoughts immediately begin their Brownian motion, and desires can not adopt a clear plan, and you, as a known substance in the hole, mecheshsya from one idea to another. The results of these flickering below the finished sketch there is no result at the end of article))).
That's actually the first tentative sketches went.

Drawn purely schematic by hand.

3.

4. As you can see, like, something abstract, but with a sense that both stylish and sell after the machine could.

5.

6.

7.

8.

The idea is defined (in the picture above is not of a sketch that was eventually chosen), it's time to deal with the case. I hope, dear reader, do not think that airbrushing - it took airbrush, spat a couple of places in the paint - the machine is ready, you can roll out of the garage. It is also a long, meticulous process of preparing cars for painting, I had no idea how much it is tedious and difficult. If I knew I would never put his car a penalty. Briefly about the process:
- Disassemble the component parts of the machine on which the paint is applied.
- Zamatirovat (removing the top layer of paint, varnish to matt)
- Masking is not painted surfaces from paint hit
- If possible, the primer (if there are defects on the surface)
- Airbrush itself
- Varnishing
- Polishing
- Assembling machines
- Cleaning, interior cleaning of dust and any precipitation from colorants, polishing compounds. The washing.
- You sit down behind the wheel ... and observe the reaction of other motorists.
Day 1 - cleaned and scrubbed the garage, removed all the rubbish cleared by a car. Nadraivat as sailors in the Navy during the general not nadraivat deck. Airbrushing can not tolerate dust, if dust gets on the freshly painted or varnished surfaces it is very difficult to remove, and the car will remain bumps and roughness that the appearance is not very good impact.
Day 2 - dismantling the machine, the most exciting and interesting process that requires maximum accuracy. Breaking, as they say, not to build. What I like Japanese cars - they are easy to understand, I do not AVTOMASTER, and not even the motorist, but the process was easy to disassemble, in principle, no manual consulted, all rivets, bolts, and the heck. The entire outer skin is removed easily, it is only necessary to pull, pull studs from the slots. The only tool that we needed - a key 10 and a screwdriver in the plus. The downside rivets only one - at times it is impossible not to get broken, had to bite, but the rivets sold.
GOOD TO KNOW ... THE FUTURE.
The only shop in Vladivostok, where there are probably ALL KINDS rivets - a company store at the Military Masuma shosse.Ya traveled all the shops and Artem Vlad - and nowhere I have not found the right but the store). If you are doing body work or your own darn car, then you are 100% here, in other stores like the Maritime Territory, and in the regions of Russia they are sold under a franchise from this store and not in such a large range. If anyone needed to be, here is the link. I do not know whether it is possible to lay out, in any case, the store did not advertise.
Directions and address
Since we want to paint the two sides of the car, I had to dismantle almost all, the only thing that has not undergone disassembly - beauty and the fact that under the hood. Dismantled all components of the doors, including locks, even had to hoist glasses disassemble. Very profitable model of my car that at bottom she had a lot of plastic, which must be removed. We killed all day for dismantling until all figured out, the bolts from each parts piled in a separate package.
Free advice ...
You will also advise to work along the same lines, you never know how much time will be delayed repairs, and not always just remember where a bolt, rivet, screw. For example, the right handle of the front door, all the items in one package, on which the marker signed Handle Right. BEFORE. DOORS. Or front bumper - a marker numbered holes for the screws if these holes are the same, they are wrapped in paper tape, it is written under the number interval of the holes that they are suitable, then it all falls into the overall package marking bumpers. The principle is clear thinking, better to zamorochitsya such systematization, than to suffer, schesav until the bald head, trying to remember where these bolts and riveting, because after all, you can polyset prematurely.
A stack of plastic bags worth a penny, paper tape (torn off easy enough adhesive to wrap the item, no trace left after peel - 115 rubles, in any hardware store. Use only brand 3M, tried others leave marks or tear off the surface with paint .

On matting (gloss removal) of the machine took a few days, I felt like a blunt blunt soldier drayaschim toothbrush Platz (recalled his military duties). Brain hung a sign - on vacation. He was engaged in masturbation for the auto body, rubbed, scrubbed, stroked, caressed, rubbed "back" felt, sandpaper, tearing off the top layer of paint, removing a layer of lacquer (a delicate process, it is important not to rub or nedoteret). I remember the old movies about karate, where instructors teach children techniques through labor, forcing to perform routine manual work, bringing their movement to automaticity. So now I know karate. I erased all the palms and knuckles before the bloody blisters. Hells work. Rub the surface of the area is not small. It would have been much easier if the car was not mine, I would not be so diligent. On how zamatiruesh depends how well will hold the paint, of course, I worked on the conscience, then the drawing is not to cry. Earlier, before, when I used the services of avtopokraski, I was indignant: why the hell are they asking for this work in 2500 p. for detail, why it is so expensive. Now I know where the roots of such requests. Besides that consumables are not cheap, so still and time-consuming. Even if you need to touch up portion 5 * 5cm, it is necessary to strip all the detail and color it completely, because as we will see where the boundary of different painted parts. By the way, without the gloss of car looks far more pleasant. I hope my machine humming with pleasure as I felt her sandpaper and rubbing.

When the matting stage was completed embarked on the next important stage - from the passenger compartment sealing lacquer particles, dust, paint mists. Since the varnish and paint is applied by air spray method, it is easily blown into all the cracks, settles and hardens, which is not horosho.Poetomu all possible areas close newspapers, plain paper, the joints are sealed with paper tape. The roof sheltering special masking tape with a cellophane film, very good thing, especially when doing home repairs, not too expensive and the usefulness of the mass. Sealed all lights, windows, counters and the area where the door and the body of the machine. Nudyatiny, consuming a lot of time.

It would all take the airbrush and herach have a square of Malevich, but no ... before it is necessary to remove small defects of the body. Inherited from the previous owner vmyatinki small, chips, bumper general was holed in one place. These problem areas very carefully rubbed, then putty, as you are at home close up the gap, the viscous mixture is overwritten, removing the excess, leave to dry and then sandpaper smoothed. Bumper had to tinker - that there had to be reinforced with a hole, covering the hole fine mesh (50rub. - 20 * 30cm), well by welding to the body with a special paste bumper adhesive composition (200r.), And has applied on top of it "plaster". Keeps dead. Many masters use laktayd, someone just melts the plastic around the surface to be repaired and it as if glued grid until hardens, it is technically not correct (deformed shape of the part and place of adhesions - becomes brittle) and then plastered and painted. Everything is ready and the machine is covered by a first layer of paint, the main component of its color, it is applied drawing. After painting the machine must stand for hours to dry, get over it, you know, to "tan" went well. This item could be and miss, if there were no defects throughout the body color should be solid, so that the repair did not show a pattern. Before the draw, first printed a sketch on paper and cut out the contours of the basic pattern drawing, as a symmetrical pattern on both sides to resort to using a stencil. Attach cut contours of the car magnets (good that the cars are made of metal) and paste contours of a marking tape (analogue very narrow tape, sold in three colors, at least with us, I saw only the green, red and blue - as the practice of blue is the ideal , well kept, not rolled, glued immediately torn off, too, without a trace).

close

Land pattern, different in color, are sealed with paper, tape, paint does not climbed to the other part of the future picture. It is still a dull dull laborious and careful work that does not require special artistic abilities, but if you have the hands of assholes grow, at this stage can be very important zakosyachit all future work. Shaded - a day to dry. Either with a hairdryer as a scarecrow standing mashesh.

close

Dried - added another shade over that was smoother color transition - again dries. Now, to rip off a sealed portion, and just as we were sealed with the previous place of the figure, seal the already shaded plot draws shadows Sokhna and again close scotch sketch place.

preparing to paint the top

The result of the first stage of painting

is seen on the edges of the gray transitions, had on old drawings overlap the tape again.

We worked almost every day, except for the time when the sick, or were still some nesrosty. Sometimes the whole day went, happened only worked for two or three hours a day, that was two weeks doing nothing - waiting fluorescent paint from Moscow, without which the whole process was. They wanted to make the background of silhouettes of buildings glowing in the dark or when light is reflected lights, the windows of houses and the contour of the pattern of light in the darkness. Three days were spent experimenting with fluorescent paint looks amazing in the dark, but in daylight, she has a pale milky color, which is at odds with the sketch, as if painted on top of another color, the mixing obtained very much dark and oversaturated colors instead gentle sunset sky turns bloody vampiric evening. I had to re-paint the space experiments, waited in vain paint. When the game Lumi-paint forgot to inform uncle Pasha, we occupied the garage, the car is so powerful that the light was coming out at night on the street, I saw the light in the garage, thinking that we are in the garage forgot to turn off the light. He was awakened by a friend in the night by a phone call and a floor, explaining what he thought of his mental faculties and taught the simple basics of the economy, is not yet opened a garage and oh ... eat our glowing saw an unidentified object. That is how myths are born of UFOs.
After we do the basics, we had to put the city here and start dancing with a tambourine. In carving stencils houses in triplicate (external contours of buildings, windows, inner contours) cut four hands for two days at the fingertips of stationery knife had calluses. Then, the stencils need to build the car in the composition, it resembles a kind of puzzles, collect the pieces, and then connects the edge of the tape is attached by magnets.

Similarly, in the same sequence and then it will be necessary to do a second side of the machine. Please attach stencils outer contours, blown pattern paint background colors. After this layer is removed and the stencil pattern applied to each portion of the stencil with the windows, the most important thing that the edges clearly coincided. Later adjustment of internal circuits, for adding 3D effect. When the first side of the machine is ready, we proceed to the second side and do the same thing.

another angle

close

A few days spent on spraying and polishing all the details, but they are not enough in total - 10 + body linings Auto + 4 discs. Twenty-four hours to assemble. When drove the car out of the garage, I could not believe that ... all that I can now ride on this miracle. So, from March to July, disappeared in the garage, even taking in rent a garage we expected maximum monthly spend on a job, Uncle Pasha at the end we had splashed saliva due to the timing. Thank God everything is over and you can safely write about it only with horror remembering those days, and not waking up at night with a longing for a new foot bottom and slave labor.
Posted in [mergetime] 1391499360 [/ mergetime]
After three hours of normal lay pictures of finished machines. Unfortunately the work is not preserved photographs. You can discuss if you do not want to wait for the normal angle of the machine)))

front - hood covered with carboxylic film. Very practical primer on the rocks chipping leave

Source:
