586
How to make a built-in wardrobe with his hands
To build his own wardrobe – a rather troublesome task. Without some carpentry skills to work with wood and in the end to a perfect result is quite difficult. But all come with experience. And if you start to build up your house fitted wardrobes in each niche, starting with invisible locker on the balcony, then the kitchen, then, finding a huge niche in the living room gradually, the cabinets will be.
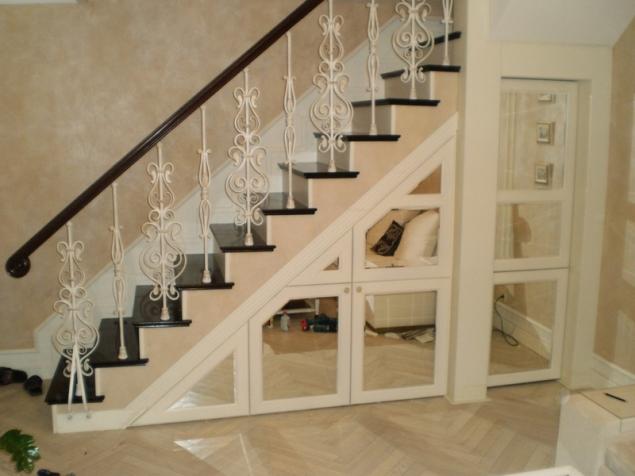
To build these cabinets is recommended for those who have a house in little space and a lot of things, who wants to save money on buying ready-made wardrobe, one in the house showed a beautiful, created under the Cabinet of unnecessary openings and niches in the walls.
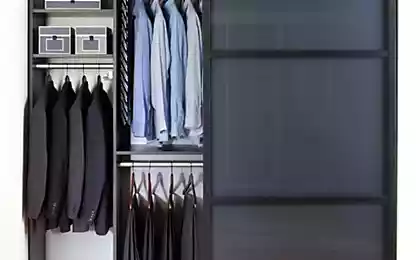
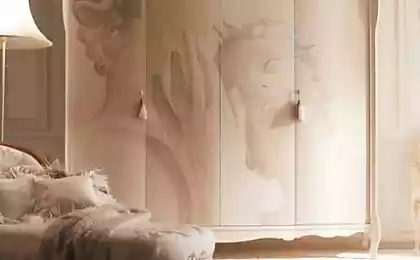
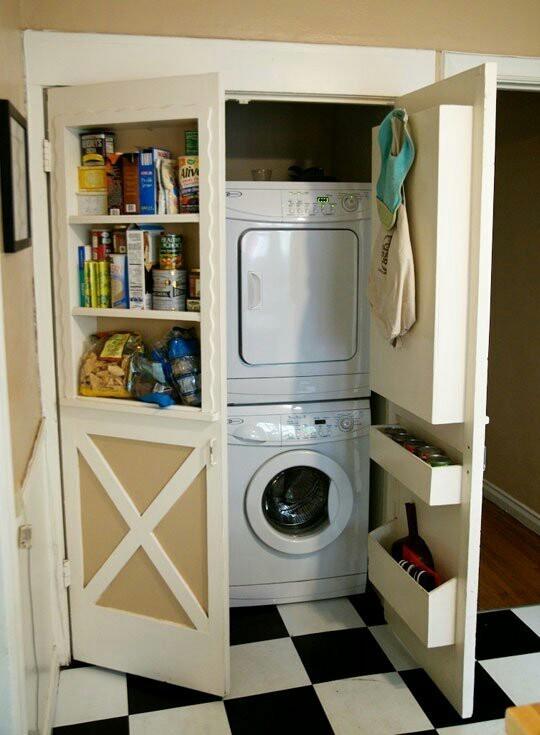
Attached to the wall Cabinet is good in that stable, not loose and not rattling from a passing man. And most importantly – the lack of side and rear panels allows for the same external dimensions of the Cabinet to win a significant internal useful volume: in a extra large box (25 liters) or two extra hanging coats – isn't it good luck for the owner of a dozen fur coats and the little tiny room?
Having dealt with the specifics of designing and mounting can be started.
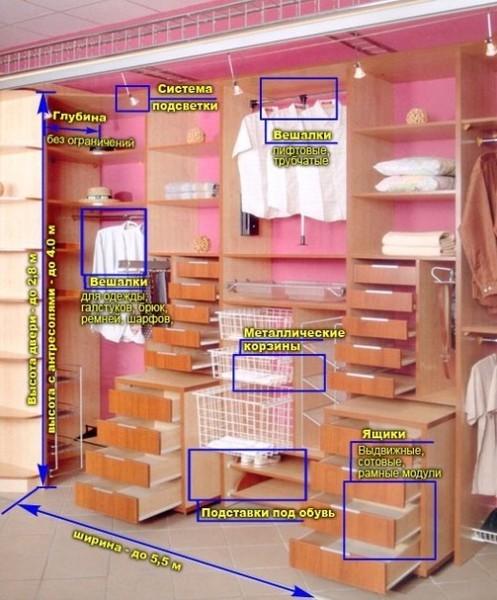
DesigningWhen designing the interior space shelves and racks you can model for themselves. You need to pick an interval between the shelves, so practically does not remain empty places.
The hanging rail is better to mount closer to the ceiling, not to lose the place.
Compartments for linen and clothes – 30-40 cm tall
If in the closet with plans to build a TV or music centre in advance to protect a place for it.
After the measurements are drawing, you can even try to paint the entire room and wardrobe design on the computer using special programs. Then there is the possibility of detailed modeling and the sketch clearer.

Great help or the opposite trouble can bring to the construction of the Cabinet native walls and ceiling – or rather the degree of curvature. If the ceiling and walls are perfectly aligned and all angles between them of 90 degrees, the cupboard was incredibly lucky. Alignment of parts is simple.
Another option is to level the plane level and plumb (more accurate), but then the wall built-in wardrobe can significantly deviate from the planes of the walls (if they are very crooked) and it will be evident. In General, the choice – what is better to level the Cabinet empirically. But all items must be free of cracks, to lie down to the floor, walls and ceiling.
For Cabinet it is better to use the same hardware handles the same shape and colour, albeit of different sizes, screwed on the same distance from the edges of the drawers and doors.
There are times when to cut out one large item (for example, a panel long-side wall) of one of the paintings is difficult. Therefore, it can be long side walls to make through the borders, that is, to fasten some small boards overlap. Then take two strips of equal length, pristragivajut one to the floor, the other to the ceiling strictly above each other and perevorachivayutsya screws. Then for the rest of the distance between them (dimensions are added to the splice) cut the third sheet, pritragivaetsya to the wall and provorachivaetsya to the borders overlap. So get a neat wall with borders. On the front side of these borders can nicely hide behind the doors (if they are done at the level of overlap).
Wardrobe better to put on a hard surface (overhead floors or layers outdoor "pie" with the insulation it is better to remove). To think – whether to parse the subfloor to the concrete. Hard surfaces such as parquet, linoleum will withstand the average wardrobe, laminate flooring, most likely, have to remove, as heavy Cabinet can cause waves on the surface.
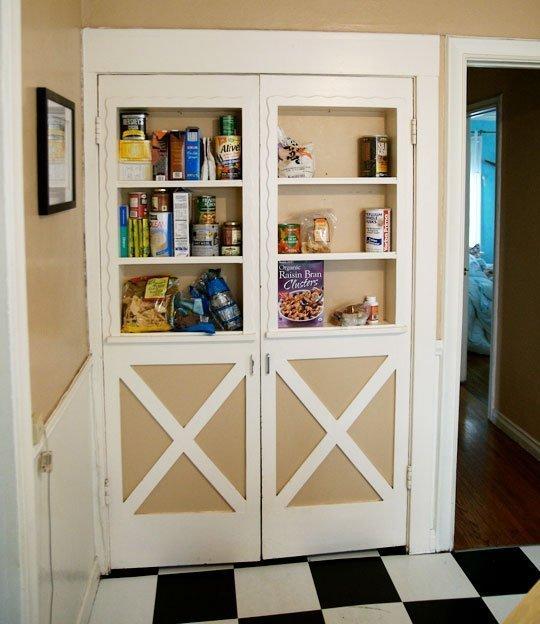
If the Cabinet is scheduled to make glass items, you should think in advance, stick them in doors or make them all glass. The second option would be easier. Instead of glass you can use the mirror from scratches protect the special coating, for example waterproof varnish.
During the planning and construction of the Cabinet do not forget about the peculiarities of the material, an important detail, for example, is the direction of fibers in wood stove. Depending on this can be right or wrong to cut the material. Wood along the grain is much stronger than across. The plywood layers of fibers are directed the cross, so that quality of strength at any point is approximately the same. Furniture boards important to make sure that the fibers were directed from one plan to the point of attachment to another. If the fibers in the material clearly visible, it is believed that they go along the long side of the sheet, and find the item, given the mounting points necessary for her.
During installation, you need to leave gaps of a few millimeters for the extension of large wooden components from fluctuations in humidity. These gaps can be filled with small sliver that did not pass the dust. Too long parts (more than 80 cm with a width of 60 cm), which are not supported in the middle (for example, horizontal shelves) if possible it is better not to do so, since the "flow" of the wood will show itself in a few years, and the shelf can SAG.
Building on the example of the wardrobe
Wardrobes differ from conventional embedded only the design of the doors, so the principles of their installation in a niche of the wall are the same.
First, fabricate the internal supporting frame, to the frame fixed thin panels of different materials: agrolita, textolite, fiberglass. Carrying vertical pane (if they are used, not walls) are firmly attached to the wall. The gaps in internal corners close precisely customized square or profiled rails.
As the side walls of the Cabinet and floor, you can use elements of the room. But if the walls are too crooked, the best alternative would be to install in the wall Cabinet put together separately. This is especially important for wardrobes, because of the curvature of the planes will greatly suffer or not even work mobile door mechanisms – rollers and rails for doors.
If you set the wardrobe in niche with uneven side walls and a floor, the Cabinet design will quickly wear out. Therefore, before installation, align all surfaces with trim panels, boards. If the deviation of the walls from the vertical is negligible, then the wall is not level, and reject the door by using the adjustment screws.
The opening of the wardrobe needs to be bigger and taller than the height of the sliding panels is somewhere in the 5 cm opening Width of wardrobe must include the overlap (when one door comes the other), it needs to be at least 2 cm If Cabinet 4 folds, overlap will be 4 cm.
Typically, for a wardrobe make their own floor inside the Cabinet. This is done not only from a decorative point of view, and mainly for leveling the floor under the rails – bottom rail of the door.
On linoleum and laminate, if it does not want to talk, always under the rails cut a strip width of several cm around the perimeter of the future Cabinet. On floating floors closets do not put. For carpet make additional floors of particle Board or substrate under the bottom rail of the door so that the door is not pressed into the pile.
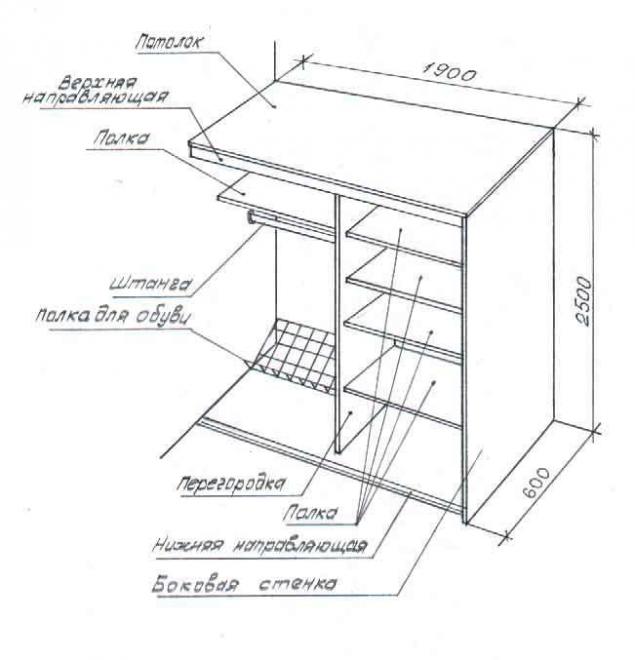
Upper guide fixed to the ceiling. Lower rail mounted on the floor at an offset from the upper 30 mm in the interior of the Cabinet. First checked the door, as they ride in the grooves, and then the rails bolted to the floor tightly.
Horizontal clothes rack placed in a Cabinet at a distance of not less than 6 cm from the mezzanine shelf. From the same stick to the shelves with the Shoe should be at least 150 cm (to hanging the clothes did not touch the Shoe). From the back wall of the hanger needs to defend at least 21 cm.
Being in the extreme open position, the door should not hinder the pulling out of drawers. The inner space of the Cabinet is conveniently divided into as many partitions as the valves will be in the closet – if two doors, three sections, three folds.
Installation of doors in the closet is carried out in the last turn – after installing all partitions, walls and floor and completion of internal device. First put the inner door (starting from the insertion of the upper rollers). Then install the right door. Before mounting the doors on the side walls of the box furniture set self-adhesive shock absorbers that will cushion the blows doors on the wall and the wardrobe.published
P. S. And remember, only by changing their consumption — together we change the world! ©
Join us in Facebook , Vkontakte, Odnoklassniki
Source: vse-svoe.com/?p=469
To build these cabinets is recommended for those who have a house in little space and a lot of things, who wants to save money on buying ready-made wardrobe, one in the house showed a beautiful, created under the Cabinet of unnecessary openings and niches in the walls.
Attached to the wall Cabinet is good in that stable, not loose and not rattling from a passing man. And most importantly – the lack of side and rear panels allows for the same external dimensions of the Cabinet to win a significant internal useful volume: in a extra large box (25 liters) or two extra hanging coats – isn't it good luck for the owner of a dozen fur coats and the little tiny room?
Having dealt with the specifics of designing and mounting can be started.
DesigningWhen designing the interior space shelves and racks you can model for themselves. You need to pick an interval between the shelves, so practically does not remain empty places.
The hanging rail is better to mount closer to the ceiling, not to lose the place.
Compartments for linen and clothes – 30-40 cm tall
If in the closet with plans to build a TV or music centre in advance to protect a place for it.
After the measurements are drawing, you can even try to paint the entire room and wardrobe design on the computer using special programs. Then there is the possibility of detailed modeling and the sketch clearer.

Great help or the opposite trouble can bring to the construction of the Cabinet native walls and ceiling – or rather the degree of curvature. If the ceiling and walls are perfectly aligned and all angles between them of 90 degrees, the cupboard was incredibly lucky. Alignment of parts is simple.
Another option is to level the plane level and plumb (more accurate), but then the wall built-in wardrobe can significantly deviate from the planes of the walls (if they are very crooked) and it will be evident. In General, the choice – what is better to level the Cabinet empirically. But all items must be free of cracks, to lie down to the floor, walls and ceiling.


For Cabinet it is better to use the same hardware handles the same shape and colour, albeit of different sizes, screwed on the same distance from the edges of the drawers and doors.
There are times when to cut out one large item (for example, a panel long-side wall) of one of the paintings is difficult. Therefore, it can be long side walls to make through the borders, that is, to fasten some small boards overlap. Then take two strips of equal length, pristragivajut one to the floor, the other to the ceiling strictly above each other and perevorachivayutsya screws. Then for the rest of the distance between them (dimensions are added to the splice) cut the third sheet, pritragivaetsya to the wall and provorachivaetsya to the borders overlap. So get a neat wall with borders. On the front side of these borders can nicely hide behind the doors (if they are done at the level of overlap).
Wardrobe better to put on a hard surface (overhead floors or layers outdoor "pie" with the insulation it is better to remove). To think – whether to parse the subfloor to the concrete. Hard surfaces such as parquet, linoleum will withstand the average wardrobe, laminate flooring, most likely, have to remove, as heavy Cabinet can cause waves on the surface.
If the Cabinet is scheduled to make glass items, you should think in advance, stick them in doors or make them all glass. The second option would be easier. Instead of glass you can use the mirror from scratches protect the special coating, for example waterproof varnish.

During the planning and construction of the Cabinet do not forget about the peculiarities of the material, an important detail, for example, is the direction of fibers in wood stove. Depending on this can be right or wrong to cut the material. Wood along the grain is much stronger than across. The plywood layers of fibers are directed the cross, so that quality of strength at any point is approximately the same. Furniture boards important to make sure that the fibers were directed from one plan to the point of attachment to another. If the fibers in the material clearly visible, it is believed that they go along the long side of the sheet, and find the item, given the mounting points necessary for her.
During installation, you need to leave gaps of a few millimeters for the extension of large wooden components from fluctuations in humidity. These gaps can be filled with small sliver that did not pass the dust. Too long parts (more than 80 cm with a width of 60 cm), which are not supported in the middle (for example, horizontal shelves) if possible it is better not to do so, since the "flow" of the wood will show itself in a few years, and the shelf can SAG.
Building on the example of the wardrobe
Wardrobes differ from conventional embedded only the design of the doors, so the principles of their installation in a niche of the wall are the same.
First, fabricate the internal supporting frame, to the frame fixed thin panels of different materials: agrolita, textolite, fiberglass. Carrying vertical pane (if they are used, not walls) are firmly attached to the wall. The gaps in internal corners close precisely customized square or profiled rails.

As the side walls of the Cabinet and floor, you can use elements of the room. But if the walls are too crooked, the best alternative would be to install in the wall Cabinet put together separately. This is especially important for wardrobes, because of the curvature of the planes will greatly suffer or not even work mobile door mechanisms – rollers and rails for doors.
If you set the wardrobe in niche with uneven side walls and a floor, the Cabinet design will quickly wear out. Therefore, before installation, align all surfaces with trim panels, boards. If the deviation of the walls from the vertical is negligible, then the wall is not level, and reject the door by using the adjustment screws.
The opening of the wardrobe needs to be bigger and taller than the height of the sliding panels is somewhere in the 5 cm opening Width of wardrobe must include the overlap (when one door comes the other), it needs to be at least 2 cm If Cabinet 4 folds, overlap will be 4 cm.
Typically, for a wardrobe make their own floor inside the Cabinet. This is done not only from a decorative point of view, and mainly for leveling the floor under the rails – bottom rail of the door.
On linoleum and laminate, if it does not want to talk, always under the rails cut a strip width of several cm around the perimeter of the future Cabinet. On floating floors closets do not put. For carpet make additional floors of particle Board or substrate under the bottom rail of the door so that the door is not pressed into the pile.

Upper guide fixed to the ceiling. Lower rail mounted on the floor at an offset from the upper 30 mm in the interior of the Cabinet. First checked the door, as they ride in the grooves, and then the rails bolted to the floor tightly.
Horizontal clothes rack placed in a Cabinet at a distance of not less than 6 cm from the mezzanine shelf. From the same stick to the shelves with the Shoe should be at least 150 cm (to hanging the clothes did not touch the Shoe). From the back wall of the hanger needs to defend at least 21 cm.
Being in the extreme open position, the door should not hinder the pulling out of drawers. The inner space of the Cabinet is conveniently divided into as many partitions as the valves will be in the closet – if two doors, three sections, three folds.
Installation of doors in the closet is carried out in the last turn – after installing all partitions, walls and floor and completion of internal device. First put the inner door (starting from the insertion of the upper rollers). Then install the right door. Before mounting the doors on the side walls of the box furniture set self-adhesive shock absorbers that will cushion the blows doors on the wall and the wardrobe.published
P. S. And remember, only by changing their consumption — together we change the world! ©
Join us in Facebook , Vkontakte, Odnoklassniki
Source: vse-svoe.com/?p=469