922
I did sauna with their hands from scratch.
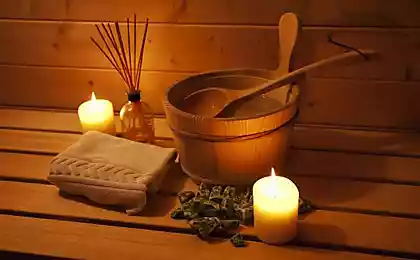
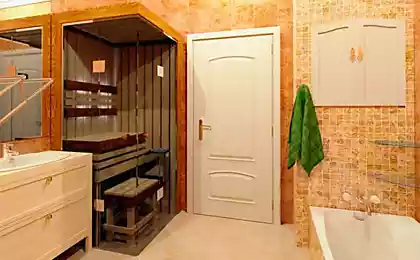
Greetings to all who looked into this top. Here I will try to paint step by step instructions on how I was doing myself a sauna.
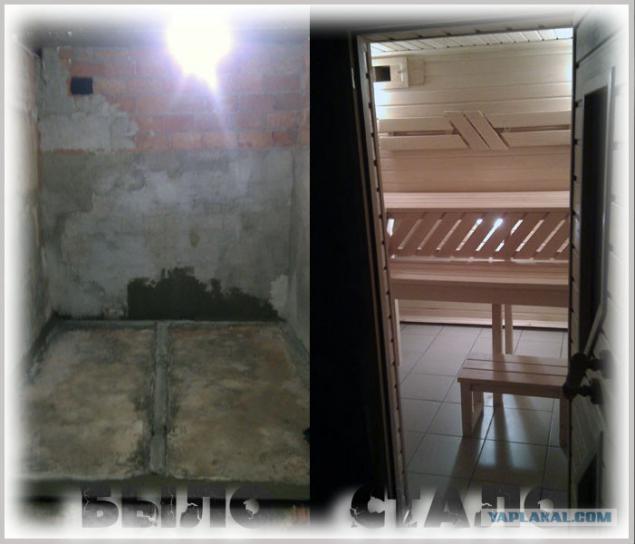
I have long dreamed of place where you can warm your soul and ass, ie about the sauna. In the presence of a well equipped town house with no basement. After reading a bunch of web pages on the subject, I decided to saunas. He hired builders, they told me the main wall was built, dividing in half basement. In a half I had to build a wall separating the area even at the sauna facilities and the washing compartment. Then I decided to do everything with their hands only. Expenses I fail at the end of the report.
28 photo.
So the very first thing I did, took the piece of paper and drew a rough plan of the sauna. Where will my shelves where the heater (hang or stand). The size of my room after building a brick wall, from floor to ceiling (2, 3 meters) 2, 2 x 2 meters. From these dimensions it depends on how much is your steam room and a heater power is required for heating. Yet it is important to know in advance what you will be the front door. (wood, glass or combined) Subject to wall and ceiling, the amount of steam will be my little less than 8m3. On the Internet there are online calculators for the selection of the stove, in which you wind your size. Such as [url = http: //www.harvia.com: www.harvia.com/content/ru/17/10039/...0єРё.html]сайте Manufacturer heaters [/ url]
I liked best family model harvia Vega 6kW. For heating of 6-8 m3 of air. For its connection can be used as a single-phase connection (220) and three-phase (380V). To supply I hired an electrician from the local electrical network that he would put me in the electrical machine on a separate heater and wiring made in 3 phases.
It is important even before the cladding already know where you will be withdrawn cables for lighting and power cable to the heater.
I apologize in advance for the quality of the photos. Removed old smartik from which listened audioknizhki until rukozhopil.
The source from which you started:

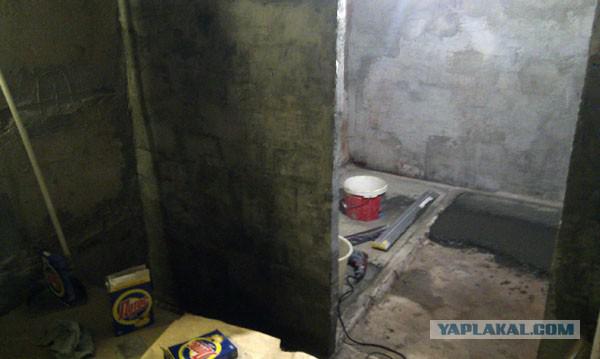
As with the selection of "heart" saunas and food for him all the questions I decided, you can start leveling the floor. Sex I got a curve like a scimitar janissary. The difference in height at 2 meters was more than 20 cm. It was necessary to fill with cement and concrete rubble, and then align another self-leveling floors. Erected a wall behind which I would heater. Photos with the process of filling the floor:
Calculate the area, I drove to the store bought a ceramic-granite tile. How to style, angled herringbone or ferdipёpersno everyone decides for himself. Since I was putting it on the second time in his life, happy with the result. Although it is not perfect of course did. The process of putting some, the main thing all the time to monitor the levels of each tile that would just lay down, there was no bias, etc. ATTENTION. I'm having problems with grouting. I chose a dark graphite but on the bright tiles, apparently violated the technology and as a result some of the tiles to paint me a little bit in the dark. So read the instructions carefully. We must now look for tools that you can wash it, and grinding alcohol did not help.
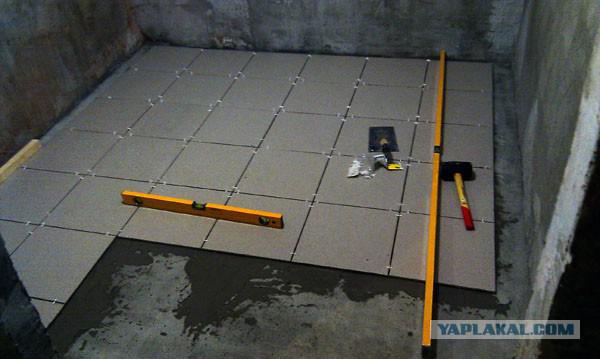
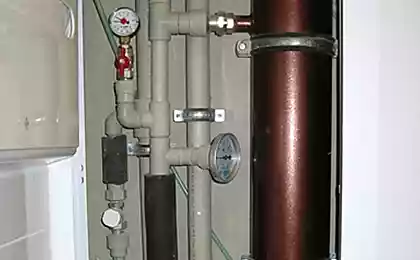
When the floor is dry, you need to do wiring. I tucked the flutes all electrical wires and ran on the walls. Here I also happen to plugging. I bought a 3-phase 5-wire copper cable in section 1, 5, as it is written in the instructions to my heater. A professional electrician came and looked and said, I advise you to change the cross-section of 2, 5, that would be a reserve. And then 1, 5 can be heated. I have by the time the wall sheathed paroizolyatorom and erected crate. We had to buy a new cable, disassemble the floor, walls and lay new cables. In the future, it was necessary to disassemble the wall again, because cable length is not enough then to the control unit in the heater. So leave the slack.
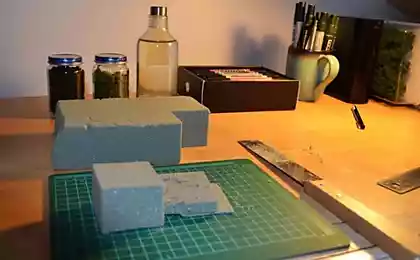
A few words about the tree. What would it for half a year does not rot (went to feed the bugs / fungi) on humidity and temperature, I'm the tree (except regiments) covered with a special compound with a wax, and the bottom of wood, and even a few layers. Time it took a bunch, but it's worth it. Seen saunas where up to 40 cm across the bottom all black wood.
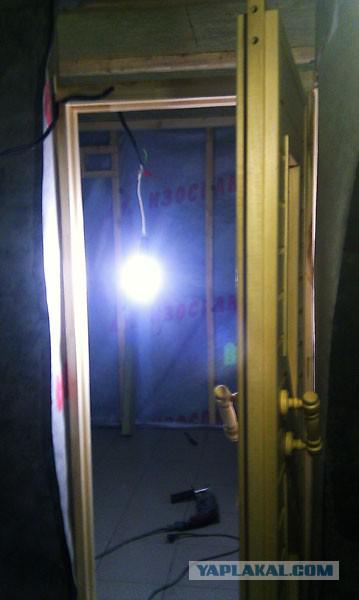
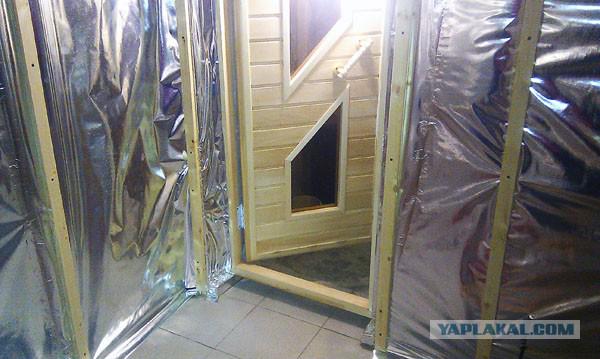
The next step I was the purchase and installation of doors. I stopped on the combined version for several reasons. Glass is good to all, but it is not as well kept as the warm wood and the second - it is 2 times more expensive than wood. Wilderness Wood also does not like that would be pokomfortnee, and many suffer from claustrophobia but in extreme conditions.
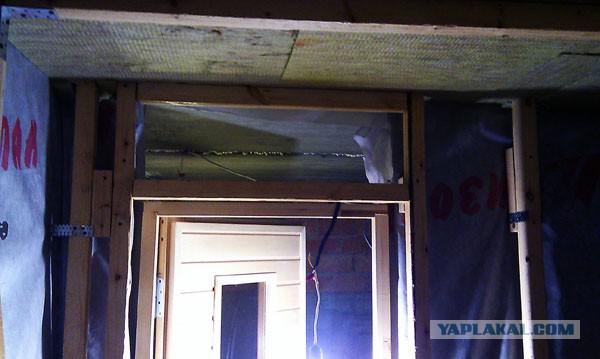
Door size was only 2 options: 1, 0 and 7 m height, width 7 or 1, 9h07m. Given that I only insulate the ceiling 10 cm + + crate lining, the door I get to the ceiling. And I still had to leave under the door 5 cm. For air intake, I bought a door height of 1, 7, and will not regret this choice. Keep warm in the steam room is much better.
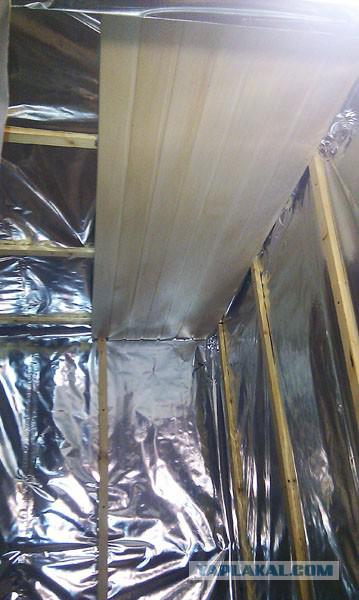
I begin to insulate the ceiling. Originally I planned to insulate the ceiling of non-combustible mineral wool with a thickness of 10cm internal use. When brought out of the store delivery, it turned out that I slipped a thickness of 5 cm. At the same area. This annoyance even plus went. One layer I put perpendicular crate, the second layer has povdol wooden beams 5x5cm. It turned out great. So I dropped the ceiling 10 cm.
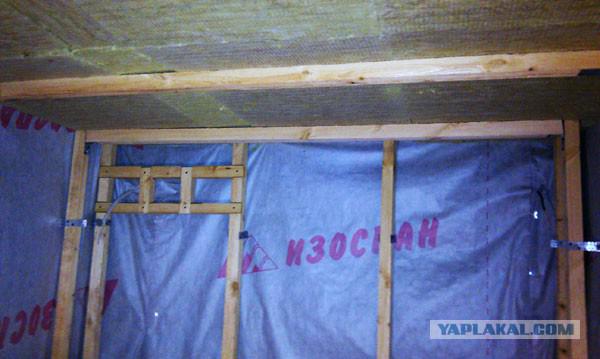
That's what I turned lintels. Tall people have to stoop, and I'm not a giant, walk normally):
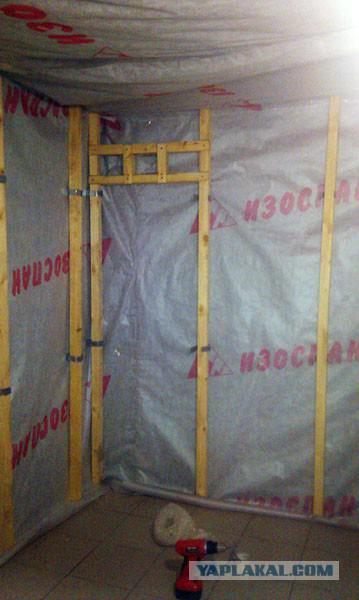
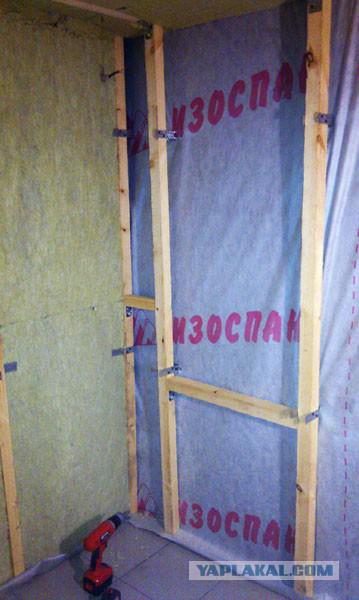
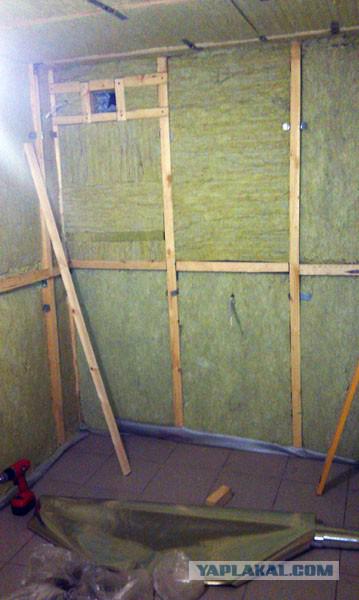
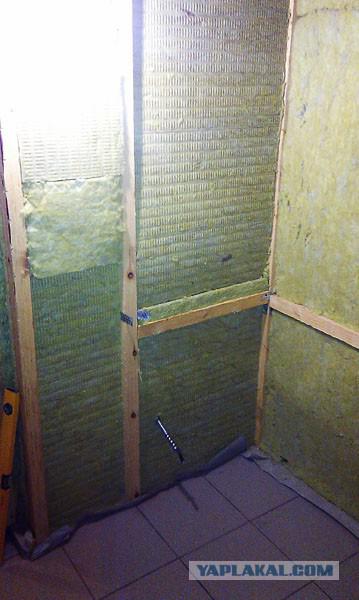
Once the ceiling is insulated walls 5 cm mineral wool. Stack it is not difficult, even for one, only then you itch all after the lice. In advance I left between the wooden crate 59 cm, as Standard wool 60 cm in width. Crossbeam - to them I prishurupil bars, which later will form the shelves. It must also be taken into account in advance at the stage of drawing the plan. I certainly nakosyachil not screwed in places, then reworked everything.
It can be seen in the corner sticking out transactions on the backlight.
The ventilation hole is mandatory. Will be closed to keep the heat fanerku indoors during heating. Smart people write that the air in the sauna should circulate proper rate of 4 volumes per hour. Ie 8 cubic meters per 15 minutes in my sauna. According to my idea of a door cold air comes for a visit to the sauna, passes by the heater and rises to the top, where I'm already bastard)
The wall, which will hang air heater. The corrugated metal slipped 3 phase wire. But I did not consider the wall thickness, the casing and then the whole wall raskurochil, remodel your same school:
The next step - is the creation of the space of the room. So imagine the people in the middle of the last century, the future of the room or office on the spaceship. Looks beautiful. Foil dense enough, just do not tear his hands on hard basis. I do not know the name, but not on a thick insulation, which is sold in DIY stores. Such heaters emit heat when some chemical garbage that never add health.
He worked as a staple gun. Fast and very exciting to overlap each other went to the tape. In sizing metallic expansion joints with duct tape. Foil of such shokolodki, very sticky and easily torn. Very carefully take it stage. Go through minimum holes and joints, especially in the corners. Think of it as the boundary for which heat should not go and stay indoors. On top of foil lining keeps little heat, and only serves to finish the walls and ceiling:
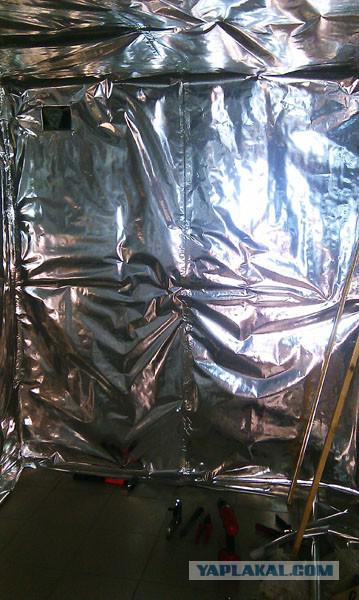
Over the first crate prisobachivayu bars 3x5 cm. It is necessary that the air would circulate between the foil and lining, for airing the latest. I that's what happened:
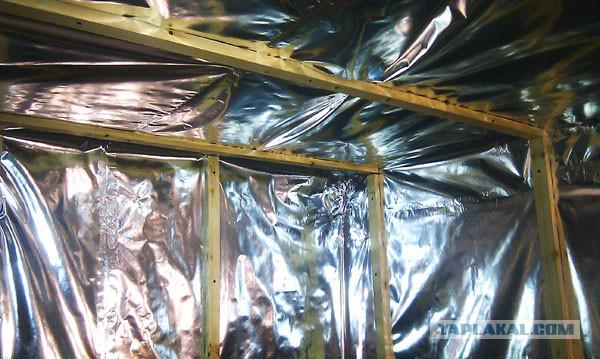
Continuation of the previous frame, with only a door. And she raised to 5 bars to see the free fresh air intake:
As always miscalculated and bought 800 long lining 2, 4th Class A (the best knot-free linings, jambs and miscue). Then again bought additional 200 first went lining. Then it turned out that many of the board as a battle bow were arc. Every board I covered the protective structure. Buy and our production and the Finnish "Tikkurila»:
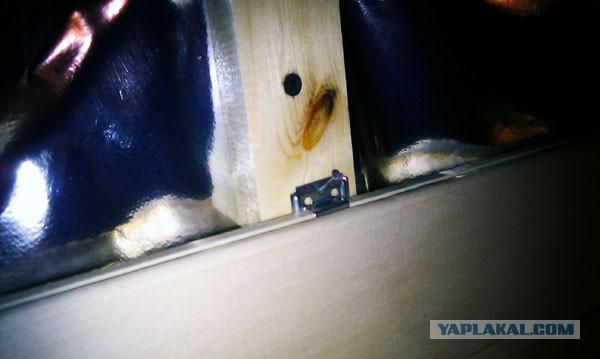
This metal piece - Klyaymer. Many sellers in DIY stores do not know what it is. Especially for prisobachivaniya lining to the sheathing. Namuchalas with this garbage. Hammer of cloves to get virtually impossible. A promazhesh past, will cant to bunk in plain view. I puts a small hammer to cloves and beat him more. Some boards still zakosyachil:
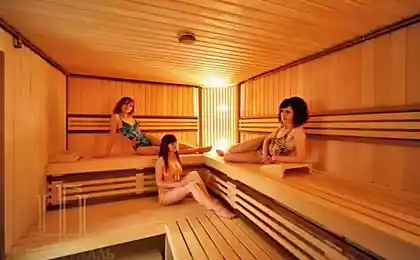
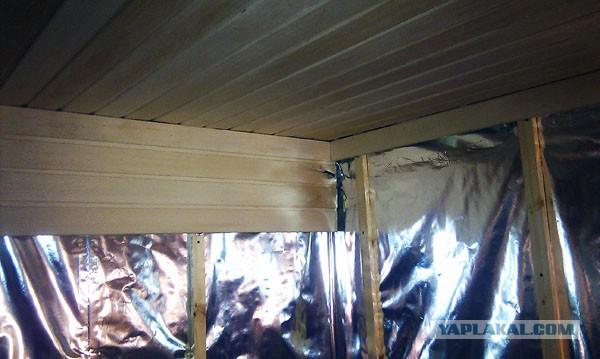
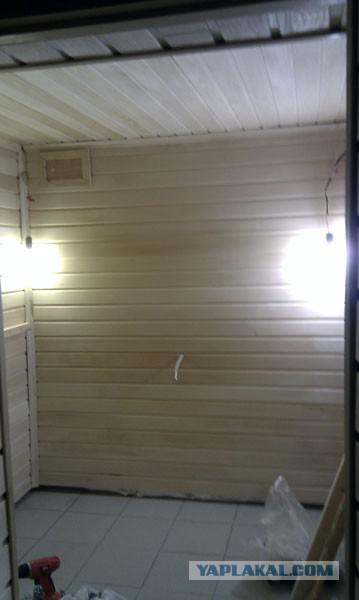
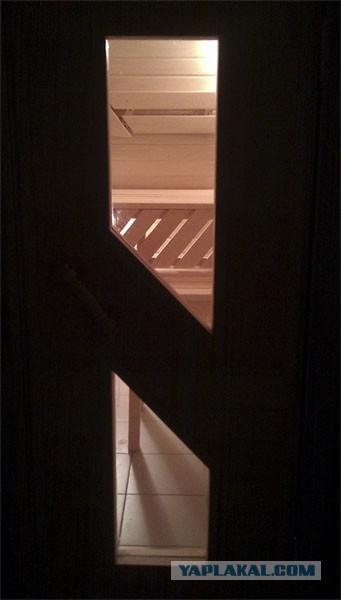
The ceiling is ready. The walls in the process. I chose a horizontal position for two reasons: allows long planks and if the bottom board will rot, spoil or change color over time, they can simply tear off and replace with new ones. On the vertical boards is not a ride:
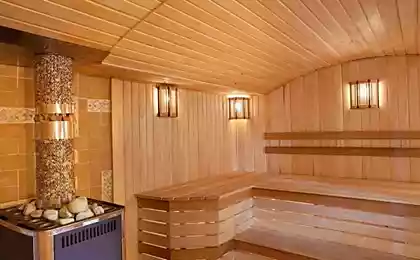
The wall on which to hang the heater. The very 5 kg and 20 kg. stones therein. Therefore reinforced bars wherever it then hang:
Wall paneling has finished. Kamenka bought and immediately join the power cable hang in place. Then you can already do a test warm sauna. Boards specifically to the floor that would reduce air leak was under the bunk and the wall does not take up moisture from the puddles on the floor (such suddenly appear). Although I have a sauna, dry 15-20% moisture:
Ventilation window shut homemade sliding mechanism. You can move on to the shelves rukozhopstvu assholes:
The frame is going ... .sobiraetsya frame:
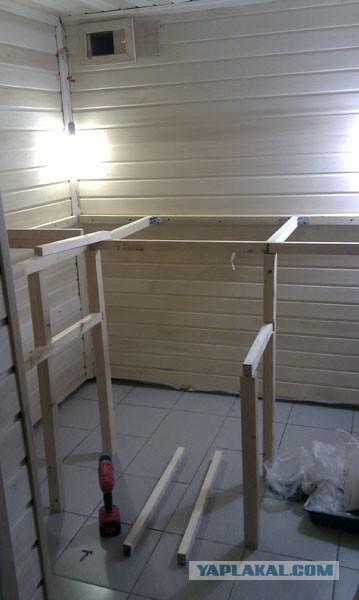
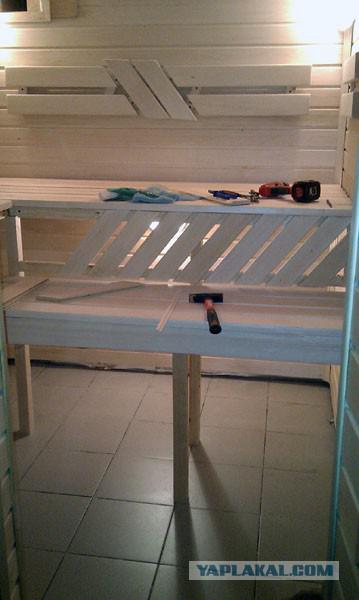
Now shelf. The length and width the same individual. I made the top 80 cm wide that you could go easily. bottom and side shelves of 60 cm. From wall to wall in my 187 cm. The average person is placed. All fasteners and screws from the bottom that would touch any metal with the human body. A shelf can not be covered by those compositions that I covered bunk and another tree. When heated saunas, accidentally touching a person just gets burned body. What is to be offered in the store shelf, but I did not dare to put anything on them. In which case just grind them nazhdachkoy:
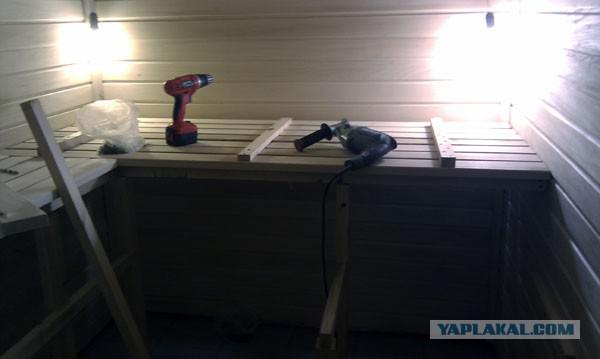
Shelves and back from the remnants of the boards are ready for shelves:
Navozhu cosmetic beauty of the surplus lining:
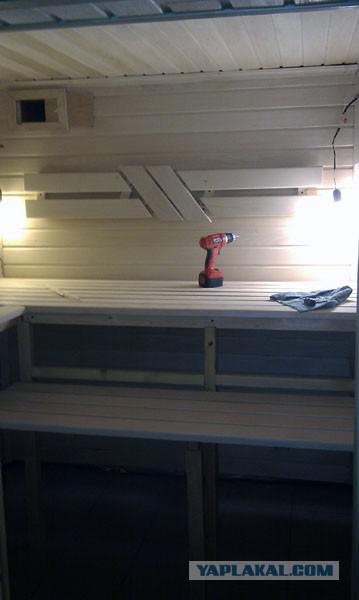
Beauty is induced. Of course, not all perfectly straight, but could not, and did. But himself.
Bought 3 lampshades Street waterproofed. Two of the corners, one under the ass, let it also be nice:

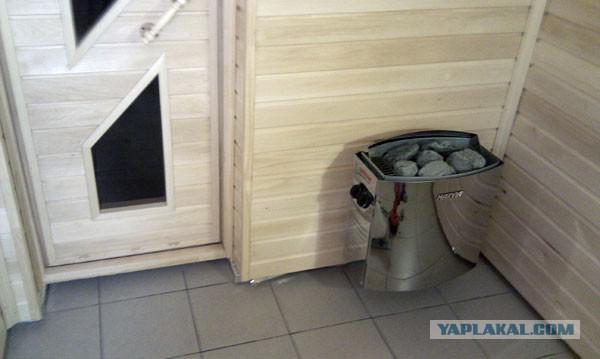
"The engine is the heart" in the sauna. Housing does not heat up, it is possible in the heat of the hand touch:

Finishing touches: Bought and hung thermometer / hygrometer. The plans of buying sand wall weights and a mini table on the wall for herbal tea.
By the time to build it took me half a year. Because it worked only in the evenings, and then 1-2 times a week for 2-3 hours per day, sometimes it turned out to snatch a few hours at the weekend.
Expenses. On the whole sauna I took me 64 000r. The biggest costs were on Wall paneling and boards for shelves (about 30 thousand), 10 000r Kamenka. 4500 door. Electrics about 3 000. The composition for protecting wood 3000r. Brick zabutovochny 2500r. Circular saw 3000r. (hand would have fallen to cut as much wood). Other small things (screws, corners), beams 5x5cm, 3h5sm, wooden corners and everything else that I forgot to write. I am pleased to answer your questions, if any)
Enjoy Your Bath!
Source:
I have long dreamed of place where you can warm your soul and ass, ie about the sauna. In the presence of a well equipped town house with no basement. After reading a bunch of web pages on the subject, I decided to saunas. He hired builders, they told me the main wall was built, dividing in half basement. In a half I had to build a wall separating the area even at the sauna facilities and the washing compartment. Then I decided to do everything with their hands only. Expenses I fail at the end of the report.
28 photo.

So the very first thing I did, took the piece of paper and drew a rough plan of the sauna. Where will my shelves where the heater (hang or stand). The size of my room after building a brick wall, from floor to ceiling (2, 3 meters) 2, 2 x 2 meters. From these dimensions it depends on how much is your steam room and a heater power is required for heating. Yet it is important to know in advance what you will be the front door. (wood, glass or combined) Subject to wall and ceiling, the amount of steam will be my little less than 8m3. On the Internet there are online calculators for the selection of the stove, in which you wind your size. Such as [url = http: //www.harvia.com: www.harvia.com/content/ru/17/10039/...0єРё.html]сайте Manufacturer heaters [/ url]
I liked best family model harvia Vega 6kW. For heating of 6-8 m3 of air. For its connection can be used as a single-phase connection (220) and three-phase (380V). To supply I hired an electrician from the local electrical network that he would put me in the electrical machine on a separate heater and wiring made in 3 phases.
It is important even before the cladding already know where you will be withdrawn cables for lighting and power cable to the heater.
I apologize in advance for the quality of the photos. Removed old smartik from which listened audioknizhki until rukozhopil.
The source from which you started:

As with the selection of "heart" saunas and food for him all the questions I decided, you can start leveling the floor. Sex I got a curve like a scimitar janissary. The difference in height at 2 meters was more than 20 cm. It was necessary to fill with cement and concrete rubble, and then align another self-leveling floors. Erected a wall behind which I would heater. Photos with the process of filling the floor:

Calculate the area, I drove to the store bought a ceramic-granite tile. How to style, angled herringbone or ferdipёpersno everyone decides for himself. Since I was putting it on the second time in his life, happy with the result. Although it is not perfect of course did. The process of putting some, the main thing all the time to monitor the levels of each tile that would just lay down, there was no bias, etc. ATTENTION. I'm having problems with grouting. I chose a dark graphite but on the bright tiles, apparently violated the technology and as a result some of the tiles to paint me a little bit in the dark. So read the instructions carefully. We must now look for tools that you can wash it, and grinding alcohol did not help.

When the floor is dry, you need to do wiring. I tucked the flutes all electrical wires and ran on the walls. Here I also happen to plugging. I bought a 3-phase 5-wire copper cable in section 1, 5, as it is written in the instructions to my heater. A professional electrician came and looked and said, I advise you to change the cross-section of 2, 5, that would be a reserve. And then 1, 5 can be heated. I have by the time the wall sheathed paroizolyatorom and erected crate. We had to buy a new cable, disassemble the floor, walls and lay new cables. In the future, it was necessary to disassemble the wall again, because cable length is not enough then to the control unit in the heater. So leave the slack.

A few words about the tree. What would it for half a year does not rot (went to feed the bugs / fungi) on humidity and temperature, I'm the tree (except regiments) covered with a special compound with a wax, and the bottom of wood, and even a few layers. Time it took a bunch, but it's worth it. Seen saunas where up to 40 cm across the bottom all black wood.
The next step I was the purchase and installation of doors. I stopped on the combined version for several reasons. Glass is good to all, but it is not as well kept as the warm wood and the second - it is 2 times more expensive than wood. Wilderness Wood also does not like that would be pokomfortnee, and many suffer from claustrophobia but in extreme conditions.
Door size was only 2 options: 1, 0 and 7 m height, width 7 or 1, 9h07m. Given that I only insulate the ceiling 10 cm + + crate lining, the door I get to the ceiling. And I still had to leave under the door 5 cm. For air intake, I bought a door height of 1, 7, and will not regret this choice. Keep warm in the steam room is much better.

I begin to insulate the ceiling. Originally I planned to insulate the ceiling of non-combustible mineral wool with a thickness of 10cm internal use. When brought out of the store delivery, it turned out that I slipped a thickness of 5 cm. At the same area. This annoyance even plus went. One layer I put perpendicular crate, the second layer has povdol wooden beams 5x5cm. It turned out great. So I dropped the ceiling 10 cm.

That's what I turned lintels. Tall people have to stoop, and I'm not a giant, walk normally):

Once the ceiling is insulated walls 5 cm mineral wool. Stack it is not difficult, even for one, only then you itch all after the lice. In advance I left between the wooden crate 59 cm, as Standard wool 60 cm in width. Crossbeam - to them I prishurupil bars, which later will form the shelves. It must also be taken into account in advance at the stage of drawing the plan. I certainly nakosyachil not screwed in places, then reworked everything.
It can be seen in the corner sticking out transactions on the backlight.

The ventilation hole is mandatory. Will be closed to keep the heat fanerku indoors during heating. Smart people write that the air in the sauna should circulate proper rate of 4 volumes per hour. Ie 8 cubic meters per 15 minutes in my sauna. According to my idea of a door cold air comes for a visit to the sauna, passes by the heater and rises to the top, where I'm already bastard)

The wall, which will hang air heater. The corrugated metal slipped 3 phase wire. But I did not consider the wall thickness, the casing and then the whole wall raskurochil, remodel your same school:

The next step - is the creation of the space of the room. So imagine the people in the middle of the last century, the future of the room or office on the spaceship. Looks beautiful. Foil dense enough, just do not tear his hands on hard basis. I do not know the name, but not on a thick insulation, which is sold in DIY stores. Such heaters emit heat when some chemical garbage that never add health.
He worked as a staple gun. Fast and very exciting to overlap each other went to the tape. In sizing metallic expansion joints with duct tape. Foil of such shokolodki, very sticky and easily torn. Very carefully take it stage. Go through minimum holes and joints, especially in the corners. Think of it as the boundary for which heat should not go and stay indoors. On top of foil lining keeps little heat, and only serves to finish the walls and ceiling:

Over the first crate prisobachivayu bars 3x5 cm. It is necessary that the air would circulate between the foil and lining, for airing the latest. I that's what happened:

Continuation of the previous frame, with only a door. And she raised to 5 bars to see the free fresh air intake:

As always miscalculated and bought 800 long lining 2, 4th Class A (the best knot-free linings, jambs and miscue). Then again bought additional 200 first went lining. Then it turned out that many of the board as a battle bow were arc. Every board I covered the protective structure. Buy and our production and the Finnish "Tikkurila»:

This metal piece - Klyaymer. Many sellers in DIY stores do not know what it is. Especially for prisobachivaniya lining to the sheathing. Namuchalas with this garbage. Hammer of cloves to get virtually impossible. A promazhesh past, will cant to bunk in plain view. I puts a small hammer to cloves and beat him more. Some boards still zakosyachil:

The ceiling is ready. The walls in the process. I chose a horizontal position for two reasons: allows long planks and if the bottom board will rot, spoil or change color over time, they can simply tear off and replace with new ones. On the vertical boards is not a ride:

The wall on which to hang the heater. The very 5 kg and 20 kg. stones therein. Therefore reinforced bars wherever it then hang:

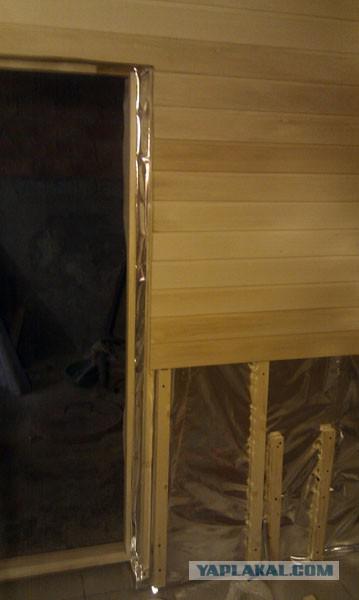
Wall paneling has finished. Kamenka bought and immediately join the power cable hang in place. Then you can already do a test warm sauna. Boards specifically to the floor that would reduce air leak was under the bunk and the wall does not take up moisture from the puddles on the floor (such suddenly appear). Although I have a sauna, dry 15-20% moisture:

Ventilation window shut homemade sliding mechanism. You can move on to the shelves rukozhopstvu assholes:

The frame is going ... .sobiraetsya frame:

Now shelf. The length and width the same individual. I made the top 80 cm wide that you could go easily. bottom and side shelves of 60 cm. From wall to wall in my 187 cm. The average person is placed. All fasteners and screws from the bottom that would touch any metal with the human body. A shelf can not be covered by those compositions that I covered bunk and another tree. When heated saunas, accidentally touching a person just gets burned body. What is to be offered in the store shelf, but I did not dare to put anything on them. In which case just grind them nazhdachkoy:

Shelves and back from the remnants of the boards are ready for shelves:

Navozhu cosmetic beauty of the surplus lining:

Beauty is induced. Of course, not all perfectly straight, but could not, and did. But himself.
Bought 3 lampshades Street waterproofed. Two of the corners, one under the ass, let it also be nice:

"The engine is the heart" in the sauna. Housing does not heat up, it is possible in the heat of the hand touch:

Finishing touches: Bought and hung thermometer / hygrometer. The plans of buying sand wall weights and a mini table on the wall for herbal tea.
By the time to build it took me half a year. Because it worked only in the evenings, and then 1-2 times a week for 2-3 hours per day, sometimes it turned out to snatch a few hours at the weekend.
Expenses. On the whole sauna I took me 64 000r. The biggest costs were on Wall paneling and boards for shelves (about 30 thousand), 10 000r Kamenka. 4500 door. Electrics about 3 000. The composition for protecting wood 3000r. Brick zabutovochny 2500r. Circular saw 3000r. (hand would have fallen to cut as much wood). Other small things (screws, corners), beams 5x5cm, 3h5sm, wooden corners and everything else that I forgot to write. I am pleased to answer your questions, if any)
Enjoy Your Bath!

Source: