534
Minifontan own hands from the ground.
Immediately warn, will be 20 pictures. Please do not break.
The idea to make a small fountain came to my mind for quite some time. And it is small, because the table is not very much space, plus a self-contained. As once even made a fountain. But the pump was the purchase (Aquarium) weighed about 400 grams and swayed be healthy. Accordingly, the fountain has turned out not be so small as desired. And then the other day once again digging into their spare parts from electronics came across a pile of micromotors cameras. Then came the idea that the same can be done, and the pump itself, so much so that the small fountain will be the size of a cigarette pack on the area.
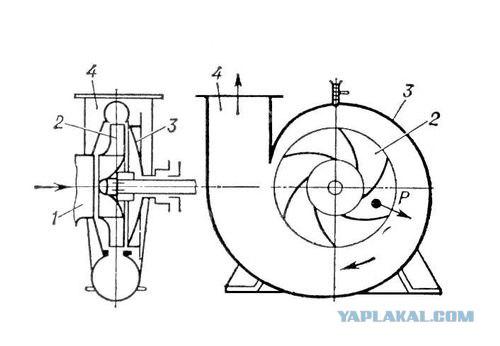
Pump decided to make the principle of the centrifugal pump. The tank is supplied through the inlet water, and then paddle wheel spins. Due to centrifugal force, the water tends to the edge, where there is an outlet.
1 - hole for supplying the liquid; 2 - impeller; 3 - the case; 4 - pipe for discharging liquid; F - the centrifugal force.
So we start. That's actually the motor itself, the size of more than acceptable.
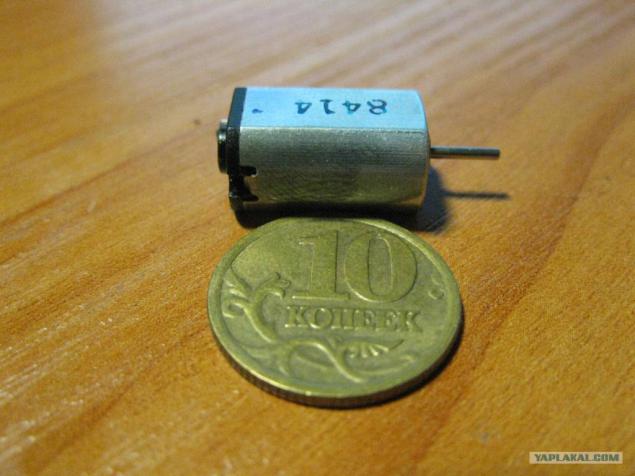
By doing this motor impeller, which will pump water.
I made him out first got plastic gears.
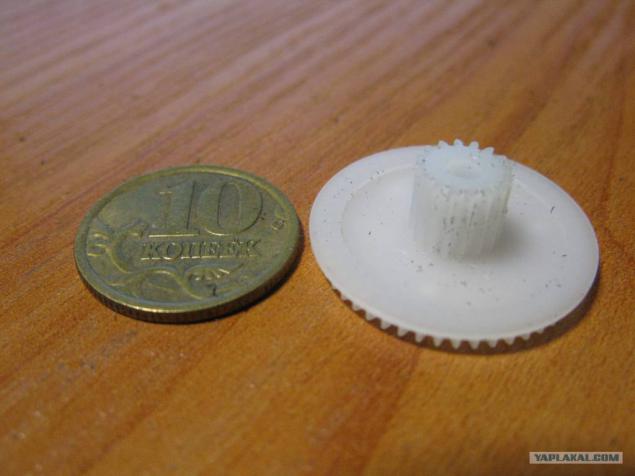
After processing, the size of the pump casing, it began to look like that.
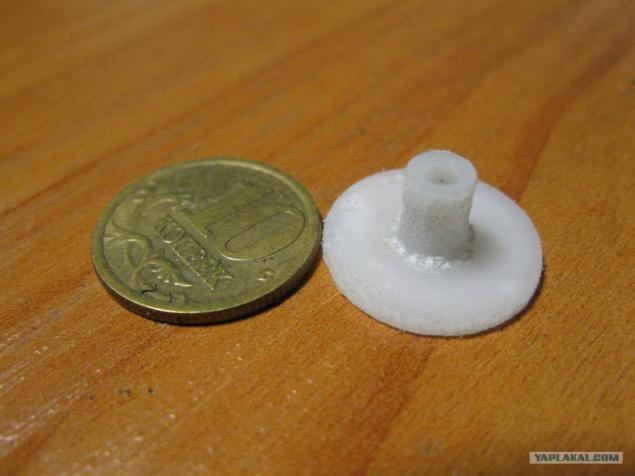
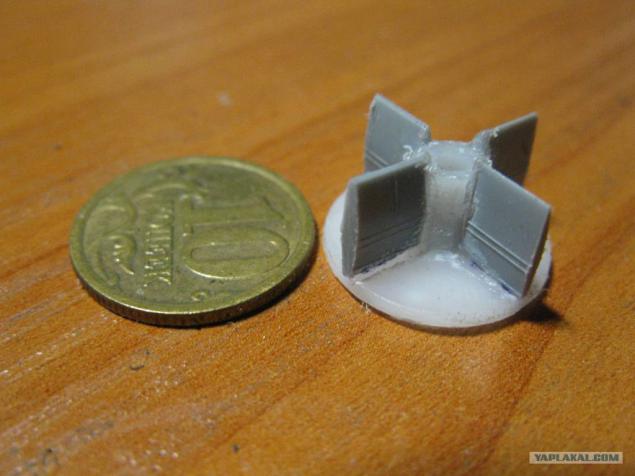
Now, from the pieces of plastic do blade and glue them to the impeller. After the glue dries, process ends with a file so they do not go beyond the wheel.
Getting to the manufacture of our body pump. As I took a plastic cap on deodorant.
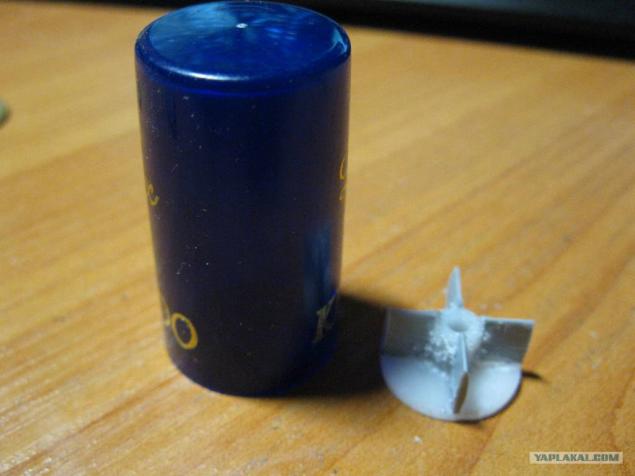
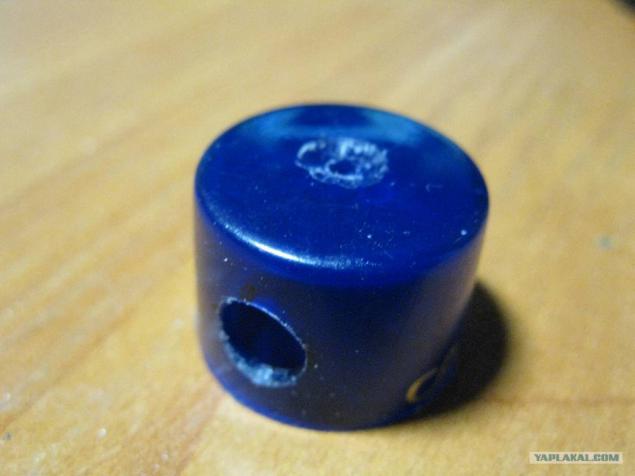
We saw off him too much, and drill two holes. The small top to the motor shaft, and a large water outlet.
Now, melting attach to our motor housing and outlet tube. As her body was selected from a ballpoint pen.
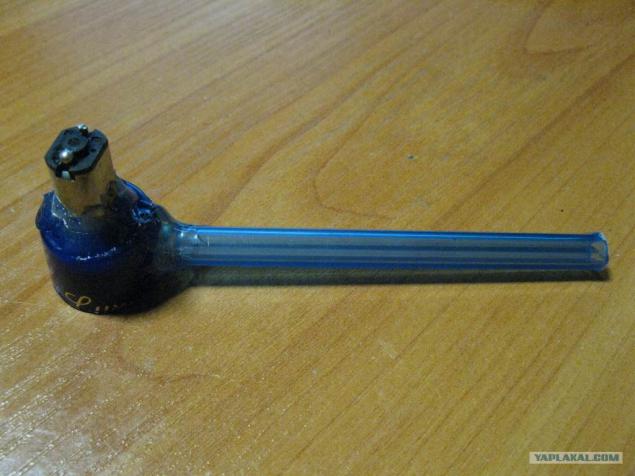
Motor should stick very carefully, without bias, that the impeller does not touch the inside of the body at work.
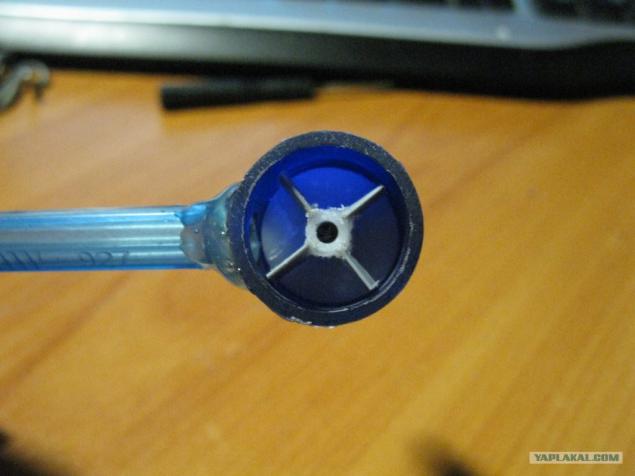
Once the glue is dry, cut out of a piece of plastic panel with a hole for water inlet. I did it from the cover of sunflower oil.

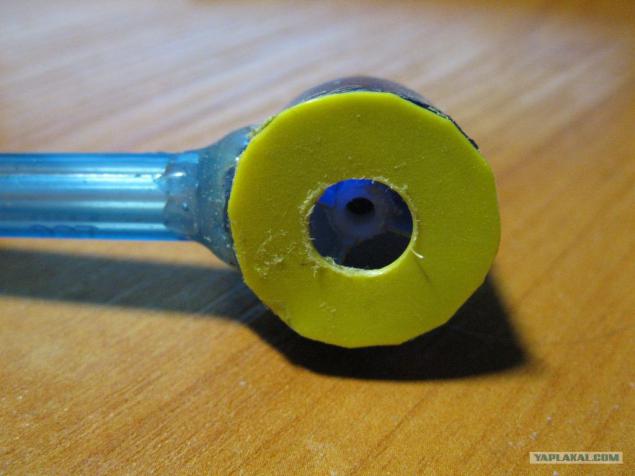
Hermetically glue it to the body and our mini pump ready. Such a pump of its size in the tests on the test gave a water column height of 20 cm and a thickness of 4 mm (internal diameter of the body handles) when powered by batteries nokievskoy 3.7 volts. If the outlet is already done, the flow will be higher, but I did not need it.
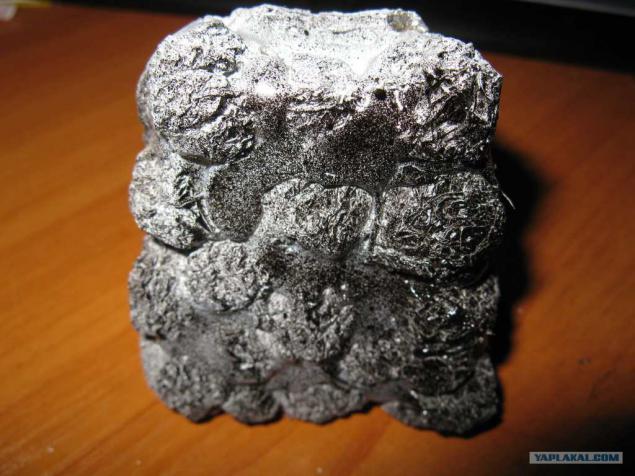
Now proceed to the manufacture of the fountain. Here, as they say, who on that fancy enough. In my mind it was a slide, which drops from above the water flow, changing the direction of the fall. Make it decided foil, dull crumpling some balls and glue them melting. After gluing and pre-coloring the blank look like this.
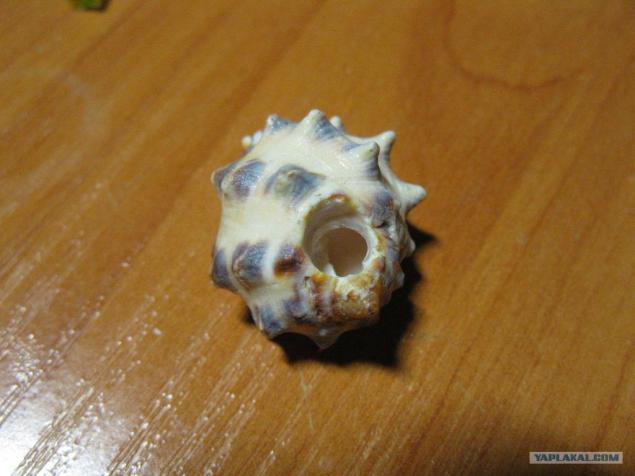
The source from which the water will flow, I took the shell of a suitable size and drilled a hole in it for the tube.
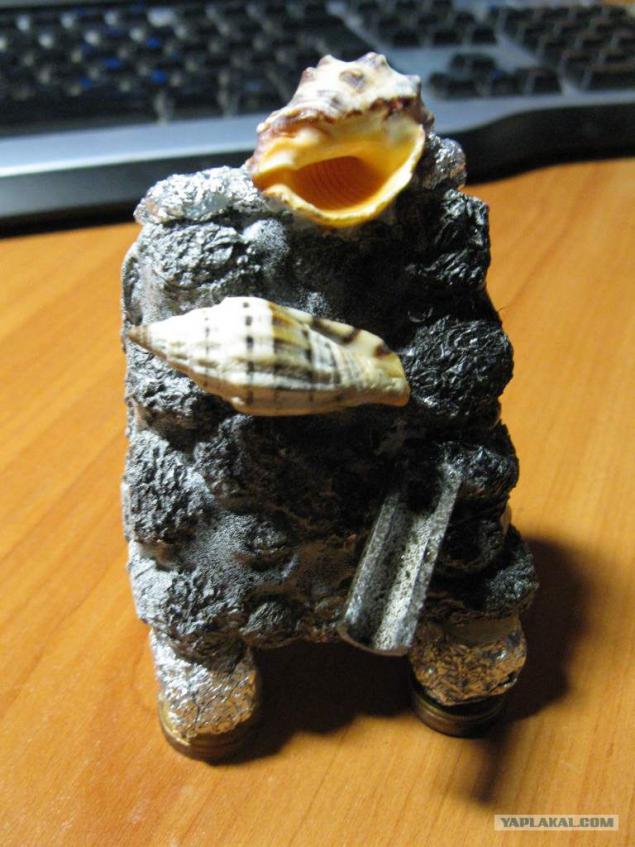
After attaching to the pump and Hill and decorative elements I got this. Unpainted cubes foil was time to adjust the direction of the flow is attached seashells and lower groove.
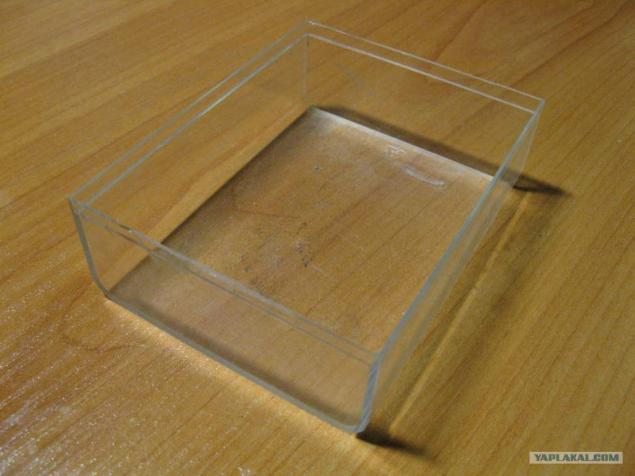
As the water tank, I took a small plastic box.
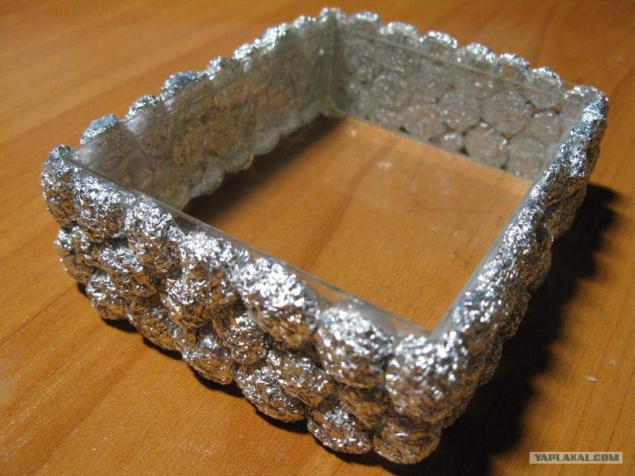
After pasting the balls of foil, it began to look like this.
Now we insert our hill to the tank, glue the battery, switch, connector for charging and optional trimmer to adjust the force of the flow and the LEDs for backlighting. Then the hot melt glue itself uphill to a reservoir on the edges.
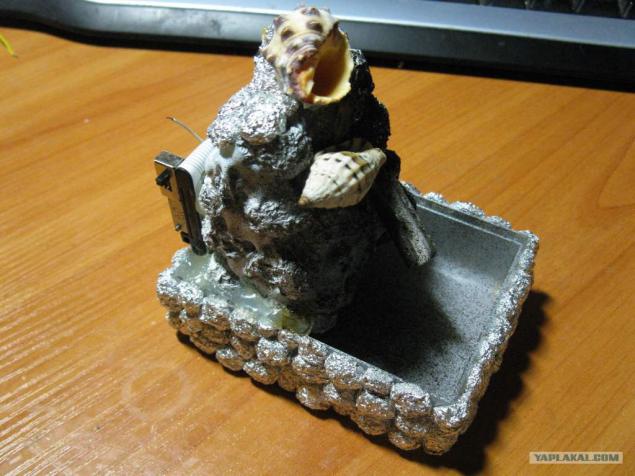
Masking the junction tank slides and balls of foil, and finally paint, do not forget to protect non-staining elements.
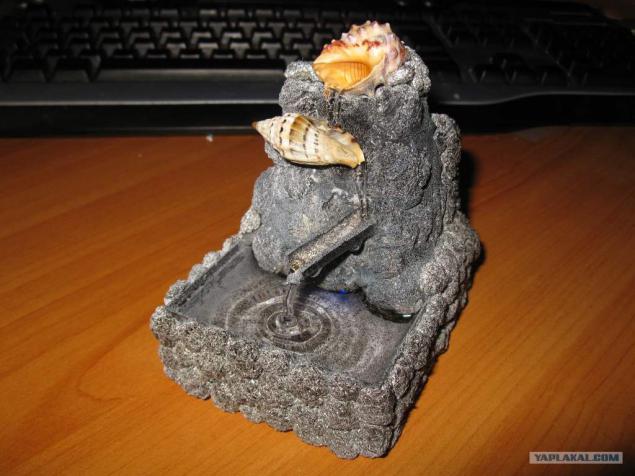
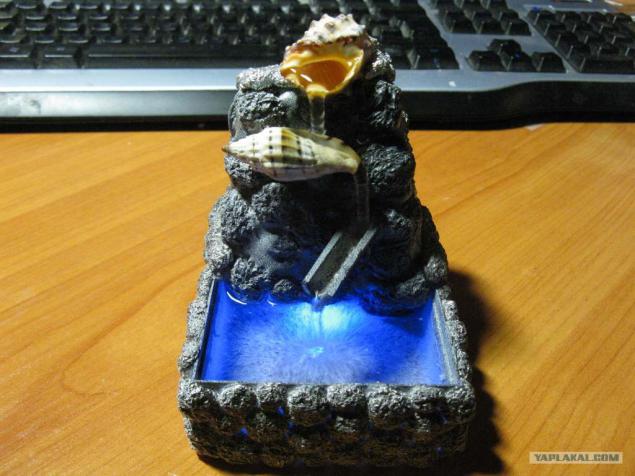
After drying fill water into the tank, turn on the power and enjoy the work done
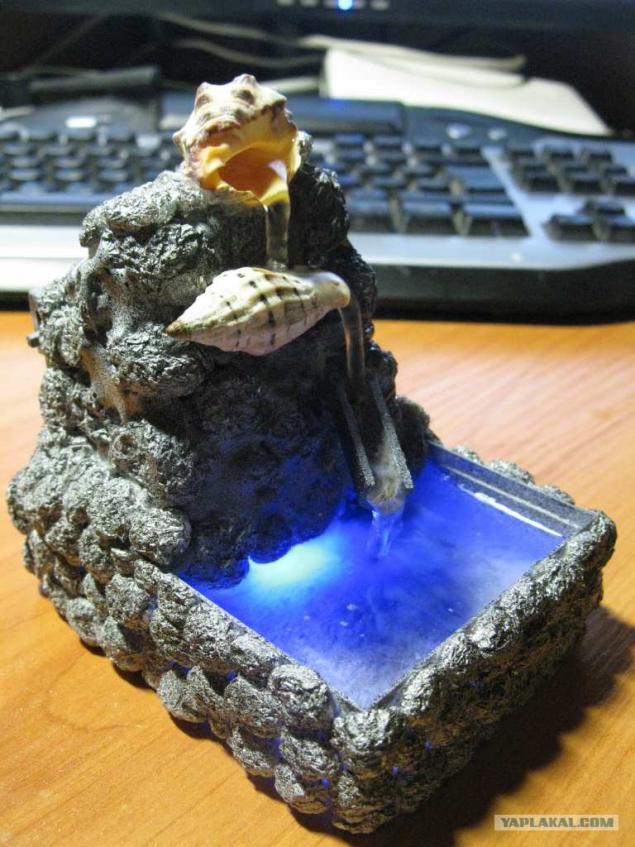
With flash.
That's all I wanted to say. Thank you for attention!
Source:
The idea to make a small fountain came to my mind for quite some time. And it is small, because the table is not very much space, plus a self-contained. As once even made a fountain. But the pump was the purchase (Aquarium) weighed about 400 grams and swayed be healthy. Accordingly, the fountain has turned out not be so small as desired. And then the other day once again digging into their spare parts from electronics came across a pile of micromotors cameras. Then came the idea that the same can be done, and the pump itself, so much so that the small fountain will be the size of a cigarette pack on the area.
Pump decided to make the principle of the centrifugal pump. The tank is supplied through the inlet water, and then paddle wheel spins. Due to centrifugal force, the water tends to the edge, where there is an outlet.
1 - hole for supplying the liquid; 2 - impeller; 3 - the case; 4 - pipe for discharging liquid; F - the centrifugal force.

So we start. That's actually the motor itself, the size of more than acceptable.

By doing this motor impeller, which will pump water.
I made him out first got plastic gears.

After processing, the size of the pump casing, it began to look like that.

Now, from the pieces of plastic do blade and glue them to the impeller. After the glue dries, process ends with a file so they do not go beyond the wheel.

Getting to the manufacture of our body pump. As I took a plastic cap on deodorant.

We saw off him too much, and drill two holes. The small top to the motor shaft, and a large water outlet.

Now, melting attach to our motor housing and outlet tube. As her body was selected from a ballpoint pen.

Motor should stick very carefully, without bias, that the impeller does not touch the inside of the body at work.

Once the glue is dry, cut out of a piece of plastic panel with a hole for water inlet. I did it from the cover of sunflower oil.

Hermetically glue it to the body and our mini pump ready. Such a pump of its size in the tests on the test gave a water column height of 20 cm and a thickness of 4 mm (internal diameter of the body handles) when powered by batteries nokievskoy 3.7 volts. If the outlet is already done, the flow will be higher, but I did not need it.

Now proceed to the manufacture of the fountain. Here, as they say, who on that fancy enough. In my mind it was a slide, which drops from above the water flow, changing the direction of the fall. Make it decided foil, dull crumpling some balls and glue them melting. After gluing and pre-coloring the blank look like this.

The source from which the water will flow, I took the shell of a suitable size and drilled a hole in it for the tube.

After attaching to the pump and Hill and decorative elements I got this. Unpainted cubes foil was time to adjust the direction of the flow is attached seashells and lower groove.

As the water tank, I took a small plastic box.

After pasting the balls of foil, it began to look like this.

Now we insert our hill to the tank, glue the battery, switch, connector for charging and optional trimmer to adjust the force of the flow and the LEDs for backlighting. Then the hot melt glue itself uphill to a reservoir on the edges.

Masking the junction tank slides and balls of foil, and finally paint, do not forget to protect non-staining elements.
After drying fill water into the tank, turn on the power and enjoy the work done

With flash.

That's all I wanted to say. Thank you for attention!

Source:


