539
Build a warm home - technology LogECO
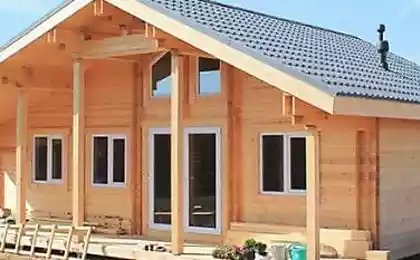
How to combine advantages of natural wood with good insulation? This gives the batch bar.
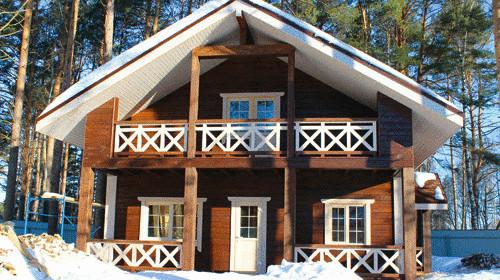
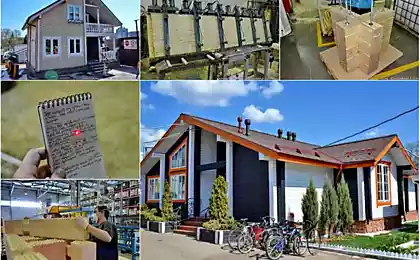
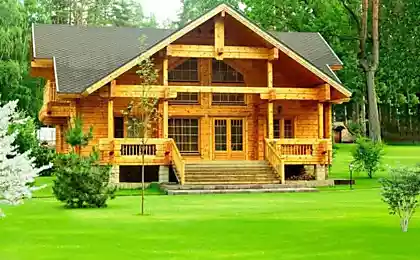
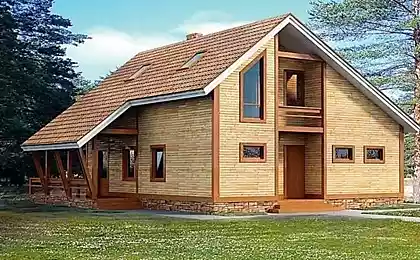
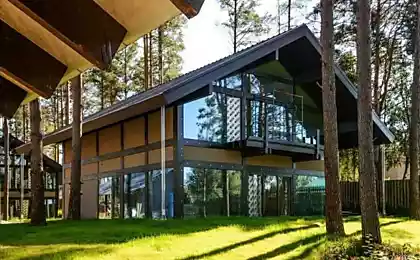
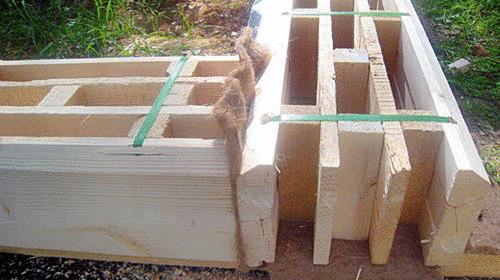
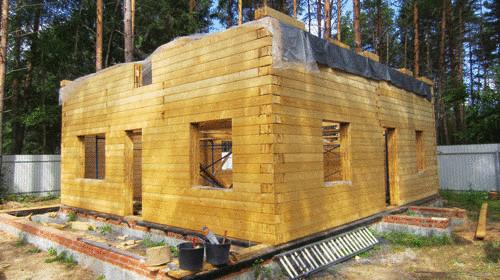
Two-storey house built of insulated batch of timber on patented technology LogECO. In the batch timber with wooden slats alternate cavities filled with insulating material: foam glass or with. Both insulation freely pass air and steam, without hindering the "breathing" of the wood. The alternation of lamellae and cavities, in order to avoid "cold bridges" occurs in a staggered manner. The batch timber is approximately 2.5 times higher than glued laminated timber for heat saving. That is, the wall thickness of 240 mm from a batch of timber will be same warm, as the wall thickness of 600 mm of laminated veneer lumber.
In the manufacture of a batch of timber is possible to do without adhesives, using only mechanical connection by special ties
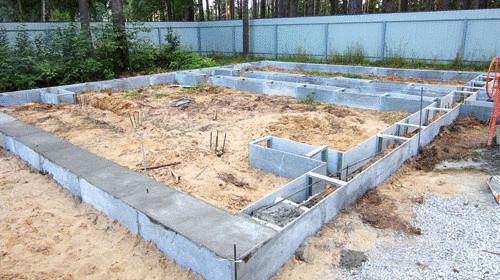
STEP 1 – low-depth tape Because the batch timber is almost twice easier than common laminated veneer lumber, you can (and should!) do a lightweight Foundation. Low-depth strip Foundation of reinforced concrete laid at a shallow depth, so he will experience less stress during freezing and the ground. The concrete casting is carried out in permanent form. The base tape is laid under all bearing walls of the house, left produhi for ventilation.
Tape roll base covered with a waterproofing material, and it fit the reference Board. Build log is using mezhventsovogo heater.
Since the batch timber is easy to work with him much easier than with a conventional laminated Board.
Pouring concrete permanent formwork
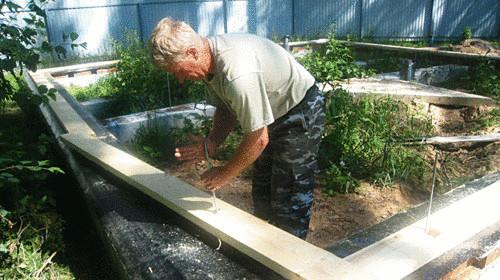
Laying reference Board
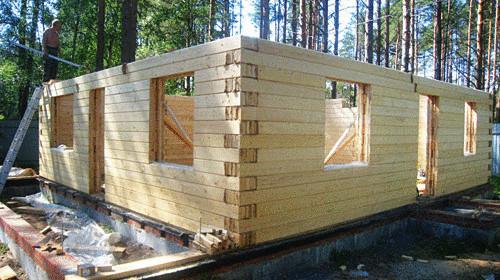
STEP 2 – frame Assembly frame Assembly is the simplest way – back to back, without cutting out complex cups and editions. The corners are held together by pins 3-5 crowns and studs shrink. To protect from blowing the beam has a double lock tongue-and-groove. The images show that instead of glue in the manufacture of lumber applied special ties.
Looks like that batch of timber

Assembly butt
STEP 3 – complete factory-assembled Window and door openings are cut at the factory. On site arrives the batch timber is marked for cutting in accordance with the optimized computer card cutting (waste accounts for less than 10 %), which is assembled in accordance with the "lining".
Wall cut beams, and begins assembling the attic floor.
Windows cut at the factory
The beams are mounted by means of metal fasteners
The beginning of the installation of the attic floor
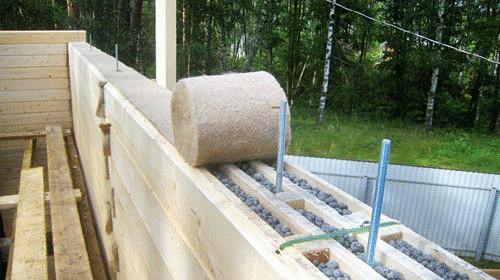
STEP 4 – insulation of frame After frame Assembly is completed, the cavity is filled with a batch of timber for insulation – foamed glass cellulose wool, expanded clay or ordinary. The insulation serves to make the cavity do not mix with the air.
The filling of the insulation in the cavity of a batch of timber
Laying between-joisting sealant
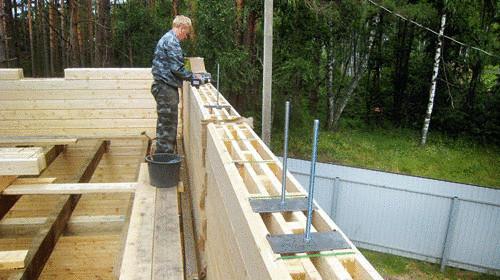
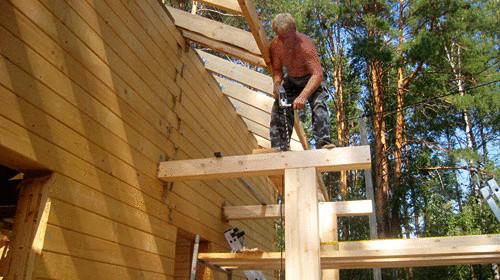
STEP 5 – truss system is Performed facing Gables. Then placed and secured by anchors mauerlat. Mounted truss system. For a more rigid mounting for the attaching elements are used the special plates.
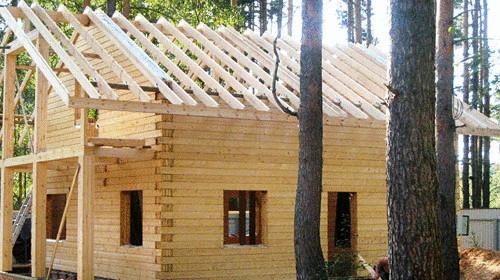
Installed truss system
STEP 6 – reliable support Mounted supporting columns and beams of the terrace. Then insert the window and door boxes ("Akasaka") at a floating scheme, taking into account shrinkage.
The support poles
STEP 7 – insulation of roof Installation of insulated ventilated roof is bottom-up. First of all, from the bottom to the rafters is filed, waterproofing film, which aims to keep water vapor in the insulation of the heated space.
In the space between the rafters insulation laid, which is hiding on top of the diffusion membrane, permeable to water vapour, but retains water. On top of the membrane is formed a ventilation gap and is stitched on top of the crate on which lay sheets OSB – lining under the soft tile.
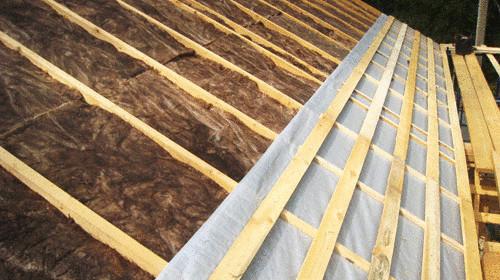
Insulation serves a diffusion membrane
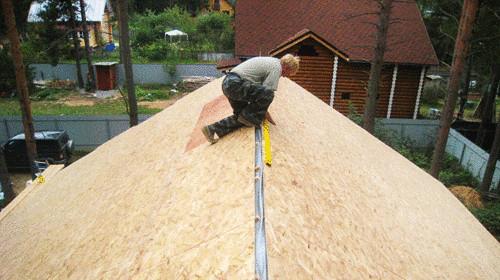
The laid sheets of OSB
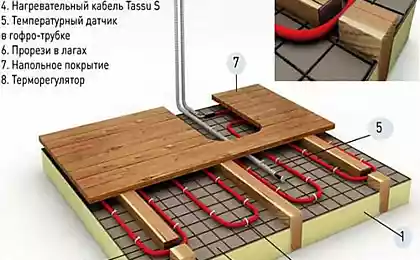
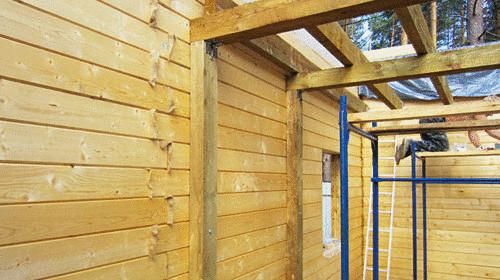
STEP 8 – start of finishing works Fit roofing – soft shingles, and immediately mounted water drainage system. In the house laying rough floors, filed the rough ceiling. Laid hidden utilities. Insulated floor and ceilings.
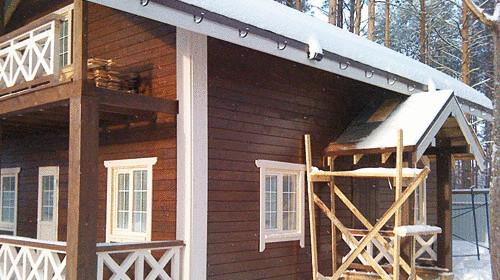
House painted outside. Openings yet closed film to the inside does not have drafts and have established a stable temperature and humidity conditions. On the balcony and the terrace are set fences and railings.
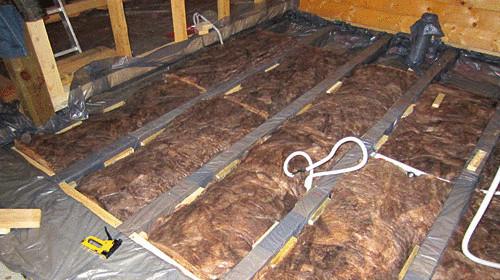
Insulation of the floor
Fencing
STEP 9 – interior Walls and partitions inside the house are sheathed with decorative Board. Laying finishing floor, the ceiling is sheathed. On an internal balcony installed handrail and balustrade. Inserted Windows, hung doors, and nailed and painted trim. Filed the eaves of the roof; it should be remembered that in the ventilation gap under the roofing material to freely circulate the air. On the terrace and the balcony is laid deck Board.
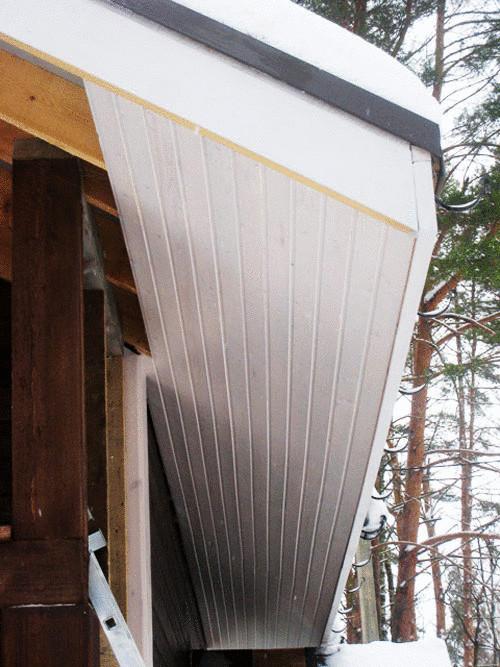
Hemmed the eaves of the roof
Text: Alexei Ryabov
Source: www.ldacha.ru

Two-storey house built of insulated batch of timber on patented technology LogECO. In the batch timber with wooden slats alternate cavities filled with insulating material: foam glass or with. Both insulation freely pass air and steam, without hindering the "breathing" of the wood. The alternation of lamellae and cavities, in order to avoid "cold bridges" occurs in a staggered manner. The batch timber is approximately 2.5 times higher than glued laminated timber for heat saving. That is, the wall thickness of 240 mm from a batch of timber will be same warm, as the wall thickness of 600 mm of laminated veneer lumber.
In the manufacture of a batch of timber is possible to do without adhesives, using only mechanical connection by special ties
STEP 1 – low-depth tape Because the batch timber is almost twice easier than common laminated veneer lumber, you can (and should!) do a lightweight Foundation. Low-depth strip Foundation of reinforced concrete laid at a shallow depth, so he will experience less stress during freezing and the ground. The concrete casting is carried out in permanent form. The base tape is laid under all bearing walls of the house, left produhi for ventilation.
Tape roll base covered with a waterproofing material, and it fit the reference Board. Build log is using mezhventsovogo heater.
Since the batch timber is easy to work with him much easier than with a conventional laminated Board.

Pouring concrete permanent formwork

Laying reference Board
STEP 2 – frame Assembly frame Assembly is the simplest way – back to back, without cutting out complex cups and editions. The corners are held together by pins 3-5 crowns and studs shrink. To protect from blowing the beam has a double lock tongue-and-groove. The images show that instead of glue in the manufacture of lumber applied special ties.

Looks like that batch of timber

Assembly butt
STEP 3 – complete factory-assembled Window and door openings are cut at the factory. On site arrives the batch timber is marked for cutting in accordance with the optimized computer card cutting (waste accounts for less than 10 %), which is assembled in accordance with the "lining".
Wall cut beams, and begins assembling the attic floor.

Windows cut at the factory

The beams are mounted by means of metal fasteners

The beginning of the installation of the attic floor
STEP 4 – insulation of frame After frame Assembly is completed, the cavity is filled with a batch of timber for insulation – foamed glass cellulose wool, expanded clay or ordinary. The insulation serves to make the cavity do not mix with the air.

The filling of the insulation in the cavity of a batch of timber

Laying between-joisting sealant
STEP 5 – truss system is Performed facing Gables. Then placed and secured by anchors mauerlat. Mounted truss system. For a more rigid mounting for the attaching elements are used the special plates.

Installed truss system
STEP 6 – reliable support Mounted supporting columns and beams of the terrace. Then insert the window and door boxes ("Akasaka") at a floating scheme, taking into account shrinkage.

The support poles
STEP 7 – insulation of roof Installation of insulated ventilated roof is bottom-up. First of all, from the bottom to the rafters is filed, waterproofing film, which aims to keep water vapor in the insulation of the heated space.
In the space between the rafters insulation laid, which is hiding on top of the diffusion membrane, permeable to water vapour, but retains water. On top of the membrane is formed a ventilation gap and is stitched on top of the crate on which lay sheets OSB – lining under the soft tile.

Insulation serves a diffusion membrane

The laid sheets of OSB
STEP 8 – start of finishing works Fit roofing – soft shingles, and immediately mounted water drainage system. In the house laying rough floors, filed the rough ceiling. Laid hidden utilities. Insulated floor and ceilings.
House painted outside. Openings yet closed film to the inside does not have drafts and have established a stable temperature and humidity conditions. On the balcony and the terrace are set fences and railings.

Insulation of the floor

Fencing
STEP 9 – interior Walls and partitions inside the house are sheathed with decorative Board. Laying finishing floor, the ceiling is sheathed. On an internal balcony installed handrail and balustrade. Inserted Windows, hung doors, and nailed and painted trim. Filed the eaves of the roof; it should be remembered that in the ventilation gap under the roofing material to freely circulate the air. On the terrace and the balcony is laid deck Board.

Hemmed the eaves of the roof
Text: Alexei Ryabov
Source: www.ldacha.ru