2494
Computer desk with his hands
Surf on the internet, repeatedly ran across a fantastic transparent tables with embedded computers, water cooling and lots of multi-colored bulbs. And I liked the idea that I decided it's time and I porukozhopit. Especially long wanted to change his large corner table that realties interesting.
Let me introduce you, dear YaPovtsy, a brief overview of my efforts:
10 photo.
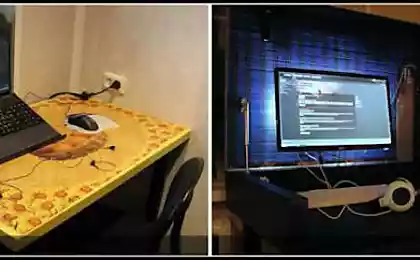
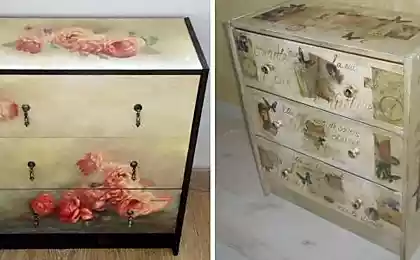
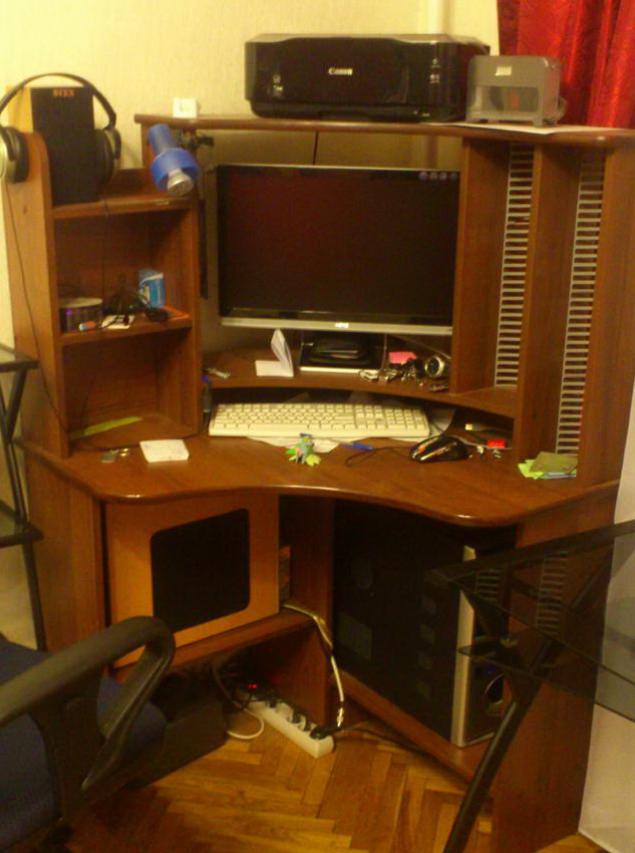
So here's to look like my old desk (photographed on the arm):
The basis was chosen and purchased here is a table:
This is already a converted version. Included was a shelf for the keyboard, which I did not even install and shelf system unit that was supposed to be at the bottom and interfere in the legs, I lifted up and fastened under the main tabletop. The distance between them is determined by the height of the motherboard with the graphics card is inserted into it.

In the next step the old desk was dismantled and replaced by a new set. By the way for office equipment and various small things in the appendage to the table was bought whatnot.
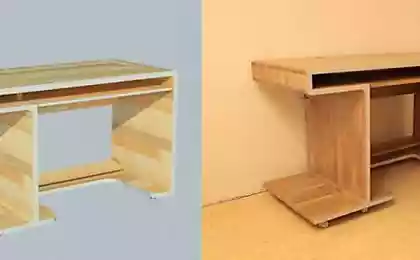
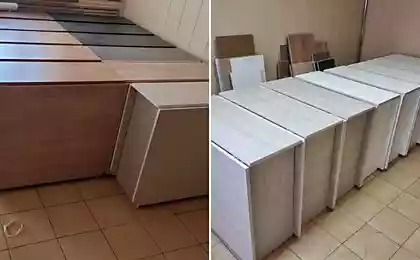
Obtain interim version:
Next came the moment when I had to pick up a saw. The inspection on the spot, chipboard marked, you can begin:
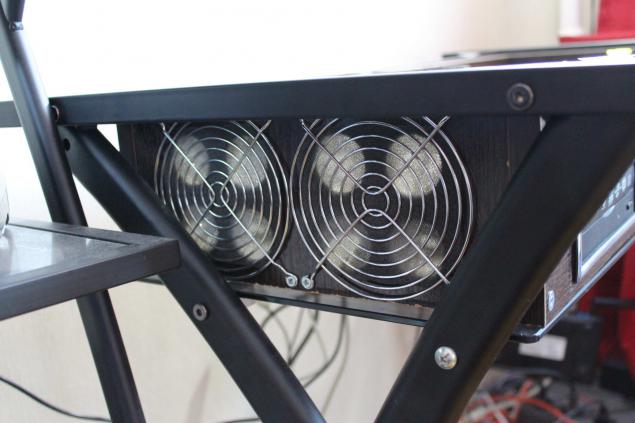
Unfortunately, in the heat of the work, completely forgot about the fixation of all stages. I'll try to describe in words. Chipboard were sawn four sides and stapled furniture screws. The right and left side were made on 8 large openings for ventilation. From the inner side of these walls were bolted four fans, two (left) for ventilation, two (right) for exhaust. On the front was a rectangular propyl DVD-drive and a hole for the power button. On the back wall were made U-shaped cuts for the power supply and motherboard connectors. Here I ran into one problem. The fact that the height of the video was practically equal to the height of the wall and at its rear side there is a lot of connectors to which access is needed. So we had to just cut it back wall and drank too much part. The result was that here:
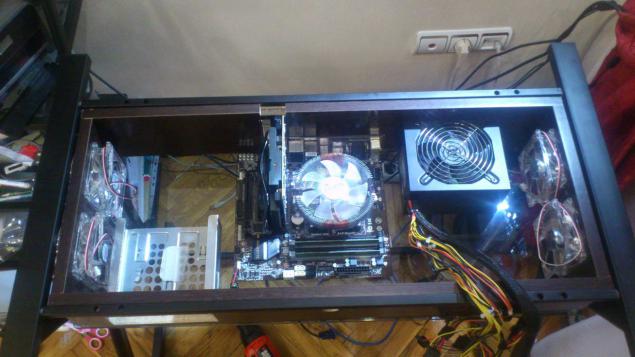
Sled DVD-drive were removed from the old system unit and bolted with screws from the inside. For mounting the motherboard used ordinary adhesive pad 20x20 mm. In them I drilled a hole in the center and the same screw that usually motherboard is fixed in the housing, screwed these sites to the board. This decision proved to be very convenient, because do not remove the protective paper from these sites, it is convenient to try it in place. And then, when everything was repeatedly died out and drank, I stuck to the glass motherboard. The power supply is also standing on the four self-adhesive rubber feet. Fans left to suck in air from the outside covered with decorative lattices, which is laid under a thin foam rubber, as an air filter.
To turn on the computer at the car was purchased here such wonderful knopentsiya:

Winchesters leave in a basket, which also migrated from the old system unit.
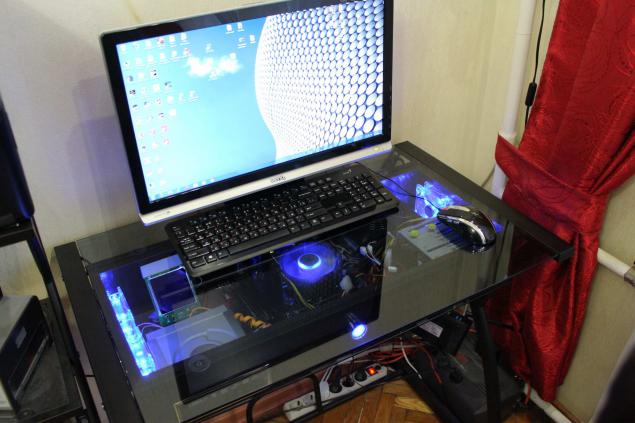
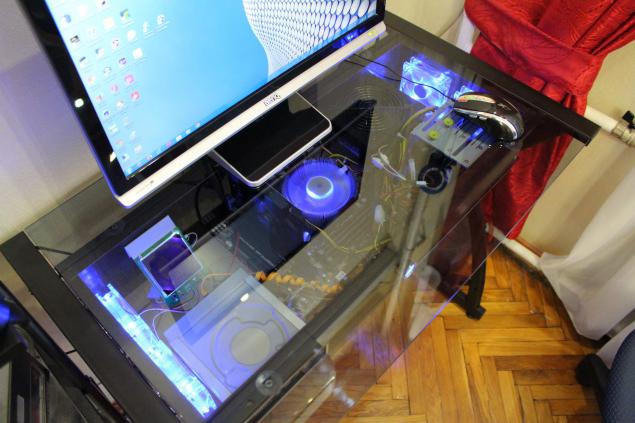
All combine, connect and check.
And more ...
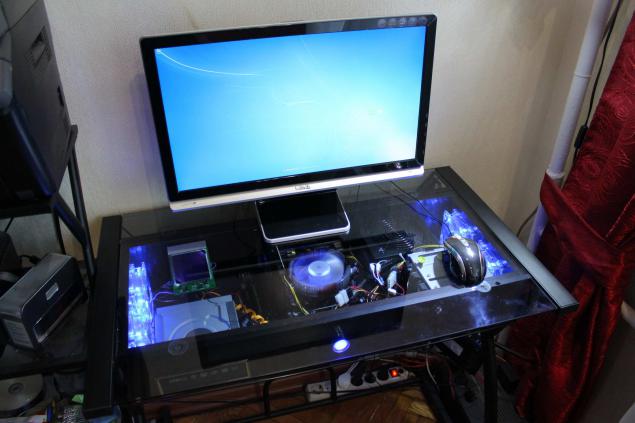
In conclusion, all the fans are included through resistors, and CPU cooler through the speed control. All elements are either on rubber feet, or on the grounds of self-adhesive, which acting as a shock absorber, do not allow to appear odd noises. As a result, the system was very quiet.
I have everything! Kick.
Let me introduce you, dear YaPovtsy, a brief overview of my efforts:
10 photo.

So here's to look like my old desk (photographed on the arm):

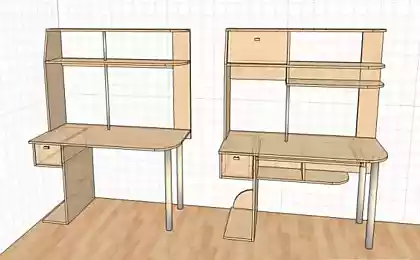
The basis was chosen and purchased here is a table:
This is already a converted version. Included was a shelf for the keyboard, which I did not even install and shelf system unit that was supposed to be at the bottom and interfere in the legs, I lifted up and fastened under the main tabletop. The distance between them is determined by the height of the motherboard with the graphics card is inserted into it.

In the next step the old desk was dismantled and replaced by a new set. By the way for office equipment and various small things in the appendage to the table was bought whatnot.
Obtain interim version:

Next came the moment when I had to pick up a saw. The inspection on the spot, chipboard marked, you can begin:

Unfortunately, in the heat of the work, completely forgot about the fixation of all stages. I'll try to describe in words. Chipboard were sawn four sides and stapled furniture screws. The right and left side were made on 8 large openings for ventilation. From the inner side of these walls were bolted four fans, two (left) for ventilation, two (right) for exhaust. On the front was a rectangular propyl DVD-drive and a hole for the power button. On the back wall were made U-shaped cuts for the power supply and motherboard connectors. Here I ran into one problem. The fact that the height of the video was practically equal to the height of the wall and at its rear side there is a lot of connectors to which access is needed. So we had to just cut it back wall and drank too much part. The result was that here:

Sled DVD-drive were removed from the old system unit and bolted with screws from the inside. For mounting the motherboard used ordinary adhesive pad 20x20 mm. In them I drilled a hole in the center and the same screw that usually motherboard is fixed in the housing, screwed these sites to the board. This decision proved to be very convenient, because do not remove the protective paper from these sites, it is convenient to try it in place. And then, when everything was repeatedly died out and drank, I stuck to the glass motherboard. The power supply is also standing on the four self-adhesive rubber feet. Fans left to suck in air from the outside covered with decorative lattices, which is laid under a thin foam rubber, as an air filter.

To turn on the computer at the car was purchased here such wonderful knopentsiya:

Winchesters leave in a basket, which also migrated from the old system unit.
All combine, connect and check.

And more ...

In conclusion, all the fans are included through resistors, and CPU cooler through the speed control. All elements are either on rubber feet, or on the grounds of self-adhesive, which acting as a shock absorber, do not allow to appear odd noises. As a result, the system was very quiet.
I have everything! Kick.