294
Simple procedure for the prevention of varicose veins
Self-massage to prevent varicose veins
Self-massage activates blood flow in the fingers, feet, knee, ankle joints of the legs and muscles of the lumbar region. This is an effective method of preventing varicose veins, diseases of the joints and feet.
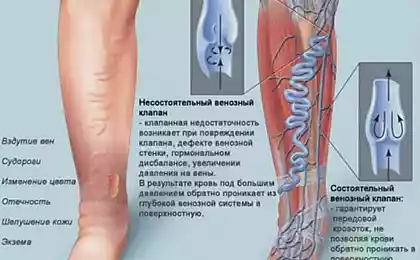
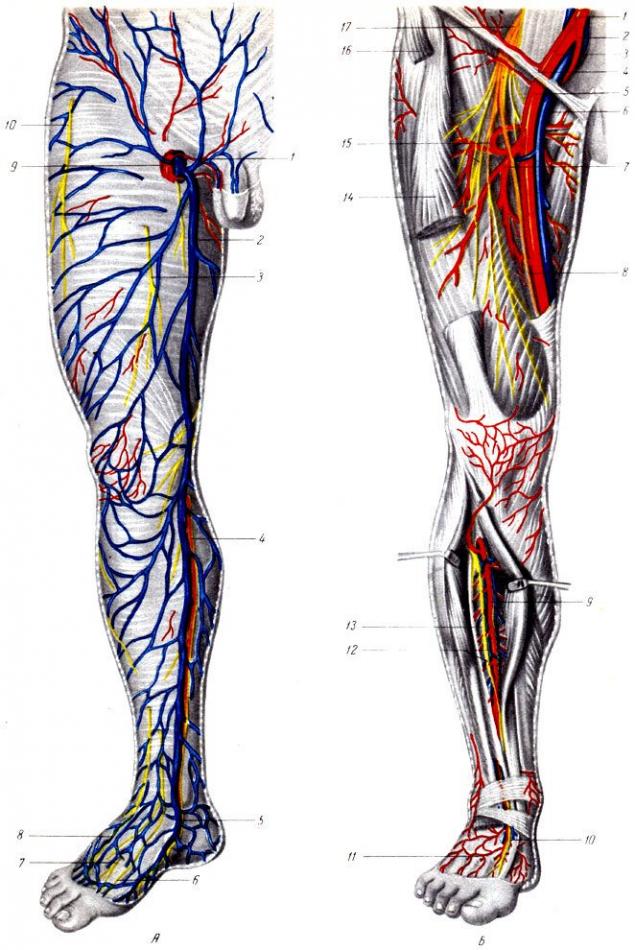
Every person should know that a powerful artery descends to the foot and toes of each leg, and the same vein rises to the heart. These blood tubes are connected by capillaries – numerous thin tubes through which red blood cells can only move one after another.
 5
5
With poor patency of blood through the capillaries of the fingers and feet (injuries, long standing on the legs, performing heavy physical work, etc.), blood in small quantities moves with effort from the arteries to the veins.
In this case, the right atrium (this is a pump that sucks blood from the veins into the heart) cannot overcome the force of the vacuum formed in the veins due to the small flow of blood through the capillaries of the fingers and feet.
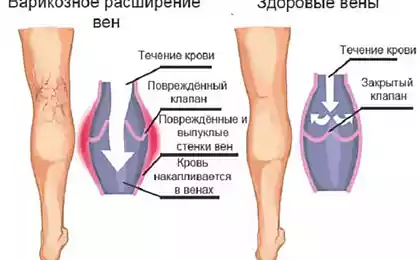
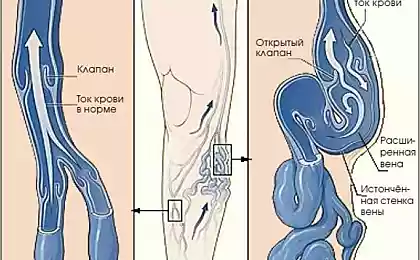
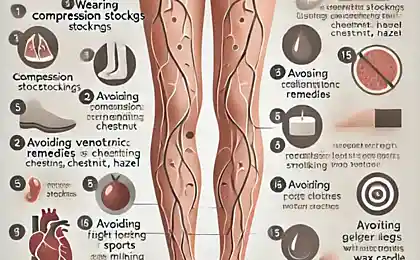
Blood is delayed, gradually accumulates in the veins, expands the walls and increases their length. So there is varicose veins. In this position, the heart, to ensure the vital activity of the body, pumps blood from other veins, in which it more freely passes through the capillaries. If the body is impassable capillaries of other organs, the heart will stop due to a lack of venous blood. Therefore, this exercise should be performed daily.
Self-massage:
1.Sit on a sofa, bed or chair.
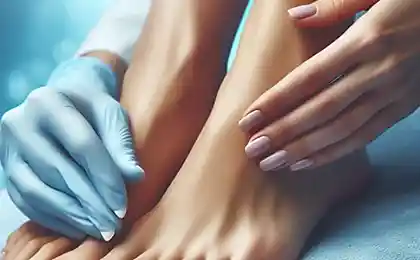
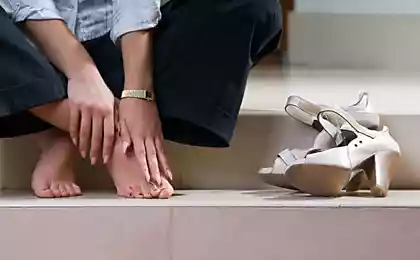
2.Place the left leg in the knee joint and the outside of the lower leg on the knee of the right leg. With the palms of both hands, embrace the foot and make a straight alternate stroking of the sole and back of the foot from the tips of the fingers to the back of the heel (on the sole) and to the ankle joint (on the back of the foot). When the left hand finishes stroking the back of the foot, the right begins stroking the sole.
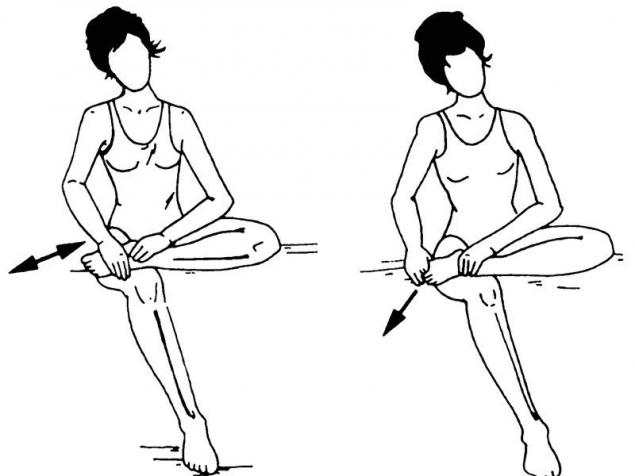
3. With your left hand, fix the foot in the ankle joint. With the fingers of the right hand, embrace the big toe of the left foot so that the pads of the index and middle fingers are at the bottom, on the plantar side, and the pad of the big one is at the top. Make rotational and / or rectilinear movements from the tips of the thumb to its base. In the same way, rub the other fingers. Perform active and passive (with the right hand) movements with your fingers - bending and extension, rotation.
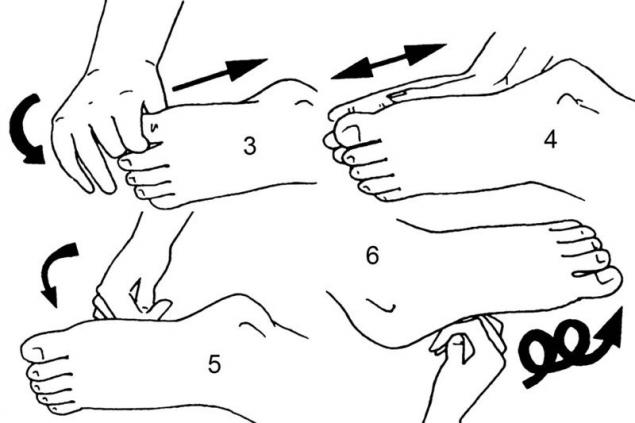
4. In the same position, with the palm of the right hand, make a straight stroking of the sole from the fingers to the heel, then with the crest of the fist - straight rubbing in the same direction and supplement it with a spiraling rubbing of the sole with the back surfaces of the middle phalanges of the bent fingers of the right hand.
5. Without changing the position of the legs, cover the bottom of the heel of the left foot so that the thumb of the right hand is on the inner surface of the heel, and the other four on the outer. Perform a pinch-shaped stroking of the outer, inner and back surfaces of the heel. At the same time, the thumb and the four others seem to strive towards each other and connect on the back surface of the heel bone. Do not change the position of the fingers of the right hand, make a straight rub on the left heel. To do this, alternately with four fingers, then with the thumb of the right hand rub the heel from below to the heel bump (located on the back surface of the heel). Then, alternately, with four fingers making rotational movements towards the little finger, then with your thumb moving in the course of the clockwise hand, make a spiral rubbing of the heel.
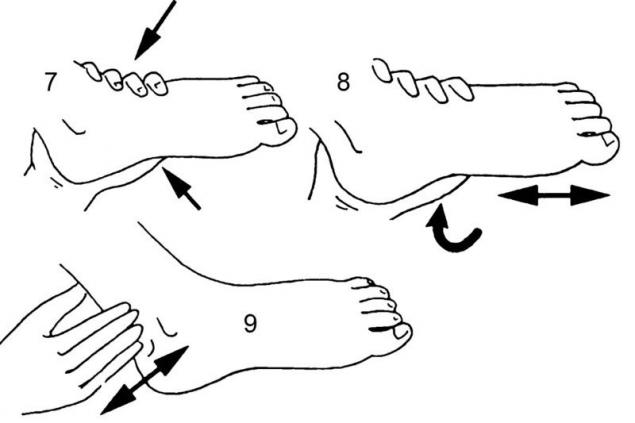
6.Now, with the palm surface of the fingers of the right hand, perform a pinch-shaped stroking of the Achilles tendon, and then with the pads of the fingers of the same hand - a straight-line pinch-shaped and spiral-shaped rubbing of the tendon. In the process of pinch-like rubbing, the Achilles tendon is massaged simultaneously from both sides, with a spiral - then from the outside (four fingers), then with the inner (big finger).
7. With the palm of the right hand (four fingers on the outside of the foot, the large one on the inside), perform a straight stroking of the back area of the foot.
8. With the pads of the fingers of the left hand, make a straight, and then spiraling rubbing the interplus gaps of the foot in the direction from the base of the fingers to the ankle joint.
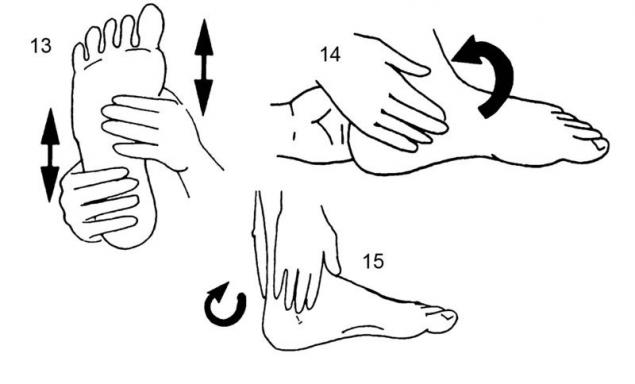
9. Tightly capturing and somewhat squeezing the foot with the hands of both hands (the thumbs on the back surface, the rest on the sole), alternate movements of the hands up and down, knead the foot.
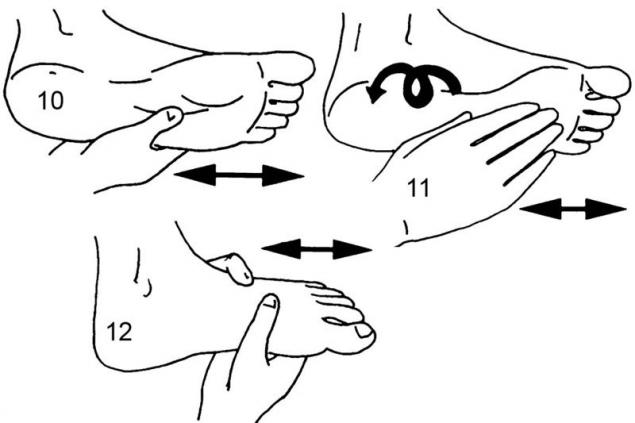
10. With the palms of both hands, located across the lower leg, embrace the ankle joint. Perform concentric (circular) stroking of the joint.
11. Having placed the thumbs of both hands on the front surface of the lower leg (5-7 centimeters above the ankles), and the pads of the four closed fingers of both hands on the front surface of the joint (along the joint slit), simultaneously making rectilinear or spiraling movements with the pads of four fingers from top to bottom to top, rub the ankle joint.
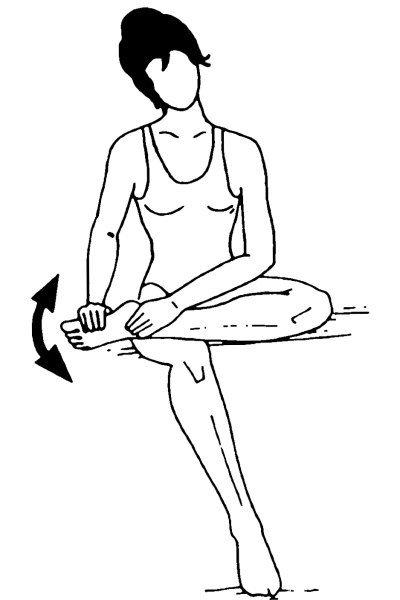
12. Now put your right foot on the floor and, putting your left foot on its knee, perform active and passive flexions, extensions, turns of the foot outward and inward, and rotations of the foot in the joint in both directions.
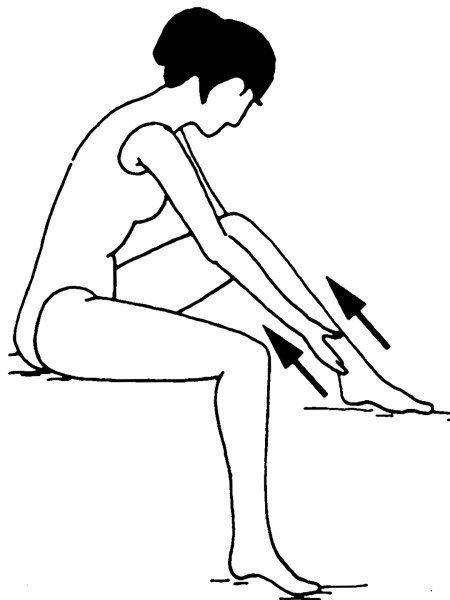
13. Finish the self-massage of the foot, Achilles tendon and ankle joint with stroking. Then embrace both hands of the left leg in the ankle joint. Slowly, sliding the palms of both hands along the leg to the pelvis, perform a general stroke of the lower leg and thigh.
14. Similarly, changing only the starting position, with the other hand perform self-massage of the foot, Achilles tendon and ankle joint of the right leg.
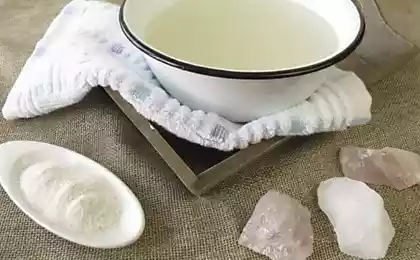
In the evening, make a warm foot bath. Do not wear tight shoes so that there is no stagnation of blood in the veins and it easily enters the heart. published
P.S. And remember, just by changing your consciousness – together we change the world!
Source: vk.com/wall-23903469?w=wall-23903469_6178
Self-massage activates blood flow in the fingers, feet, knee, ankle joints of the legs and muscles of the lumbar region. This is an effective method of preventing varicose veins, diseases of the joints and feet.
Every person should know that a powerful artery descends to the foot and toes of each leg, and the same vein rises to the heart. These blood tubes are connected by capillaries – numerous thin tubes through which red blood cells can only move one after another.
 5
5With poor patency of blood through the capillaries of the fingers and feet (injuries, long standing on the legs, performing heavy physical work, etc.), blood in small quantities moves with effort from the arteries to the veins.
In this case, the right atrium (this is a pump that sucks blood from the veins into the heart) cannot overcome the force of the vacuum formed in the veins due to the small flow of blood through the capillaries of the fingers and feet.
Blood is delayed, gradually accumulates in the veins, expands the walls and increases their length. So there is varicose veins. In this position, the heart, to ensure the vital activity of the body, pumps blood from other veins, in which it more freely passes through the capillaries. If the body is impassable capillaries of other organs, the heart will stop due to a lack of venous blood. Therefore, this exercise should be performed daily.
Self-massage:
1.Sit on a sofa, bed or chair.
2.Place the left leg in the knee joint and the outside of the lower leg on the knee of the right leg. With the palms of both hands, embrace the foot and make a straight alternate stroking of the sole and back of the foot from the tips of the fingers to the back of the heel (on the sole) and to the ankle joint (on the back of the foot). When the left hand finishes stroking the back of the foot, the right begins stroking the sole.

3. With your left hand, fix the foot in the ankle joint. With the fingers of the right hand, embrace the big toe of the left foot so that the pads of the index and middle fingers are at the bottom, on the plantar side, and the pad of the big one is at the top. Make rotational and / or rectilinear movements from the tips of the thumb to its base. In the same way, rub the other fingers. Perform active and passive (with the right hand) movements with your fingers - bending and extension, rotation.

4. In the same position, with the palm of the right hand, make a straight stroking of the sole from the fingers to the heel, then with the crest of the fist - straight rubbing in the same direction and supplement it with a spiraling rubbing of the sole with the back surfaces of the middle phalanges of the bent fingers of the right hand.

5. Without changing the position of the legs, cover the bottom of the heel of the left foot so that the thumb of the right hand is on the inner surface of the heel, and the other four on the outer. Perform a pinch-shaped stroking of the outer, inner and back surfaces of the heel. At the same time, the thumb and the four others seem to strive towards each other and connect on the back surface of the heel bone. Do not change the position of the fingers of the right hand, make a straight rub on the left heel. To do this, alternately with four fingers, then with the thumb of the right hand rub the heel from below to the heel bump (located on the back surface of the heel). Then, alternately, with four fingers making rotational movements towards the little finger, then with your thumb moving in the course of the clockwise hand, make a spiral rubbing of the heel.

6.Now, with the palm surface of the fingers of the right hand, perform a pinch-shaped stroking of the Achilles tendon, and then with the pads of the fingers of the same hand - a straight-line pinch-shaped and spiral-shaped rubbing of the tendon. In the process of pinch-like rubbing, the Achilles tendon is massaged simultaneously from both sides, with a spiral - then from the outside (four fingers), then with the inner (big finger).
7. With the palm of the right hand (four fingers on the outside of the foot, the large one on the inside), perform a straight stroking of the back area of the foot.
8. With the pads of the fingers of the left hand, make a straight, and then spiraling rubbing the interplus gaps of the foot in the direction from the base of the fingers to the ankle joint.

9. Tightly capturing and somewhat squeezing the foot with the hands of both hands (the thumbs on the back surface, the rest on the sole), alternate movements of the hands up and down, knead the foot.
10. With the palms of both hands, located across the lower leg, embrace the ankle joint. Perform concentric (circular) stroking of the joint.
11. Having placed the thumbs of both hands on the front surface of the lower leg (5-7 centimeters above the ankles), and the pads of the four closed fingers of both hands on the front surface of the joint (along the joint slit), simultaneously making rectilinear or spiraling movements with the pads of four fingers from top to bottom to top, rub the ankle joint.
12. Now put your right foot on the floor and, putting your left foot on its knee, perform active and passive flexions, extensions, turns of the foot outward and inward, and rotations of the foot in the joint in both directions.

13. Finish the self-massage of the foot, Achilles tendon and ankle joint with stroking. Then embrace both hands of the left leg in the ankle joint. Slowly, sliding the palms of both hands along the leg to the pelvis, perform a general stroke of the lower leg and thigh.

14. Similarly, changing only the starting position, with the other hand perform self-massage of the foot, Achilles tendon and ankle joint of the right leg.
In the evening, make a warm foot bath. Do not wear tight shoes so that there is no stagnation of blood in the veins and it easily enters the heart. published
P.S. And remember, just by changing your consciousness – together we change the world!
Source: vk.com/wall-23903469?w=wall-23903469_6178
