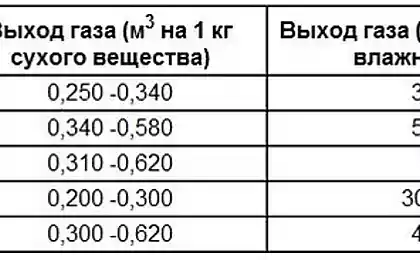
782
As we did my very first layout
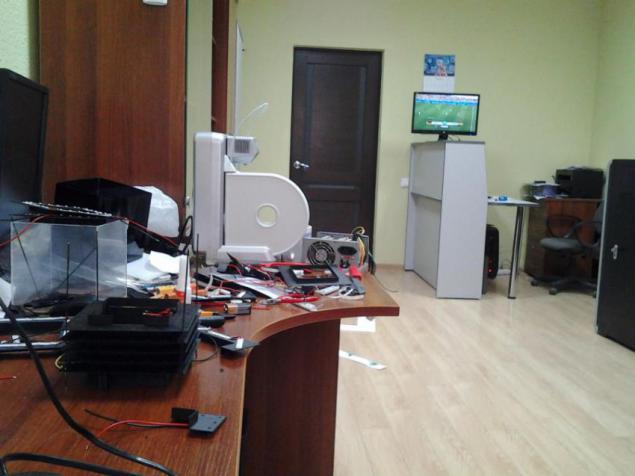
I have never done layout. Print, of course, drawn in Google Sketchape building, but his hands are not working. And it was very interesting to try myself in this.

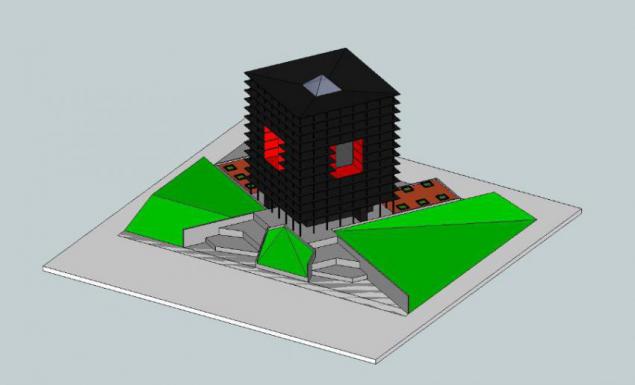
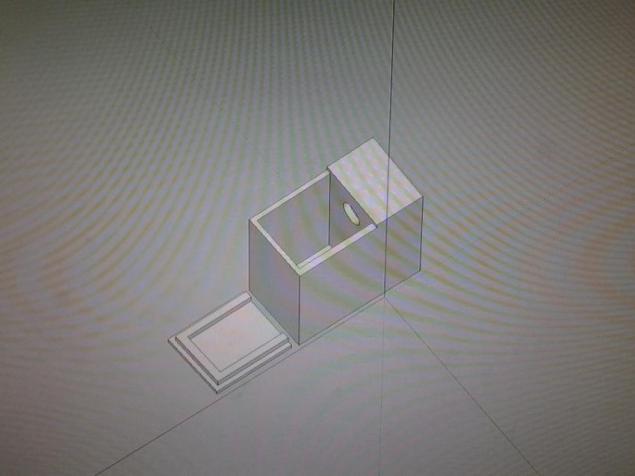
First of all, my companion and I started with the building to determine the scale. We modeled divided by floors and print.
That's how the layout looks in Google SketchUp
There is a print of one of the floors.
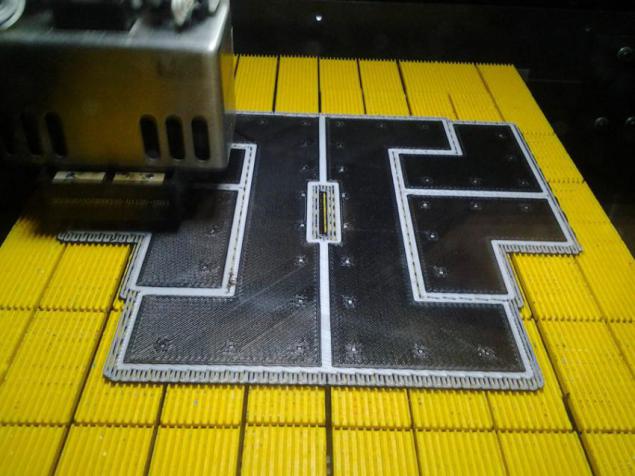
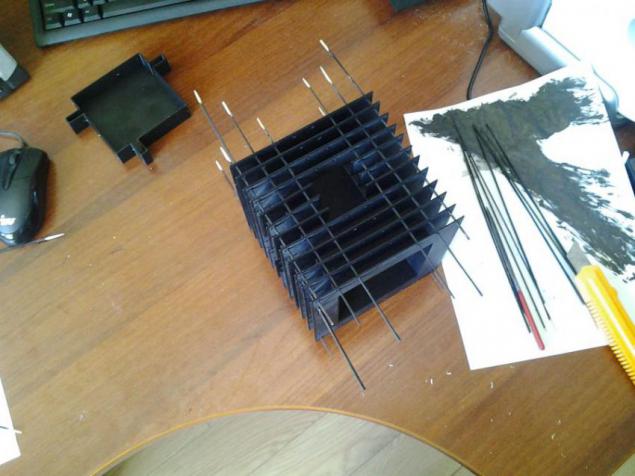
After printing began to check how the floors adjacent to each other. Here, faced with his first mistake - the middle floor, where large niche, it was necessary to print on another. That is, when the construction of the layout had to be careful of their siting and monitor offset. But we came out of the situation, securing their sticks.
Fit floors

Consolidated middle floors sticks
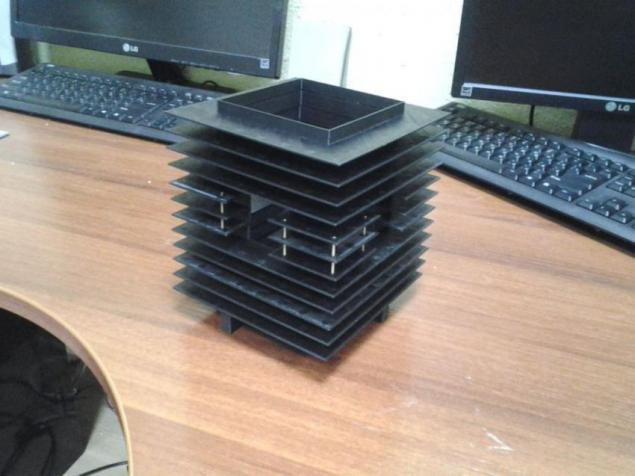
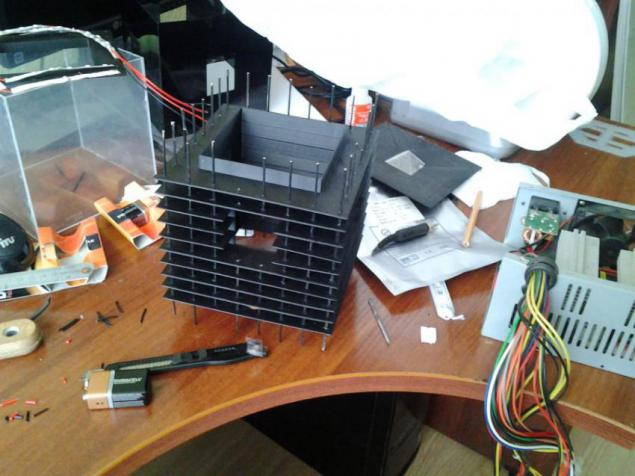
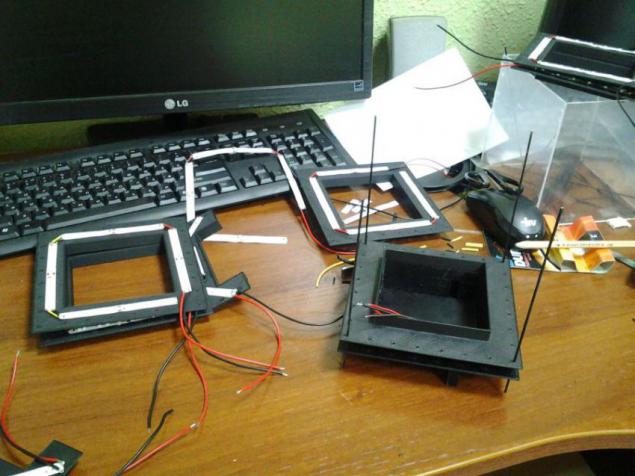
They looked twisted in his hands and began to collect the entire structure together. For alignment and bonding floors used conventional wooden skewers, painted black. Is threaded into the holes that have already been on the model.
The entire building assembly
Then we a couple of weeks due to some circumstances, hovered, and the building and stood "unfinished."
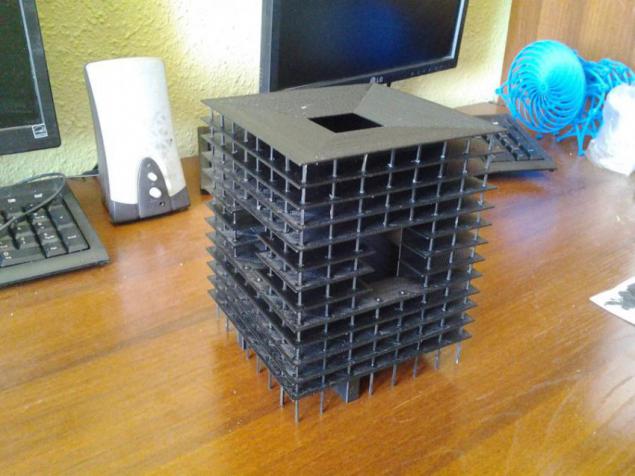
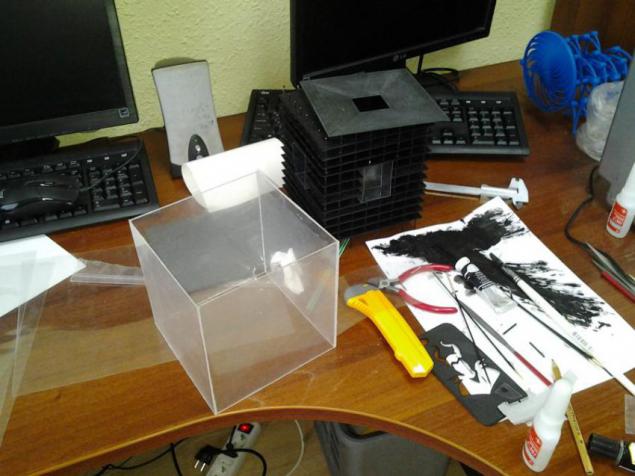
Once again we went to work, began to think, what to do facing the building. We wanted a 1 mm thick acrylic. Even bought a leaf, cut, glued box, but eventually abandoned this option because of its bulkiness, weight and complexity of the cutting holes (we would CNC).
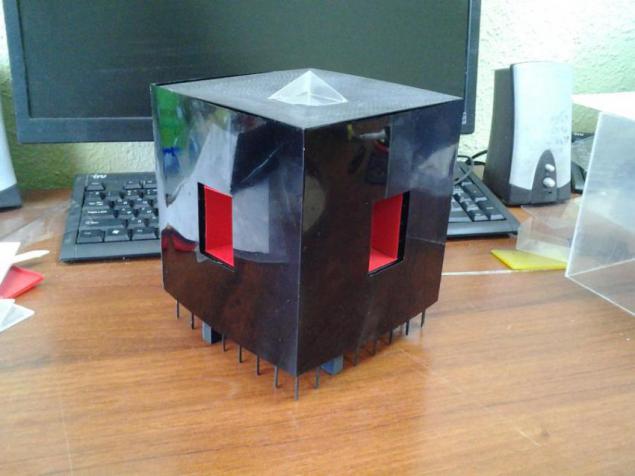
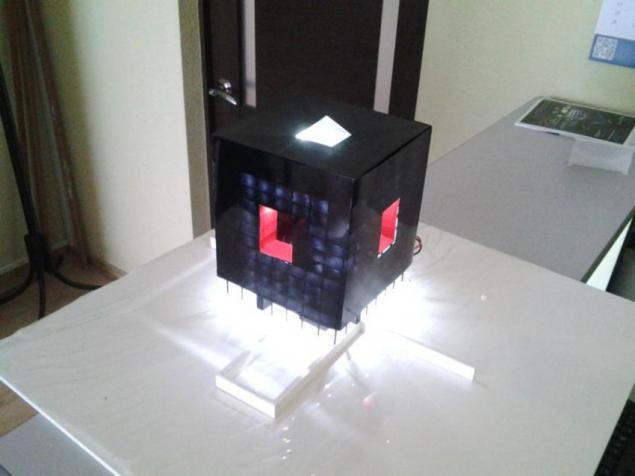
We decided to use conventional film lamination. Sliced, glued and toned avtotonirovkoy. Pyramid collected from the same film, and cut red box of stationery folder :)
Then the question arose of illumination. We go to the store and bought a light electrical LED tape. There you have Crohn's batteries. And began to collect light.
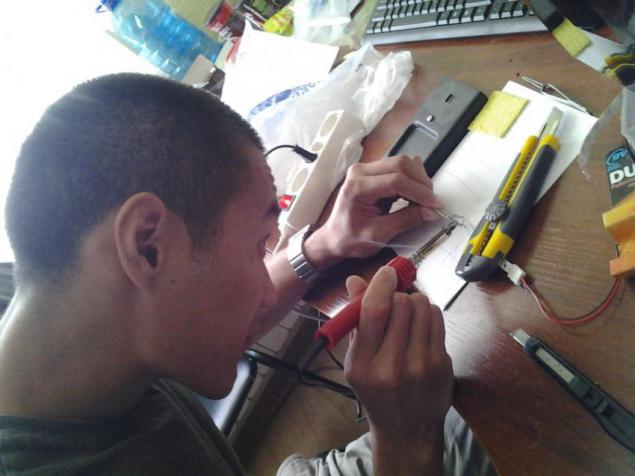
I for the first time took a soldering iron in his hands :)
We had to dismantle the building.

Mark and began to solder

I note that the solder :) I liked the first time is a bit kosyachit, could not put a normal solder, but soon it went.
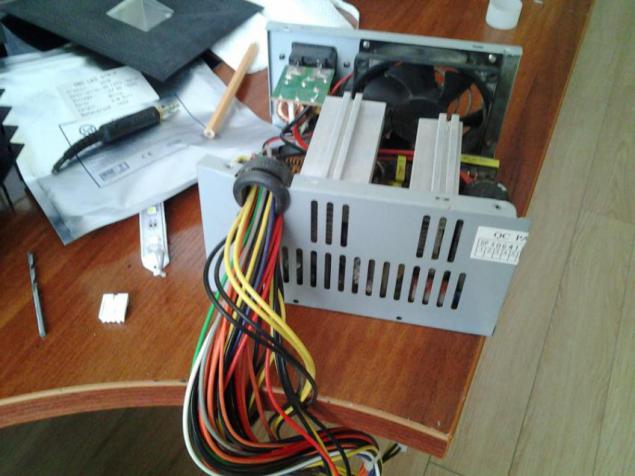
Donor wires served as the old power supply from the company

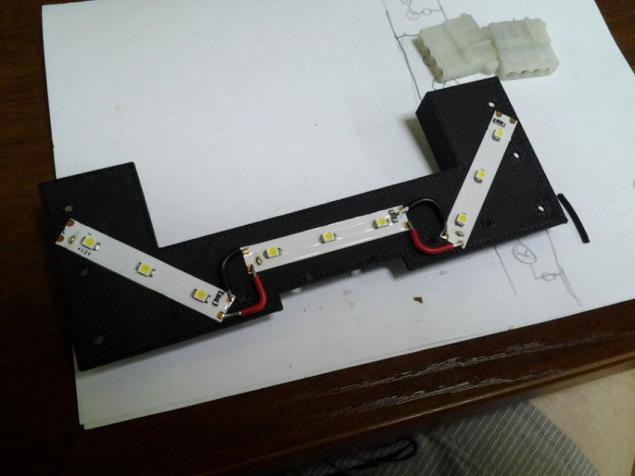
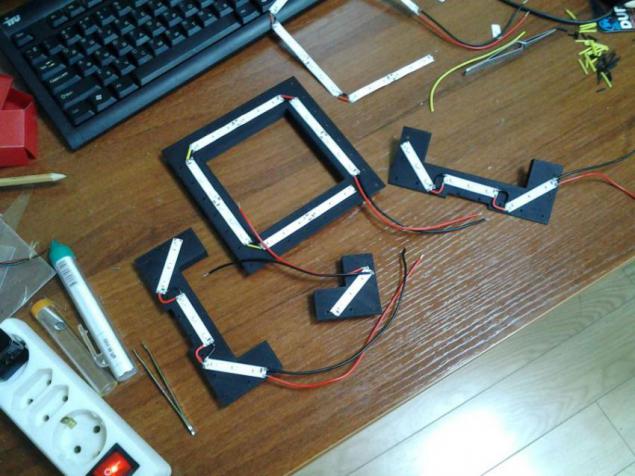
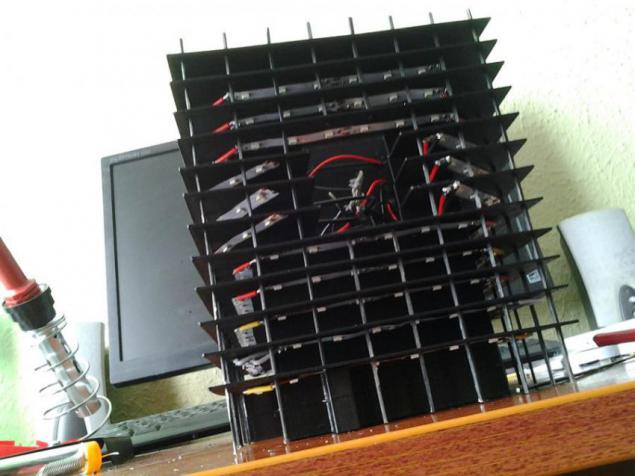
A bunch of floors illuminated.
Several floors is ready
Intertwined wires

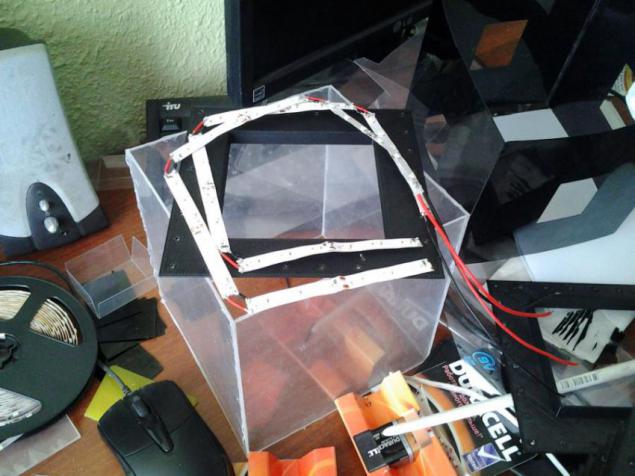
This whole building assembly backlit
Check
While highlighting payali watched the World Cup :)
Even two parallel match :)

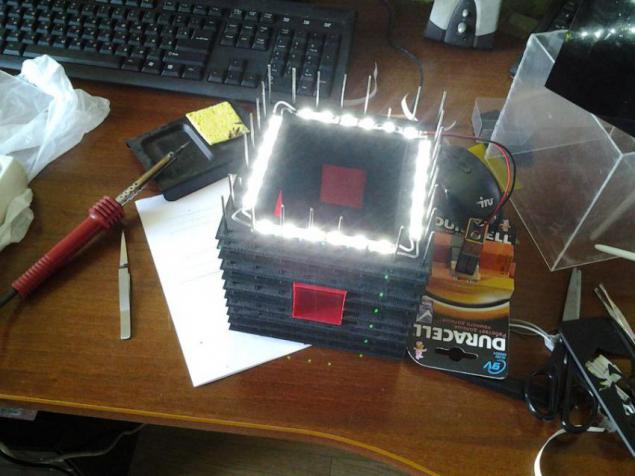
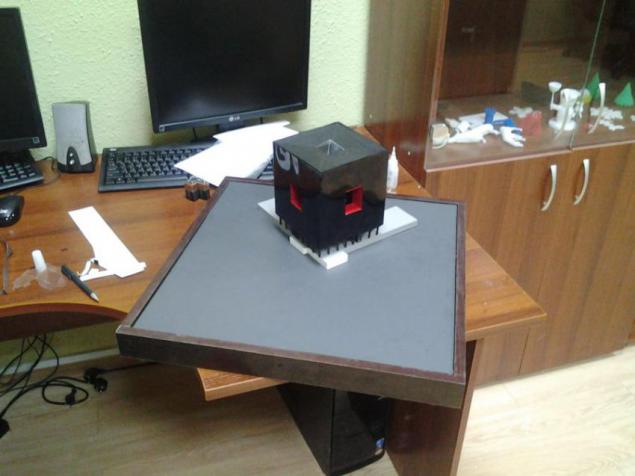
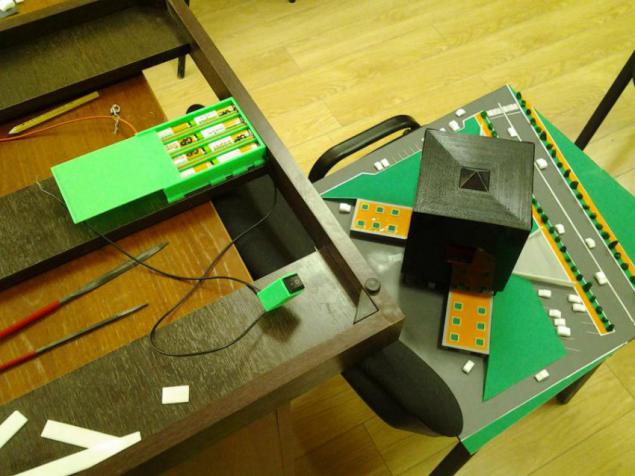
The building is illuminated ready now to do podmaketnik (although in theory should be in a different order). Cut PVC square with sides 50cm. And the size of steel cut underground parking.
Trying underground parking

The hardest part was with the construction of housing podmaketnika. Carefully we could not, so we decided to book. In a furniture shop by size, we made it :)
Podmaketnik of chipboard.
Installation layout for podmaketnik
It's time to set the layout on podmaketnik. A bored desired holes, inserted a wire and began to think about the switch. Bestrenko promptly inserted switch model of the future in the editor. I decided to make one body with crowns. So it was convenient.
Inserting the batteries.
With switch.
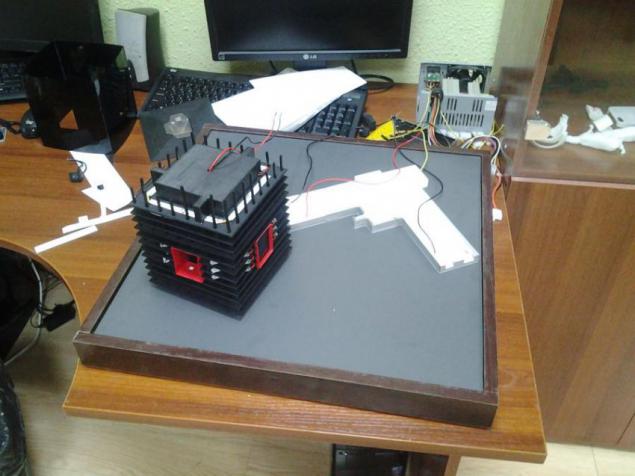
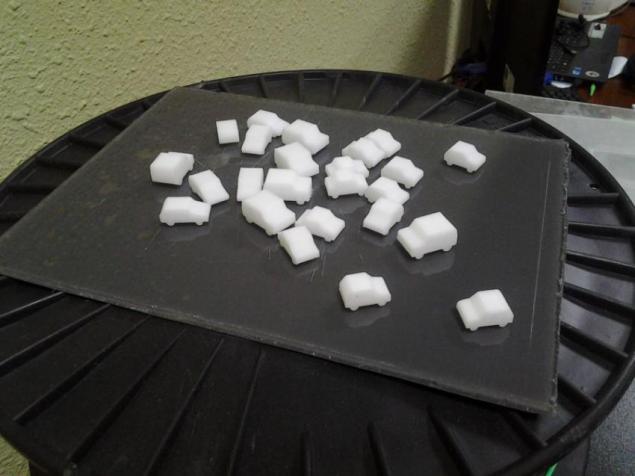
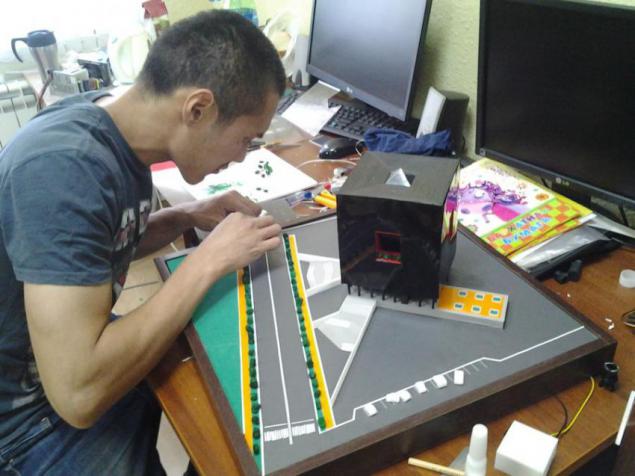
After that, came the turn of the installation of the remaining elements of the layout. Draw and print machines.
Master of parking :)
Supplement layout

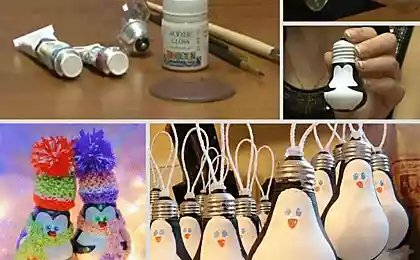
From self-adhesive film cut into strips, markup, but because of the velvet paper grass. And stick everything. We had to do more trees in an Internet found a very interesting and simple way, and decided to try.
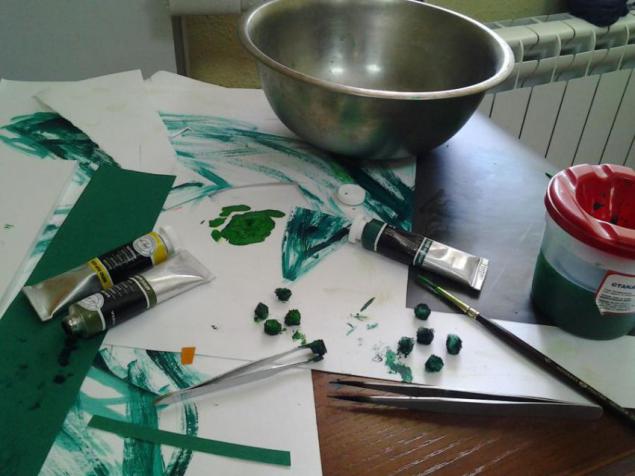
Need a wire, PVC glue, acrylic paint and foam rubber crumb. Here are the most chips, I tried to find any in Yakutsk, is not found. I tried to chop foam itself, but it is a tedious activity without special equipment. I decided to use simple pieces of foam.

Lubricate PVC and painted after drying brown paint
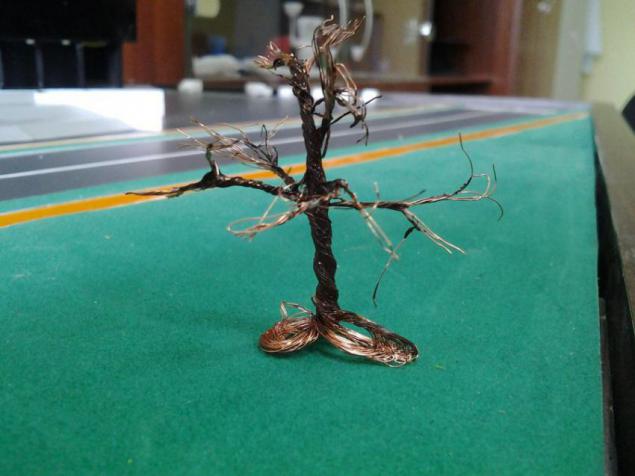
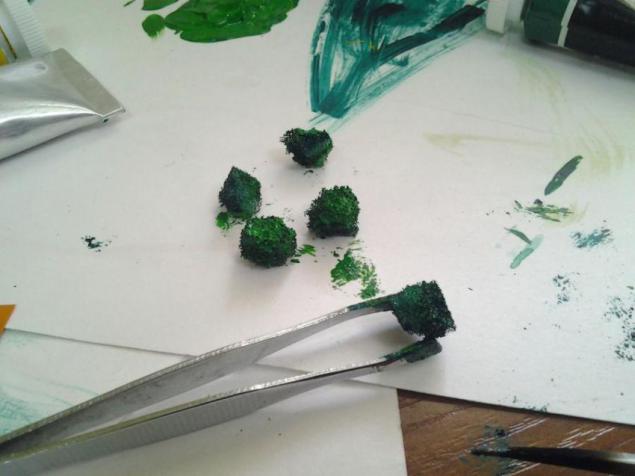
While dried up tree, painted pieces of foam (foliage)
That's how it turned wood.
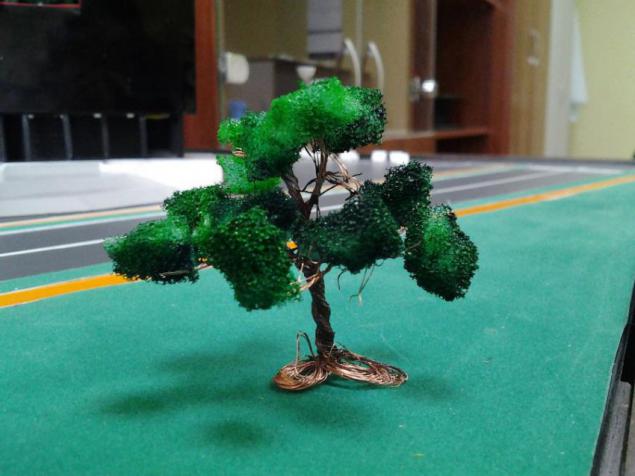
But I miscalculated the scale of the couple and the tree turned disproportionate. It was necessary to "plant" the other trees :) Just from pieces of foam :)
A typical Russian carelessness - peshehodka rests on the bushes :)

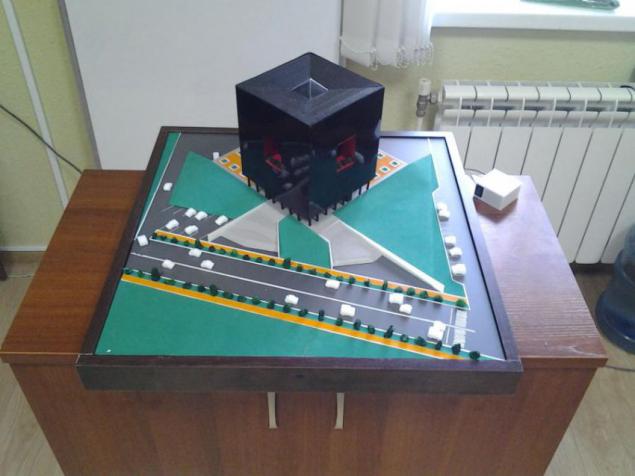
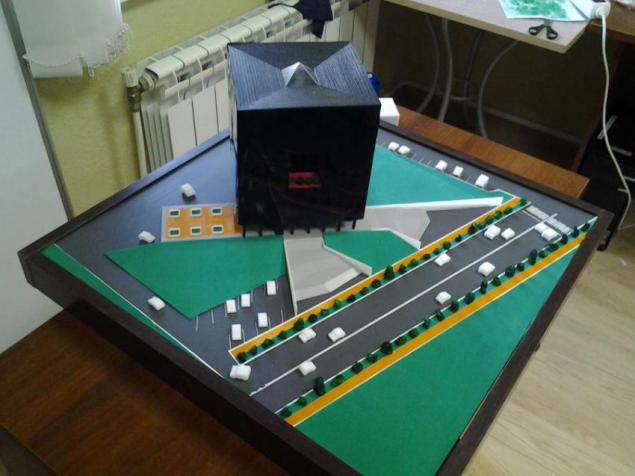
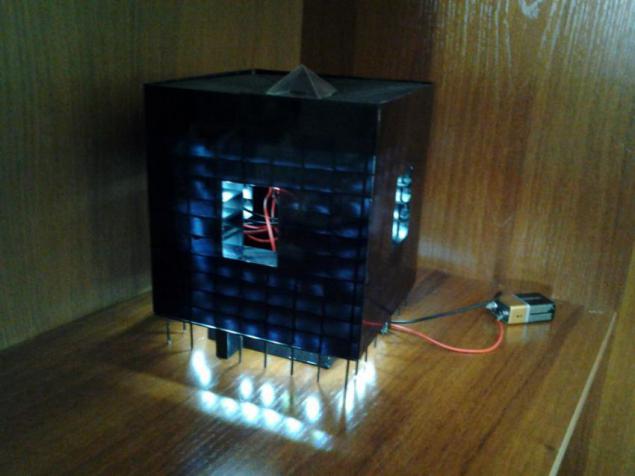
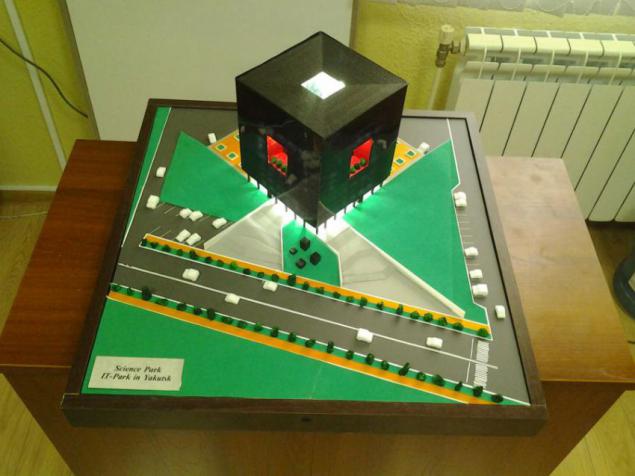
That's how the layout looks assembly

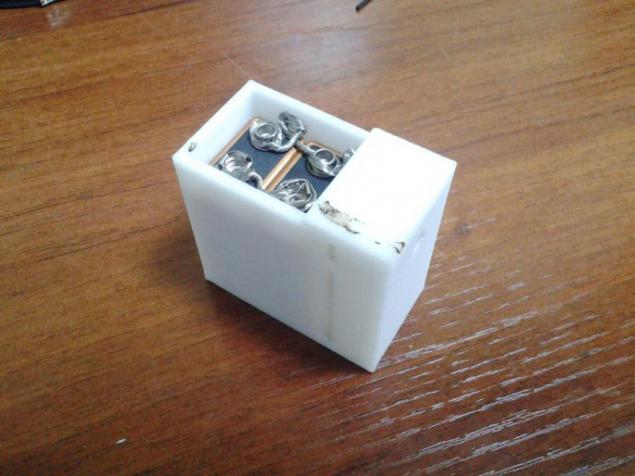
Since more time enough, I decided to change the layout of the power supply system. Crowns were no longer convenient option, because of the low capacity, low voltage (9V) and replace the inconvenience.
I decided to use ordinary penlight batteries. For 12V only need 8 pieces.
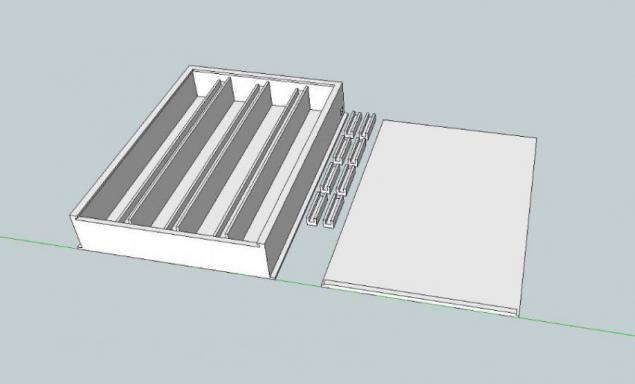
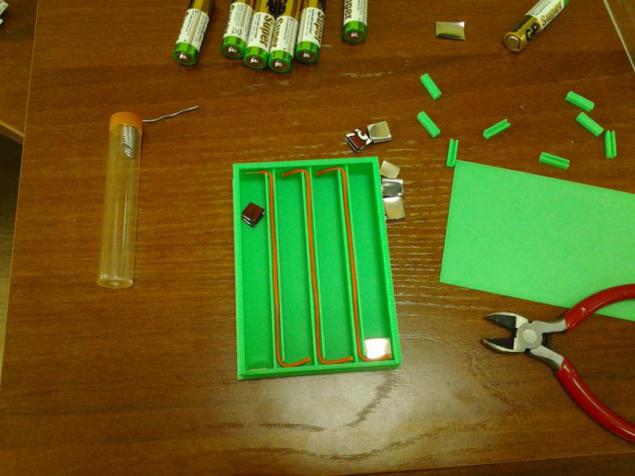
An hour designed housing for the batteries and put in print.
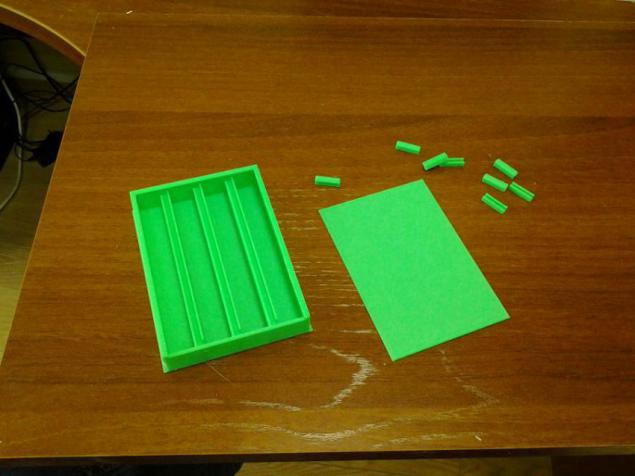
Here such it turned out, the lid is conveniently retracted.

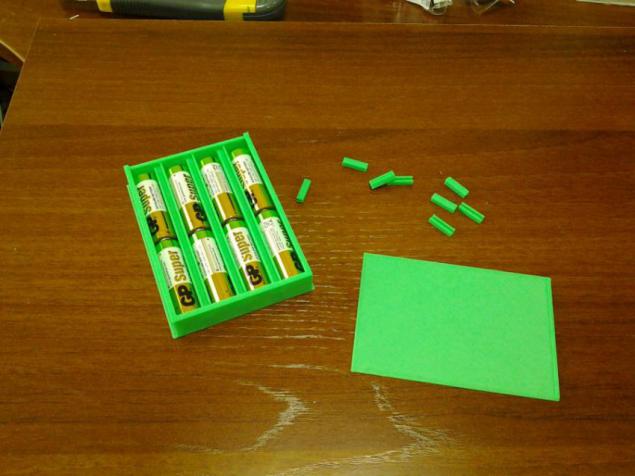
Examples battery
Spent a wire and cut out cans of coffee terminals
Again he took his now favorite activities - soldering :)
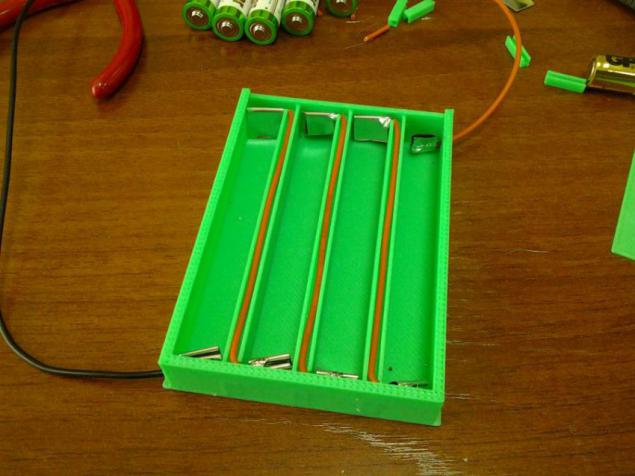
LEDs become brighter shine

Glued to the bottom of the container podmaketnika guides to make it easier to change the batteries. You just need to push it, pull out from under the layout and change the batteries without turning the entire structure.

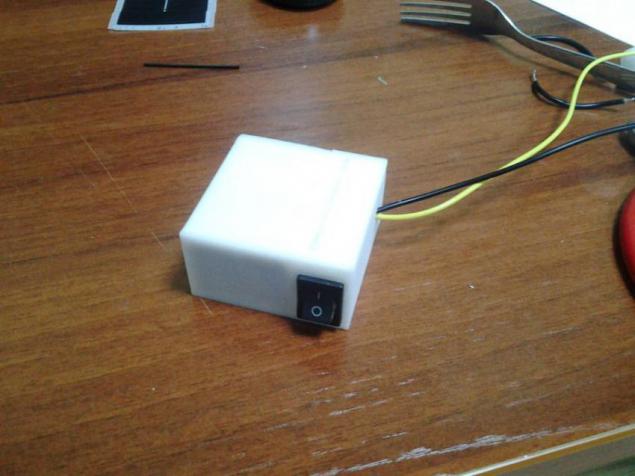
Solder switch

Now I had to somehow arrange the switch. Again painted body for him and unsealed.
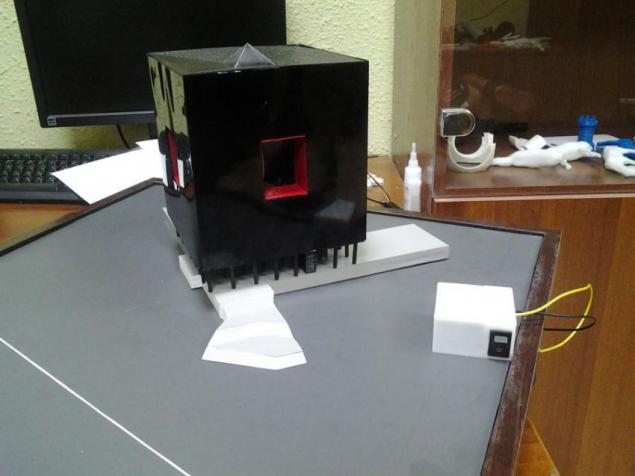
Everything. Now we need to make more transparent cap. I will go and look to cut Plexiglas :)
Source: dnevniki.ykt.ru

First of all, my companion and I started with the building to determine the scale. We modeled divided by floors and print.
That's how the layout looks in Google SketchUp

There is a print of one of the floors.

After printing began to check how the floors adjacent to each other. Here, faced with his first mistake - the middle floor, where large niche, it was necessary to print on another. That is, when the construction of the layout had to be careful of their siting and monitor offset. But we came out of the situation, securing their sticks.
Fit floors

Consolidated middle floors sticks

They looked twisted in his hands and began to collect the entire structure together. For alignment and bonding floors used conventional wooden skewers, painted black. Is threaded into the holes that have already been on the model.

The entire building assembly

Then we a couple of weeks due to some circumstances, hovered, and the building and stood "unfinished."
Once again we went to work, began to think, what to do facing the building. We wanted a 1 mm thick acrylic. Even bought a leaf, cut, glued box, but eventually abandoned this option because of its bulkiness, weight and complexity of the cutting holes (we would CNC).

We decided to use conventional film lamination. Sliced, glued and toned avtotonirovkoy. Pyramid collected from the same film, and cut red box of stationery folder :)

Then the question arose of illumination. We go to the store and bought a light electrical LED tape. There you have Crohn's batteries. And began to collect light.
I for the first time took a soldering iron in his hands :)
We had to dismantle the building.


Mark and began to solder

I note that the solder :) I liked the first time is a bit kosyachit, could not put a normal solder, but soon it went.

Donor wires served as the old power supply from the company


A bunch of floors illuminated.

Several floors is ready

Intertwined wires

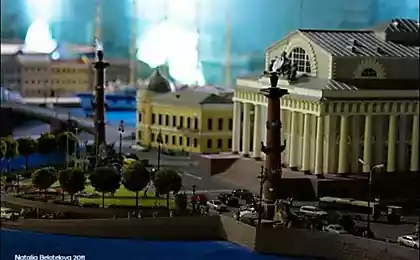
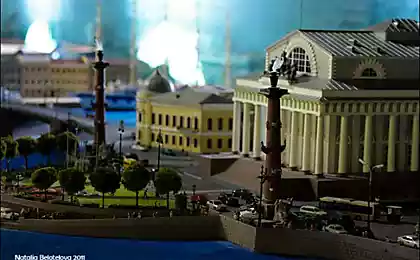
This whole building assembly backlit


Check

While highlighting payali watched the World Cup :)

Even two parallel match :)

The building is illuminated ready now to do podmaketnik (although in theory should be in a different order). Cut PVC square with sides 50cm. And the size of steel cut underground parking.

Trying underground parking

The hardest part was with the construction of housing podmaketnika. Carefully we could not, so we decided to book. In a furniture shop by size, we made it :)
Podmaketnik of chipboard.

Installation layout for podmaketnik

It's time to set the layout on podmaketnik. A bored desired holes, inserted a wire and began to think about the switch. Bestrenko promptly inserted switch model of the future in the editor. I decided to make one body with crowns. So it was convenient.

Inserting the batteries.

With switch.


After that, came the turn of the installation of the remaining elements of the layout. Draw and print machines.

Master of parking :)

Supplement layout

From self-adhesive film cut into strips, markup, but because of the velvet paper grass. And stick everything. We had to do more trees in an Internet found a very interesting and simple way, and decided to try.
Need a wire, PVC glue, acrylic paint and foam rubber crumb. Here are the most chips, I tried to find any in Yakutsk, is not found. I tried to chop foam itself, but it is a tedious activity without special equipment. I decided to use simple pieces of foam.

Lubricate PVC and painted after drying brown paint

While dried up tree, painted pieces of foam (foliage)


That's how it turned wood.

But I miscalculated the scale of the couple and the tree turned disproportionate. It was necessary to "plant" the other trees :) Just from pieces of foam :)

A typical Russian carelessness - peshehodka rests on the bushes :)


That's how the layout looks assembly

Since more time enough, I decided to change the layout of the power supply system. Crowns were no longer convenient option, because of the low capacity, low voltage (9V) and replace the inconvenience.
I decided to use ordinary penlight batteries. For 12V only need 8 pieces.
An hour designed housing for the batteries and put in print.


Here such it turned out, the lid is conveniently retracted.

Examples battery

Spent a wire and cut out cans of coffee terminals

Again he took his now favorite activities - soldering :)

LEDs become brighter shine

Glued to the bottom of the container podmaketnika guides to make it easier to change the batteries. You just need to push it, pull out from under the layout and change the batteries without turning the entire structure.

Solder switch

Now I had to somehow arrange the switch. Again painted body for him and unsealed.

Everything. Now we need to make more transparent cap. I will go and look to cut Plexiglas :)

Source: dnevniki.ykt.ru