631
That all starts immediately!
You ever visited the idea of the "Here to favorite microwave oven (vacuum / puncher / washing machine - underline) are included with the computer!" It was the case? Then you read on)))
Interesting article is available on the Habrahabr. But only for those who have a radius of curvature is sharpened by hand! Otherwise, there may be all sorts of negative consequences. In general - all at your own risk
12 ph + many letters via habrahabr
What I want: Turn on the computer and everything connected to it, too, is turned on, I turned off the computer and everything is switched off. To do this, we are incorporated into the unit outlet, which will be switched on and off with your computer.
Why is it necessary?
A small digression. I stand a pretty powerful speakers, they played great, but when you disconnect a computer - they make very unpleasant low-frequency sound. If you want to use a computer as an alarm clock, the column should be left enabled. All facilities in the bedroom, and sleeping with the buzz is impossible ... Therefore it is necessary that the speaker be switched on and off with your computer. This is mainly because that struggle
In addition, we get the convenience of a power failure the entire periphery, when the computer shuts down.
What you need:
Tool:
Drill or screwdriver,
Drill (10mm-15mm),
The Bulgarian,
Screwdriver,
Cutters,
Ohm meter (tester),
Soldering,
The probe voltage presence
Materials:
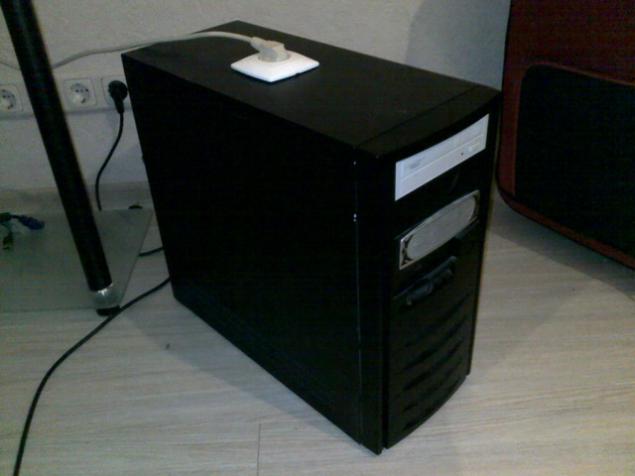
Computer,
The pilot,
Power splitter HDD,
Flush-mounted socket (at the wall),
Din-rail,
Several screws, metal,
Cable 3-wire 2, 5mm2, about a meter,
Plastic ties,
solder and rosin,
Relay coil at 12 volts.
The idea of an electric circuit:
When you turn on the computer connector HDD power there 12V between the black and yellow wire. When you turn off - this voltage disappears. We use it to close the relay contacts that will be connected to the network socket 220V. 220V power input to take the computer power supply.
Driving get here is this: Let us proceed.
Turn off the system unit from the network. Do not proceed until you are sure that the chains, cables and terminals are de-energized - it is possible to use the "probe" or a voltmeter.
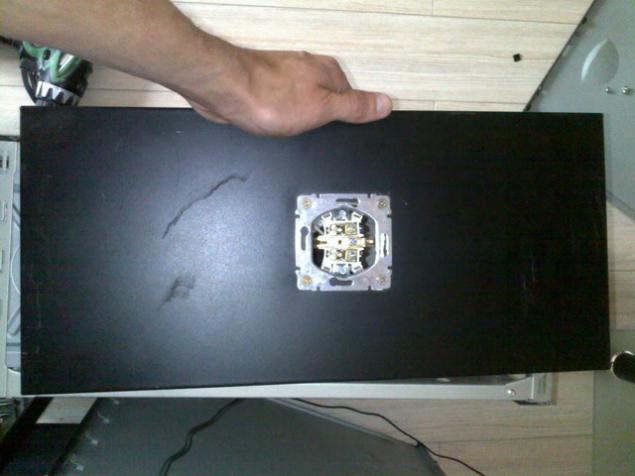
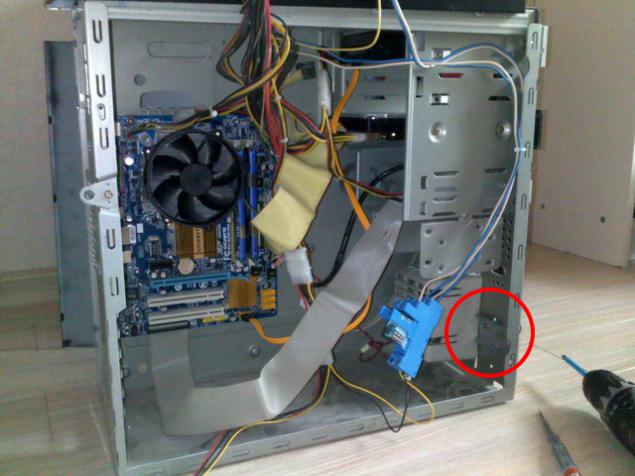
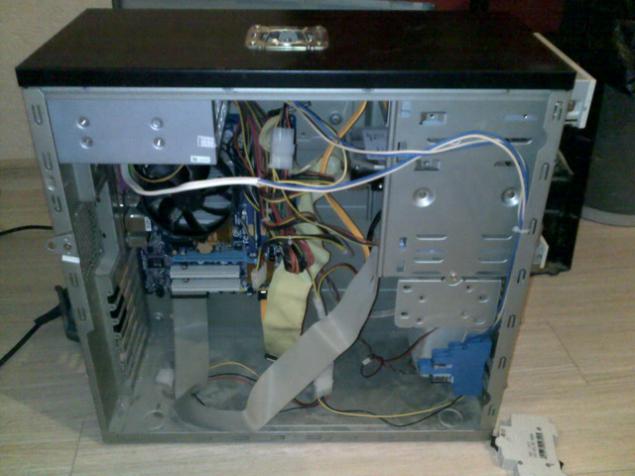
First, make holes for the sockets in the system unit. You need to check whether there is enough space for the recessed portion of the socket housing. Not touches whether it is CD-ROM or the power supply. If space is insufficient, you can take outdoor outlet installation (it is not deepened into the body, and simply screwed to it), or look for a place for the socket on the side walls. We take a pencil and outline the site of the future hole, and then take the grinder and saw a cutout. Insert the plug into the hole and fasten screws to the metal housing.
04
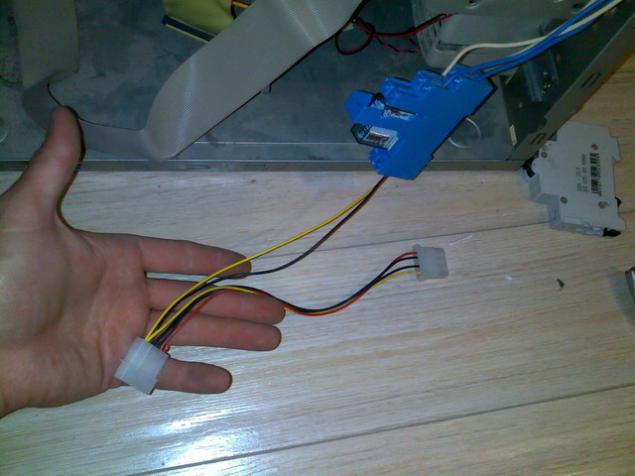
The next step - placing switch on the computer. I found a place on the front wall of the system unit. DIN-rail is screwed with screws to the wall of the housing. Measure the distance from the metal decorative wall to cover the system unit that does not have screws holed the "face" of your computer. Try the relay, but attach it to the rail early in my opinion - it is more convenient to fasten the wire "suspended" and then hang up the relay DIN-rail.
Then take the power supply 220V. For this purpose shall open the computer power supply. Warning: this results in a loss of warranty, as will have to break the paper seal.
In general, everything that is described here, you must do with great care and precision. After all, electricity.
All manipulations were carried out, unplug the computer from the network. So, opening the power supply, make sure access to the input terminals (the connector which is included in the power cord of the system unit). Each power supply has a switch - I plugged the power outlet after the switch. In this case, if we turn off the power supply switch that, inside the system will be no voltage on any conductor. If you connect directly to the connector, even when you turn off the power supply cable to the relay is energized, it is dangerous.
We extend our circuit assembly. With a convenient location, I drilled a hole through it and handed it to the wire: 3 wires, section 2, 5mm2. Two wires soldered to the inputs 220, one screwed to the screw on the housing power supply. Be sure to use a third grounding conductor - it will protect you in the breakdown phase, on the body of any connected devices.
Just pay attention to the piece of insulation around the power cable at the point of entry into the power supply. Even minimal friction from the vibration of the fan will be enough, that would be a couple of years insulation cable broke and turned on the computer 220. Ideally, here it is necessary to put the seal (what it is, can be seen at the site of the entrance of the power supply cables to the motherboard, HDD, all other glands of the computer), it costs a penny, sold in the same place where the cable I cost that was under hand.
Check the connections: take an ohmmeter, check by measuring the resistance between the pins of the lead-outlet power supply (of 3) - between them should be breaks if you find that any two pins are connected (resistance - zero), then you have a short circuit and when you connect the power cable, there will be a "bang" and turns off the light in the apartment, you will have to go change fuses or cocked machines.
Now we check that each wire connected to its power adapter and sleeve bridged (resistance should be zero). Middle pin - it is grounding his conduct directly to the outlet. The other two - on the relay.
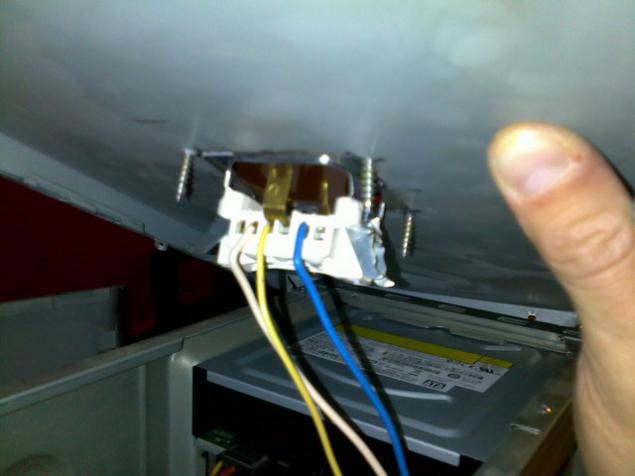
It remains to connect the relay socket and power wiring: normally open contacts are connected to the power socket contacts. Total is now coming to the outlet 3 wires: Ground, phase, neutral.
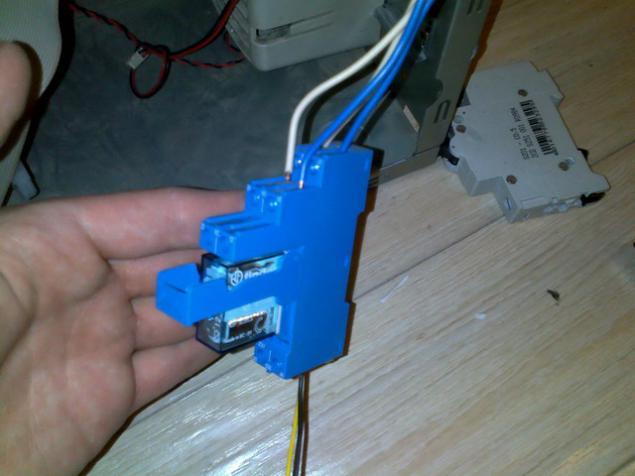
The latest bar - connection relay control. Take the HDD power splitter and takes a bite one black and red wires. It remains a couple: black and yellow.
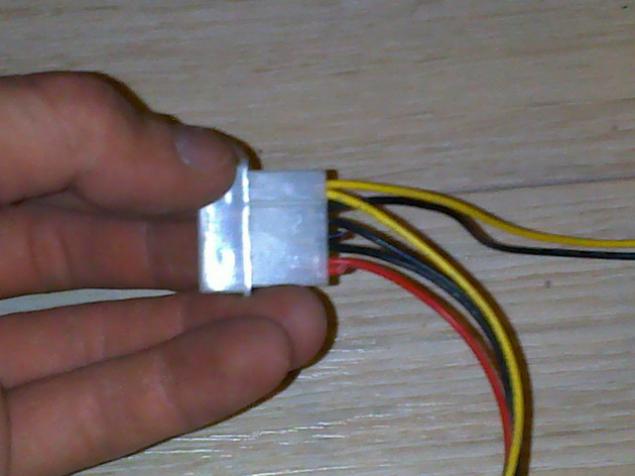
This pair is connected to the relay coil.
Pick up wire ties to the body.
akryvaem sistemnik.
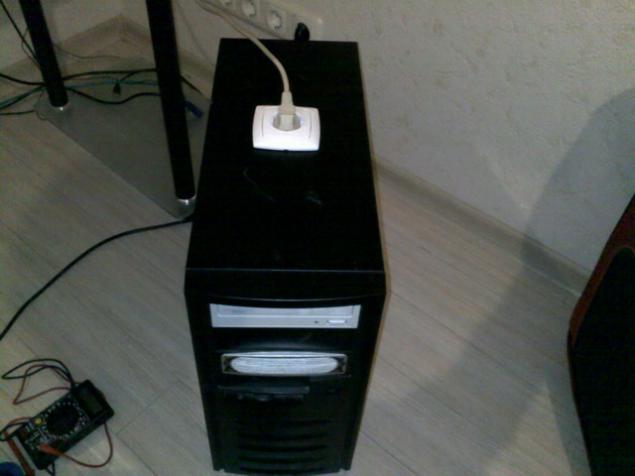
Check the probe installed in the absence of voltage outlet. We try to turn it on. He joined now take the probe and see what there was tension. The pilot is stuck in the socket and enjoy. Goal achieved.
Here's a modding. If someone is to repeat the experiment, remember - electronics, the science of bad contacts and careless installation. And be careful with electricity
Source:
Interesting article is available on the Habrahabr. But only for those who have a radius of curvature is sharpened by hand! Otherwise, there may be all sorts of negative consequences. In general - all at your own risk
12 ph + many letters via habrahabr
What I want: Turn on the computer and everything connected to it, too, is turned on, I turned off the computer and everything is switched off. To do this, we are incorporated into the unit outlet, which will be switched on and off with your computer.
Why is it necessary?
A small digression. I stand a pretty powerful speakers, they played great, but when you disconnect a computer - they make very unpleasant low-frequency sound. If you want to use a computer as an alarm clock, the column should be left enabled. All facilities in the bedroom, and sleeping with the buzz is impossible ... Therefore it is necessary that the speaker be switched on and off with your computer. This is mainly because that struggle

In addition, we get the convenience of a power failure the entire periphery, when the computer shuts down.
What you need:
Tool:
Drill or screwdriver,
Drill (10mm-15mm),
The Bulgarian,
Screwdriver,
Cutters,
Ohm meter (tester),
Soldering,
The probe voltage presence
Materials:
Computer,
The pilot,
Power splitter HDD,
Flush-mounted socket (at the wall),
Din-rail,
Several screws, metal,
Cable 3-wire 2, 5mm2, about a meter,
Plastic ties,
solder and rosin,
Relay coil at 12 volts.
The idea of an electric circuit:
When you turn on the computer connector HDD power there 12V between the black and yellow wire. When you turn off - this voltage disappears. We use it to close the relay contacts that will be connected to the network socket 220V. 220V power input to take the computer power supply.
Driving get here is this: Let us proceed.
Turn off the system unit from the network. Do not proceed until you are sure that the chains, cables and terminals are de-energized - it is possible to use the "probe" or a voltmeter.
First, make holes for the sockets in the system unit. You need to check whether there is enough space for the recessed portion of the socket housing. Not touches whether it is CD-ROM or the power supply. If space is insufficient, you can take outdoor outlet installation (it is not deepened into the body, and simply screwed to it), or look for a place for the socket on the side walls. We take a pencil and outline the site of the future hole, and then take the grinder and saw a cutout. Insert the plug into the hole and fasten screws to the metal housing.

04

The next step - placing switch on the computer. I found a place on the front wall of the system unit. DIN-rail is screwed with screws to the wall of the housing. Measure the distance from the metal decorative wall to cover the system unit that does not have screws holed the "face" of your computer. Try the relay, but attach it to the rail early in my opinion - it is more convenient to fasten the wire "suspended" and then hang up the relay DIN-rail.

Then take the power supply 220V. For this purpose shall open the computer power supply. Warning: this results in a loss of warranty, as will have to break the paper seal.
In general, everything that is described here, you must do with great care and precision. After all, electricity.
All manipulations were carried out, unplug the computer from the network. So, opening the power supply, make sure access to the input terminals (the connector which is included in the power cord of the system unit). Each power supply has a switch - I plugged the power outlet after the switch. In this case, if we turn off the power supply switch that, inside the system will be no voltage on any conductor. If you connect directly to the connector, even when you turn off the power supply cable to the relay is energized, it is dangerous.
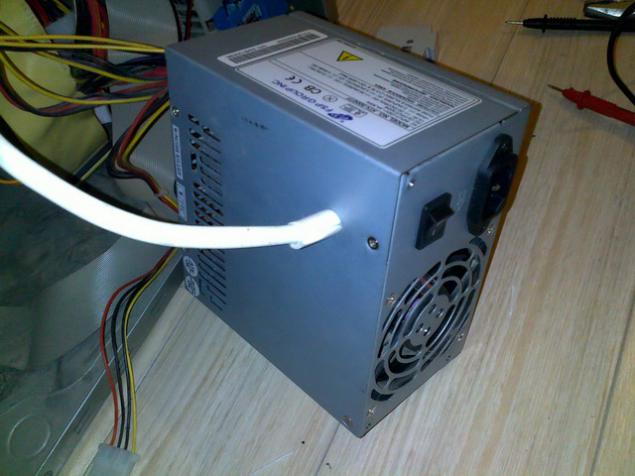
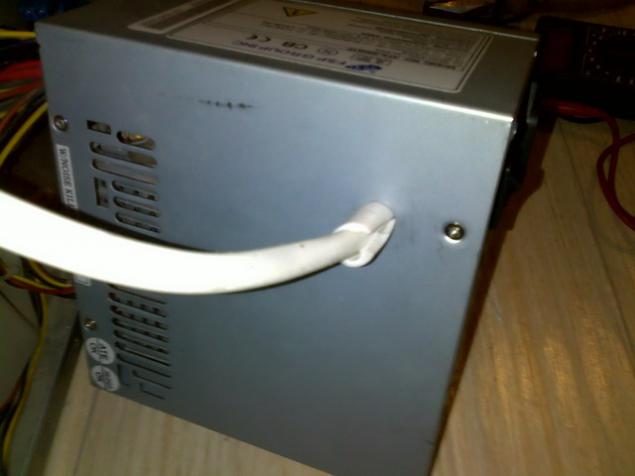
We extend our circuit assembly. With a convenient location, I drilled a hole through it and handed it to the wire: 3 wires, section 2, 5mm2. Two wires soldered to the inputs 220, one screwed to the screw on the housing power supply. Be sure to use a third grounding conductor - it will protect you in the breakdown phase, on the body of any connected devices.

Just pay attention to the piece of insulation around the power cable at the point of entry into the power supply. Even minimal friction from the vibration of the fan will be enough, that would be a couple of years insulation cable broke and turned on the computer 220. Ideally, here it is necessary to put the seal (what it is, can be seen at the site of the entrance of the power supply cables to the motherboard, HDD, all other glands of the computer), it costs a penny, sold in the same place where the cable I cost that was under hand.

Check the connections: take an ohmmeter, check by measuring the resistance between the pins of the lead-outlet power supply (of 3) - between them should be breaks if you find that any two pins are connected (resistance - zero), then you have a short circuit and when you connect the power cable, there will be a "bang" and turns off the light in the apartment, you will have to go change fuses or cocked machines.
Now we check that each wire connected to its power adapter and sleeve bridged (resistance should be zero). Middle pin - it is grounding his conduct directly to the outlet. The other two - on the relay.
It remains to connect the relay socket and power wiring: normally open contacts are connected to the power socket contacts. Total is now coming to the outlet 3 wires: Ground, phase, neutral.

The latest bar - connection relay control. Take the HDD power splitter and takes a bite one black and red wires. It remains a couple: black and yellow.

This pair is connected to the relay coil.

Pick up wire ties to the body.

akryvaem sistemnik.
Check the probe installed in the absence of voltage outlet. We try to turn it on. He joined now take the probe and see what there was tension. The pilot is stuck in the socket and enjoy. Goal achieved.
Here's a modding. If someone is to repeat the experiment, remember - electronics, the science of bad contacts and careless installation. And be careful with electricity

Source: