1046
Mummy feechki
Many people like to strongly tinkering gifts close with their hands. Only now anyone can enjoy such a gift, it remains a mystery ... Nevertheless, detailed instructions for creating such a nice gift in the continuation of the post. Scary, but someone may come to their liking.
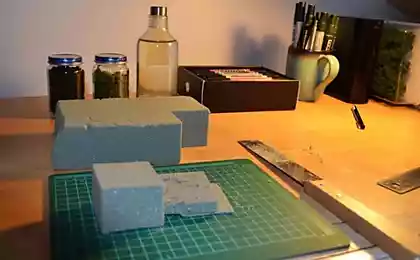
Step one. All necessary
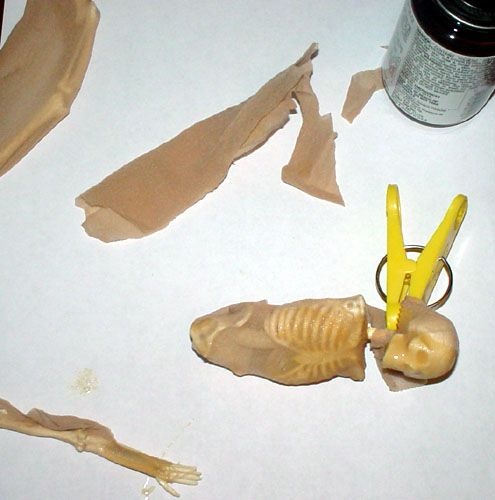
Toy skeleton; The old nylon stockings; Clay pin; Hot glue; PVA glue; Polymer clay; Toilet paper or a thin x / cotton fabric; Spray-paint; Acrylic paint; Beautiful dry leaves; Frame. Step Two. Loosening skeletons
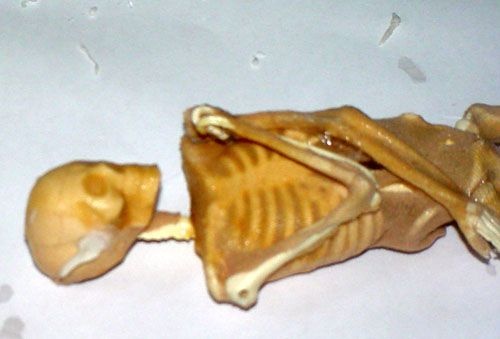
Remove the bolts and brackets, which are fixed bone skeletons.
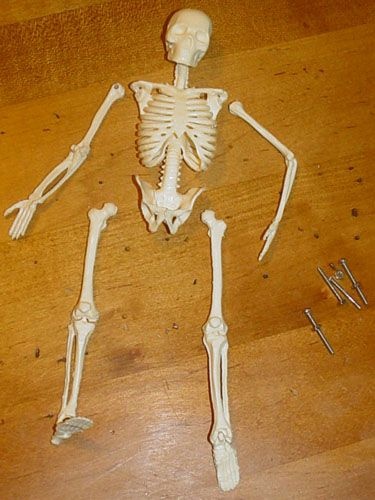
Do not worry, if he has something to break away, we still then we'll wrap all items and affixed pieces of tights that has fallen off.
Step Three. We stretch "the skin»
Skeleton smeared with a thick layer of contact glue and wrap the pieces of the former pantyhose, pulling back the surplus.
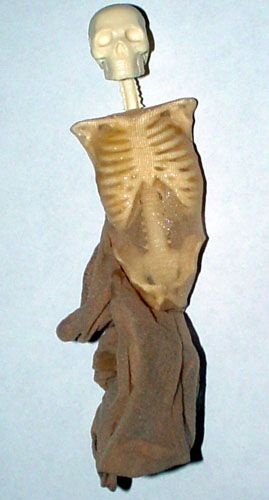
In my case, mummy feechki from the back is not visible, so you can back joints especially not execute. But if you want to set the "exhibit" in a glass box or flask, then you have to come up with a neat way to disguise excess of our "skin».
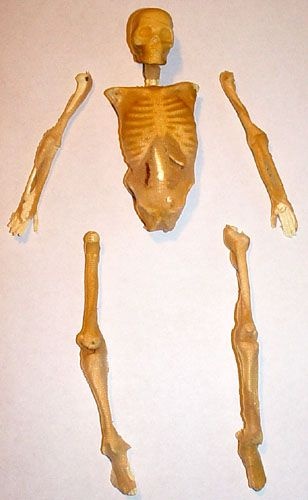
Step Four. The head, neck, legs, arms
In the same way the rest of the skin-tight body "feechki».
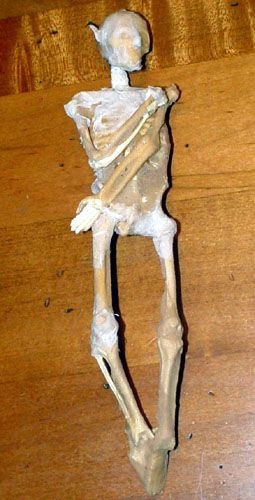
Step Five. Remove the excess
Allow the glue to dry completely, and cut off all unnecessary.
Step Six. Putting items together
Now we need a gun to hot glue to return to the place of arms and legs.
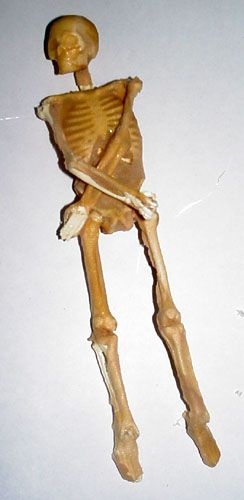
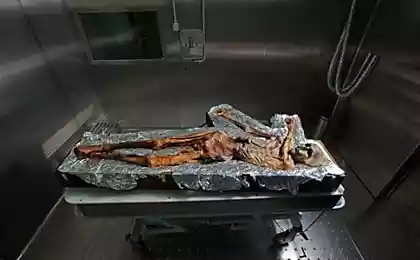
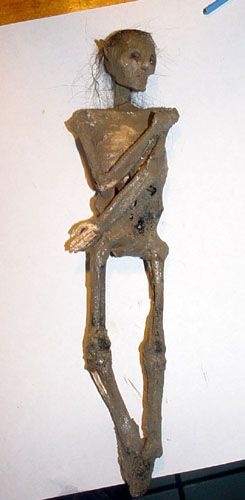
At this stage the figure given desired position - one in which our feechka fell and died. And mummified. However, most likely, it is the male feechki ...
Step Seven. Ears and nose
Actually, we turn our stockings covered skeletons in a magical creature - do pointy ears. Take small pieces of polymer clay oval, zaschipyvaem them at one end and bake or waiting for drying, as described in your manual.
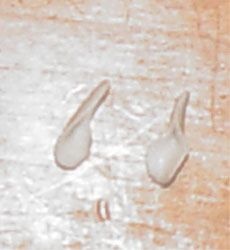
Then we glue them to the head of hot glue.
And we do the same clay nose. And somehow silly to be - preserved ears and nose - no.
Step Eight. Adding volume
Now we need PVA glue and toilet paper. Diluted with water and glue pasted in some places, pieces of toilet paper. For more natural.
We are waiting to dry.
Step Nine. Paint spray
Some pieces of paper tape to seal bones, and the rest - beautiful. For example, in such a sallow.
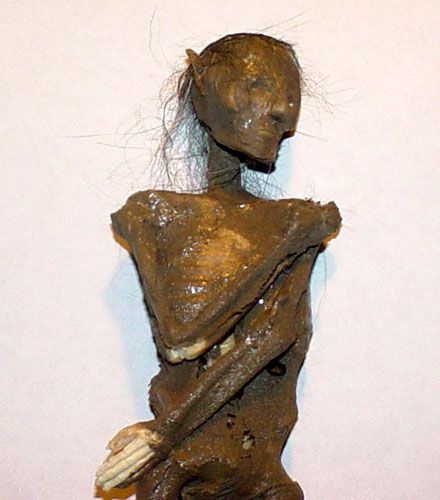
Step Ten. Hair!
It is unlikely that during the life of feechka was bald. So what remains of hair on the head is also a good idea to portray. In this case, we used to comb out a dog's coat, but it is quite possible to do any artificial Volosenkov. Just smear the head with contact adhesive and cleave the hair the way you want.
Step Eleven. The final painting
Now take acrylic paint and attach naturalistic mummy - dorisovyvat eye sockets, stains, dirt and other decorative elements.
And while the figure dries we will take the next step.
Step Twelve. Wings
In fact, it is not necessary to do it from the leaves of the wings. But in our case feechka life he worked at Scout-saboteur, so had to disguise themselves well in the woods. So we need a good big leaves. We spread them, as it should, make sure that they look good in front, and glue them to the back of our mummy hot glue

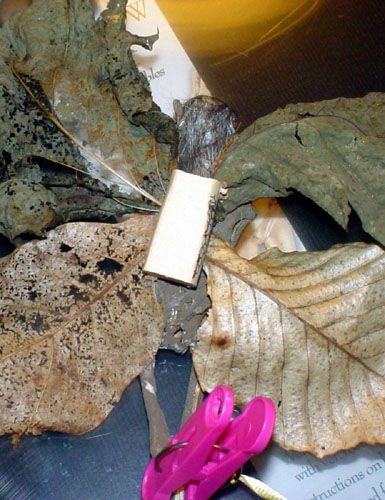
Now take a cut piece of wine cork and glue to the back. This will be the point of attachment to the frame of the mummy
Step Thirteen. Add details
It will be interesting if the withered body feechki be found along with a couple of items belonging to her, right? In this case, it is a miniature bow and quiver.
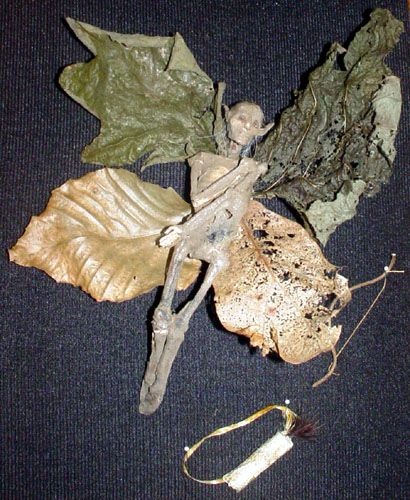
Bow made of thin willow branches - just give it the desired shape and let it dry, and then pull the string-string. A quiver - from a piece of leather lizard wrapped around the pen cap. And belt-lace of fine rawhide. At first I wanted to do more feechke and shield, but then it seemed illogical - rare soldiers go along with bow and shield.
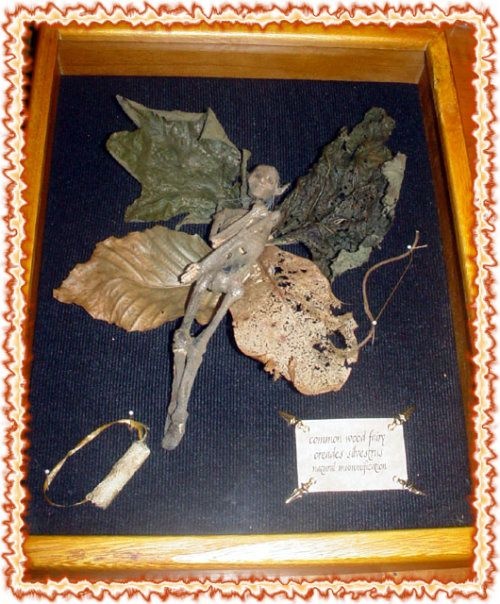
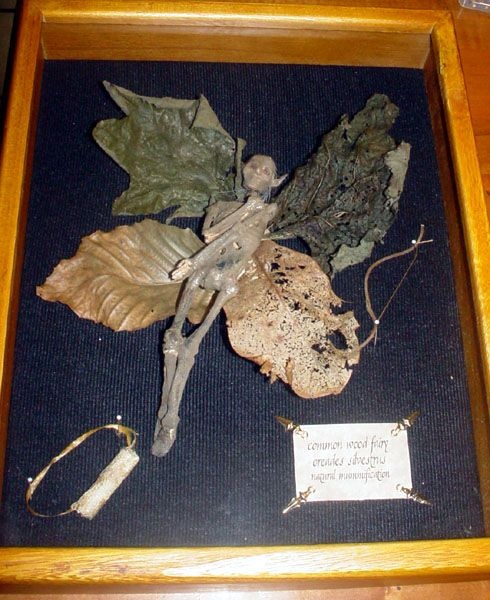
Step Fourteen. Frame and plate signed
Well, that's our mummy and ready. To make the exhibit greater authority, add a sign-tag, and can be broadcast on the wall!
Source: master-klass.livejournal.com

Step one. All necessary
Toy skeleton; The old nylon stockings; Clay pin; Hot glue; PVA glue; Polymer clay; Toilet paper or a thin x / cotton fabric; Spray-paint; Acrylic paint; Beautiful dry leaves; Frame. Step Two. Loosening skeletons
Remove the bolts and brackets, which are fixed bone skeletons.

Do not worry, if he has something to break away, we still then we'll wrap all items and affixed pieces of tights that has fallen off.
Step Three. We stretch "the skin»
Skeleton smeared with a thick layer of contact glue and wrap the pieces of the former pantyhose, pulling back the surplus.

In my case, mummy feechki from the back is not visible, so you can back joints especially not execute. But if you want to set the "exhibit" in a glass box or flask, then you have to come up with a neat way to disguise excess of our "skin».
Step Four. The head, neck, legs, arms
In the same way the rest of the skin-tight body "feechki».

Step Five. Remove the excess
Allow the glue to dry completely, and cut off all unnecessary.

Step Six. Putting items together
Now we need a gun to hot glue to return to the place of arms and legs.

At this stage the figure given desired position - one in which our feechka fell and died. And mummified. However, most likely, it is the male feechki ...
Step Seven. Ears and nose
Actually, we turn our stockings covered skeletons in a magical creature - do pointy ears. Take small pieces of polymer clay oval, zaschipyvaem them at one end and bake or waiting for drying, as described in your manual.

Then we glue them to the head of hot glue.

And we do the same clay nose. And somehow silly to be - preserved ears and nose - no.
Step Eight. Adding volume
Now we need PVA glue and toilet paper. Diluted with water and glue pasted in some places, pieces of toilet paper. For more natural.

We are waiting to dry.
Step Nine. Paint spray
Some pieces of paper tape to seal bones, and the rest - beautiful. For example, in such a sallow.

Step Ten. Hair!
It is unlikely that during the life of feechka was bald. So what remains of hair on the head is also a good idea to portray. In this case, we used to comb out a dog's coat, but it is quite possible to do any artificial Volosenkov. Just smear the head with contact adhesive and cleave the hair the way you want.
Step Eleven. The final painting
Now take acrylic paint and attach naturalistic mummy - dorisovyvat eye sockets, stains, dirt and other decorative elements.

And while the figure dries we will take the next step.
Step Twelve. Wings
In fact, it is not necessary to do it from the leaves of the wings. But in our case feechka life he worked at Scout-saboteur, so had to disguise themselves well in the woods. So we need a good big leaves. We spread them, as it should, make sure that they look good in front, and glue them to the back of our mummy hot glue

Now take a cut piece of wine cork and glue to the back. This will be the point of attachment to the frame of the mummy

Step Thirteen. Add details
It will be interesting if the withered body feechki be found along with a couple of items belonging to her, right? In this case, it is a miniature bow and quiver.

Bow made of thin willow branches - just give it the desired shape and let it dry, and then pull the string-string. A quiver - from a piece of leather lizard wrapped around the pen cap. And belt-lace of fine rawhide. At first I wanted to do more feechke and shield, but then it seemed illogical - rare soldiers go along with bow and shield.
Step Fourteen. Frame and plate signed
Well, that's our mummy and ready. To make the exhibit greater authority, add a sign-tag, and can be broadcast on the wall!

Source: master-klass.livejournal.com