957
Diy
In the early 2000s, the author, being a student has decided to make a wall in the living room. The main requirement was to: ease of construction, low cost, and of course meet all needs. Let's see what he has got.
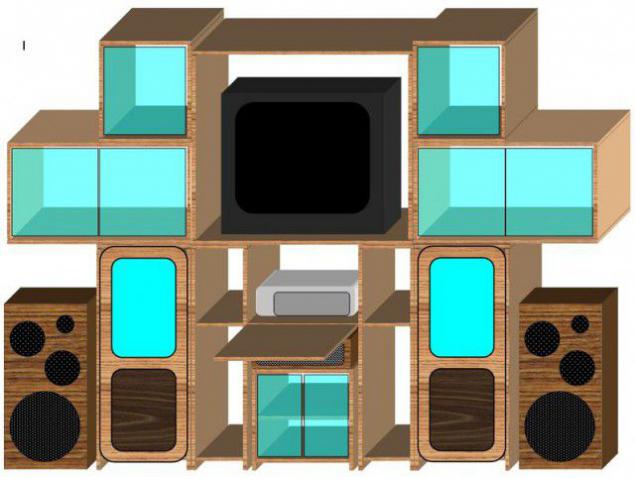
So. What we have. Any MS Word. It draw what you want. Looking ahead - we will build of furniture boards. Then they cost is not so expensive.
Shields standard. 80-100-1200-1500 length, width 30-40-50.
In general, it turns out a designer for adults. Fits all penny corners with screws in bulk.
All that is needed: Tape measure, ruler, pencil, screwdriver, jigsaw, drill.
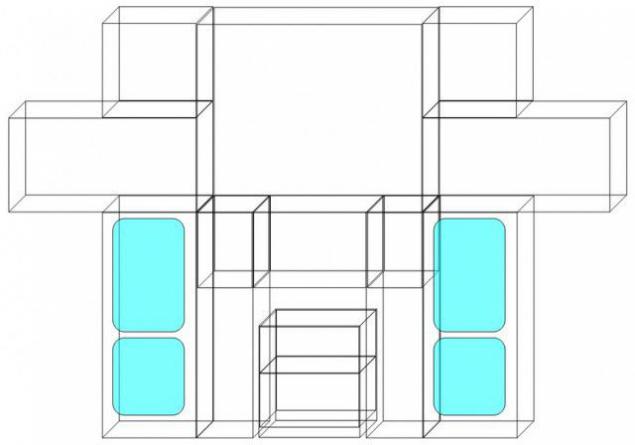
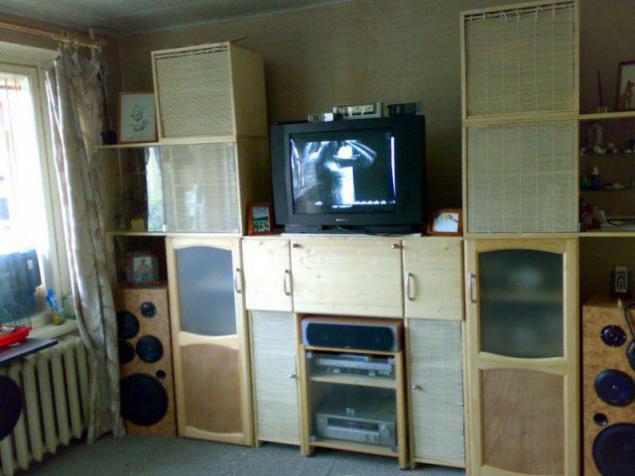
And so the drawing is ready. Each element of the wall and then is drawn separately.
All terribly easy! Mode billboards on the desired segment. Cut away the extra depth. Putting the frame. Insert the inner shelf.
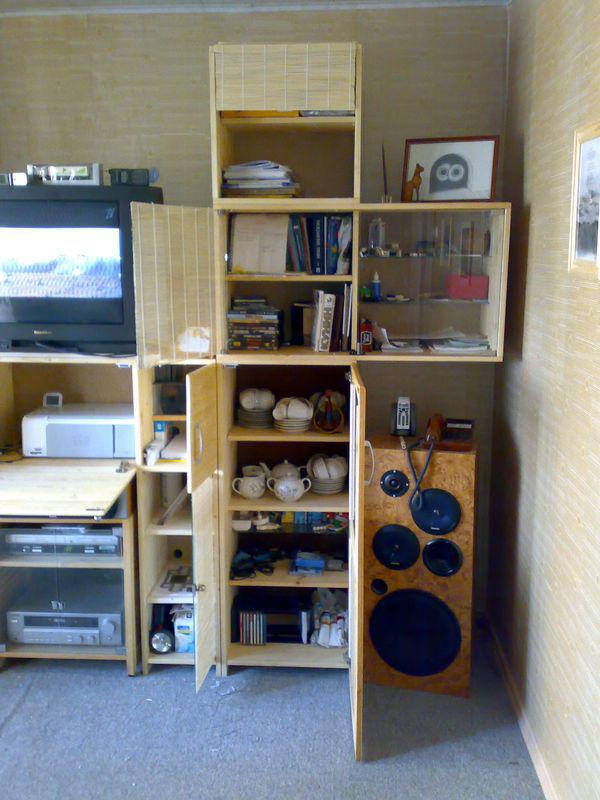
The doors! Here I had to take ready. They stood a little more expensive than the shield. But to make the door of the board, but still normal, you need to oooooooochen much work. And then the door starts to the humidity. Tested on a similar headset in the hallway.
Yes Yes! The hall is also a small corner of the boards.
So. Average crates bulging on the sides of the width of the bottom drawer. This to poke a hole in this column. They are way too self-made.
The modules are fastened together with screws.
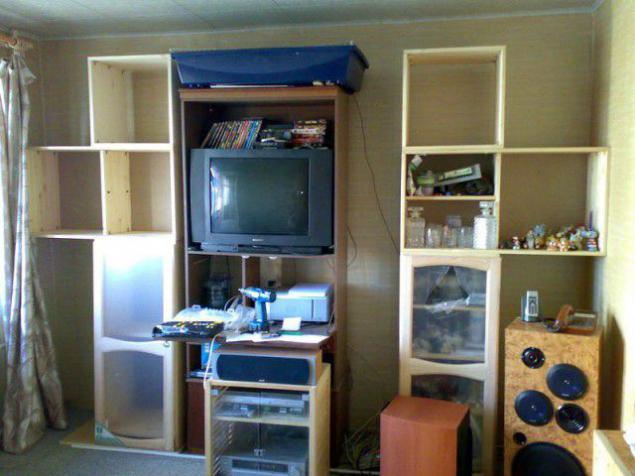
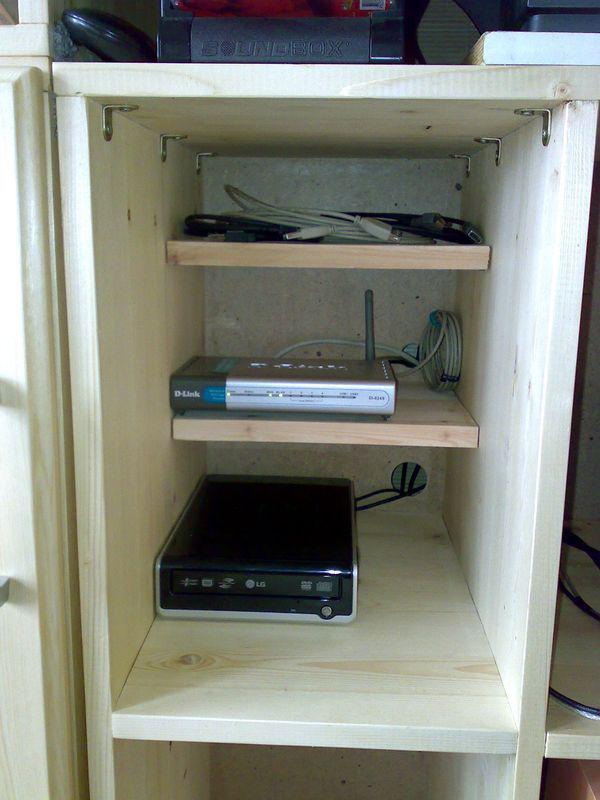
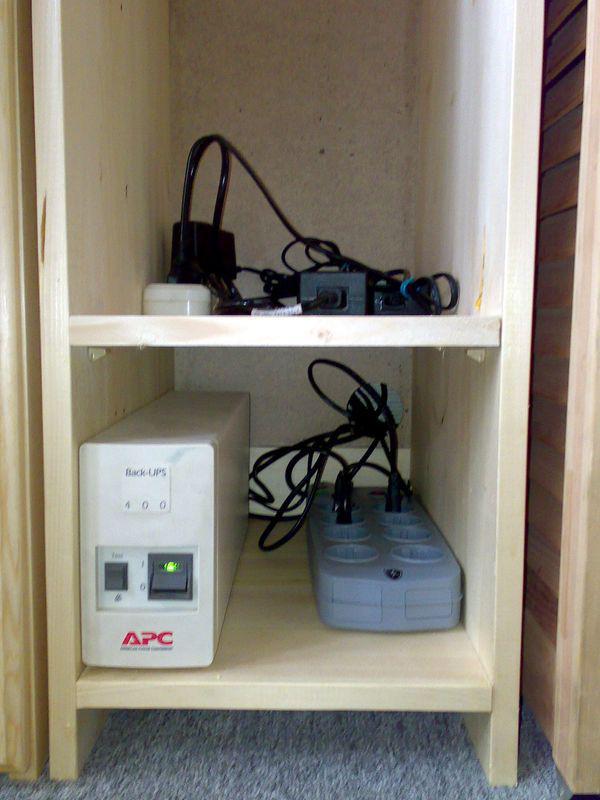
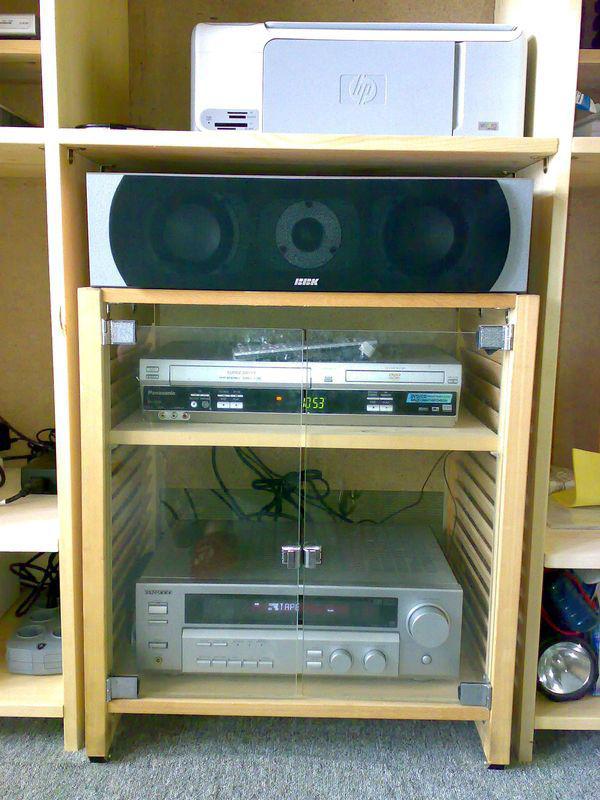
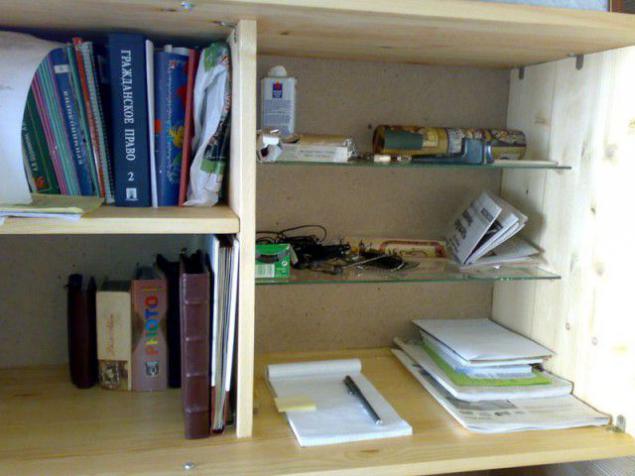
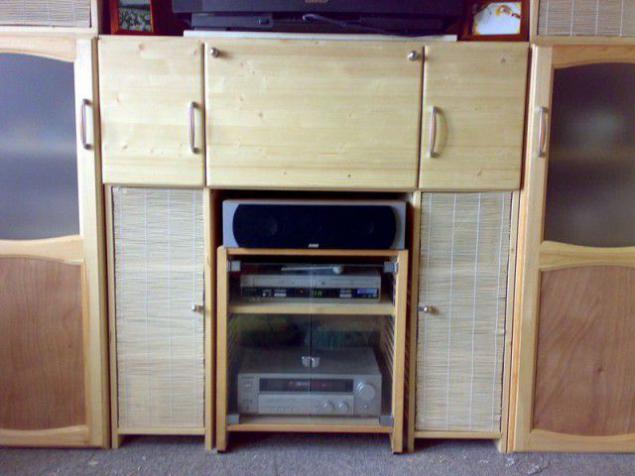
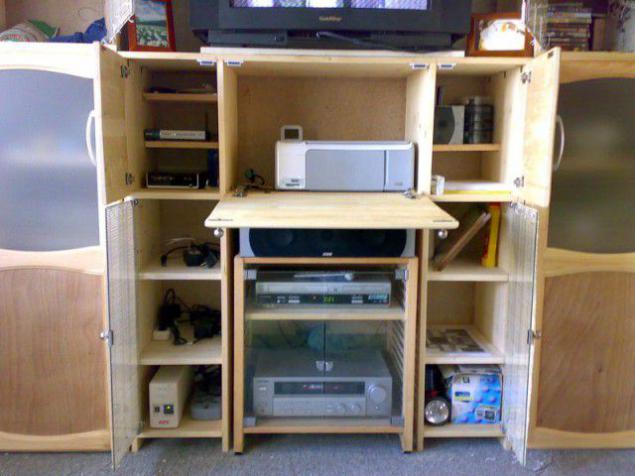
The central section. This is actually the stuff of communication which I started all muddy. This is the heart of the headset.
There must be located: laptop, router, printer, bespereboynik, stabilizers, and other electronics.
In the middle of the bottom of the central unit recess. Inside the cabinet is placed with dvdkom and receiver. Bollard also self-made, but not out of this crown.
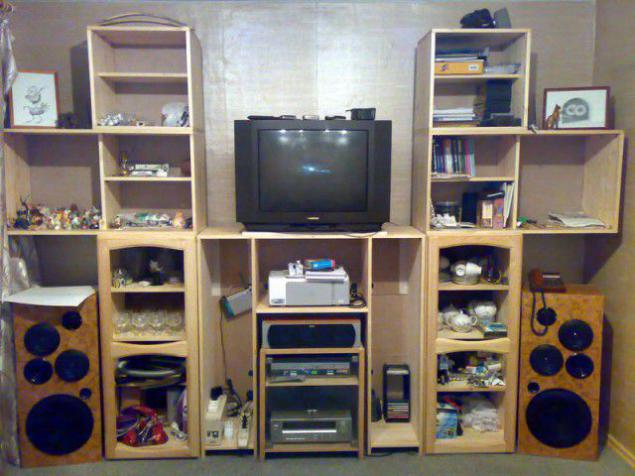
The central unit acquires sections.
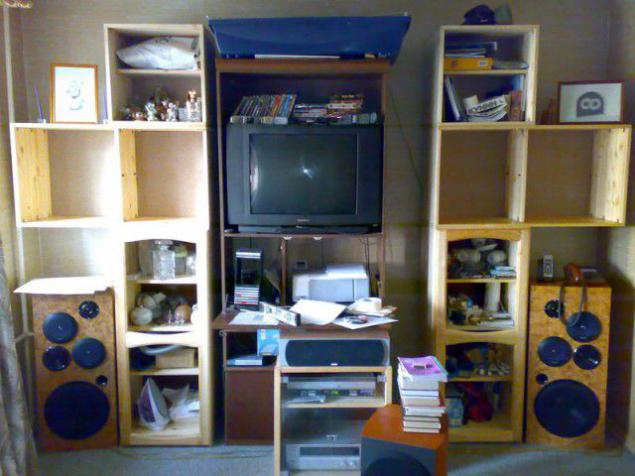
PS: The rear module closes the hole hardboard. Where needed verezayutsya hole wiring.
It's very simple, very elementary and very fast.
Lower the door closed up the hole with plywood veneer finish under kakoeto blatnogo tree. Neeeee. I do not buy! On the garbage found excellent remnants of someone's closet.
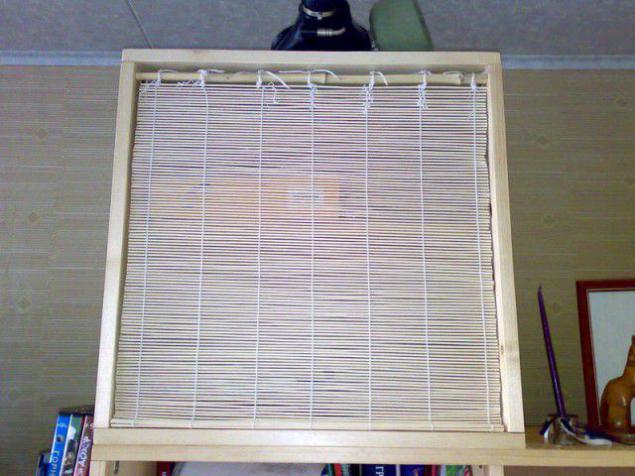
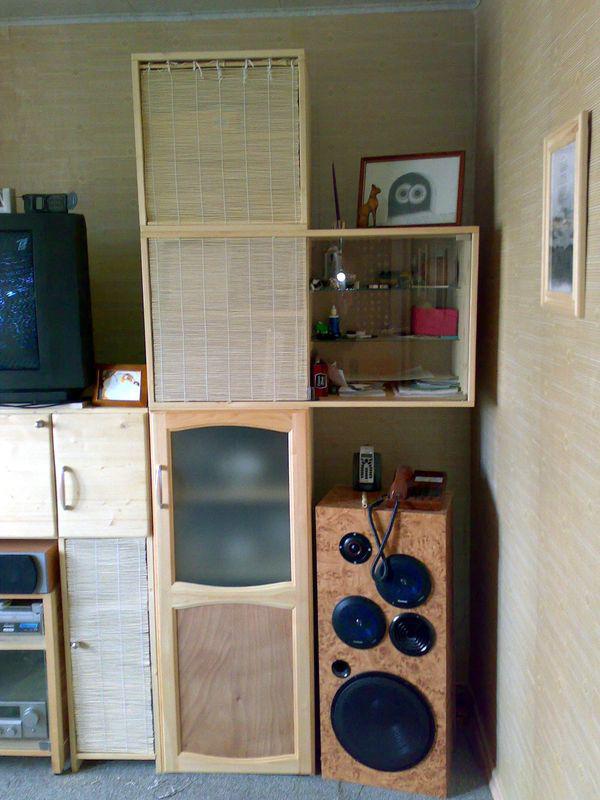
The doors of the upper block? But where there! TtN student! Break! Instant decision - bamboo blinds on bamboo sticks from the flower shop.
Here.
Other side.
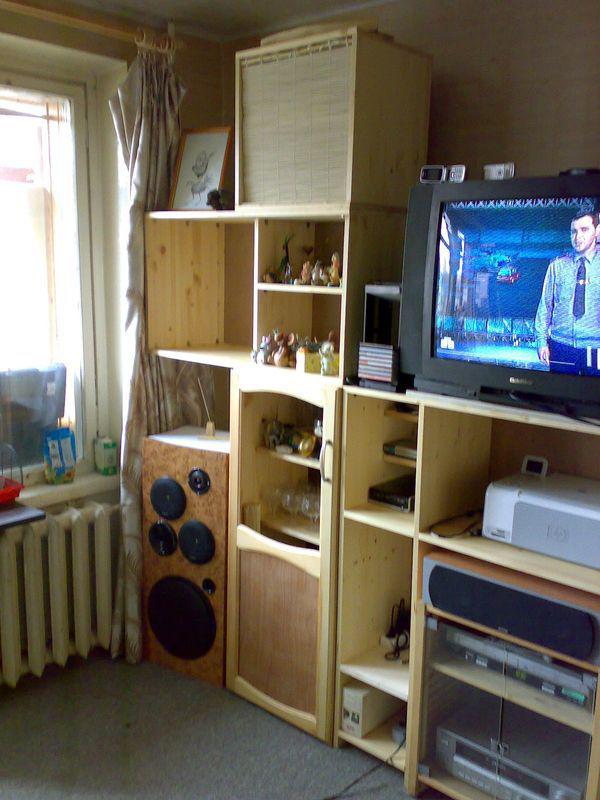
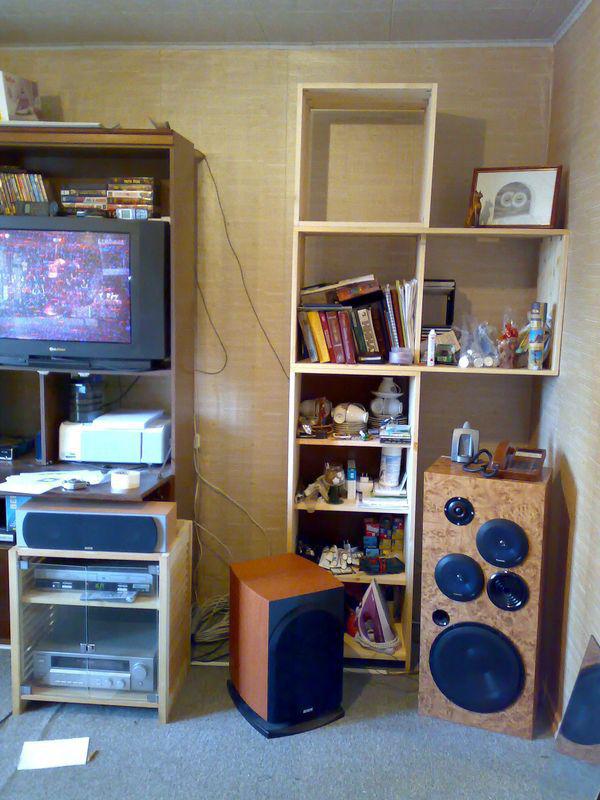
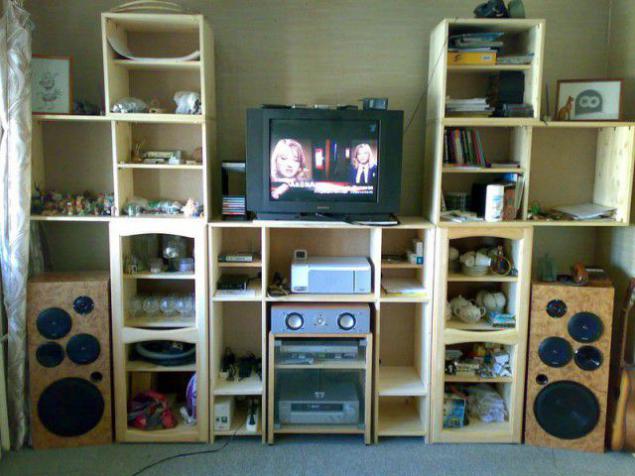
The central section. All shelves !!!

Cupboard on wheels.
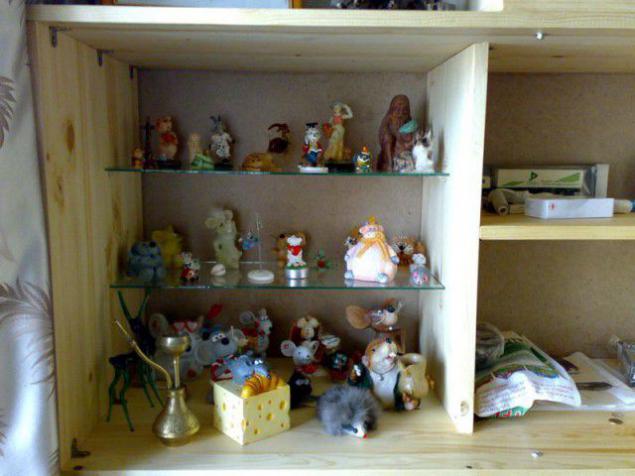
Collection mice. Somehow my rod mouse ...
The other side.
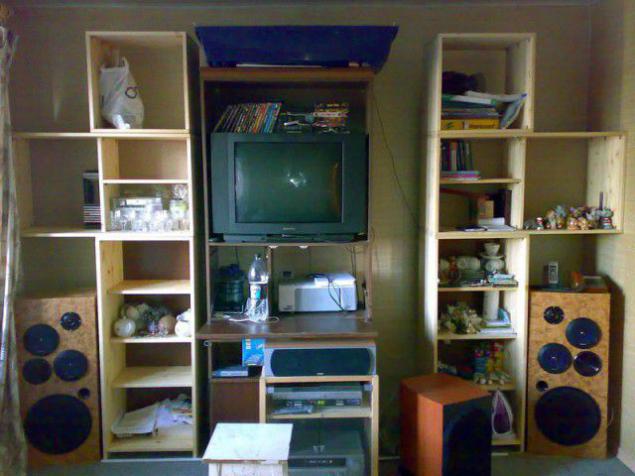
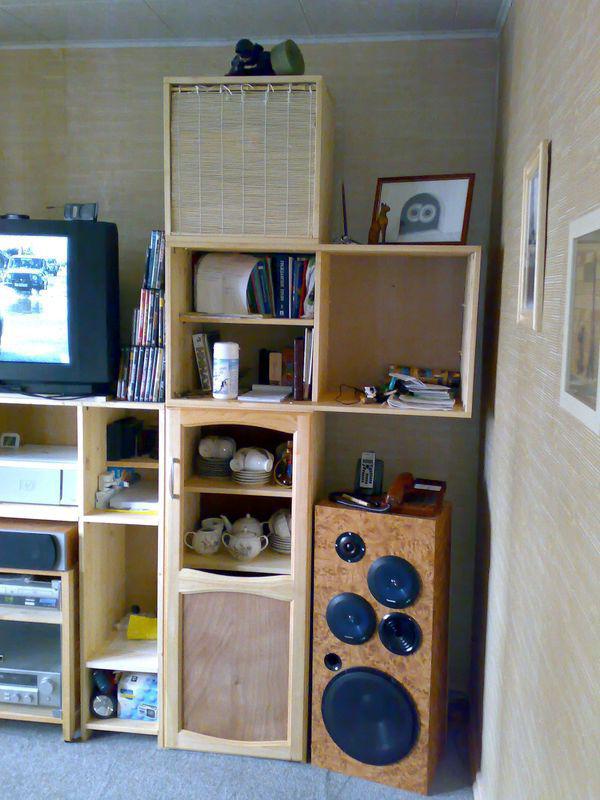
Oh yes! Shelves glass. There had poshlyatsya money in the glass workshop. Hang onto those plastic holders. The bins were many.
That went trim doors. Malnkie door has somehow kept the humidity drops, but still went. Central door had to weight a thick piece of plywood to stiffen. At the same time the door is a table nouta.
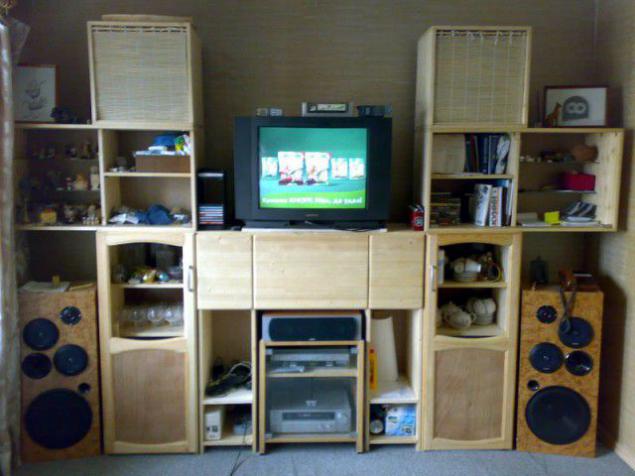
The remaining holes are closing glass doors. Once in the studio! But it is cheaper and more practical than wood. We can see what's inside. On top of the glass, where necessary, bamboo blinds are hung up again. They are attached by ropes. Receive such cases for glasses.
The trick! Frosted glass. I had to Spend in the mirror workshop. But how beautiful!
Centre.
In the open as
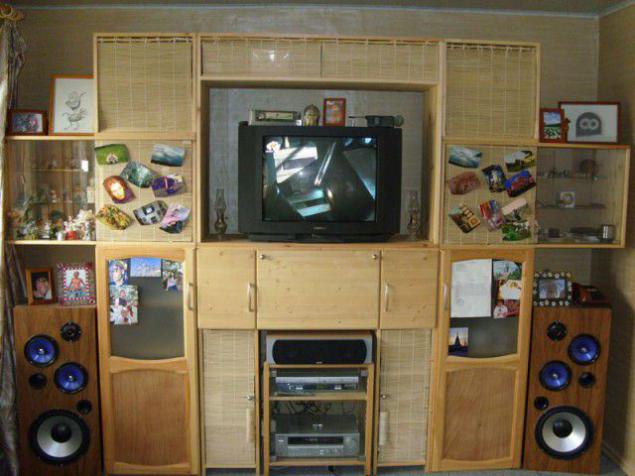
And the finale!
Source: isachok
--img27--
Source:

So. What we have. Any MS Word. It draw what you want. Looking ahead - we will build of furniture boards. Then they cost is not so expensive.
Shields standard. 80-100-1200-1500 length, width 30-40-50.
In general, it turns out a designer for adults. Fits all penny corners with screws in bulk.
All that is needed: Tape measure, ruler, pencil, screwdriver, jigsaw, drill.
And so the drawing is ready. Each element of the wall and then is drawn separately.

All terribly easy! Mode billboards on the desired segment. Cut away the extra depth. Putting the frame. Insert the inner shelf.

The doors! Here I had to take ready. They stood a little more expensive than the shield. But to make the door of the board, but still normal, you need to oooooooochen much work. And then the door starts to the humidity. Tested on a similar headset in the hallway.
Yes Yes! The hall is also a small corner of the boards.
So. Average crates bulging on the sides of the width of the bottom drawer. This to poke a hole in this column. They are way too self-made.
The modules are fastened together with screws.


The central section. This is actually the stuff of communication which I started all muddy. This is the heart of the headset.
There must be located: laptop, router, printer, bespereboynik, stabilizers, and other electronics.
In the middle of the bottom of the central unit recess. Inside the cabinet is placed with dvdkom and receiver. Bollard also self-made, but not out of this crown.

The central unit acquires sections.
PS: The rear module closes the hole hardboard. Where needed verezayutsya hole wiring.
It's very simple, very elementary and very fast.

Lower the door closed up the hole with plywood veneer finish under kakoeto blatnogo tree. Neeeee. I do not buy! On the garbage found excellent remnants of someone's closet.
The doors of the upper block? But where there! TtN student! Break! Instant decision - bamboo blinds on bamboo sticks from the flower shop.

Here.

Other side.

The central section. All shelves !!!


Cupboard on wheels.

Collection mice. Somehow my rod mouse ...

The other side.
Oh yes! Shelves glass. There had poshlyatsya money in the glass workshop. Hang onto those plastic holders. The bins were many.

That went trim doors. Malnkie door has somehow kept the humidity drops, but still went. Central door had to weight a thick piece of plywood to stiffen. At the same time the door is a table nouta.

The remaining holes are closing glass doors. Once in the studio! But it is cheaper and more practical than wood. We can see what's inside. On top of the glass, where necessary, bamboo blinds are hung up again. They are attached by ropes. Receive such cases for glasses.

The trick! Frosted glass. I had to Spend in the mirror workshop. But how beautiful!


Centre.

In the open as


And the finale!

Source: isachok
--img27--
Source: