2263
With their hands: a music box for the little princess
One girl had created with their hands wonderful music box for his favorite niece.
See also: The hands: creative souvenir (23 photos)
Our little princess, my beloved niece, coming first in her life birthday. On the birthday of her mother in February (my little sister) children broke our favorite musical toy chips, glass ball with bears. And I do not throw gave musical mechanism from it with the expectation that I'll think of something. So I decided to make a box. Girls love boxes. I myself a girl and I know :) While our little Sonia, my mother will collect your favorite girls treasures in the form of Boucicaut, rings and bracelets.
One of my hobbies is handmade boxes, and for a long time that I'm doing this, I already save up all sorts of materials.
And So. We need a can of biscuit, or candy. You can also buy a tin can. The stores of goods for needlework now you can find any banks. I found the cans in the store with tea and coffee. Just banks. But this time I went to the bank of the biscuit confectionery factory "Spartak". It's big. 22 cm in diameter, and the height of 7, 5 cm.
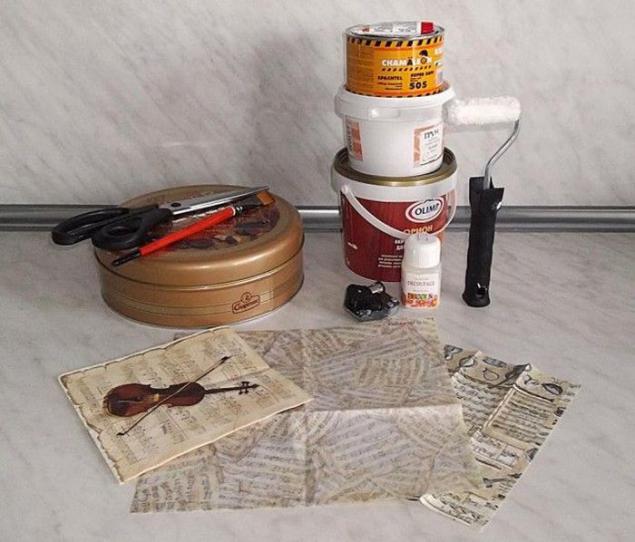
Filler metal, acrylic primer, acrylic paint, PVA glue, brushes, rice decoupage card with notes (rice card can be replaced with a napkin decoupage), scissors, musical mechanism. So do we need a glue gun and glue stick. I like to work with rice napkins and maps. Under the influence of glue they do not break or warp. And they have a nice texture to the touch. Everything else will be selected on the fly. Sometimes in the beginning, I do not know that I will have as a result. That is, normally there is some early theory, but very often in operation, something changes.
But in my bank has one major drawback. Cover surface is not smooth. She squeezed pechenyuzhki. So I took the car filler metal and lined the whole thing. Photo is none, because there was nobody to take pictures, besides stinks putty extremely harsh and unpleasant. When the filler has dried, it must be sanded. I deliberately did not oshkurivala to perfect flatness and smoothness.
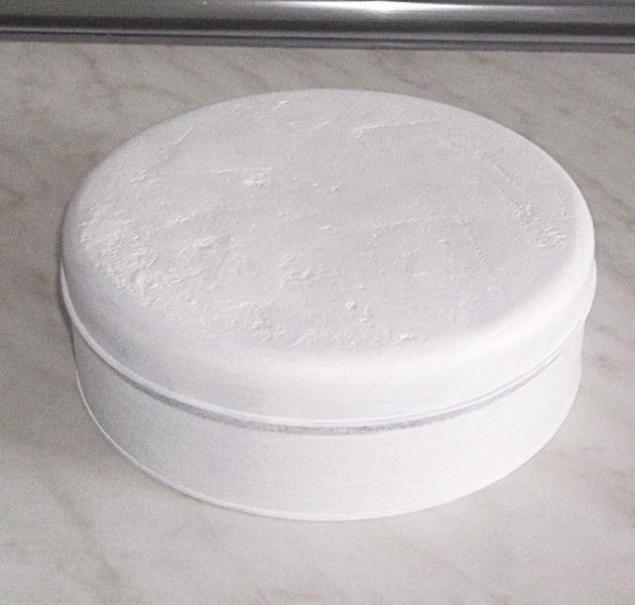
Then cover the whole of our future ground in one box, but better in two layers. The second layer is applied only after the first coat has dried thoroughly. I think no need to explain why there is a ground.
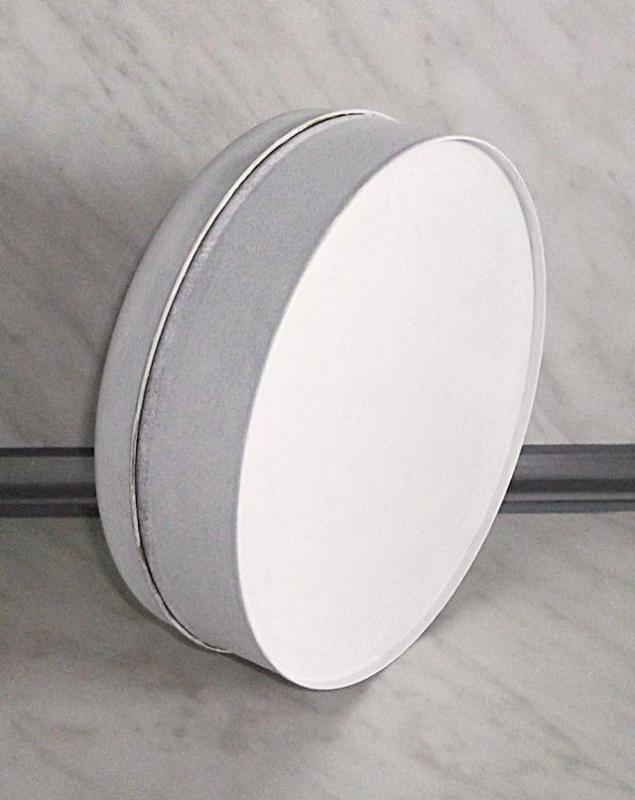
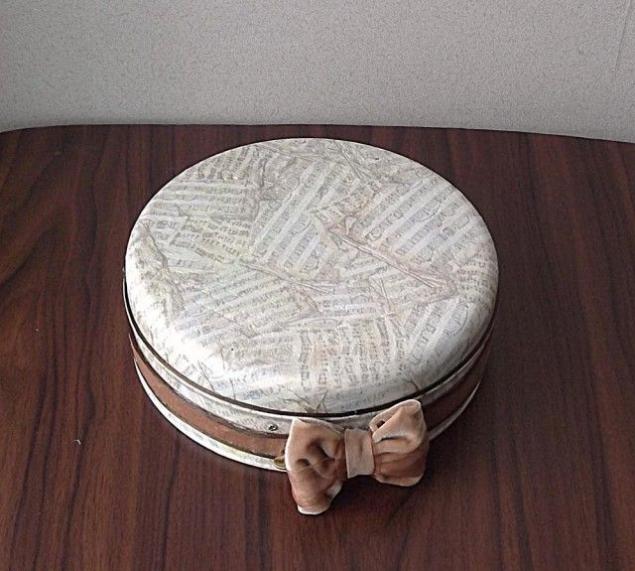
So all dried up. The time has come to our napkins. First papered cover. Remembering the lessons of labor in the primary school. Cut a circle with a diameter equal to the diameter of the top of the cover plus the height of the cover plus a couple of centimeters on the safe side. Apply the glue with a brush on the cover and gently apply a our circle on top of the lid, flatten to avoid wrinkles. Very carefully to avoid tearing. Unfortunately, no photos of the process, since there was no one to photograph. Leveled at the top, now we take the hands lid and gently soaking in the glue, brush glue the card to the side walls of the cover. In the same way pastes the lower part of the future of our boxes. Here easier. Need a strip height of the retaining rim to the bottom plus the height to the bottom. I plus 5 mm to the main length. And the circle. Put our box at the map and outlines its pencil. Put to dry.
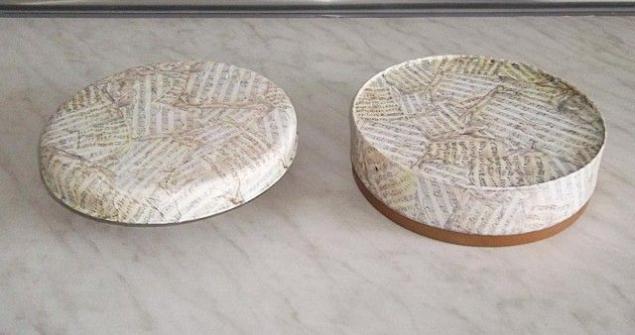
Here
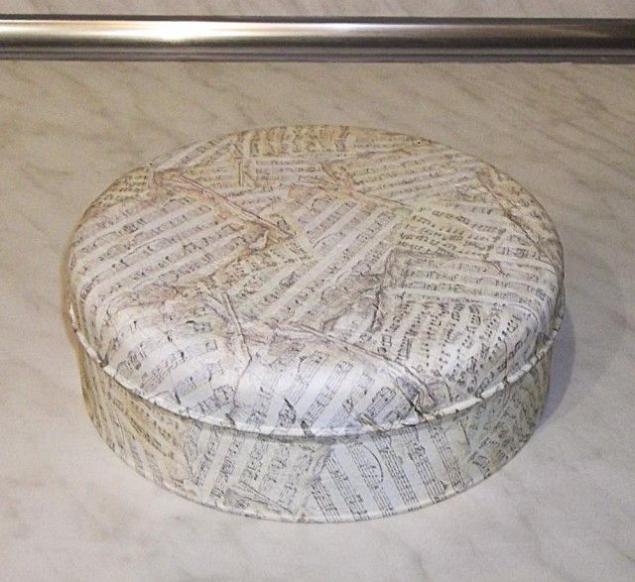
I have dried up a few hours. Clay must be completely dry before applying the varnish. Otherwise varnish will stick to hands. I bought a hardware store varnish for wood. Special varnish for decoupage not let me down once. They are expensive and stick their hands in the finished product. So I went and bought a nail in the hardware store. I do not like gloss, because the choice of varnish I stopped on the varnish, which has a matte surface.
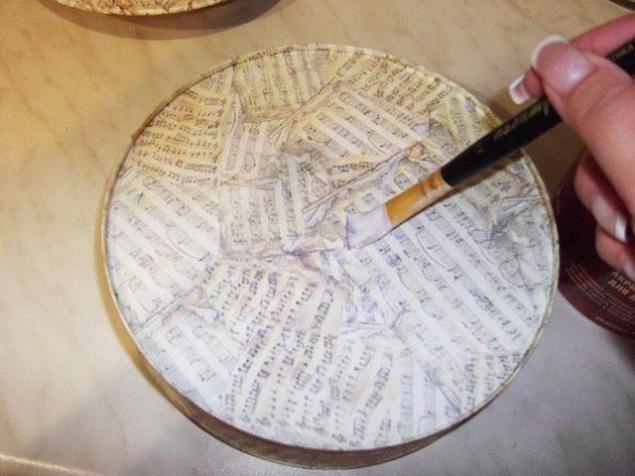
So, the next step is the application of varnish. The varnish should be applied strictly according to instructions. In the two layers. Carefully drying each layer.
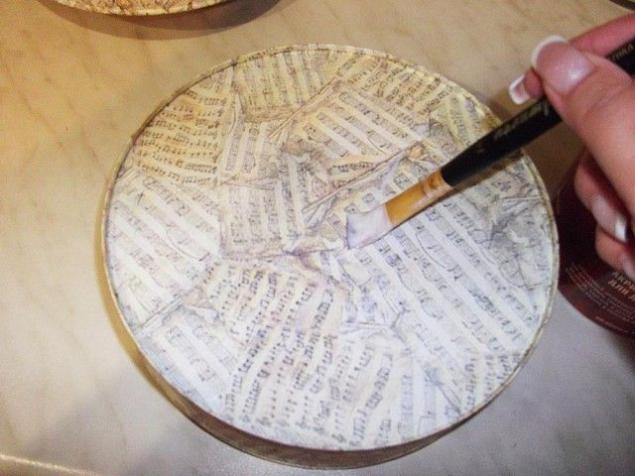
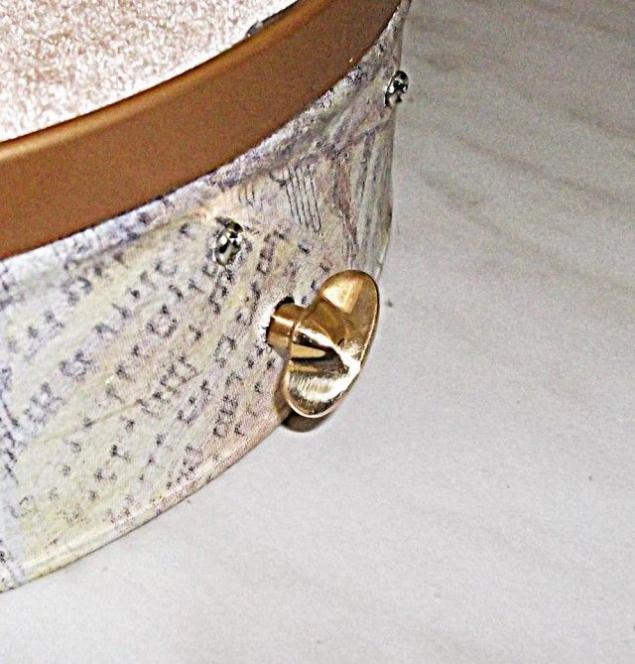
Here you go. Dried. Now the fun begins. In the beginning, I forgot to make a hole for the musical mechanism, so we had to make a hole after varnishing. The hole made with caution. I ignored the safety and stabbed his finger screwdriver straight into the crown. Gulf hole peroxide and difficult to stop the bleeding, I started to mount a musical mechanism. In view of the fact that I was a little hurt, I forgot to take pictures of the process. Then it turned out that the key, which I picked up a familiar watchmaker very big and ugly. And then I'm using his charm persuaded a friend to make me a little turner s brass key. Here he is handsome.
So Much. Now we start to work on the internal "decoration." The first thing to decorate the walls, floor and hide the mechanism. Take the cardboard and cut out details. I'm somewhere long ago dug very cool compressed cardboard 3 mm thick. From it cut out parts that will hide the mechanism. The bottom of the side cover and cut out cardboard 300g / m2. The same items only allowance cut velvet. Here are the details. Take the glue stick and velvet. I really like to stick the fabric to the cardboard is glue-pencil. I buy expensive pencils companies Kohinoor or Erich Krause. But now, as luck would have found neither one nor the other, and again bought at the hardware store the most expensive glue stick German manufacturer. Took at your own risk, but it paid off. So, we put glue on cardboard and apply a velvet. Give the dry and glue allowances. Something like that.
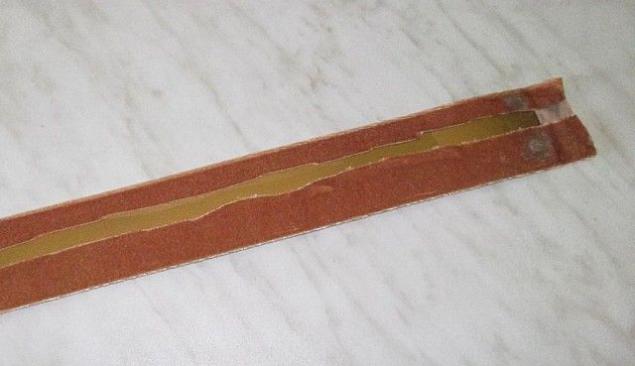
Sides
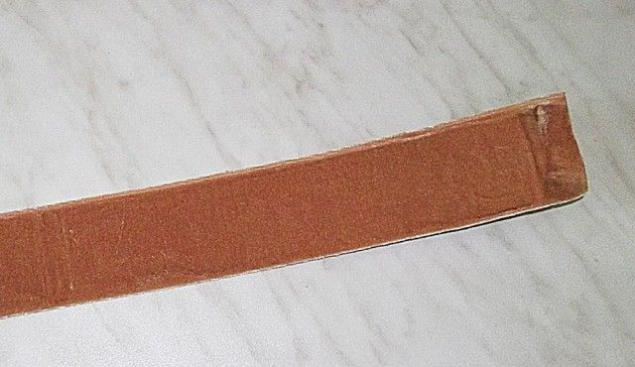
This box under the mechanism
The downside
Bedplate
Using the glue gun, fasten the parts inside the velvet box. For ready-made.
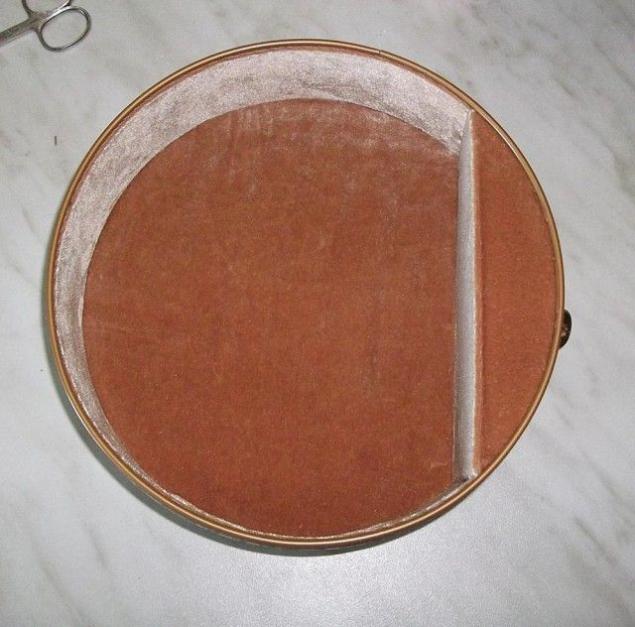
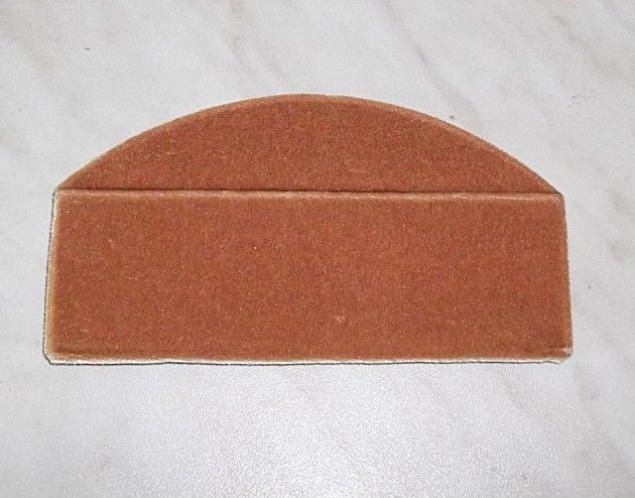
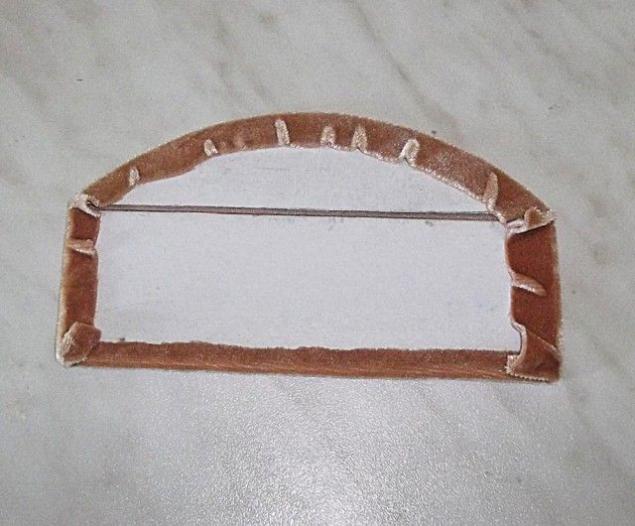
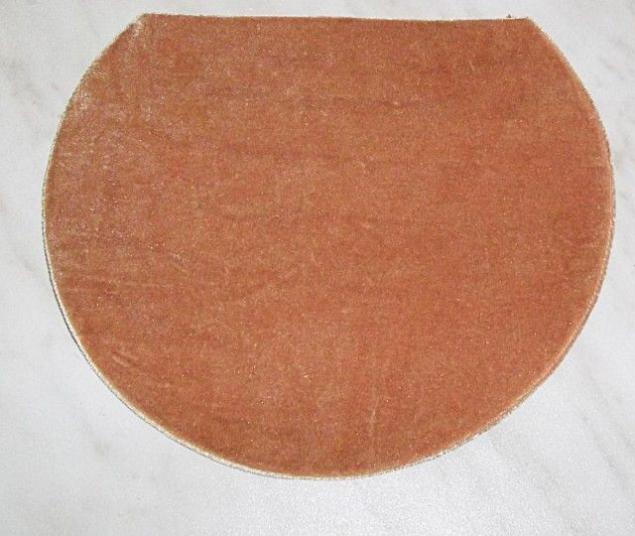
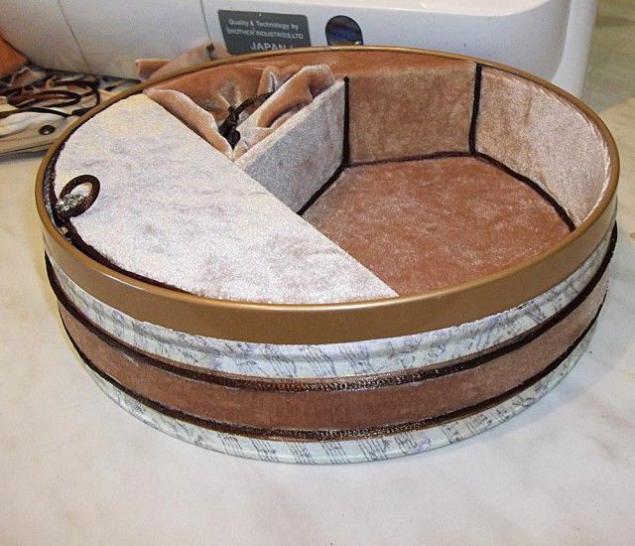
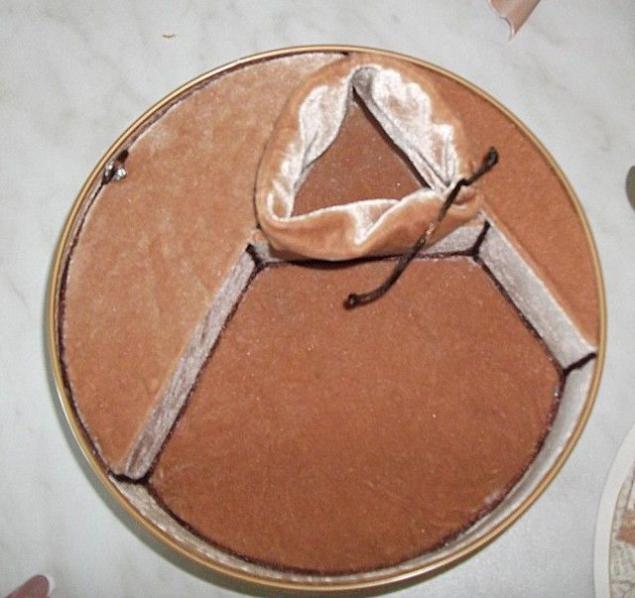
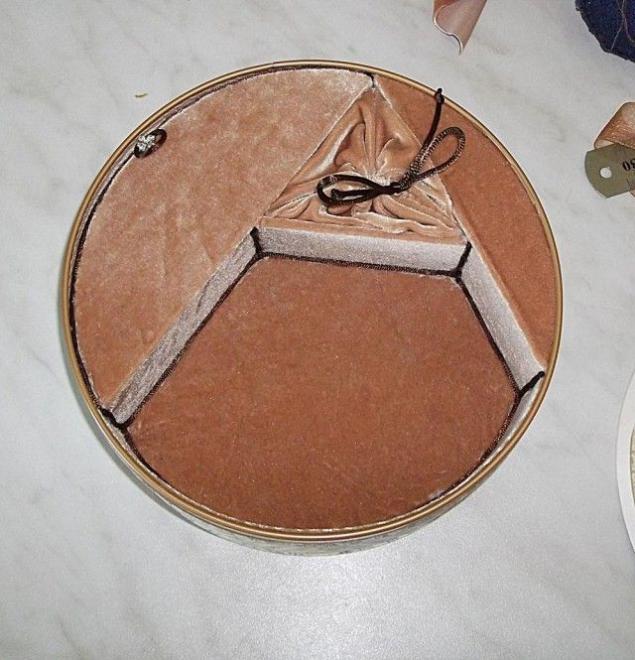
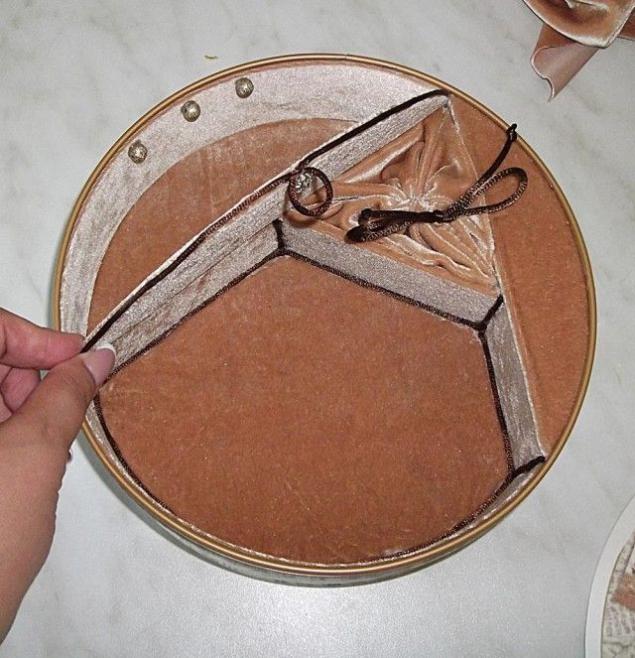
Next make a box for small items. Initially, I wanted to make a box that would be a continuation of the box under the mechanism. But when I tried on, I realized that it turns out some garbage and decided to make a separate box. Cut a circle sector (cover) and stenochku of thick cardboard. Okleit them together at a distance of 4 mm from each other to design bent. Cut the velvet on the edge. Thread with a needle stitched edge velvet. And fix everything inside the box. I do not seem pale, and I am using glue gun cemented joints on brown satin cord. Beads as a stopper to cover not fail.
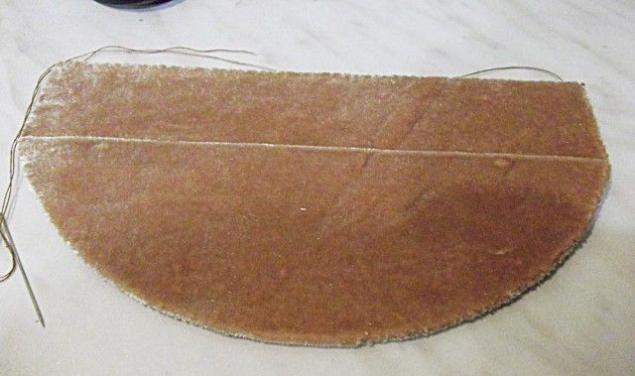
Papered on both sides. Bends.
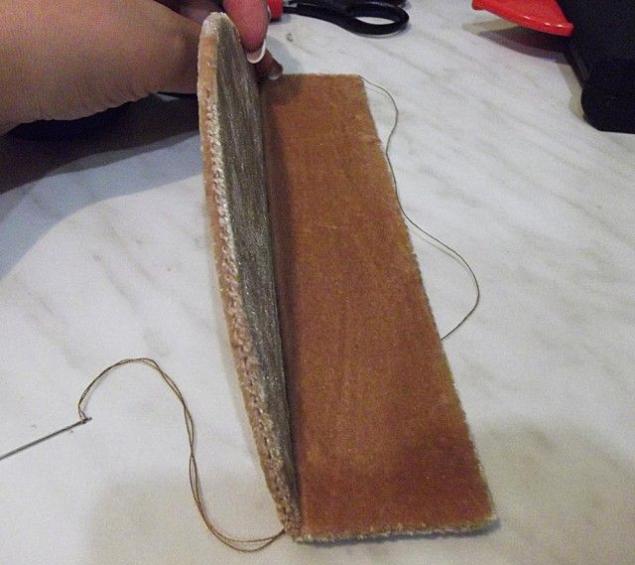
Sew the edges
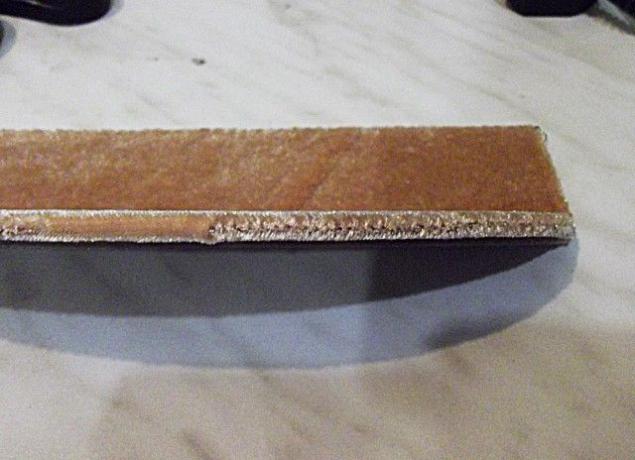
Looked at the results and decided to add one more outlet. And that was interesting (I'm doing a casket for girls) instead of caps made imitation bag, tighten satin cord. All attached glue gun. Here you go. Like anything wrong.
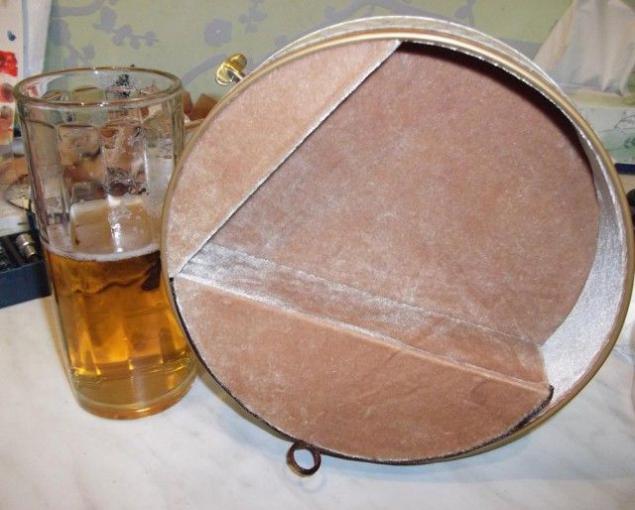
For a bag
Here
And
And
Now you need to decorate the outside of the box. I honestly long time and in different places looking braid that I needed, but not found. And because it was bought to do something that would suit me. Organza ribbon, satin cord and velvet strip. I took organza ribbon and an iron with the help of adhesive tape stuck on her velvet stripes. All this beauty, I glue gun glued to the box. Something is missing. Pale. Then I glue gun glued satin cord on the edge of the velvet ribbon. Of velvet and organza ribbon bow I built and attach it next to the key. So I hid the place seam tape and a little hidden key.
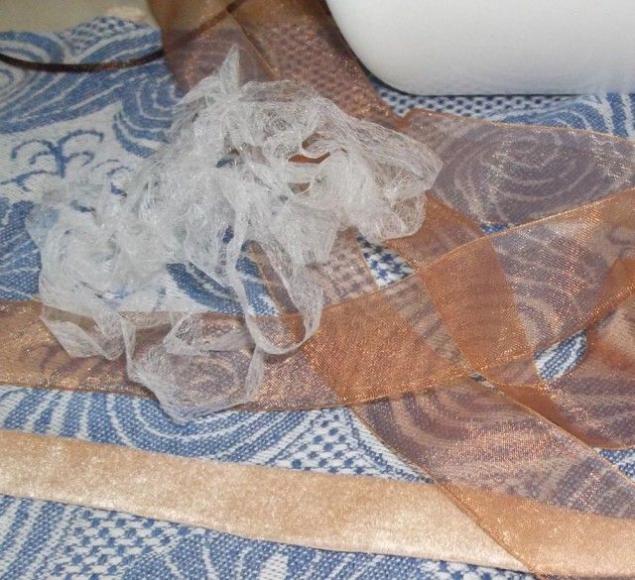
Sticking
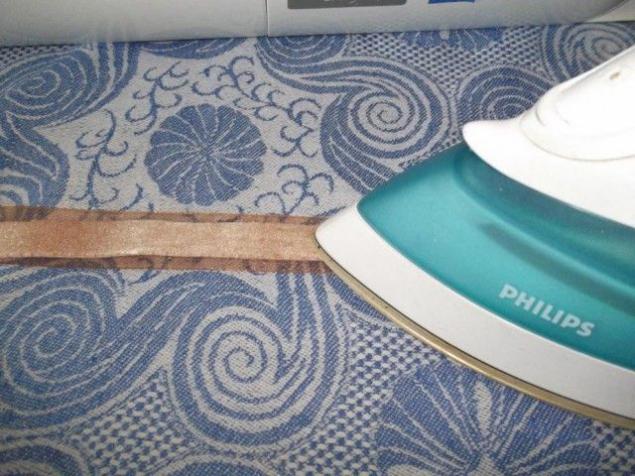
...
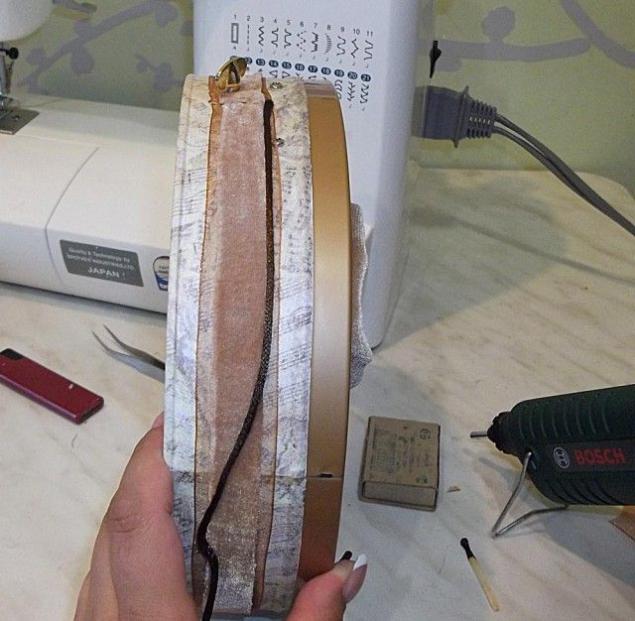
bow
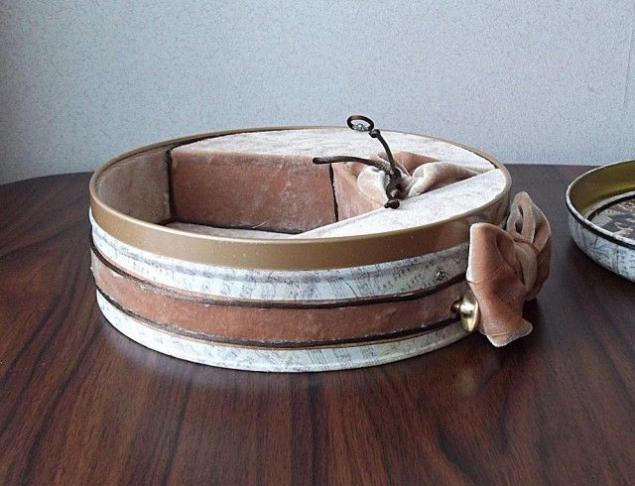
more
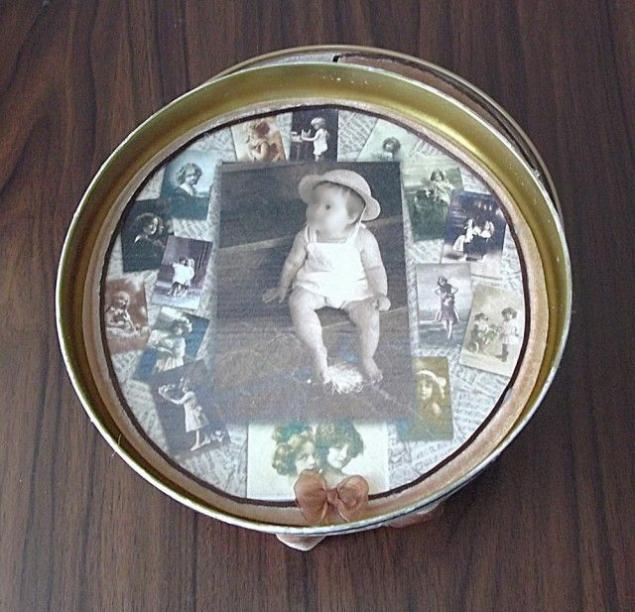
Cover. On the bottom lid I attached satin cord. Inside the lid. I have never nor expert Photoshop, Illustrator therefore created a collage of old photographs of children. In the center post pictures of our beauties. I specifically made photo plemyashki blurred because they do not like being put on public display pictures of young children. Background made such as the basic background of our boxes. Print everything on rice paper. Pasted a printout onto cardboard and spattered hairspray very strong fixation. Lac need to paint on acrylic varnish does not flowed. Inkjet printer. When the hair spray has dried, covered with acrylic lacquer printout. At the edge of the tape and let the velvety satin cord. The joint hid under the bow.
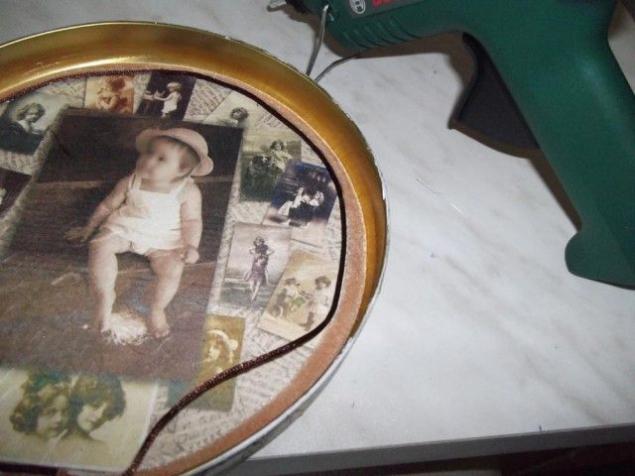
Another
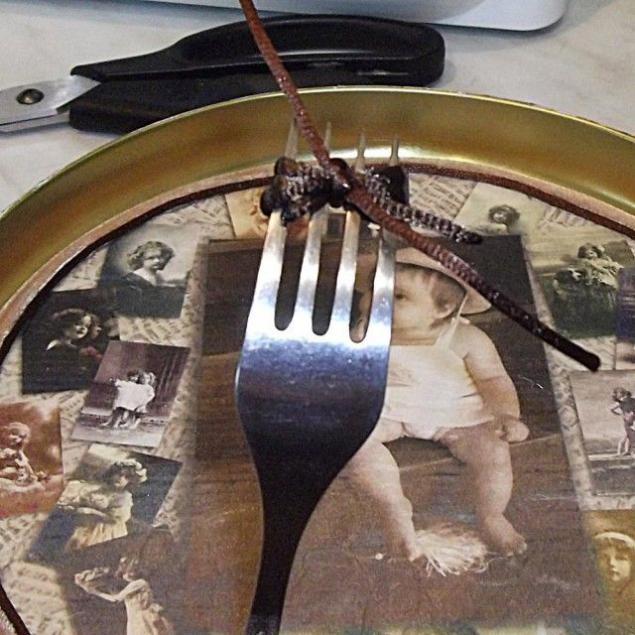
That's the way with a fork, you can make a small neat bow.
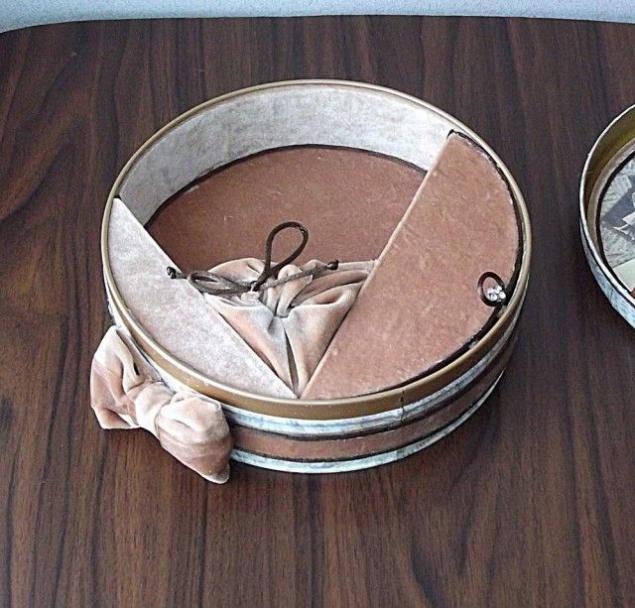
That is, in principle, and all. Stash ready.
Author: oliatalaat
See also: The hands: creative souvenir (23 photos)

Our little princess, my beloved niece, coming first in her life birthday. On the birthday of her mother in February (my little sister) children broke our favorite musical toy chips, glass ball with bears. And I do not throw gave musical mechanism from it with the expectation that I'll think of something. So I decided to make a box. Girls love boxes. I myself a girl and I know :) While our little Sonia, my mother will collect your favorite girls treasures in the form of Boucicaut, rings and bracelets.
One of my hobbies is handmade boxes, and for a long time that I'm doing this, I already save up all sorts of materials.
And So. We need a can of biscuit, or candy. You can also buy a tin can. The stores of goods for needlework now you can find any banks. I found the cans in the store with tea and coffee. Just banks. But this time I went to the bank of the biscuit confectionery factory "Spartak". It's big. 22 cm in diameter, and the height of 7, 5 cm.

Filler metal, acrylic primer, acrylic paint, PVA glue, brushes, rice decoupage card with notes (rice card can be replaced with a napkin decoupage), scissors, musical mechanism. So do we need a glue gun and glue stick. I like to work with rice napkins and maps. Under the influence of glue they do not break or warp. And they have a nice texture to the touch. Everything else will be selected on the fly. Sometimes in the beginning, I do not know that I will have as a result. That is, normally there is some early theory, but very often in operation, something changes.
But in my bank has one major drawback. Cover surface is not smooth. She squeezed pechenyuzhki. So I took the car filler metal and lined the whole thing. Photo is none, because there was nobody to take pictures, besides stinks putty extremely harsh and unpleasant. When the filler has dried, it must be sanded. I deliberately did not oshkurivala to perfect flatness and smoothness.
Then cover the whole of our future ground in one box, but better in two layers. The second layer is applied only after the first coat has dried thoroughly. I think no need to explain why there is a ground.

So all dried up. The time has come to our napkins. First papered cover. Remembering the lessons of labor in the primary school. Cut a circle with a diameter equal to the diameter of the top of the cover plus the height of the cover plus a couple of centimeters on the safe side. Apply the glue with a brush on the cover and gently apply a our circle on top of the lid, flatten to avoid wrinkles. Very carefully to avoid tearing. Unfortunately, no photos of the process, since there was no one to photograph. Leveled at the top, now we take the hands lid and gently soaking in the glue, brush glue the card to the side walls of the cover. In the same way pastes the lower part of the future of our boxes. Here easier. Need a strip height of the retaining rim to the bottom plus the height to the bottom. I plus 5 mm to the main length. And the circle. Put our box at the map and outlines its pencil. Put to dry.

Here

I have dried up a few hours. Clay must be completely dry before applying the varnish. Otherwise varnish will stick to hands. I bought a hardware store varnish for wood. Special varnish for decoupage not let me down once. They are expensive and stick their hands in the finished product. So I went and bought a nail in the hardware store. I do not like gloss, because the choice of varnish I stopped on the varnish, which has a matte surface.

So, the next step is the application of varnish. The varnish should be applied strictly according to instructions. In the two layers. Carefully drying each layer.

Here you go. Dried. Now the fun begins. In the beginning, I forgot to make a hole for the musical mechanism, so we had to make a hole after varnishing. The hole made with caution. I ignored the safety and stabbed his finger screwdriver straight into the crown. Gulf hole peroxide and difficult to stop the bleeding, I started to mount a musical mechanism. In view of the fact that I was a little hurt, I forgot to take pictures of the process. Then it turned out that the key, which I picked up a familiar watchmaker very big and ugly. And then I'm using his charm persuaded a friend to make me a little turner s brass key. Here he is handsome.

So Much. Now we start to work on the internal "decoration." The first thing to decorate the walls, floor and hide the mechanism. Take the cardboard and cut out details. I'm somewhere long ago dug very cool compressed cardboard 3 mm thick. From it cut out parts that will hide the mechanism. The bottom of the side cover and cut out cardboard 300g / m2. The same items only allowance cut velvet. Here are the details. Take the glue stick and velvet. I really like to stick the fabric to the cardboard is glue-pencil. I buy expensive pencils companies Kohinoor or Erich Krause. But now, as luck would have found neither one nor the other, and again bought at the hardware store the most expensive glue stick German manufacturer. Took at your own risk, but it paid off. So, we put glue on cardboard and apply a velvet. Give the dry and glue allowances. Something like that.

Sides

This box under the mechanism

The downside

Bedplate

Using the glue gun, fasten the parts inside the velvet box. For ready-made.

Next make a box for small items. Initially, I wanted to make a box that would be a continuation of the box under the mechanism. But when I tried on, I realized that it turns out some garbage and decided to make a separate box. Cut a circle sector (cover) and stenochku of thick cardboard. Okleit them together at a distance of 4 mm from each other to design bent. Cut the velvet on the edge. Thread with a needle stitched edge velvet. And fix everything inside the box. I do not seem pale, and I am using glue gun cemented joints on brown satin cord. Beads as a stopper to cover not fail.

Papered on both sides. Bends.

Sew the edges

Looked at the results and decided to add one more outlet. And that was interesting (I'm doing a casket for girls) instead of caps made imitation bag, tighten satin cord. All attached glue gun. Here you go. Like anything wrong.

For a bag

Here

And

And

Now you need to decorate the outside of the box. I honestly long time and in different places looking braid that I needed, but not found. And because it was bought to do something that would suit me. Organza ribbon, satin cord and velvet strip. I took organza ribbon and an iron with the help of adhesive tape stuck on her velvet stripes. All this beauty, I glue gun glued to the box. Something is missing. Pale. Then I glue gun glued satin cord on the edge of the velvet ribbon. Of velvet and organza ribbon bow I built and attach it next to the key. So I hid the place seam tape and a little hidden key.

Sticking

...

bow

more

Cover. On the bottom lid I attached satin cord. Inside the lid. I have never nor expert Photoshop, Illustrator therefore created a collage of old photographs of children. In the center post pictures of our beauties. I specifically made photo plemyashki blurred because they do not like being put on public display pictures of young children. Background made such as the basic background of our boxes. Print everything on rice paper. Pasted a printout onto cardboard and spattered hairspray very strong fixation. Lac need to paint on acrylic varnish does not flowed. Inkjet printer. When the hair spray has dried, covered with acrylic lacquer printout. At the edge of the tape and let the velvety satin cord. The joint hid under the bow.

Another

That's the way with a fork, you can make a small neat bow.

That is, in principle, and all. Stash ready.

Author: oliatalaat

