1842
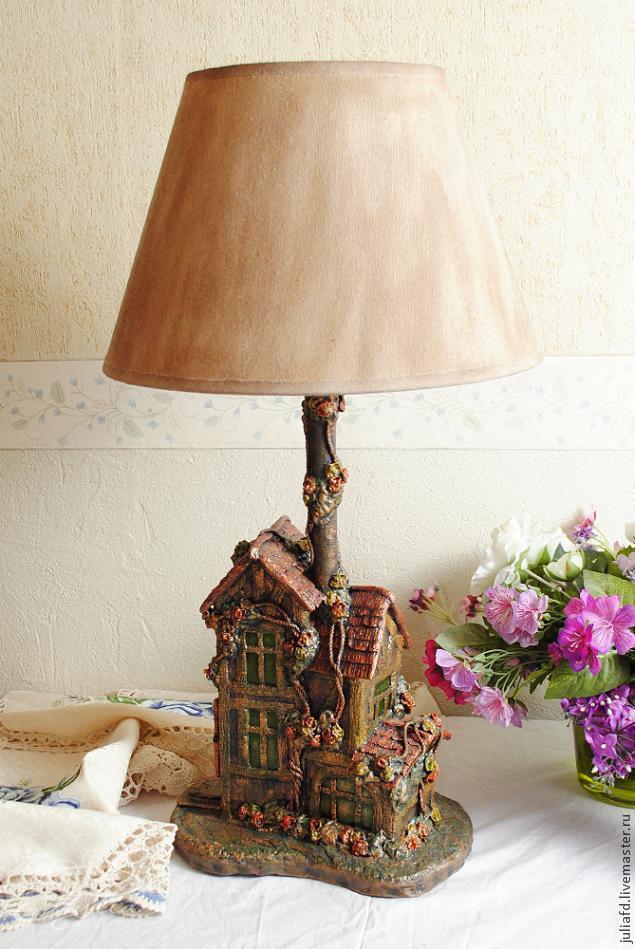
Lamp with your hands
-Let packaging of juice or milk
-malyarny scotch scotch or plain
-gips (alabaster)
-shtukaturka what remained of repairs or specifically acquired (in my case the finished acrylic plaster)
poly pipe of any diameter and material, the main thing that took place inside the cord. (In my case a piece of plastic pipe of small diameter - a fragment of the old exhibition cages for cats)
-level
-odnorazovye cups
-gipsovy bint (the number depends on the size of the future building)
-Let plastic bottle (in my case green)
-plastilin scissors
-pischevaya film
-PVA
-hozyaystvennaya rope
-kistochki and stack (can be improvised from wooden skewers, for example) for the convenience of working with plaster and plaster bandages
-misochka with water to soak the bandage
-acrylic colors for the final finishing of the building
-lak (in my case parquet matt)
The timing of production - they are individual, largely depend on your skill, the size of the house, and the degree of "fluid" a plaster base and bandage. At all stages of the construction of the house, you will inevitably soak it with water. And after the new operation will have to wait for it to dry, such as dyeing and finishing. While you're working with plaster, bandage or plaster, you can move on to new stages without waiting for complete drying. But that's only possible finish completely dry product. My house is big and long cox.
Ideally - 1 day to assemble the entire structure (if the house is not great), and a half days to dry, and 3-4 hours for painting.
Recommendations for accelerating drying:
finishing work at any stage prior to painting, leave your workpiece on a thick layer of paper towels or napkins. Gypsum is very hygroscopic. And because the water is always striving to flow down, you will inevitably and sometimes long (several days) may be wet plaster base and the lower part of the walls. Napkins accelerate the drying process.
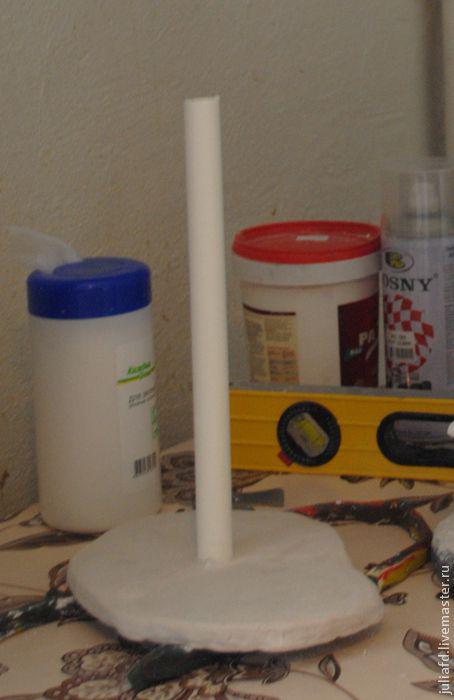
1. Make a lamp base
For this stage I do not have a visual image, therefore, explain the words. From ordinary clay absolutely any color makes a long sausage. Sausages flattened, closed in the ring and out of the circle forming the perimeter of our future plaster casting base. This will be our base shaper, it is set firmly on any flat surface, I use an ordinary kitchen table, the laid cling film, for the convenience of separating the base from the surface of the countertop.
After we set our path pouring on level ground, divorce alabaster in the cup and the resulting solution pour mold. At this stage I hook the plastic tube, just dropping it into another liquid plaster and leveling by level, fixed until dry.
Plaster hardens very quickly, but the tube is not yet to be firmly fixed on the basis of its further strengthening strips plaster bandages, podkleivaya it around.
Further forward when the base dries and you can build a house. Drying depends on the size, thickness, and on how much liquid you have dissolved gypsum. You can build a house in principle and without waiting for complete drying, you can wait for sufficient strength. When the workpiece is cooled down (plaster always heated during solidification), you can shoot a plasticine ledge and continue working. The photo was captured and blank plasticine standing on the rim of which was removed from it.
2. The walls and roof - building a frame house
For building framework, we need to empty packaging of juices or milk paint or ordinary adhesive tape for bonding structures.
On the packaging mark up windows and doors, kroim suitable for our taste roof and collect all the items on the tape, checking the evenness design level.
The walls are attached to the base by means of strips of plaster bandages.


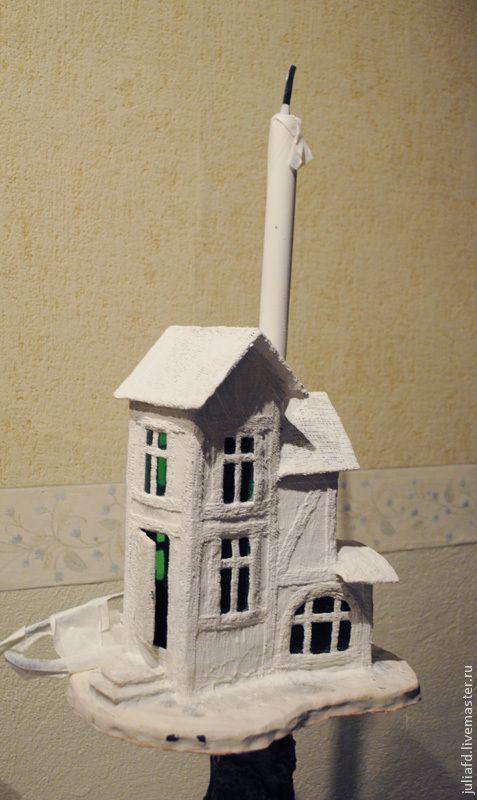
Further outside of our construction glue on pieces of plastic bottle of Scotch in the window openings and paste all of our design first layer of plaster bandage.
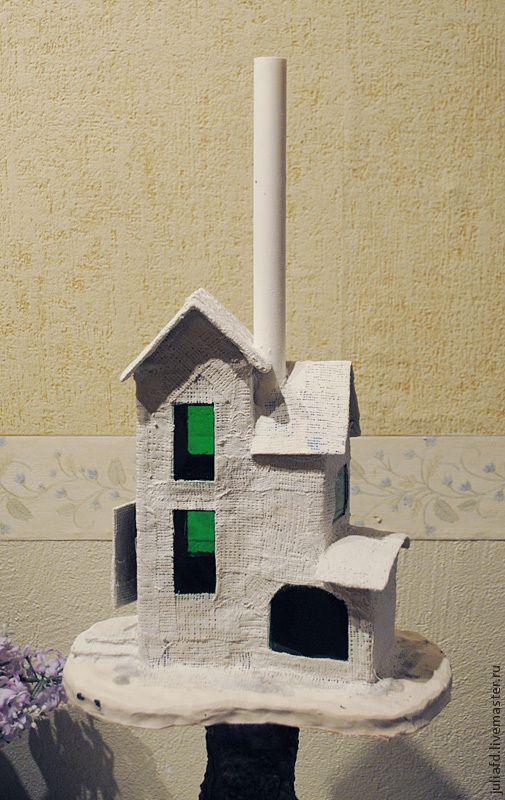
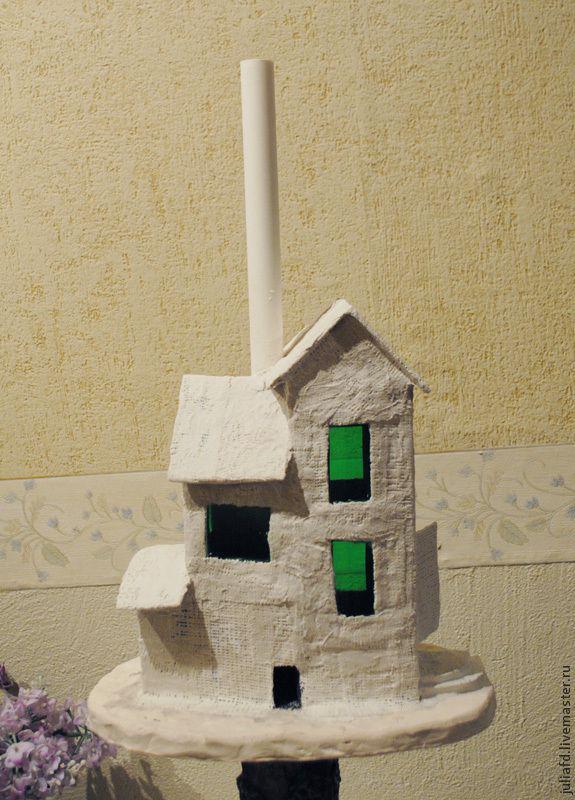
3. Decorating the house
My home style timbered, so the next phase of the folded strips of plaster bandages I form the characteristic form of half-timbered houses. Making the layout frames just thin strips of plaster bandages. At this stage, I held out the cord, as I yield to the cord of the lamp side and after the finish was a risk that I will not be able to push it. Cord fix tape and masking tape wrapped him not to soil.
After a sketch of the layout Homepage wall plasterer. I use a simple, soft brush. Plastered walls aligns background. A wooden beams on the layout I put longitudinal strips to simulate tree on wet plaster.
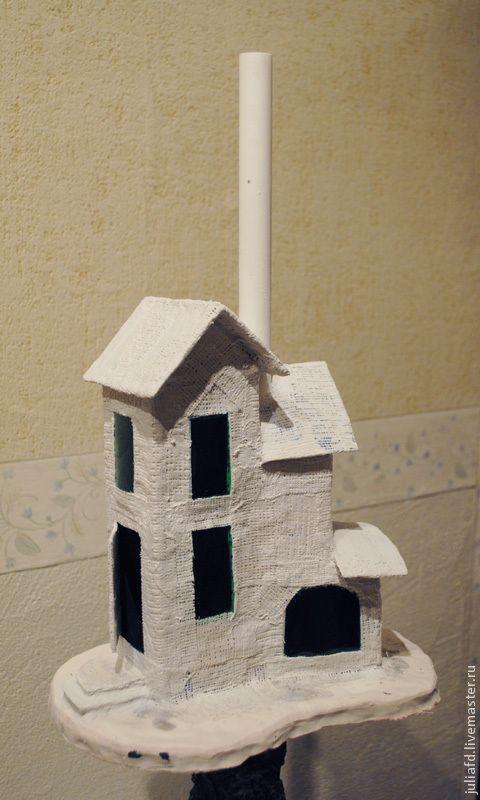
When ready, our framework with the primary finish, you can do the roof. It is also because of gypsum bandages. plastic material, can be simulated tile or cane make a variety of ways.
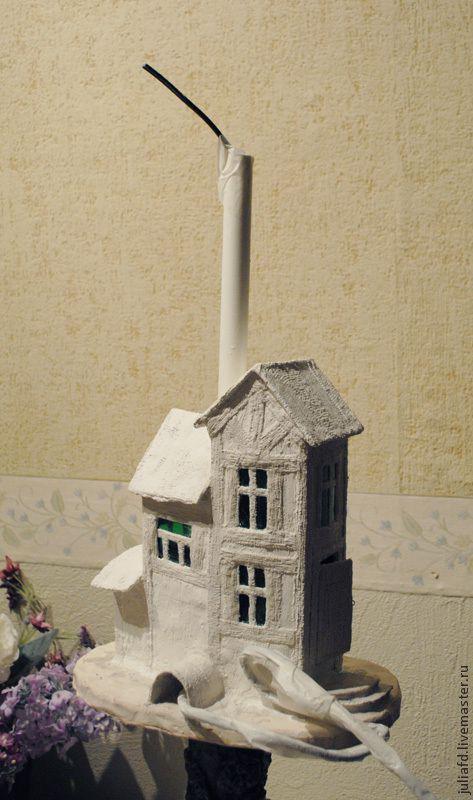
4. The garden will bloom
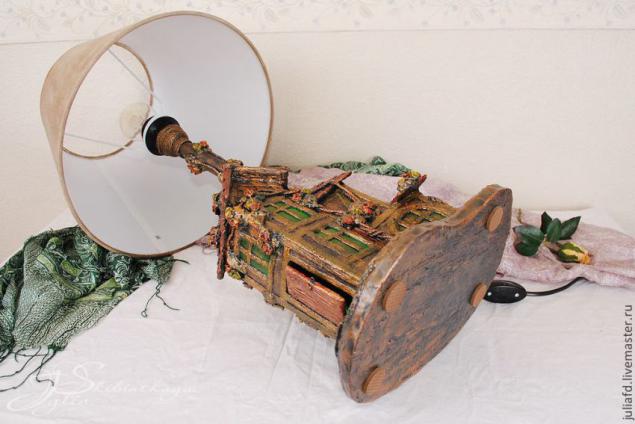
When our house is ready, we need to decorate it with flowers, make a track of pebbles and grass around the house. I buzz my house roses. For the branches I take twisted economic rope. PVA glue on the glue pieces of rope, simulating climbing roses, to the walls of our house. Next of plaster bandages Forms green, roses, grass around the house. For tracks, we will again be useful plaster. Impose her plump layer, level and causes notches in the form of individual stones. Now we wait for the complete drying. At the same stage electrician install fixating on the tube holder, decorate its base.
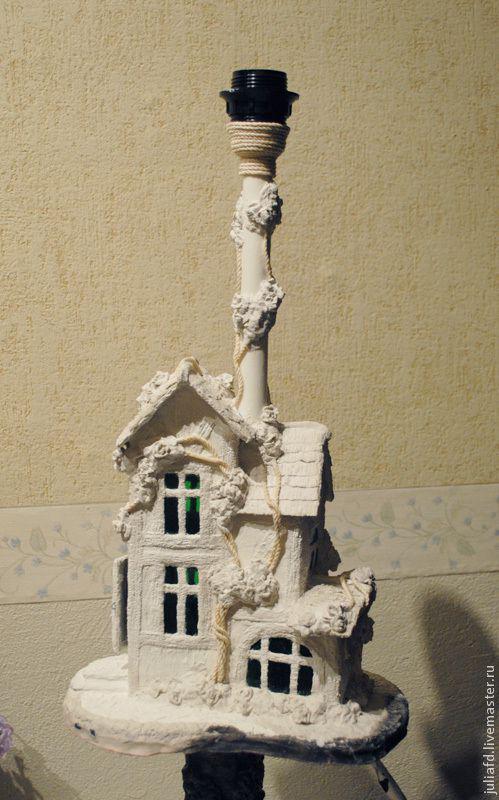
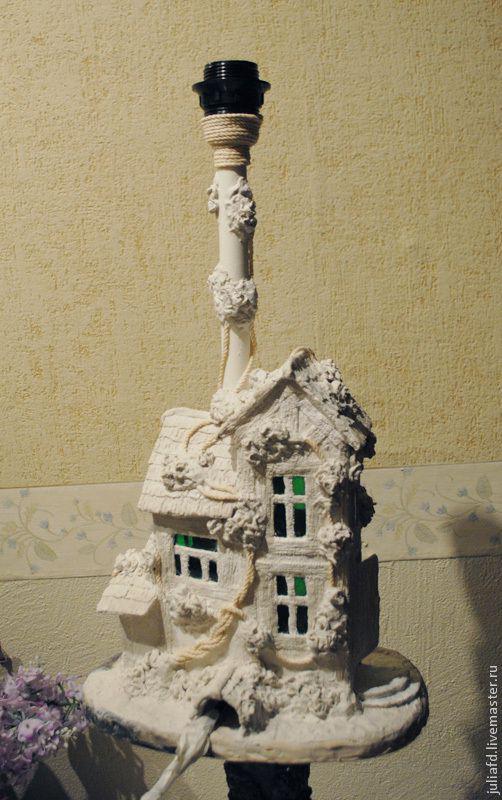
And do the first fitting of the lampshade.
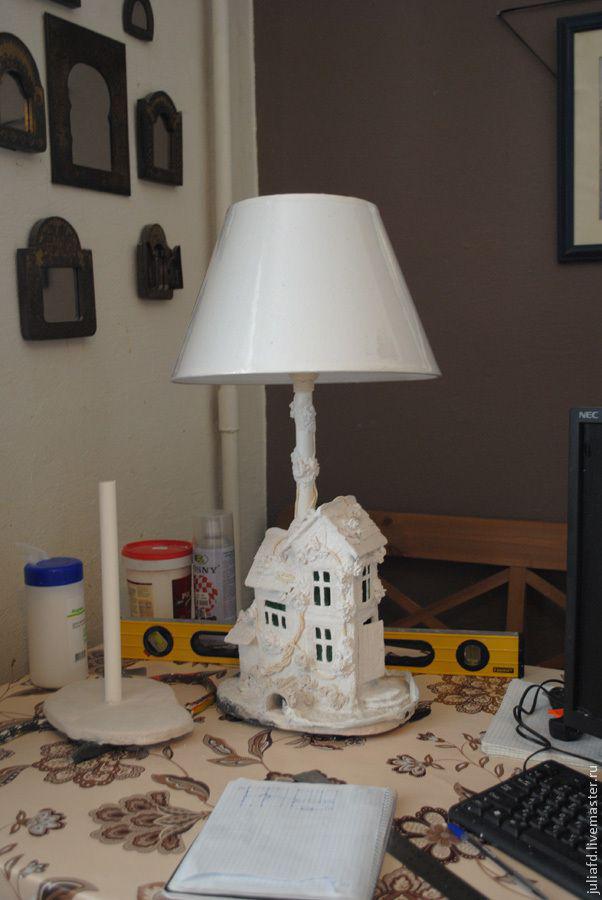
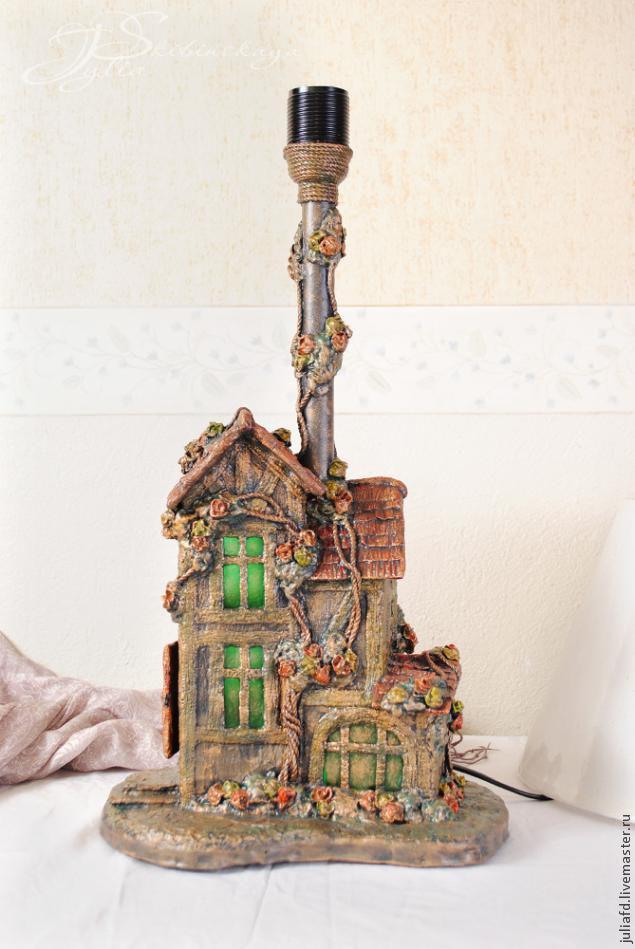
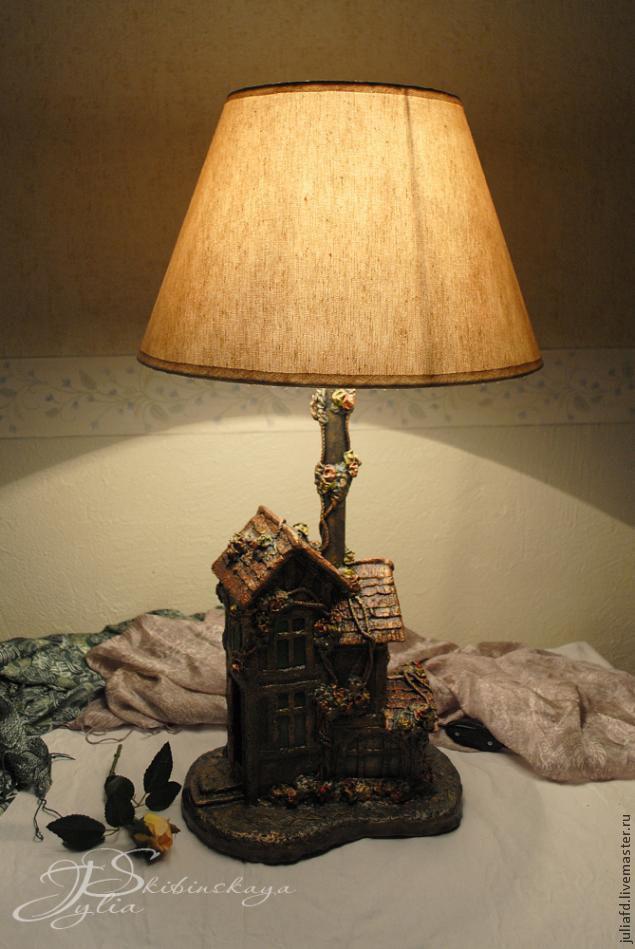
5. Paint and final finishing.
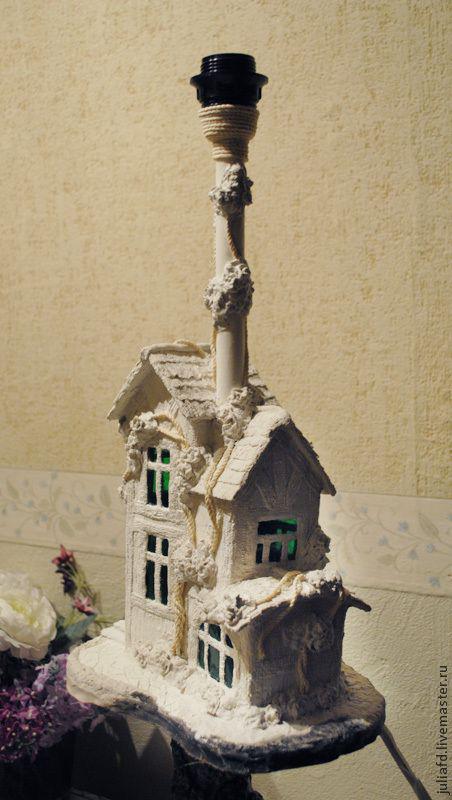
I liked my house at all stages of the final. And in white with a white shade. Next, it was painted black for subsequent decoration. But in black with silver-steel shade it looked fine.
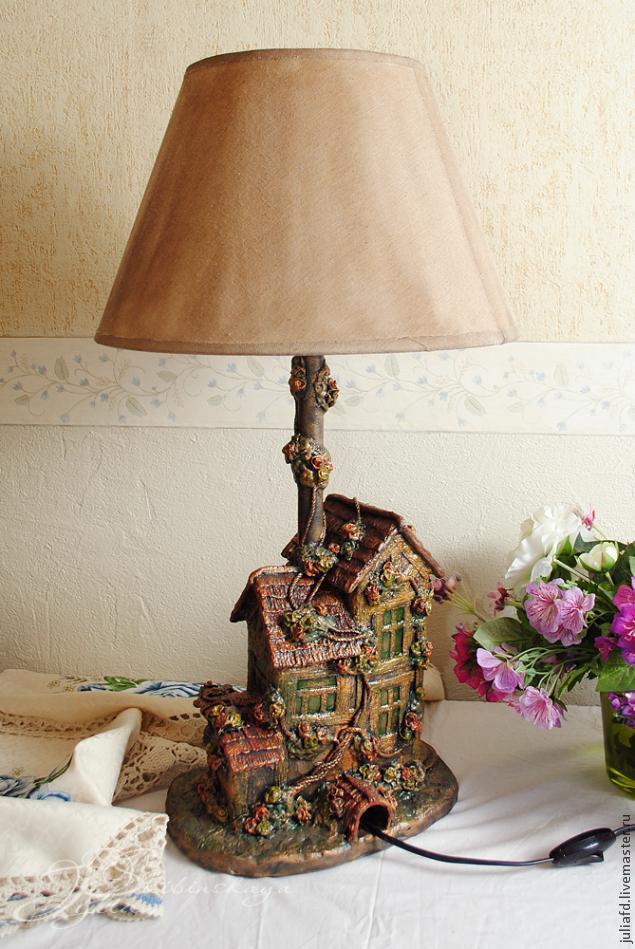
For painting I use acrylic paint for interior and Kohler. Suitable for small areas and artistic acrylic paints. Finishing inlay was made of bronze acrylic paint using a sponge sponge for washing dishes. After complete drying of the house was covered with matte varnish parquet
Fabric lampshade I toned coffee with PVA solution. Now lampshade not only the desired tone, but the flavor works.
-malyarny scotch scotch or plain
-gips (alabaster)
-shtukaturka what remained of repairs or specifically acquired (in my case the finished acrylic plaster)
poly pipe of any diameter and material, the main thing that took place inside the cord. (In my case a piece of plastic pipe of small diameter - a fragment of the old exhibition cages for cats)
-level
-odnorazovye cups
-gipsovy bint (the number depends on the size of the future building)
-Let plastic bottle (in my case green)
-plastilin scissors
-pischevaya film
-PVA
-hozyaystvennaya rope
-kistochki and stack (can be improvised from wooden skewers, for example) for the convenience of working with plaster and plaster bandages
-misochka with water to soak the bandage
-acrylic colors for the final finishing of the building
-lak (in my case parquet matt)
The timing of production - they are individual, largely depend on your skill, the size of the house, and the degree of "fluid" a plaster base and bandage. At all stages of the construction of the house, you will inevitably soak it with water. And after the new operation will have to wait for it to dry, such as dyeing and finishing. While you're working with plaster, bandage or plaster, you can move on to new stages without waiting for complete drying. But that's only possible finish completely dry product. My house is big and long cox.
Ideally - 1 day to assemble the entire structure (if the house is not great), and a half days to dry, and 3-4 hours for painting.
Recommendations for accelerating drying:
finishing work at any stage prior to painting, leave your workpiece on a thick layer of paper towels or napkins. Gypsum is very hygroscopic. And because the water is always striving to flow down, you will inevitably and sometimes long (several days) may be wet plaster base and the lower part of the walls. Napkins accelerate the drying process.

1. Make a lamp base
For this stage I do not have a visual image, therefore, explain the words. From ordinary clay absolutely any color makes a long sausage. Sausages flattened, closed in the ring and out of the circle forming the perimeter of our future plaster casting base. This will be our base shaper, it is set firmly on any flat surface, I use an ordinary kitchen table, the laid cling film, for the convenience of separating the base from the surface of the countertop.
After we set our path pouring on level ground, divorce alabaster in the cup and the resulting solution pour mold. At this stage I hook the plastic tube, just dropping it into another liquid plaster and leveling by level, fixed until dry.
Plaster hardens very quickly, but the tube is not yet to be firmly fixed on the basis of its further strengthening strips plaster bandages, podkleivaya it around.
Further forward when the base dries and you can build a house. Drying depends on the size, thickness, and on how much liquid you have dissolved gypsum. You can build a house in principle and without waiting for complete drying, you can wait for sufficient strength. When the workpiece is cooled down (plaster always heated during solidification), you can shoot a plasticine ledge and continue working. The photo was captured and blank plasticine standing on the rim of which was removed from it.

2. The walls and roof - building a frame house
For building framework, we need to empty packaging of juices or milk paint or ordinary adhesive tape for bonding structures.
On the packaging mark up windows and doors, kroim suitable for our taste roof and collect all the items on the tape, checking the evenness design level.
The walls are attached to the base by means of strips of plaster bandages.


Further outside of our construction glue on pieces of plastic bottle of Scotch in the window openings and paste all of our design first layer of plaster bandage.


3. Decorating the house
My home style timbered, so the next phase of the folded strips of plaster bandages I form the characteristic form of half-timbered houses. Making the layout frames just thin strips of plaster bandages. At this stage, I held out the cord, as I yield to the cord of the lamp side and after the finish was a risk that I will not be able to push it. Cord fix tape and masking tape wrapped him not to soil.

After a sketch of the layout Homepage wall plasterer. I use a simple, soft brush. Plastered walls aligns background. A wooden beams on the layout I put longitudinal strips to simulate tree on wet plaster.
When ready, our framework with the primary finish, you can do the roof. It is also because of gypsum bandages. plastic material, can be simulated tile or cane make a variety of ways.

4. The garden will bloom
When our house is ready, we need to decorate it with flowers, make a track of pebbles and grass around the house. I buzz my house roses. For the branches I take twisted economic rope. PVA glue on the glue pieces of rope, simulating climbing roses, to the walls of our house. Next of plaster bandages Forms green, roses, grass around the house. For tracks, we will again be useful plaster. Impose her plump layer, level and causes notches in the form of individual stones. Now we wait for the complete drying. At the same stage electrician install fixating on the tube holder, decorate its base.


And do the first fitting of the lampshade.

5. Paint and final finishing.
I liked my house at all stages of the final. And in white with a white shade. Next, it was painted black for subsequent decoration. But in black with silver-steel shade it looked fine.
For painting I use acrylic paint for interior and Kohler. Suitable for small areas and artistic acrylic paints. Finishing inlay was made of bronze acrylic paint using a sponge sponge for washing dishes. After complete drying of the house was covered with matte varnish parquet
Fabric lampshade I toned coffee with PVA solution. Now lampshade not only the desired tone, but the flavor works.