765
The second life stratum
Good day!
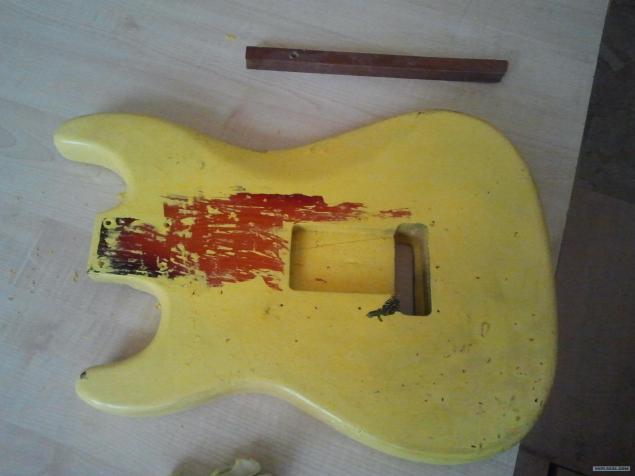
As in my hands got electric almost dead, she did not have strings of Colca (the mechanism for stringing and tuning your guitar on top of the guitar neck), and most importantly, that it was painted with a brush in a fabulous yellow color with elements of the old paint, dust, sawdust and some debris. On overlay adorned with stickers of the club "A one» type & quot; I am here zhzheg & quot ;. But, like the smooth neck, a body without cracks, electrical part, too, was workable. Since the neck has been blacked out, to determine the name of the guitar I could not, but I think that this is something inexpensive such as Ashtone or Brahner. Financial investments in renovation took about 750 rubles, of which 250 rubles painting, a string of 400 rubles, and the rest purchased: solvent 646, peg for the sixth string, screws, bar emery and foil for baking. So I decided to extend the life of this tool! Will be 34 photos, please do not break. So there you go.
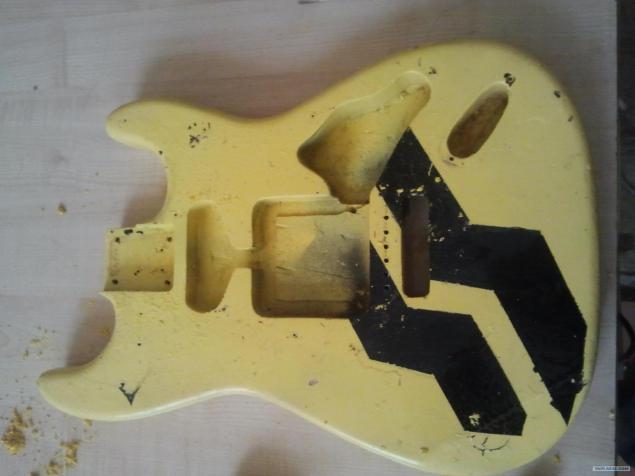
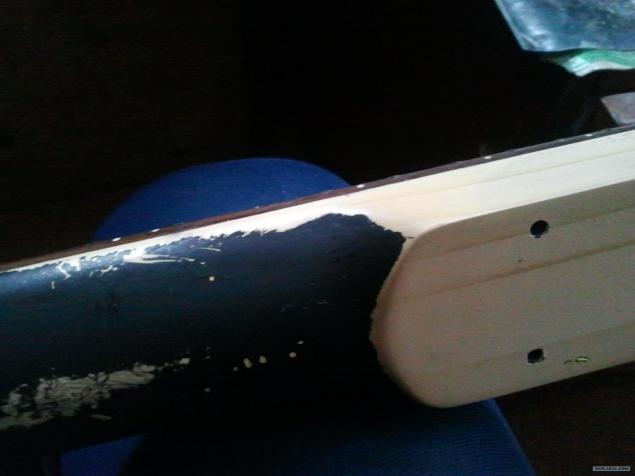
1Here way she looked when it came to me (she left).
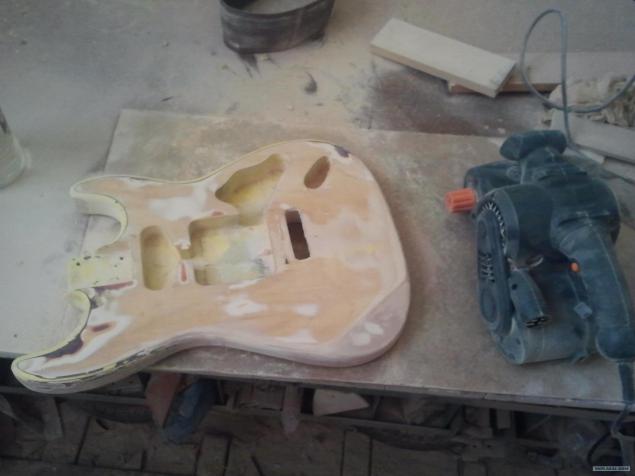
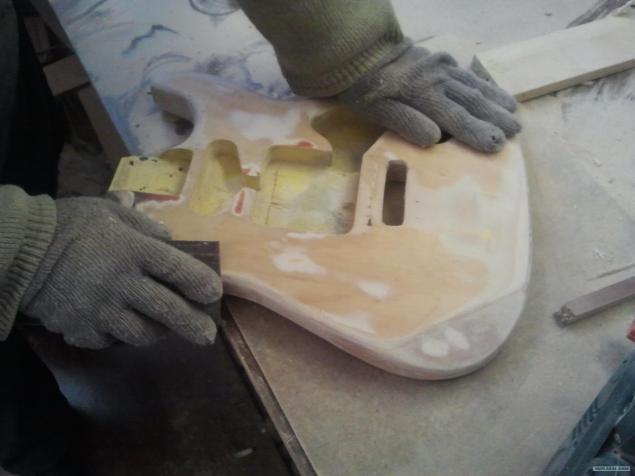
2. Begin to remove the old paint with the aid of a solvent, and see that underneath miraculously preserved old "native" paint, even with varnish (solvent paint does not take). It has been pleased to be able to recreate the original color, but once cleared the entire back panel, moved to the front, then I was in for a surprise. On the front of the guitars were numerous broken away until the wood chips deep and almost complete lack of polish.
3. How would not like it, I had to clean off old paint polnost, ie to the tree.
4. SKINS ...
5. Once the skins
6. All walked nulevkoy ... body ready.
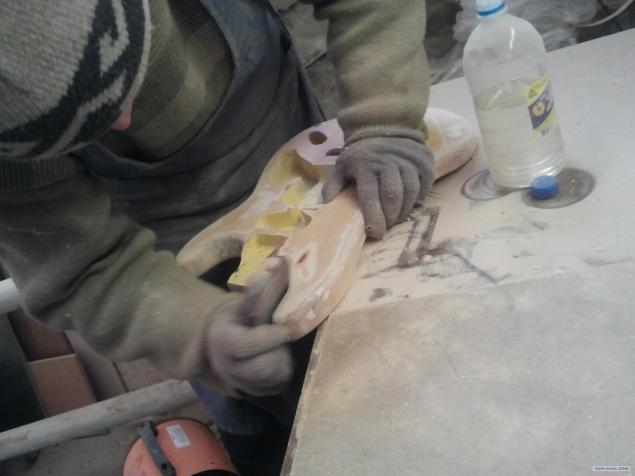
7. Now go to the patch, it also cleans with solvent.
8. Purified pad.
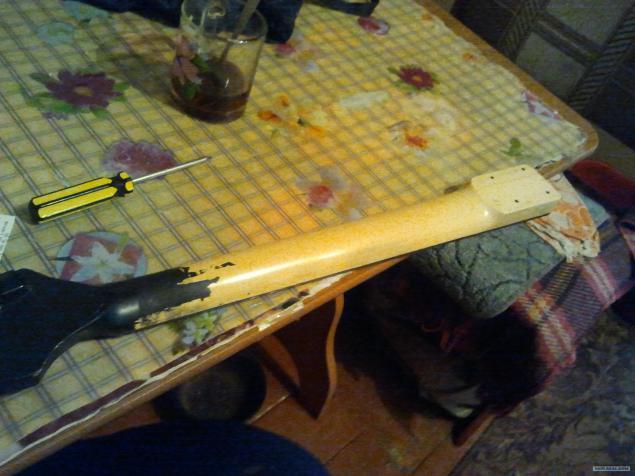
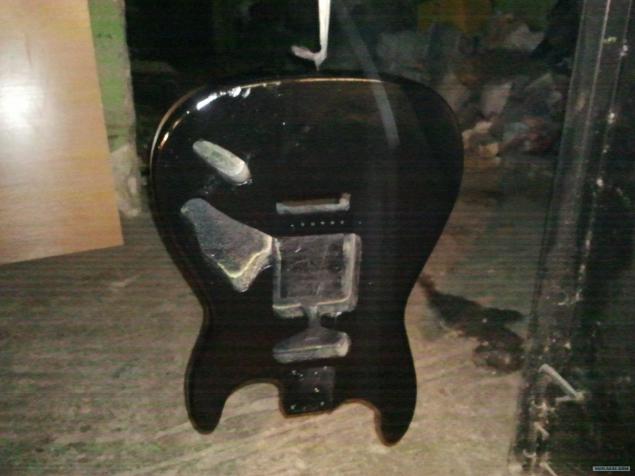
9. Since the neck, too, was not a cake, it will remove the paint with too, and also with a solvent (I wonder why he does not take the solvent ???). And what a beautiful neck turned, and why it painted black?
10. Net neck
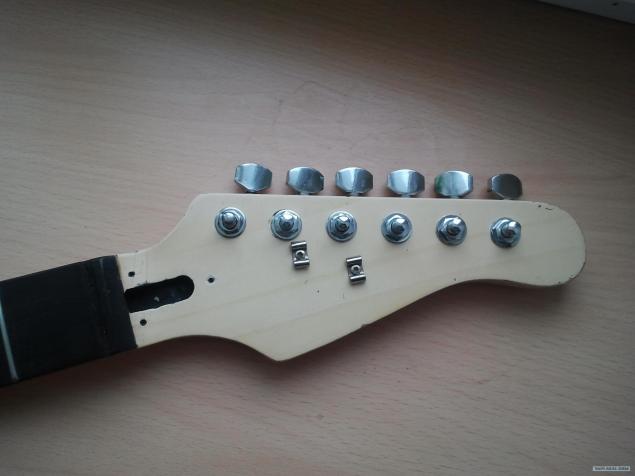
11. On the neck set pegs ...
12. Now it is necessary to polish the frets

13. To this end, we need to block grinding, the longest and the smallest abrasive grit.

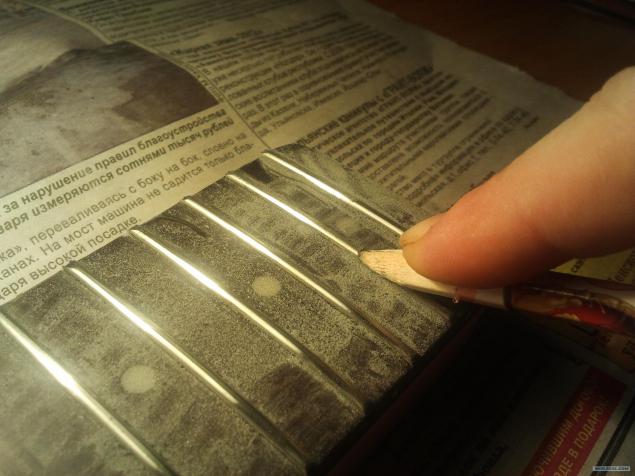
14. Draw a black marker on the frets and we clean the bar as long as there is no visible marker.
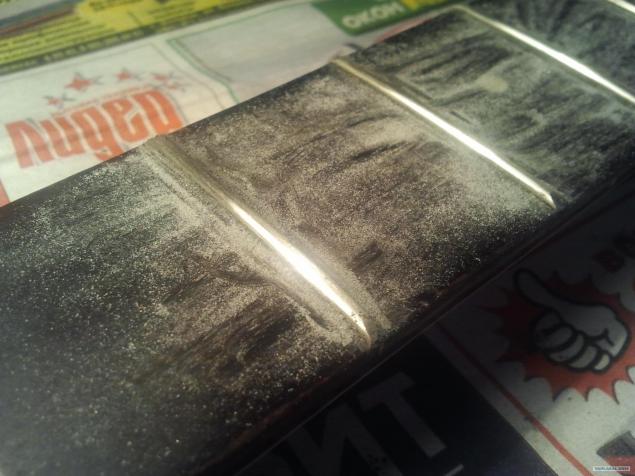
15. Then, with pencil and skins of my best rounds out, oh, and this tedious work- grinding.
16. And in the shop waiting for our body guitar that crave painted in classic black color. Painted in several layers, you're done, leave to dry, and then stroll varnish.
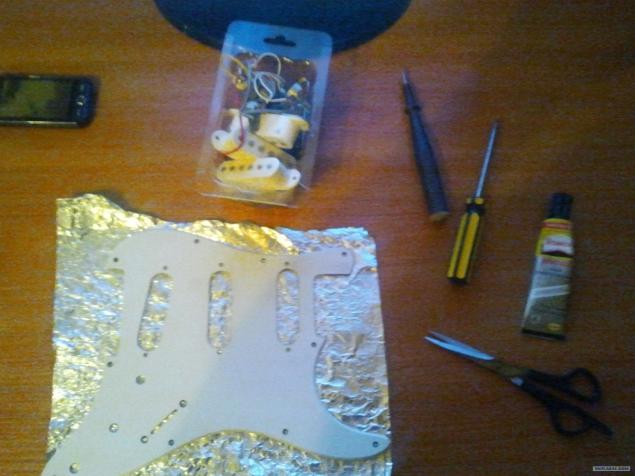
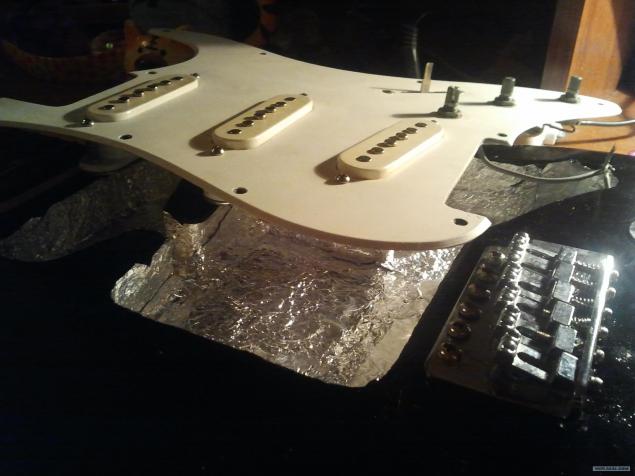
17. Then go to the assembly plates with TONE and pickups. But before you assemble, I decided to screen it with the help of the foil.
bottom view
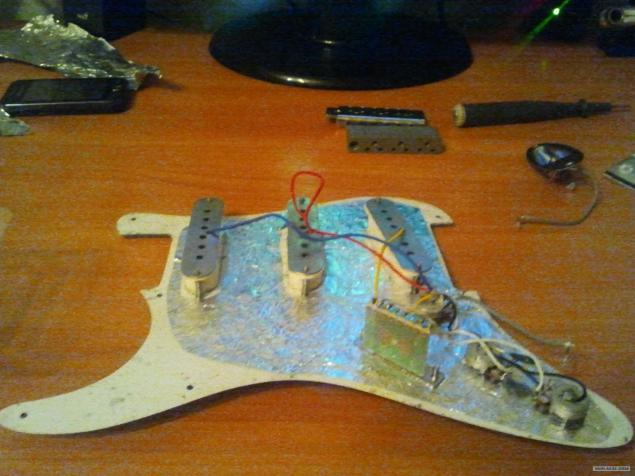
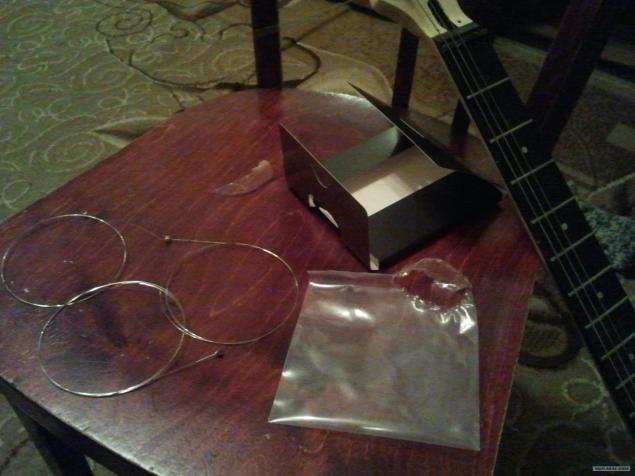
18. Screening should not only cover but also niche in the body, which was done.
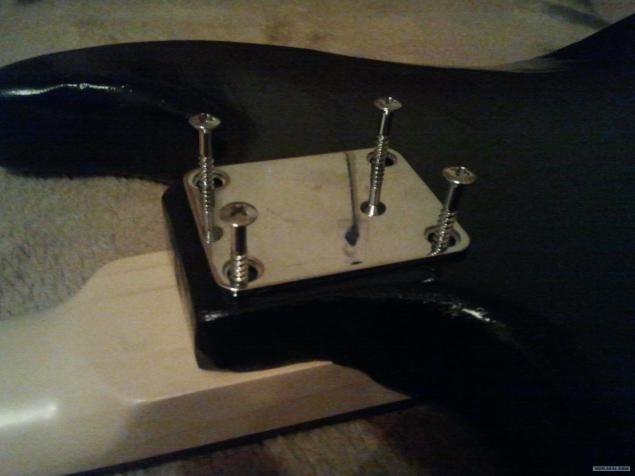
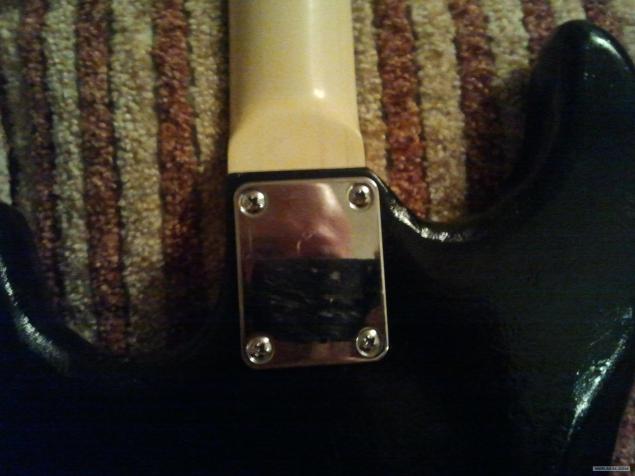
19. Well, here we come to the most interesting guitar-assembly, first of all fasten neck
Glitters ...
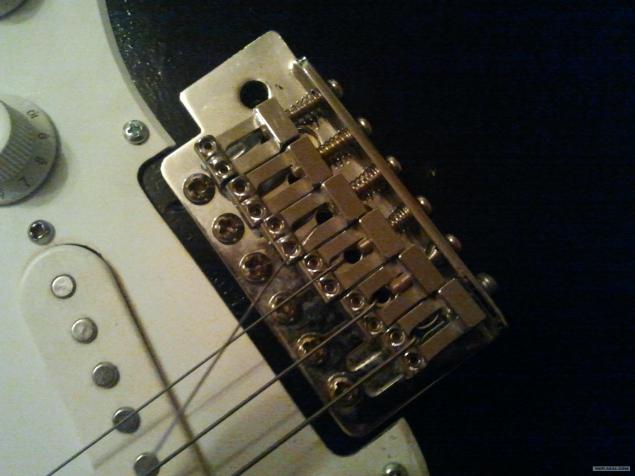
20. Then Tailpiece with all accessories
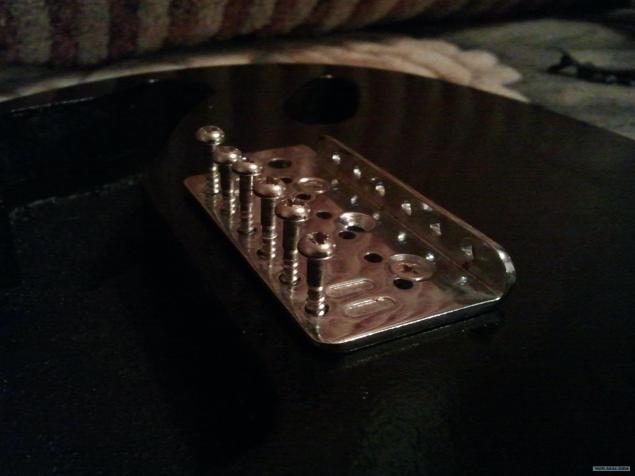
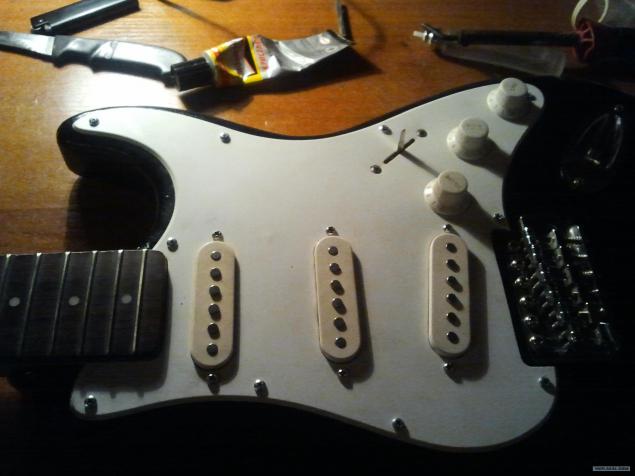
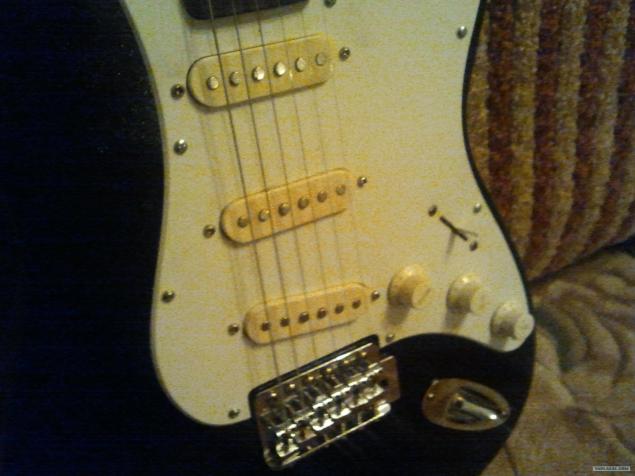
21 is connected to the plate on which the pre-installed pickups, and tone-tone and volume knobs
Assembling
22. Put the string. The actual installation on electric guitar strings is different from the acoustic guitar, the strings that are inserted from the back of the guitar and not on the front speaker.
The name strings can not remember ...
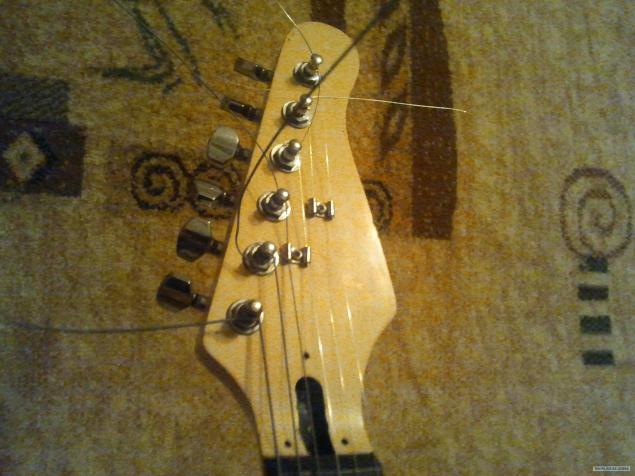
23. Well established nut and string, it now remains only to tune a guitar, and ...
... A little more ...
... And More ...
Posted in [mergetime] 1335298752 [/ mergetime]
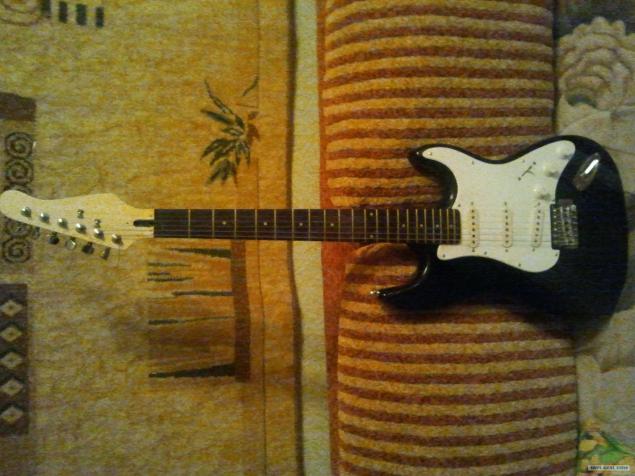
24. Try to play (after 3 liters of beer does not always hit it, sorry)
Posted in [mergetime] 1335298804 [/ mergetime]
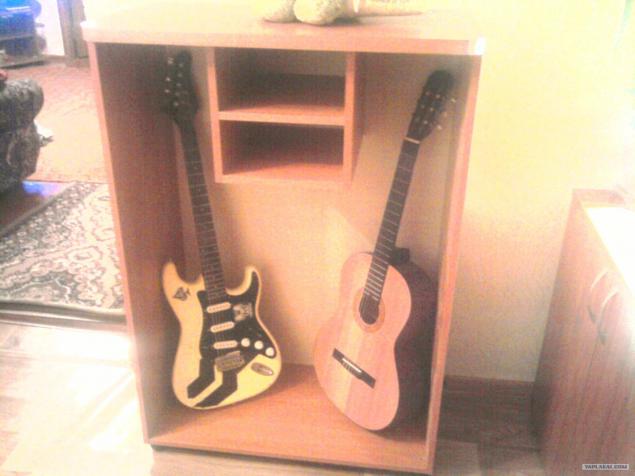
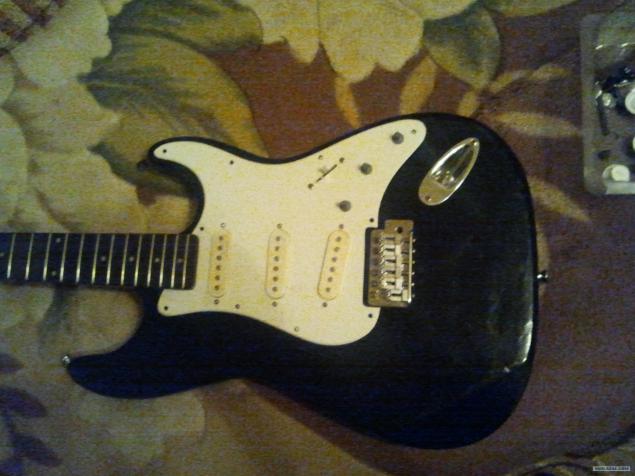
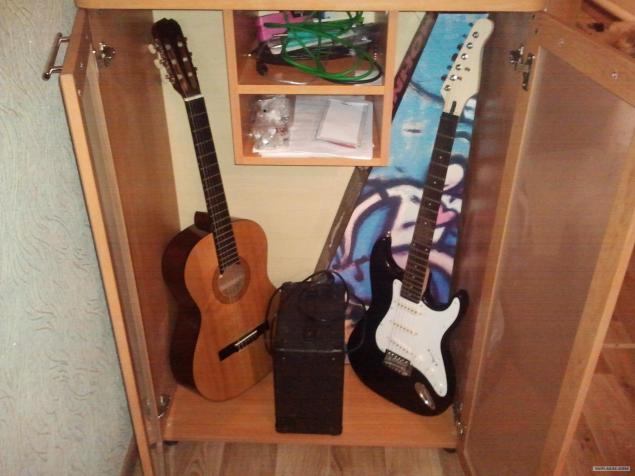
25. Well, that's all, the guitar took its place in the cabinet, which by the way, too, made my hands (not praise himself, who praises?).
Thank you all, I have everything.
Source:
As in my hands got electric almost dead, she did not have strings of Colca (the mechanism for stringing and tuning your guitar on top of the guitar neck), and most importantly, that it was painted with a brush in a fabulous yellow color with elements of the old paint, dust, sawdust and some debris. On overlay adorned with stickers of the club "A one» type & quot; I am here zhzheg & quot ;. But, like the smooth neck, a body without cracks, electrical part, too, was workable. Since the neck has been blacked out, to determine the name of the guitar I could not, but I think that this is something inexpensive such as Ashtone or Brahner. Financial investments in renovation took about 750 rubles, of which 250 rubles painting, a string of 400 rubles, and the rest purchased: solvent 646, peg for the sixth string, screws, bar emery and foil for baking. So I decided to extend the life of this tool! Will be 34 photos, please do not break. So there you go.
1Here way she looked when it came to me (she left).

2. Begin to remove the old paint with the aid of a solvent, and see that underneath miraculously preserved old "native" paint, even with varnish (solvent paint does not take). It has been pleased to be able to recreate the original color, but once cleared the entire back panel, moved to the front, then I was in for a surprise. On the front of the guitars were numerous broken away until the wood chips deep and almost complete lack of polish.

3. How would not like it, I had to clean off old paint polnost, ie to the tree.

4. SKINS ...

5. Once the skins

6. All walked nulevkoy ... body ready.

7. Now go to the patch, it also cleans with solvent.

8. Purified pad.

9. Since the neck, too, was not a cake, it will remove the paint with too, and also with a solvent (I wonder why he does not take the solvent ???). And what a beautiful neck turned, and why it painted black?

10. Net neck

11. On the neck set pegs ...

12. Now it is necessary to polish the frets

13. To this end, we need to block grinding, the longest and the smallest abrasive grit.

14. Draw a black marker on the frets and we clean the bar as long as there is no visible marker.

15. Then, with pencil and skins of my best rounds out, oh, and this tedious work- grinding.

16. And in the shop waiting for our body guitar that crave painted in classic black color. Painted in several layers, you're done, leave to dry, and then stroll varnish.

17. Then go to the assembly plates with TONE and pickups. But before you assemble, I decided to screen it with the help of the foil.

bottom view

18. Screening should not only cover but also niche in the body, which was done.

19. Well, here we come to the most interesting guitar-assembly, first of all fasten neck

Glitters ...

20. Then Tailpiece with all accessories

21 is connected to the plate on which the pre-installed pickups, and tone-tone and volume knobs

Assembling

22. Put the string. The actual installation on electric guitar strings is different from the acoustic guitar, the strings that are inserted from the back of the guitar and not on the front speaker.

The name strings can not remember ...

23. Well established nut and string, it now remains only to tune a guitar, and ...

... A little more ...

... And More ...
Posted in [mergetime] 1335298752 [/ mergetime]
24. Try to play (after 3 liters of beer does not always hit it, sorry)
Posted in [mergetime] 1335298804 [/ mergetime]

25. Well, that's all, the guitar took its place in the cabinet, which by the way, too, made my hands (not praise himself, who praises?).
Thank you all, I have everything.

Source: