170
Clean the faucet from plaque and water stone in a couple of minutes, the water no longer splashes in all directions, the fairy of purity is quite resting.
Most modern water mixers are equipped with aerators. Despite the penny cost, these simple devices play an important role in our comfort. But only until they're smacked by limestone. Therefore, regular cleaning of the aerator mixer is so important. How to do it we will tell in this article.
Cleaning aerator mixer Aerator cuts the water flow into many small and saturates it with air bubbles. Such a stream becomes voluminous, slightly milky color and does not create splashes that leave behind divorces on the tile, washbasin and chrome surfaces.
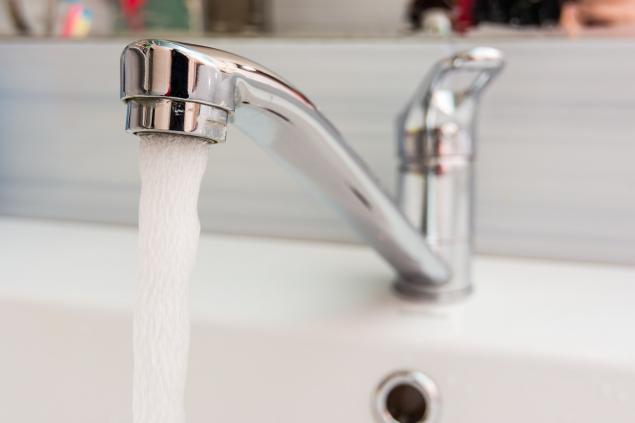
Foaming water cleanses hands and dishes better. Due to saturation with air, water consumption decreases, and washing becomes more comfortable.

In addition, the mesh in the aerator filters out large particles of dirt and rust, which often enter the water due to the deplorable state of our water supply networks. If the crane visually looks clean, but the flow of water is uneven or its direction is constantly changing, then it is time to clean the aerator.
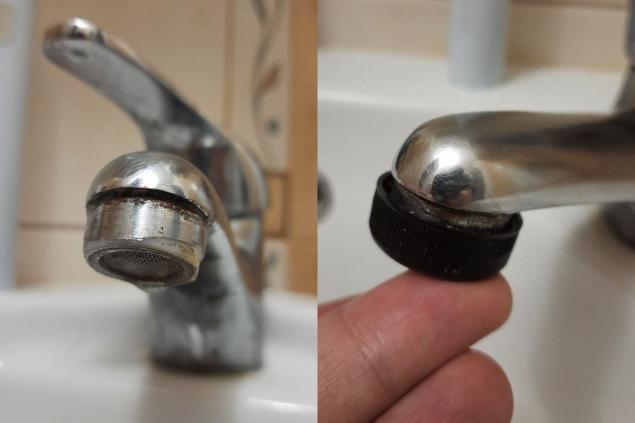
How to remove the aerator Try to unscrew the aerator nut with a draw key counterclockwise. Sponge key, so as not to damage the chrome, wrap with tape. Usually it is enough to do at least half a turn, then you can unscrew and hands.

But the difficulty is that from prolonged use, the aerator often sticks to the mixer. In this case, it is not necessary to sweat the fever. After all, excessive effort can simply break the aerator and part of it will remain inside the goose. And before the replacement of the entire mixer is not far. And the cost of good plumbing in our times, to put it mildly, is not cheap.
If the aerator does not unscrew, remove the whole goose and soak for half an hour in a solution of vinegar. You will need a 9% solution of vinegar and water in equal proportions. Gradually, vinegar will dissolve the plaque and after soaking the nozzle it can be easily unscrewed.
If you remove the goose for some reason does not work, fill a plastic bag with a mixture of vinegar and water. Then dip the tap into it and fasten it in this position with rubber band for an hour. After this procedure, the aerator nut should be unscrewed without problems.
There's another way. Fill the vinegar solution, scale remedy or citric acid plug from the plastic bottle. Wrap it with paint tape (leaves no traces on the surface) to the mixer for 1 hour. Then wash the aerator with water and you will see that the plaque has dissolved.
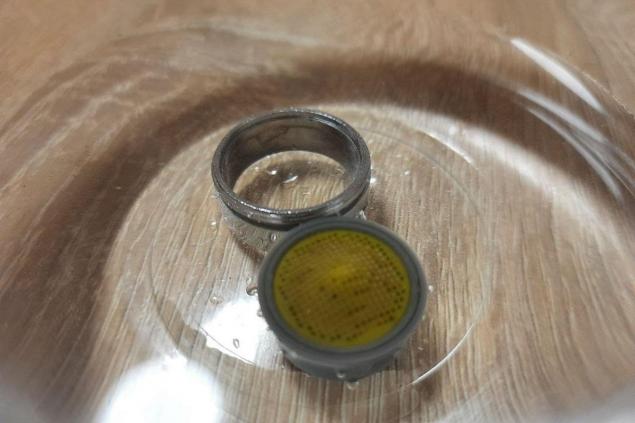
Clean aerator Aerator consists of a shell, body, mesh (or non-removable housing with a grid) and a rubber washer. At the same time, contrary to popular belief, metal mesh is no better than plastic. On the contrary, it oxidizes faster and “overgrown” with plaque.
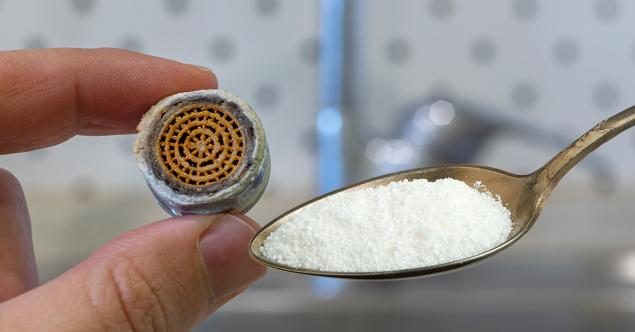
For quick cleaning of the disconnected aerator, put it in a small bowl. Pour a couple of teaspoons of citric acid into it and pour boiling water. After 5 minutes, gas bubbles will begin to stand out, and fallen pieces of plaque will appear in the water. Grains of sand stuck in the grid and small pieces of rust can be removed with a needle.

As you can see, the aerator is easy to clean even without the use of some expensive means. Unscrew and clean it at least once every six months. Then the stream of water from the tap will not create splashes, and washing hands or dishes will be more convenient and much more pleasant.

Cleaning aerator mixer Aerator cuts the water flow into many small and saturates it with air bubbles. Such a stream becomes voluminous, slightly milky color and does not create splashes that leave behind divorces on the tile, washbasin and chrome surfaces.

Foaming water cleanses hands and dishes better. Due to saturation with air, water consumption decreases, and washing becomes more comfortable.

In addition, the mesh in the aerator filters out large particles of dirt and rust, which often enter the water due to the deplorable state of our water supply networks. If the crane visually looks clean, but the flow of water is uneven or its direction is constantly changing, then it is time to clean the aerator.
How to remove the aerator Try to unscrew the aerator nut with a draw key counterclockwise. Sponge key, so as not to damage the chrome, wrap with tape. Usually it is enough to do at least half a turn, then you can unscrew and hands.

But the difficulty is that from prolonged use, the aerator often sticks to the mixer. In this case, it is not necessary to sweat the fever. After all, excessive effort can simply break the aerator and part of it will remain inside the goose. And before the replacement of the entire mixer is not far. And the cost of good plumbing in our times, to put it mildly, is not cheap.
If the aerator does not unscrew, remove the whole goose and soak for half an hour in a solution of vinegar. You will need a 9% solution of vinegar and water in equal proportions. Gradually, vinegar will dissolve the plaque and after soaking the nozzle it can be easily unscrewed.
If you remove the goose for some reason does not work, fill a plastic bag with a mixture of vinegar and water. Then dip the tap into it and fasten it in this position with rubber band for an hour. After this procedure, the aerator nut should be unscrewed without problems.

There's another way. Fill the vinegar solution, scale remedy or citric acid plug from the plastic bottle. Wrap it with paint tape (leaves no traces on the surface) to the mixer for 1 hour. Then wash the aerator with water and you will see that the plaque has dissolved.
Clean aerator Aerator consists of a shell, body, mesh (or non-removable housing with a grid) and a rubber washer. At the same time, contrary to popular belief, metal mesh is no better than plastic. On the contrary, it oxidizes faster and “overgrown” with plaque.

For quick cleaning of the disconnected aerator, put it in a small bowl. Pour a couple of teaspoons of citric acid into it and pour boiling water. After 5 minutes, gas bubbles will begin to stand out, and fallen pieces of plaque will appear in the water. Grains of sand stuck in the grid and small pieces of rust can be removed with a needle.

As you can see, the aerator is easy to clean even without the use of some expensive means. Unscrew and clean it at least once every six months. Then the stream of water from the tap will not create splashes, and washing hands or dishes will be more convenient and much more pleasant.


What to Consider When Choosing Your Upcoming Wedding Date and How It Affects Marriage
What heating to choose, if there is no gas and will not, I show that invented in Finland