756
How to plaster walls: tips for the beginner
Not every handyman is decided to plaster the walls because of the apparent complexity of work. I hasten to reassure the special skills required to perform large amounts of work in a short time. To learn well the basics of plastering with proper care and patience anyone can do.
Varieties of plasterPlaster itself rarely acts as a finishing walls. The main aim of application — levelling of the surface in a common plane, and with the elimination of local defects, e.g., seams and ledges of masonry. Following this principle, there are several types of plaster:
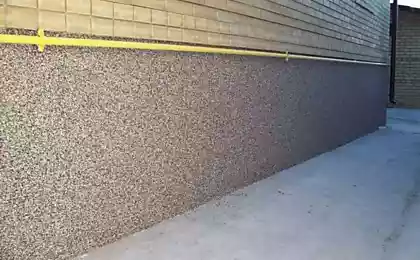
Rough wiping (spray) is used to improve the adhesion between the outer finishing and the supporting layer of the wall. This method is used for preparing surfaces for finishing, mounted on the glue or cement mortar. A typical example is the preparation under facing tiles. Impingement of ground without smoothing is used as a special case of the previous species, when there is a need to align a significant curvature of the wall surface or correct the geometry of space. Finishing plaster (nakryvki) forms a perfectly smooth surface with minimal amount of pores and defects. This method is a rough finish can be completed wallpapering or filling with putty before painting.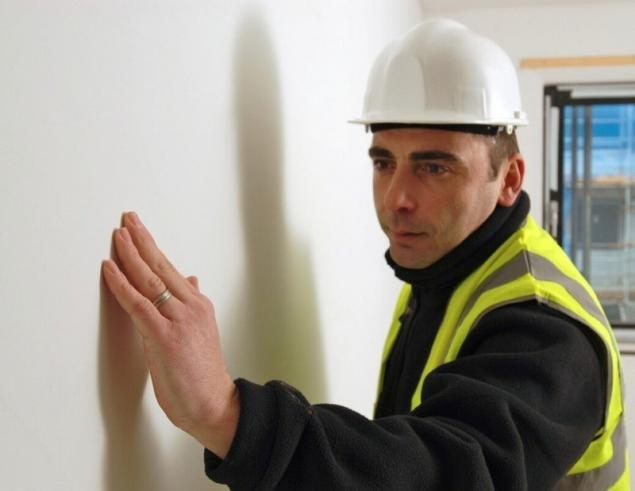
General procedure all three types of plastering work are carried out sequentially in the given order to achieve the desired surface characteristics. There are also differences due to changes in the formulation of the plaster. Depending on the desired characteristics of the finished surface, plaster may have increased strength and hardness, hydrophobicity or low conductivity. However, even with the special requirements of the application technique does not differ from the baseline, changing only the composition of the solution.
Cement mortar for plasterMaterial which is applied to walls to create a plaster — a common sand concrete with the brand strength from the M50 to M200. Because the plaster layer does not perform a direct load-bearing function, strength requirements are presented to counter the external mechanical stress and the detachment of the plaster under its own weight.

In the classic version of mortar for plastering is prepared from washed river or mountain sand with a grain size of not more than 1.2 mm for grouting and not more than 2.5 mm and spraying of the main screed. Binders for mortar is the cement of 200 or 300, for particularly durable plaster — 400 brand. The content of cement binder may not be less than 70 kg per 1 ton of dry sand, but usually it is added in a ratio of 1:5 to 1:8 to the filler. Of course, the higher grade of cement, the lower its content in the mortar for plaster.
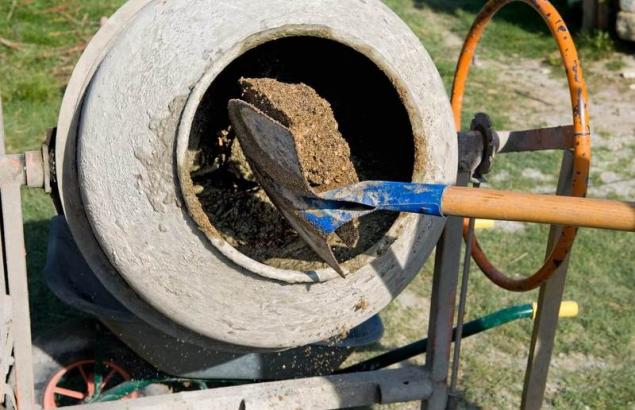
The second option of making plaster — partial (40%) or complete replacement of the cement binder into hydrated lime or hydrated. Milk of lime should contain at least 30% of lime by weight with no outstanding patches. The main purpose of the use of lime — air-entrainment to reduce the density of plaster. Respectively, reduces the consumption of binder, and the plaster is less dense and less stress on the bearing system of the building.
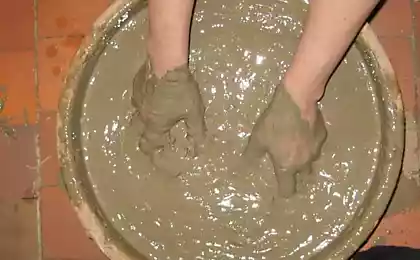
Solutions are prepared in water-based fluid is normalized on the basis of considerations to ensure the required mobility of the mixture and its tendency to stratification. The addition of water is carried out after mixing the dry filler and a binder, or by introducing completely dissolved cement in dry sand followed by bringing the mixture to the desired consistency. Density of the solution for different plaster layers is different: if obtenci substrate requires the consistency of liquid cream, the impingement of the primary layer is made thicker pasta, in which the traces of the pushing by the finger are not filled for at least 2-3 minutes.
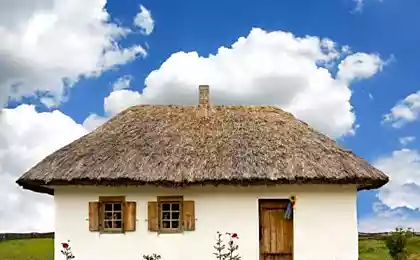
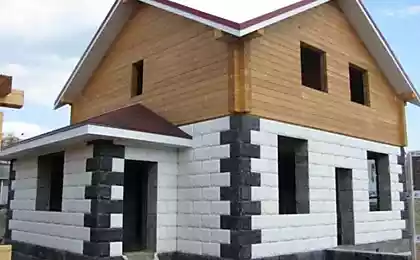
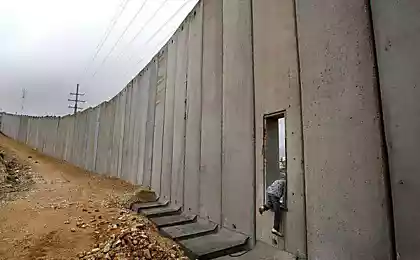
What kind of surface you can plasterFor plastering are suitable in a wide range of reasons: walls of brick, cinder block or porous blocks, concrete of grade not higher than M600 and prefabricated wooden structures. In the General case, the suitability of the ground under the plaster is determined by the adhesion, providing a sufficiently high load limit on separation.
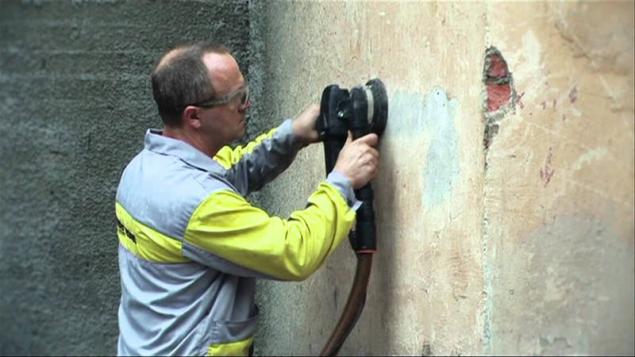
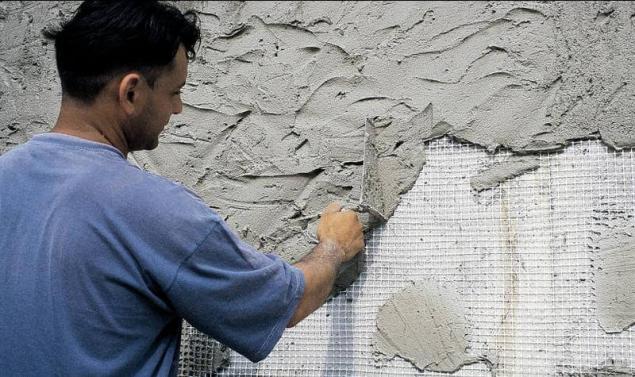
The surface of heavy concrete before plastering grind to improve porosity and soil compositions of deep penetration, do not form a film. Wood paneling sleeper or frame walls before applying the plaster covered with steel lath or stucco netting to improve the quality of the adhesion with the base.
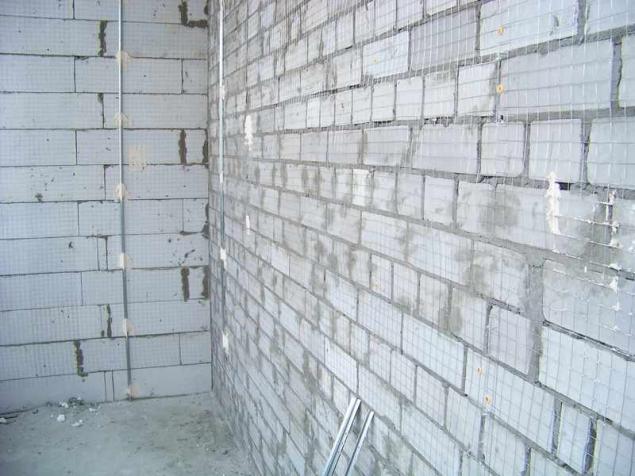
Mesh can also be used to bond the plaster layer. In this case, it stuffed after the primary obtenci before installing the beacons. Basically, the reinforcement mesh is required when the thickness of the plaster from 25 to 40 mm. an Additional argument in favor of strengthening can serve as the high mobility of the base, for example in adverse seismic conditions.
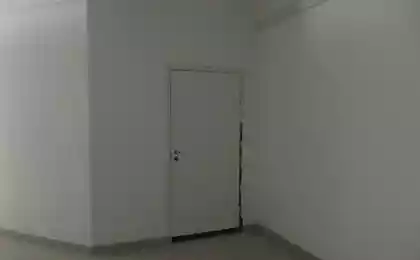
When and why you need the beaconsLinear screeds may be necessary in cases, when the surface of the plaster, the high demands of flatness. Beacons help to eliminate the formation of irregularities more than 2 mm/m, in other cases it is sufficient alignment tightening rail.
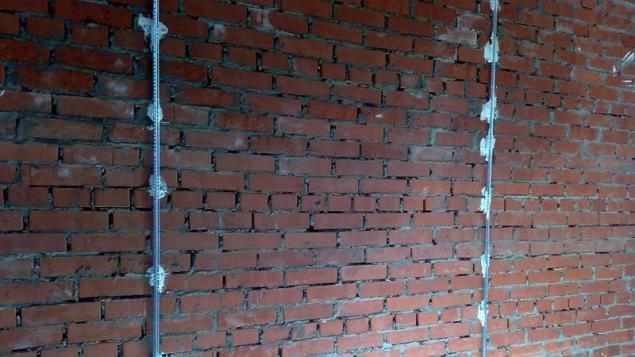
Installation of beacons is carried out on small bumps of the usual plaster with a small addition of gypsum to speed setting time. To set each beacon is mixed a small portion of the solution which is applied on the wall of a point on a vertical line with the indent in the 50-70 cm after Waiting 2-3 minutes, until the solution will thicken slightly, to the wall attach the metal rail of the lighthouse and utaplivajut it in lumps of mortar to match with the design wall plane.
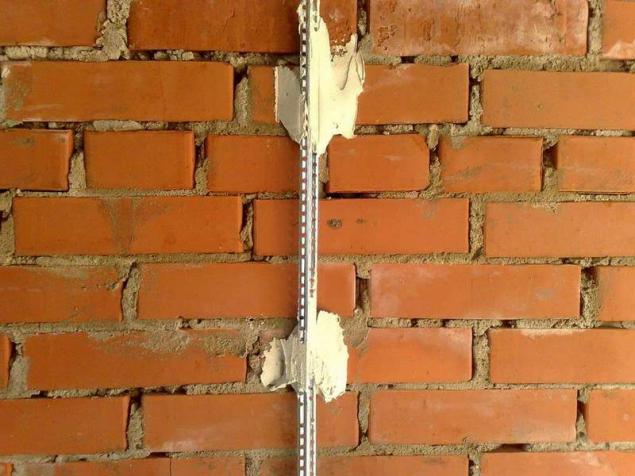
The most convenient method of alignment is the elimination of the top all lighthouses under General laces, their vertical alignment bubble level rack and then align with other lighthouses long rule. The distance between beacons should be such that when the available length of the rule, it in a horizontal position relied on at least two neighboring beacon. If after setting all the beacons marked local irregularities, straps can be quite easy to tear, and then stick with re-applying a new portion of the solution.
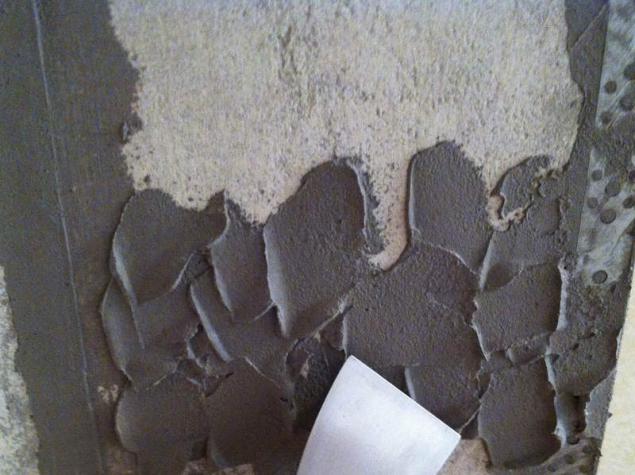
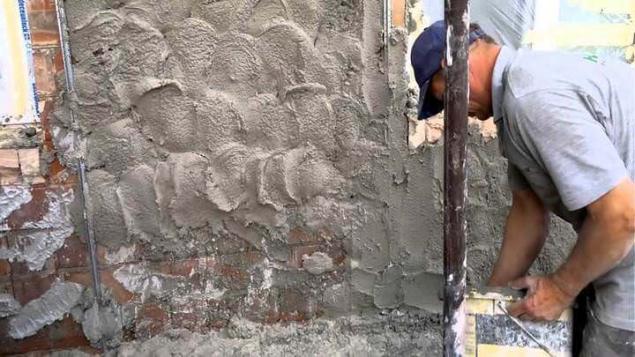
Preparation of substrate sprayedPrimary spray perform cement mortar of liquid consistency. The mixture is rubbed on the wall with a layer thickness of about 2-3 mm, using a wide spatula or trowel. The remaining nodules can not be removed immediately, but to wait for the initial hardening of the composition.
The main purpose of plastering is to fill all the pores and indentations on the surface of the substrate. So first the plaster carefully and rubbed, skreba metal edge at the base, and then stretch the mixture more or less evenly. The latter is necessary to prevent drying of the surface preparation before applying the next layer.
Technique impingement on the wallto Hold the impingement of the alignment layer can be 10-14 hours after wiping. For leveling without beacons layer up to 10 mm allowed the application of the mortar on the wall with a spatula, trowel or a trowel, that is a simple smearing thin layers one after the other with the control of the staff rules. With a more thick layer of plaster using a ladle.
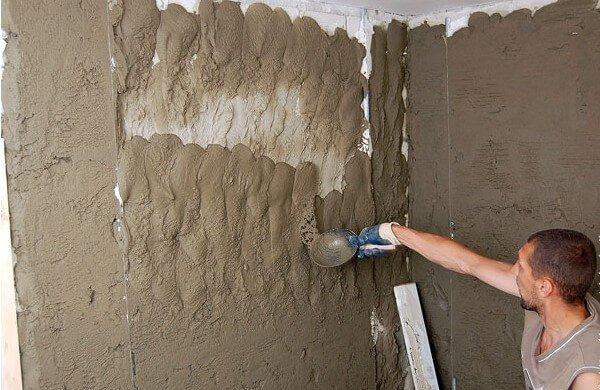
The walls of the bucket have a special shape for easy sliding of the mixture on a roll. The movement should be almost horizontal with a small (up to 20º) tilt the bucket to the side of the wall. The plaster slips into a tight ball and roll off the bucket with a small toss up.
Clash of the mixture to the wall should occur with a sufficiently large force, so the throw is performed with a smooth swing acceleration and hard braking. Thus at the moment of collision the solution is tightly compacted and gets rid of air pores. Pounce the plaster onto the wall running sections 1-1,5 m2 so that the stuck lumps protrude above the plane of installation of the beacons in the order of 7-10 mm. After filling in one section the excess mix off the tapered part of the rule and is mixed with fresh solution. The protruding mounds are cut by the pointed side of Reiki is quite simple, but in addition to motion bottom-up rule making and longitudinal fluctuations.
Grout plasterDrying base layer before the grout can be both full and partial within 2-3 days. After setting the mixture beacons sick, and educated the furrow is filled with the same solution which was used in the impingement.
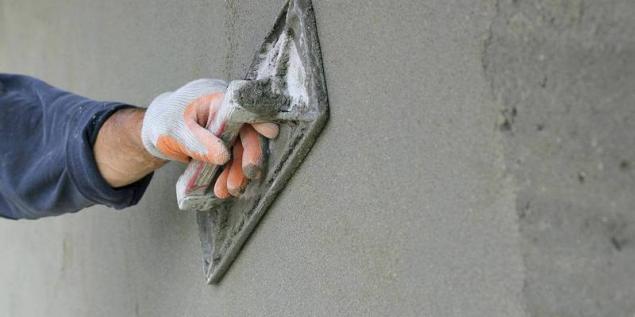
Formed surface may have many defects, cracks and hollows, but at the same time cut the plane of the mounds form the basis for the work of polyurethane trowel of appropriate size. The first solution in small portions pressed into the recesses, and then pounded on the surface in a circular motion without applying additional layer. Due to the more liquid consistency of the solution to wipe it is mixed with the crumbling particles of the filler, the surface of the plaster becomes solid and monolithic.
Drying and subsequent treatment ofthe Plastered surface is ready for finishing after a full term of aging: solutions to the cement binder to dry for 28 days in lime — within 20 days. During the first half of the deadline it is impossible to prevent drying out of the surface accompanied by formation of a web of cracks due to uneven hydration. To resolve such phenomena, in the room is maintained at high humidity: the installed capacity of water, and the plaster periodically sprinkled with water using a broom or hand sprayer.
Before applying the finishing plaster can be processed firming primer deep penetration. Before carrying out of painting works it is also possible to RUB plaster rare consistency for filling the pores and reducing paint consumption. published
P. S. And remember, only by changing their consumption — together we change the world! ©
Source: //www.rmnt.ru/story/decoration/1320434.htm
Varieties of plasterPlaster itself rarely acts as a finishing walls. The main aim of application — levelling of the surface in a common plane, and with the elimination of local defects, e.g., seams and ledges of masonry. Following this principle, there are several types of plaster:
Rough wiping (spray) is used to improve the adhesion between the outer finishing and the supporting layer of the wall. This method is used for preparing surfaces for finishing, mounted on the glue or cement mortar. A typical example is the preparation under facing tiles. Impingement of ground without smoothing is used as a special case of the previous species, when there is a need to align a significant curvature of the wall surface or correct the geometry of space. Finishing plaster (nakryvki) forms a perfectly smooth surface with minimal amount of pores and defects. This method is a rough finish can be completed wallpapering or filling with putty before painting.

General procedure all three types of plastering work are carried out sequentially in the given order to achieve the desired surface characteristics. There are also differences due to changes in the formulation of the plaster. Depending on the desired characteristics of the finished surface, plaster may have increased strength and hardness, hydrophobicity or low conductivity. However, even with the special requirements of the application technique does not differ from the baseline, changing only the composition of the solution.
Cement mortar for plasterMaterial which is applied to walls to create a plaster — a common sand concrete with the brand strength from the M50 to M200. Because the plaster layer does not perform a direct load-bearing function, strength requirements are presented to counter the external mechanical stress and the detachment of the plaster under its own weight.

In the classic version of mortar for plastering is prepared from washed river or mountain sand with a grain size of not more than 1.2 mm for grouting and not more than 2.5 mm and spraying of the main screed. Binders for mortar is the cement of 200 or 300, for particularly durable plaster — 400 brand. The content of cement binder may not be less than 70 kg per 1 ton of dry sand, but usually it is added in a ratio of 1:5 to 1:8 to the filler. Of course, the higher grade of cement, the lower its content in the mortar for plaster.

The second option of making plaster — partial (40%) or complete replacement of the cement binder into hydrated lime or hydrated. Milk of lime should contain at least 30% of lime by weight with no outstanding patches. The main purpose of the use of lime — air-entrainment to reduce the density of plaster. Respectively, reduces the consumption of binder, and the plaster is less dense and less stress on the bearing system of the building.

Solutions are prepared in water-based fluid is normalized on the basis of considerations to ensure the required mobility of the mixture and its tendency to stratification. The addition of water is carried out after mixing the dry filler and a binder, or by introducing completely dissolved cement in dry sand followed by bringing the mixture to the desired consistency. Density of the solution for different plaster layers is different: if obtenci substrate requires the consistency of liquid cream, the impingement of the primary layer is made thicker pasta, in which the traces of the pushing by the finger are not filled for at least 2-3 minutes.
What kind of surface you can plasterFor plastering are suitable in a wide range of reasons: walls of brick, cinder block or porous blocks, concrete of grade not higher than M600 and prefabricated wooden structures. In the General case, the suitability of the ground under the plaster is determined by the adhesion, providing a sufficiently high load limit on separation.

The surface of heavy concrete before plastering grind to improve porosity and soil compositions of deep penetration, do not form a film. Wood paneling sleeper or frame walls before applying the plaster covered with steel lath or stucco netting to improve the quality of the adhesion with the base.

Mesh can also be used to bond the plaster layer. In this case, it stuffed after the primary obtenci before installing the beacons. Basically, the reinforcement mesh is required when the thickness of the plaster from 25 to 40 mm. an Additional argument in favor of strengthening can serve as the high mobility of the base, for example in adverse seismic conditions.
When and why you need the beaconsLinear screeds may be necessary in cases, when the surface of the plaster, the high demands of flatness. Beacons help to eliminate the formation of irregularities more than 2 mm/m, in other cases it is sufficient alignment tightening rail.

Installation of beacons is carried out on small bumps of the usual plaster with a small addition of gypsum to speed setting time. To set each beacon is mixed a small portion of the solution which is applied on the wall of a point on a vertical line with the indent in the 50-70 cm after Waiting 2-3 minutes, until the solution will thicken slightly, to the wall attach the metal rail of the lighthouse and utaplivajut it in lumps of mortar to match with the design wall plane.

The most convenient method of alignment is the elimination of the top all lighthouses under General laces, their vertical alignment bubble level rack and then align with other lighthouses long rule. The distance between beacons should be such that when the available length of the rule, it in a horizontal position relied on at least two neighboring beacon. If after setting all the beacons marked local irregularities, straps can be quite easy to tear, and then stick with re-applying a new portion of the solution.
Preparation of substrate sprayedPrimary spray perform cement mortar of liquid consistency. The mixture is rubbed on the wall with a layer thickness of about 2-3 mm, using a wide spatula or trowel. The remaining nodules can not be removed immediately, but to wait for the initial hardening of the composition.

The main purpose of plastering is to fill all the pores and indentations on the surface of the substrate. So first the plaster carefully and rubbed, skreba metal edge at the base, and then stretch the mixture more or less evenly. The latter is necessary to prevent drying of the surface preparation before applying the next layer.
Technique impingement on the wallto Hold the impingement of the alignment layer can be 10-14 hours after wiping. For leveling without beacons layer up to 10 mm allowed the application of the mortar on the wall with a spatula, trowel or a trowel, that is a simple smearing thin layers one after the other with the control of the staff rules. With a more thick layer of plaster using a ladle.

The walls of the bucket have a special shape for easy sliding of the mixture on a roll. The movement should be almost horizontal with a small (up to 20º) tilt the bucket to the side of the wall. The plaster slips into a tight ball and roll off the bucket with a small toss up.

Clash of the mixture to the wall should occur with a sufficiently large force, so the throw is performed with a smooth swing acceleration and hard braking. Thus at the moment of collision the solution is tightly compacted and gets rid of air pores. Pounce the plaster onto the wall running sections 1-1,5 m2 so that the stuck lumps protrude above the plane of installation of the beacons in the order of 7-10 mm. After filling in one section the excess mix off the tapered part of the rule and is mixed with fresh solution. The protruding mounds are cut by the pointed side of Reiki is quite simple, but in addition to motion bottom-up rule making and longitudinal fluctuations.
Grout plasterDrying base layer before the grout can be both full and partial within 2-3 days. After setting the mixture beacons sick, and educated the furrow is filled with the same solution which was used in the impingement.

Formed surface may have many defects, cracks and hollows, but at the same time cut the plane of the mounds form the basis for the work of polyurethane trowel of appropriate size. The first solution in small portions pressed into the recesses, and then pounded on the surface in a circular motion without applying additional layer. Due to the more liquid consistency of the solution to wipe it is mixed with the crumbling particles of the filler, the surface of the plaster becomes solid and monolithic.
Drying and subsequent treatment ofthe Plastered surface is ready for finishing after a full term of aging: solutions to the cement binder to dry for 28 days in lime — within 20 days. During the first half of the deadline it is impossible to prevent drying out of the surface accompanied by formation of a web of cracks due to uneven hydration. To resolve such phenomena, in the room is maintained at high humidity: the installed capacity of water, and the plaster periodically sprinkled with water using a broom or hand sprayer.
Before applying the finishing plaster can be processed firming primer deep penetration. Before carrying out of painting works it is also possible to RUB plaster rare consistency for filling the pores and reducing paint consumption. published
P. S. And remember, only by changing their consumption — together we change the world! ©
Source: //www.rmnt.ru/story/decoration/1320434.htm