484
How to make a greenhouse according to the method of Mittleider
In due time the lover of various experiments with greenhouse crops Dr. Jacob Maladera had invented a new construction of the greenhouse. The so-called greenhouse for Mittleider often still call "American". It's light, easy to manufacture, has a convenient layout for the periodical airing and original. And going Toeplitz Mittleider your hands without any problems — its design is quite simple and mobile. It is important to know all of her secrets.
Kinds of designs of greenhouses for Mittleider
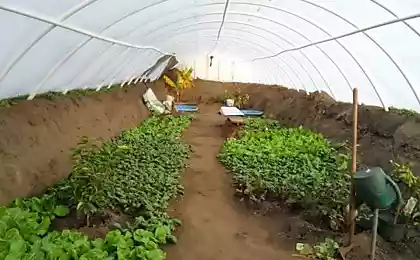
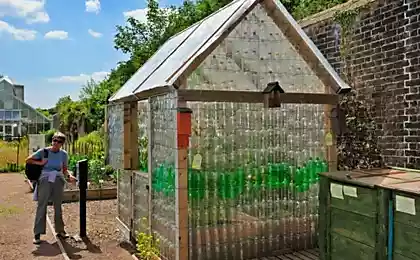
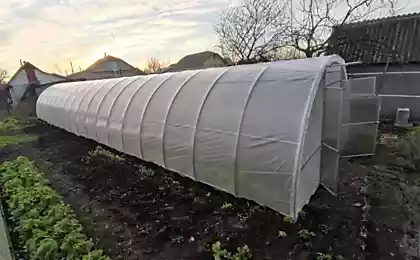
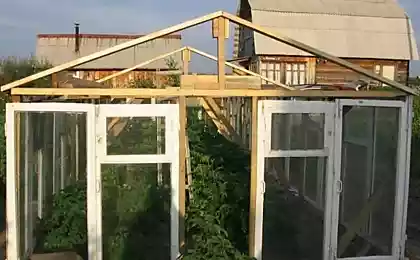
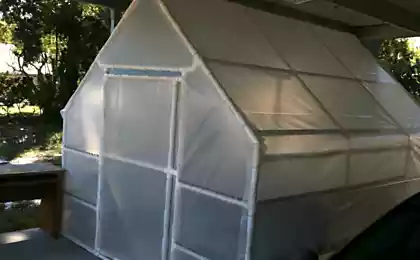
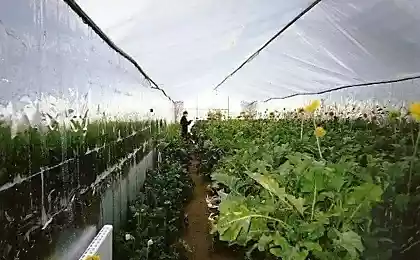
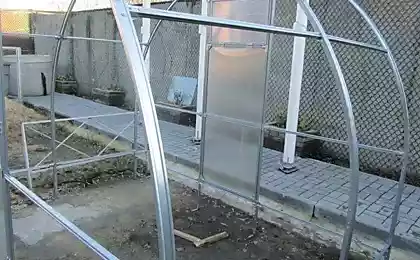
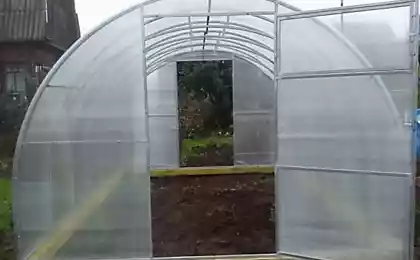
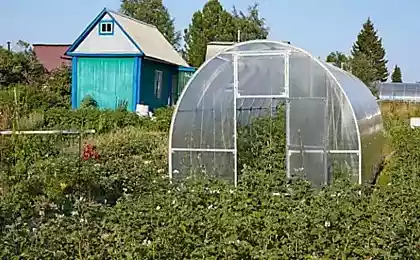
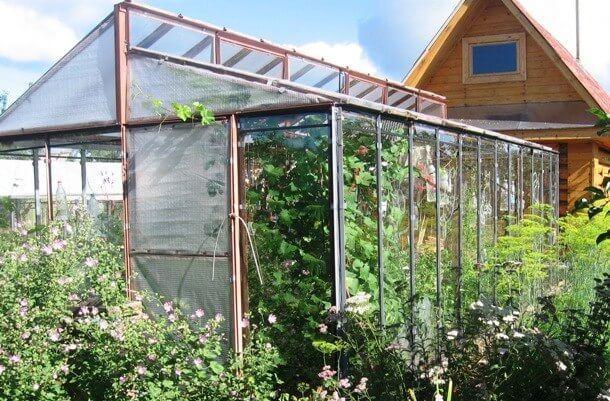
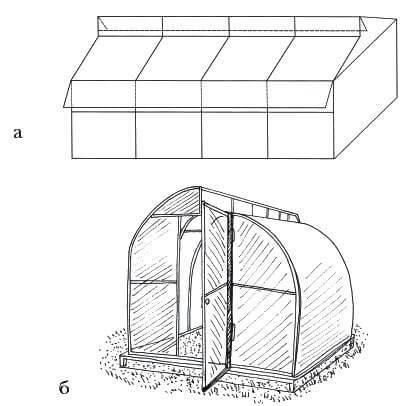
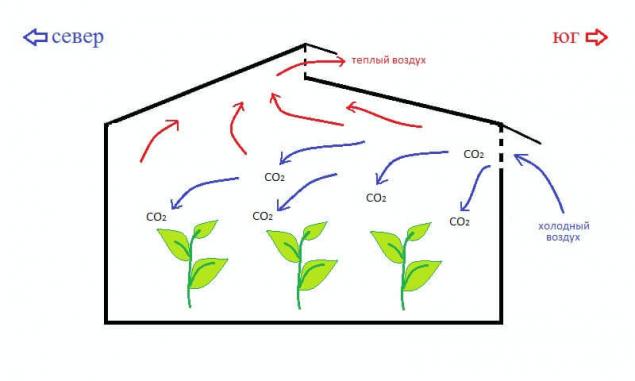
Miladinovska traditional greenhouse and a gable with vertical walls. But today, more and more began to appear in its second version – based on arch greenhouses is also covered with foil. This option is much easier than a traditional first, but because to build it with my hands much easier. This is a big plus – the usual arched greenhouse just famous for the fact that the ventilation in it is extremely difficult, and even passing through the doors the air can not displace the warm air mass, which is localized always on the ceiling. That is why the arrangement of the split-level roof, which has only a greenhouse according to the method of Mittleider, completely solves this problem.
The transom in the greenhouse of Maladera a fairly large area, and therefore more cold coming from the air fully displaces warm, and well distributed throughout the greenhouse. Appeared not so long ago and the third type of greenhouse for Mittleider with two transoms. One of them is located under the southern slope, and the second above it, but under the skate.
The main advantages miladinovski design:
— Split level roof, which is arranged in a special form of the ventilation device. It is extremely simple to manufacture and reliable in operation. Is it a vent from end to end along the greenhouse, allowing for the entire area of the internal space of the greenhouse structures to reliably ensure uniform and intensive ventilation.
Thanks to the good internal ventilation, the greenhouse Mittleider does not require additional equipment for ventilation – no fans on it at all, after all, an intense uniform air exchange occurs naturally. And this is a considerable savings in terms of electricity. Transom greenhouse Mittleider South-facing, and therefore the cold air, which would SuperCool the plants inside the structure misses.
Itself a greenhouse on Mittleider provides a very strong frame thanks to the installation of steel I-beams around the perimeter and braces that provide extra rigidity. Such a greenhouse without problems and resists hail, and strong winds, and abundant snowfall.
Due to the natural ventilation in a greenhouse is quite necessary for power plants carbon dioxide, and do not need special equipment – cylinders with this gas or any of the dispensers.
All the details miladinovski traditional greenhouse made of wood, and therefore on supporting structures already does not accumulate condensation, as, for example, on the metal parts (which is especially destructive of plants).
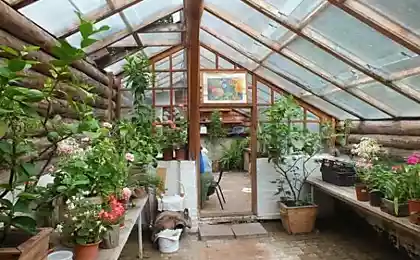
In the greenhouse of Mittleider located a horizontal cross beam – they are above human growth, whereby the side walls are not tilted, and upright, and work in such a greenhouse is a pleasure. The beams can be used for trellising plants, for example cucumbers. This design has a fairly large amount, thanks to its microclimate is the most resistant to any thermal effects from the outside.
In addition, despite the size miladinovski greenhouses, it is easy to assemble with screws and bolts, and disassemble in order to move to another area.
How to make a greenhouse
Land for greenhouses to Mittleider need to look for well-lit and perfectly smooth. As soon as such a place can cook the base.
I stage. Fabrication base
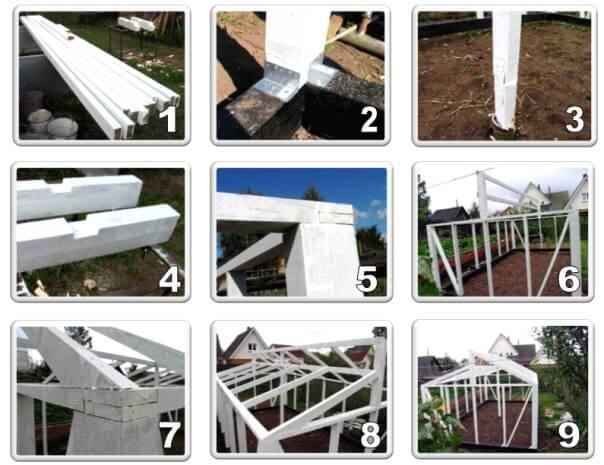
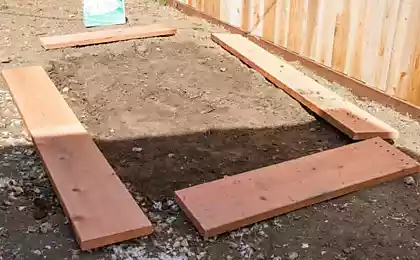
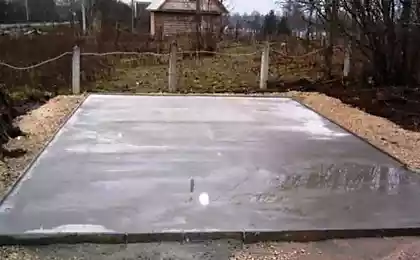
For this you need to find a timber with a cross section of 10x10 cm and a length of 3 m. the Timber is laid, and the corners are joined with screws. And to be sure that the correct get the rectangle of the base, you need to measure two diagonal – if they are equal, then everything was done right. Now the level you need to check the horizontal location of the tines in the ground. Then you need to drive stakes around the perimeter of the greenhouse and screws to connect them with the beams. But the part of the peg that is above the rail base, should be cut down.
Stage II. The construction of the greenhouse
On a flat surface you need to collect two lateral parts of the greenhouse, just as shown in the figure. Then measured the diagonal dimensions, and if the resulting wall has a rectangular shape, then put the hay harvest. Then you can put two walls upright on the base and fasten them with screws.
Stage III. Installing the end walls
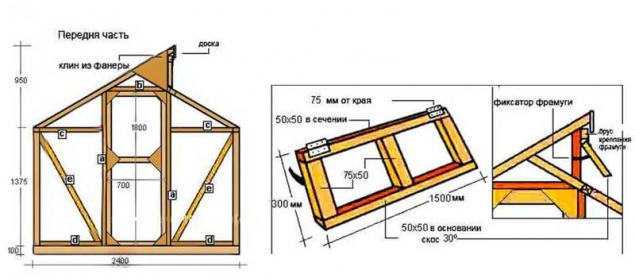
In order to install the end wall will need a beam with a cross section of 75х50 see Themselves stand should be installed at a distance of 70 cm, according to the width of the door. Stand the figure below marked as (a), the bars (b) and the cuts (e).
Stage IV. Window installation
The base of the window frame in a greenhouse for Mittlaider – 30 degrees, and the same is the slope of the roof. According to the measurements in the figure have to do 2 Windows and install them using special canopies and clamps for each of the frames. Now you need to make the beam cross section 50x50 and separate the wedges 7 mm out of simple plywood. And you can assemble the door frame on the screws and attach the plywood wedges as shown in the figure below. But pens and sheds can be set as desired.
V stage. The construction of the roof
In order to build a roof on a greenhouse Mittleider, should prepare in advance: — 5 matching rafters on the 1.9 m; — 5 support bars with a length of 32.7 cm, with cut corners; — 5 triangular wedges 50х50х50 cm, which can be easily cut from plywood with a thickness of 7 mm.
Now you need to collect 5 truss roofs the following samples. Importantly, the distance between the extreme points was equal to 2.4 m And then you can nails step 50 cm nailing triangular wedges. All 5 roof trusses need to be installed on the top of the wall first lateral structure to each side and then the other three at the same distance.
All you need to securely fasten with screws. And the roof is maintained in a vertical position, it can be temporarily prop the two ends. Now rail mounts for transom size 75х50 cm should be placed at the very top of the roof and on top of another and strengthen the Board. Further, between the rafters below the window, you should set the number of short bars.
VI stage. Shelter frame
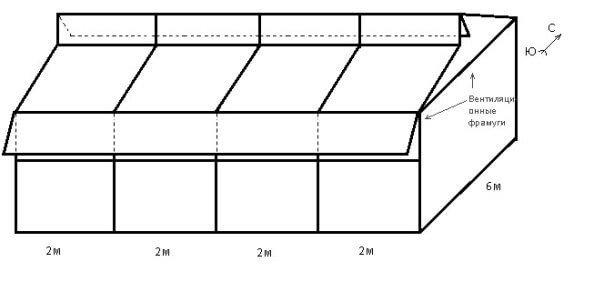
At this stage you can cover the greenhouse with plastic film, applying to it a thin Board and nailing up directly to the frame of the greenhouse. Similarly to unjam the film should be and the Windows and doors. But it is important to remember that the real greenhouse on Mittleider be covered with a double layer of film – the distance between leaves should be at least 5-7 cm Due to the double air gap even in strong frosts the plants in the greenhouse feel good.
Miladinovska greenhouse for a reason recognized worldwide as the most functional – each element performs its function as efficiently as possible, and at the same time the construction of such greenhouses is quite economical.
published
P. S. And remember, only by changing their consumption — together we change the world! ©
Source: www.pervorod.ru/blogs/eto-interesno/teplitsa-po-mitlayderu

Kinds of designs of greenhouses for Mittleider
Miladinovska traditional greenhouse and a gable with vertical walls. But today, more and more began to appear in its second version – based on arch greenhouses is also covered with foil. This option is much easier than a traditional first, but because to build it with my hands much easier. This is a big plus – the usual arched greenhouse just famous for the fact that the ventilation in it is extremely difficult, and even passing through the doors the air can not displace the warm air mass, which is localized always on the ceiling. That is why the arrangement of the split-level roof, which has only a greenhouse according to the method of Mittleider, completely solves this problem.
The transom in the greenhouse of Maladera a fairly large area, and therefore more cold coming from the air fully displaces warm, and well distributed throughout the greenhouse. Appeared not so long ago and the third type of greenhouse for Mittleider with two transoms. One of them is located under the southern slope, and the second above it, but under the skate.

The main advantages miladinovski design:
— Split level roof, which is arranged in a special form of the ventilation device. It is extremely simple to manufacture and reliable in operation. Is it a vent from end to end along the greenhouse, allowing for the entire area of the internal space of the greenhouse structures to reliably ensure uniform and intensive ventilation.
Thanks to the good internal ventilation, the greenhouse Mittleider does not require additional equipment for ventilation – no fans on it at all, after all, an intense uniform air exchange occurs naturally. And this is a considerable savings in terms of electricity. Transom greenhouse Mittleider South-facing, and therefore the cold air, which would SuperCool the plants inside the structure misses.
Itself a greenhouse on Mittleider provides a very strong frame thanks to the installation of steel I-beams around the perimeter and braces that provide extra rigidity. Such a greenhouse without problems and resists hail, and strong winds, and abundant snowfall.
Due to the natural ventilation in a greenhouse is quite necessary for power plants carbon dioxide, and do not need special equipment – cylinders with this gas or any of the dispensers.
All the details miladinovski traditional greenhouse made of wood, and therefore on supporting structures already does not accumulate condensation, as, for example, on the metal parts (which is especially destructive of plants).
In the greenhouse of Mittleider located a horizontal cross beam – they are above human growth, whereby the side walls are not tilted, and upright, and work in such a greenhouse is a pleasure. The beams can be used for trellising plants, for example cucumbers. This design has a fairly large amount, thanks to its microclimate is the most resistant to any thermal effects from the outside.
In addition, despite the size miladinovski greenhouses, it is easy to assemble with screws and bolts, and disassemble in order to move to another area.
How to make a greenhouse
Land for greenhouses to Mittleider need to look for well-lit and perfectly smooth. As soon as such a place can cook the base.
I stage. Fabrication base

For this you need to find a timber with a cross section of 10x10 cm and a length of 3 m. the Timber is laid, and the corners are joined with screws. And to be sure that the correct get the rectangle of the base, you need to measure two diagonal – if they are equal, then everything was done right. Now the level you need to check the horizontal location of the tines in the ground. Then you need to drive stakes around the perimeter of the greenhouse and screws to connect them with the beams. But the part of the peg that is above the rail base, should be cut down.
Stage II. The construction of the greenhouse

On a flat surface you need to collect two lateral parts of the greenhouse, just as shown in the figure. Then measured the diagonal dimensions, and if the resulting wall has a rectangular shape, then put the hay harvest. Then you can put two walls upright on the base and fasten them with screws.
Stage III. Installing the end walls
In order to install the end wall will need a beam with a cross section of 75х50 see Themselves stand should be installed at a distance of 70 cm, according to the width of the door. Stand the figure below marked as (a), the bars (b) and the cuts (e).

Stage IV. Window installation
The base of the window frame in a greenhouse for Mittlaider – 30 degrees, and the same is the slope of the roof. According to the measurements in the figure have to do 2 Windows and install them using special canopies and clamps for each of the frames. Now you need to make the beam cross section 50x50 and separate the wedges 7 mm out of simple plywood. And you can assemble the door frame on the screws and attach the plywood wedges as shown in the figure below. But pens and sheds can be set as desired.
V stage. The construction of the roof
In order to build a roof on a greenhouse Mittleider, should prepare in advance: — 5 matching rafters on the 1.9 m; — 5 support bars with a length of 32.7 cm, with cut corners; — 5 triangular wedges 50х50х50 cm, which can be easily cut from plywood with a thickness of 7 mm.
Now you need to collect 5 truss roofs the following samples. Importantly, the distance between the extreme points was equal to 2.4 m And then you can nails step 50 cm nailing triangular wedges. All 5 roof trusses need to be installed on the top of the wall first lateral structure to each side and then the other three at the same distance.
All you need to securely fasten with screws. And the roof is maintained in a vertical position, it can be temporarily prop the two ends. Now rail mounts for transom size 75х50 cm should be placed at the very top of the roof and on top of another and strengthen the Board. Further, between the rafters below the window, you should set the number of short bars.
VI stage. Shelter frame

At this stage you can cover the greenhouse with plastic film, applying to it a thin Board and nailing up directly to the frame of the greenhouse. Similarly to unjam the film should be and the Windows and doors. But it is important to remember that the real greenhouse on Mittleider be covered with a double layer of film – the distance between leaves should be at least 5-7 cm Due to the double air gap even in strong frosts the plants in the greenhouse feel good.
Miladinovska greenhouse for a reason recognized worldwide as the most functional – each element performs its function as efficiently as possible, and at the same time the construction of such greenhouses is quite economical.
published
P. S. And remember, only by changing their consumption — together we change the world! ©
Source: www.pervorod.ru/blogs/eto-interesno/teplitsa-po-mitlayderu
