719
Greenhouse thermos – unique energy-saving technology
Unbelievable but true: before the revolution in Russia were grown in the greenhouse up to 80 varieties of pineapple, and even exported them to Europe. And, in Belarus, for example, in the 30-ies was built greenhouse, buried 1.5 meters in the ground to grow tropical and subtropical plants. So what about the technology of the greenhouse-thermos in our area has long been known, only the construction practice for some reason was forgotten.
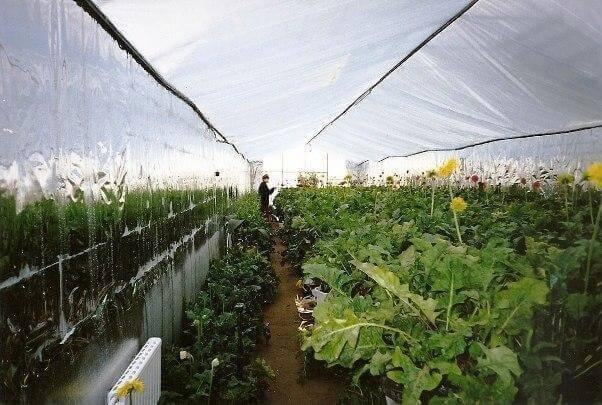
But the greenhouse-thermos – one of the best winter options for arrangement of closed ground. Its main advantage is the significant saving and heat retention, and, therefore, no need to pay up my bills with astronomical amounts. Such a greenhouse without the hassle of running all year round and in any cold weather, not only supplying the necessary products, but bringing a good profit, if the vegetables out of it to sell until spring. Moreover, if the greenhouse-the thermos properly equip, then grow it can even citrus.
And most importantly – in a makeshift greenhouse-the thermos is really possible to grow almost any culture. All this will provide proper design and application of special, time-tested technologies. And svetopropuskanie ability will not be lost – it will even be higher than in conventional greenhouses, oddly enough. A high-strength Foundation will help the greenhouse to survive and hail, and hurricanes, and the piles of snow at the sides.
The secret is that in the depth of 2-2,5 meters the land has almost the same temperature all year round. Fluctuations, of course, there is but slight – they are more dependent on surrounding groundwater. A good example is the well water which in winter and in summer from 7°C to 12°C. But at a depth of 1 meter the temperature changes is already more substantial in the winter the earth will be around +4°C and in summer +10°C. Conventional radiators such land does not warm, but "warm floor" easy. But in order to be heated not too dry soil, you need to put "dropper" — a special system of regular watering.
And built a greenhouse thermos with his hands literally for the season – inexpensively and heavy equipment. All you need is the tools and the desire to help.
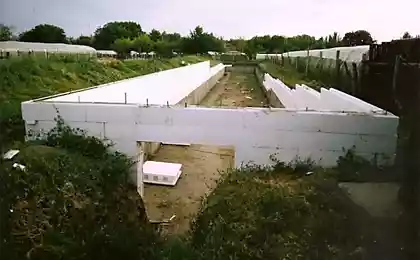
Step I. Preparation of excavation
Thus, the main part of the greenhouse-the thermos will go into the ground. That's why the first step is to dig under the pit, a depth of not less than 2 m – only where the ground freeze will not, and even contrary – to what extent it will share its warmth.
The length of underground greenhouses-thermos can be any width but no more than 5 meters. If exceed this value, and El, and the light reflectance are already weaker.
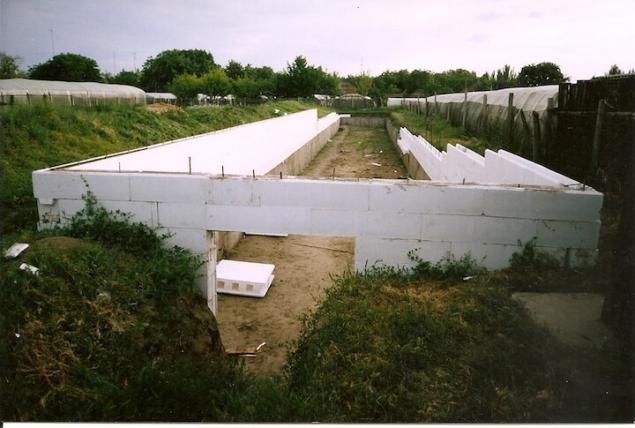
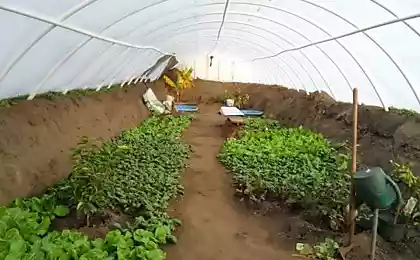
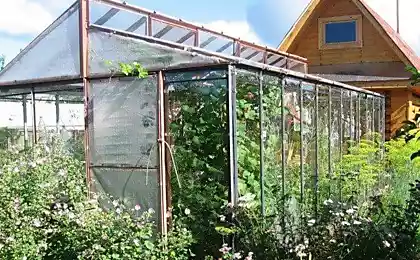
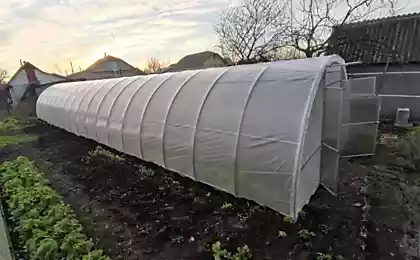
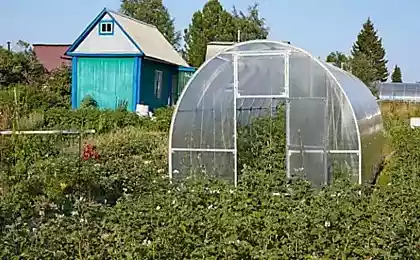
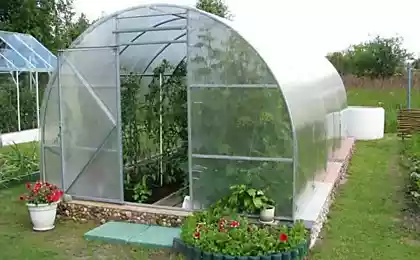
In principle, the greenhouse can be any shape but preferably one which in the photo. To Orient its possible need to go East-West, to one of its sides is maximally illuminated by the sun, and the second then you need to insulate with mineral wool or Styrofoam.
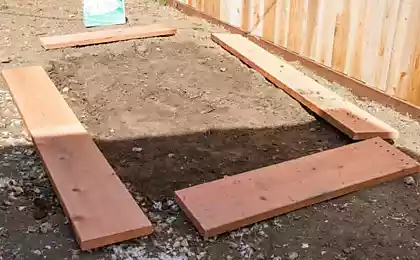
All the edges of the future greenhouses should be carefully aligned – after all, it is with the Foundation or laid on the perimeter of the concrete blocks, which will put the frame of the greenhouse-thermos – here already that someone more comfortable.
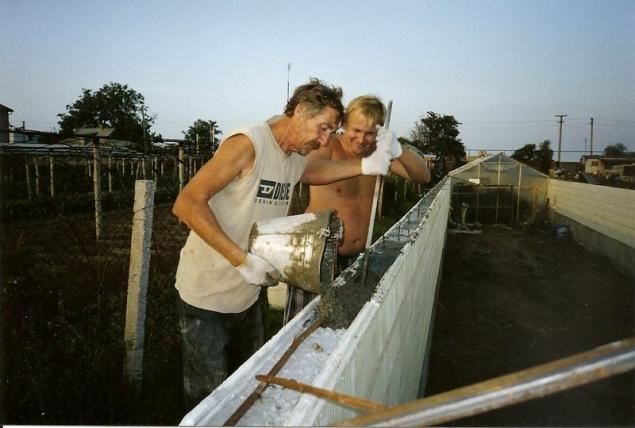
Phase II. The construction of the walls
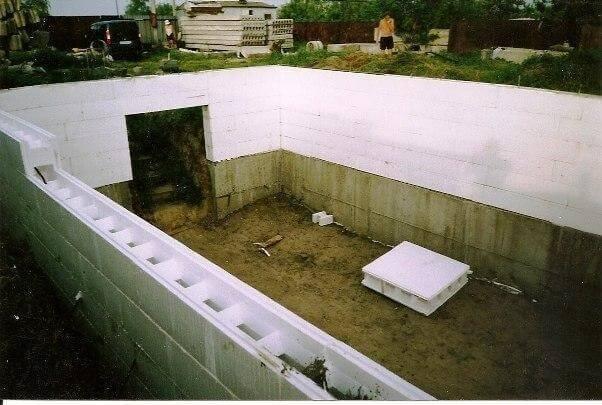
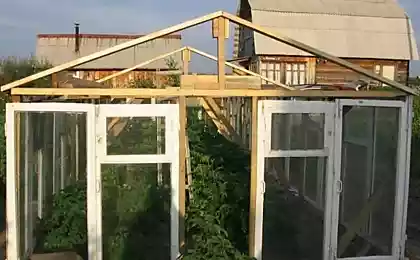
Once the Foundation is ready, you can begin to build the superstructure. It will be blocks that will stand directly on a concrete base, set on a metal frame.
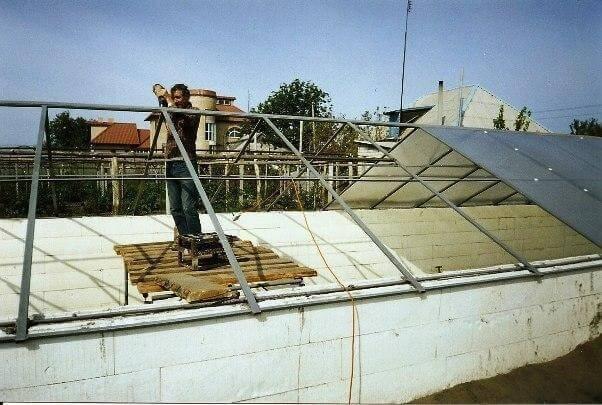
Now you need to check how easy it is to put the roof – all the little things and inconveniences should be taken care of in advance. The roof itself, of course, be made of polycarbonate, which are mounted on a metal frame with the crate and will be thoroughly secured.
Phase III. Insulation and heating
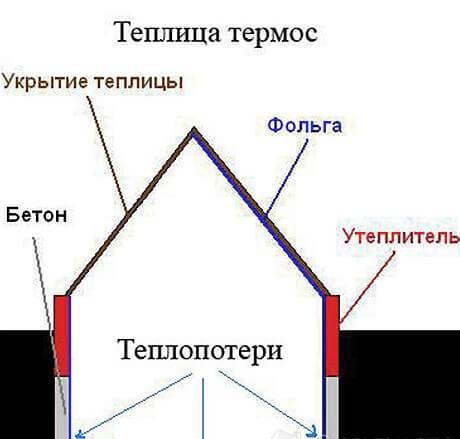
Now the internal part of walls need to be covered with special thermal insulating film, which would retain heat inside the greenhouse. In particularly cold regions of Russia it is better to use thick foil-thermoplastic film, preferably a double layer. However, this "pack" will be necessary only for the winter period. The main task of such reflective insulation is the preservation of heat, moisture and carbon dioxide, which is very valuable to plants.
It is also desirable that inside the greenhouse had a heat accumulator – it can be even a simple bottle of water, which quickly heated up, but cooled slowly because of the greenhouse effect. You can even put a simple barrel of water. Heat is also a greenhouse using the technology of Underfloor heating – electric cable under the ground. But it is important to protect from the shovel – you can do this in a regular grid, or all the same to pour a concrete cable.
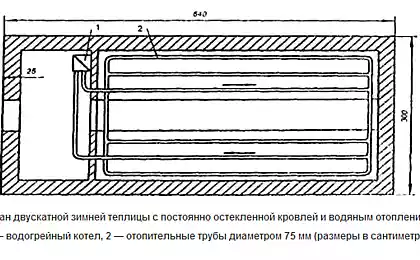
Underfloor heating in a greenhouse you could even make under the tile, and plants to grow in pots and vases. But most experienced gardeners suggest heating the greenhouse to do a combo – a little warming of the soil and a little air. After all, plants are the most important for the earth's temperature was about 25°C and 25-35°C for air at the correct humidity. In this respect, had a good performance buleryan can be enabled as a water loop, and pull it through the vent. And the pipe is better to have: part for water flow, and a part for air.
Stage IV. The construction of the roof
So, once the walls are ready, it's time to produce a polycarbonate roof.
Polycarbonate is a universal covering for greenhouses-thermos – up to 12 meters in length it can be absolutely no joints that will eliminate the flow through the entire structure. The polycarbonate is resistant to strikes, and curious birds can't hurt.
To reduce heat loss in the greenhouse-the thermos through the roof can be a very original way – a double coating of polycarbonate. This method is considered in the West one of the most effective – takes two sheets of polycarbonate of 4 mm and connected with one another through a special gasket profile for the manufacture of arcs. But the snow on this roof, of course, would not melt – so you can make an additional heating circuit. It will be switched on and off by timer and melted the snow will fall off the vibrator. Such a double loop of polycarbonate will significantly reduce the loss of heating, but the transmission, unfortunately, will decrease by 10% — you need to know. But in the end the result will be definitely better.
So, all parts of the rafters is desirable to prepare in advance and have a good soak with a protective impregnation. To connect them together to the half-tree, and the jumper to beat so that in the end the distance in the lower part, made up of 3-5 cm
Prepared from the rafters need to gather support. All jumpers are removed from the rafters. Now, under the rafters is inserted into the ridge bar, and under it – the front supports at 88 cm in height. Extreme rafters should be nailed to the ridge Board by nails 20 cm in length.
Now between the rafters and battens have to set jumpers on the front support and burs. If everything was done correctly, the roof will get collected and you can start painting in white color. As soon as the paint's dry, the roof can begin to cover with sheets of polycarbonate from the inside first, then outside. Attach the polycarbonate need screws for wood, especially before it drilled all the necessary holes.
After all the work on the roof along the ridge Bursa need to put the area of roofing iron with a lining of good insulation. But at the ends of the greenhouse polycarbonate sheets must be left screwed in – while the roof itself will not be nailed to the corner supports.
All the joints of the polycarbonate – with parts of the roof and to each other – carefully glue transparent tape. Then the roof can already be installed on the greenhouse-the thermos and fastened to its walls with nails and staples. And with both sides – back and front.
Then a triangular polycarbonate sheets can be sewn on top of the brackets.
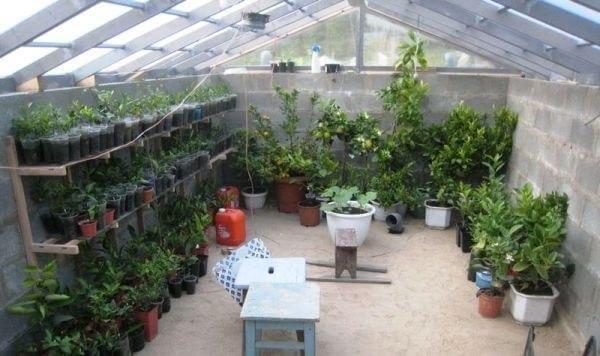
Stage V. the Arrangement of the internal space
The next step will be to settle the inner part of the greenhouse. It is extremely important to make a fully sealed, without any drafts, and the seams of the Foundation and masonry blocks need to patch or plaster, or foam. By the way, no unnecessary cracks in the roof.
The beds inside the greenhouse-the thermos should only be "high".
Left to spend in the greenhouse-the thermos to install electricity, if necessary, heaters and automatic watering. And the lack of lighting (for example, in the Siberian areas) would more than offset modern led lighting for greenhouses – they even harvest will be much richer. As for care, all you need is to dump snow from the roof, if you have not set the vibrator. You need to drop it gently so as not to damage expensive polycarbonate. But on the glass it will melt itself – will introduce more thermal conductivity. And heat loss that way, of course.
Thanks to the prospecting depth power and solid insulation the safest for delicate seedlings really is a greenhouse thermos: the design of it is that the difference between day and night temperature is not more than 5-7°C – this means that the plants are not facing stress. And therefore to grow in a greenhouse-the thermos can and the berries, fruits, and vegetables, and flowers, and even mushrooms.
Even in severe frosts in a greenhouse temperature will be just above zero. And thanks to the reflective trim in the greenhouse-the thermos without any additional light sources will be almost 2 times lighter than on the street, even on a cloudy day, well that will affect the future crop.published
P. S. And remember, only by changing their consumption — together we change the world! ©
Join us in Facebook , Vkontakte, Odnoklassniki
Source: dachnyj-sad-ogorod.com/teplica-termos-unikalnaya-energosberegayushchaya-tehnologiya

But the greenhouse-thermos – one of the best winter options for arrangement of closed ground. Its main advantage is the significant saving and heat retention, and, therefore, no need to pay up my bills with astronomical amounts. Such a greenhouse without the hassle of running all year round and in any cold weather, not only supplying the necessary products, but bringing a good profit, if the vegetables out of it to sell until spring. Moreover, if the greenhouse-the thermos properly equip, then grow it can even citrus.
And most importantly – in a makeshift greenhouse-the thermos is really possible to grow almost any culture. All this will provide proper design and application of special, time-tested technologies. And svetopropuskanie ability will not be lost – it will even be higher than in conventional greenhouses, oddly enough. A high-strength Foundation will help the greenhouse to survive and hail, and hurricanes, and the piles of snow at the sides.
The secret is that in the depth of 2-2,5 meters the land has almost the same temperature all year round. Fluctuations, of course, there is but slight – they are more dependent on surrounding groundwater. A good example is the well water which in winter and in summer from 7°C to 12°C. But at a depth of 1 meter the temperature changes is already more substantial in the winter the earth will be around +4°C and in summer +10°C. Conventional radiators such land does not warm, but "warm floor" easy. But in order to be heated not too dry soil, you need to put "dropper" — a special system of regular watering.

And built a greenhouse thermos with his hands literally for the season – inexpensively and heavy equipment. All you need is the tools and the desire to help.
Step I. Preparation of excavation

Thus, the main part of the greenhouse-the thermos will go into the ground. That's why the first step is to dig under the pit, a depth of not less than 2 m – only where the ground freeze will not, and even contrary – to what extent it will share its warmth.
The length of underground greenhouses-thermos can be any width but no more than 5 meters. If exceed this value, and El, and the light reflectance are already weaker.
In principle, the greenhouse can be any shape but preferably one which in the photo. To Orient its possible need to go East-West, to one of its sides is maximally illuminated by the sun, and the second then you need to insulate with mineral wool or Styrofoam.
All the edges of the future greenhouses should be carefully aligned – after all, it is with the Foundation or laid on the perimeter of the concrete blocks, which will put the frame of the greenhouse-thermos – here already that someone more comfortable.
Phase II. The construction of the walls

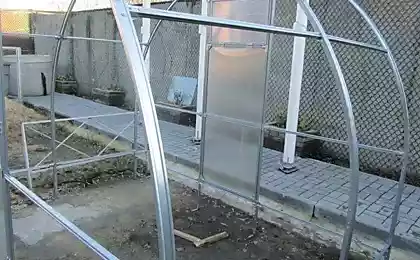
Once the Foundation is ready, you can begin to build the superstructure. It will be blocks that will stand directly on a concrete base, set on a metal frame.
Now you need to check how easy it is to put the roof – all the little things and inconveniences should be taken care of in advance. The roof itself, of course, be made of polycarbonate, which are mounted on a metal frame with the crate and will be thoroughly secured.
Phase III. Insulation and heating

Now the internal part of walls need to be covered with special thermal insulating film, which would retain heat inside the greenhouse. In particularly cold regions of Russia it is better to use thick foil-thermoplastic film, preferably a double layer. However, this "pack" will be necessary only for the winter period. The main task of such reflective insulation is the preservation of heat, moisture and carbon dioxide, which is very valuable to plants.
It is also desirable that inside the greenhouse had a heat accumulator – it can be even a simple bottle of water, which quickly heated up, but cooled slowly because of the greenhouse effect. You can even put a simple barrel of water. Heat is also a greenhouse using the technology of Underfloor heating – electric cable under the ground. But it is important to protect from the shovel – you can do this in a regular grid, or all the same to pour a concrete cable.
Underfloor heating in a greenhouse you could even make under the tile, and plants to grow in pots and vases. But most experienced gardeners suggest heating the greenhouse to do a combo – a little warming of the soil and a little air. After all, plants are the most important for the earth's temperature was about 25°C and 25-35°C for air at the correct humidity. In this respect, had a good performance buleryan can be enabled as a water loop, and pull it through the vent. And the pipe is better to have: part for water flow, and a part for air.
Stage IV. The construction of the roof

So, once the walls are ready, it's time to produce a polycarbonate roof.
Polycarbonate is a universal covering for greenhouses-thermos – up to 12 meters in length it can be absolutely no joints that will eliminate the flow through the entire structure. The polycarbonate is resistant to strikes, and curious birds can't hurt.
To reduce heat loss in the greenhouse-the thermos through the roof can be a very original way – a double coating of polycarbonate. This method is considered in the West one of the most effective – takes two sheets of polycarbonate of 4 mm and connected with one another through a special gasket profile for the manufacture of arcs. But the snow on this roof, of course, would not melt – so you can make an additional heating circuit. It will be switched on and off by timer and melted the snow will fall off the vibrator. Such a double loop of polycarbonate will significantly reduce the loss of heating, but the transmission, unfortunately, will decrease by 10% — you need to know. But in the end the result will be definitely better.
So, all parts of the rafters is desirable to prepare in advance and have a good soak with a protective impregnation. To connect them together to the half-tree, and the jumper to beat so that in the end the distance in the lower part, made up of 3-5 cm
Prepared from the rafters need to gather support. All jumpers are removed from the rafters. Now, under the rafters is inserted into the ridge bar, and under it – the front supports at 88 cm in height. Extreme rafters should be nailed to the ridge Board by nails 20 cm in length.
Now between the rafters and battens have to set jumpers on the front support and burs. If everything was done correctly, the roof will get collected and you can start painting in white color. As soon as the paint's dry, the roof can begin to cover with sheets of polycarbonate from the inside first, then outside. Attach the polycarbonate need screws for wood, especially before it drilled all the necessary holes.
After all the work on the roof along the ridge Bursa need to put the area of roofing iron with a lining of good insulation. But at the ends of the greenhouse polycarbonate sheets must be left screwed in – while the roof itself will not be nailed to the corner supports.
All the joints of the polycarbonate – with parts of the roof and to each other – carefully glue transparent tape. Then the roof can already be installed on the greenhouse-the thermos and fastened to its walls with nails and staples. And with both sides – back and front.
Then a triangular polycarbonate sheets can be sewn on top of the brackets.
Stage V. the Arrangement of the internal space

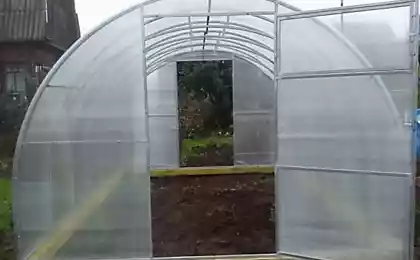
The next step will be to settle the inner part of the greenhouse. It is extremely important to make a fully sealed, without any drafts, and the seams of the Foundation and masonry blocks need to patch or plaster, or foam. By the way, no unnecessary cracks in the roof.
The beds inside the greenhouse-the thermos should only be "high".
Left to spend in the greenhouse-the thermos to install electricity, if necessary, heaters and automatic watering. And the lack of lighting (for example, in the Siberian areas) would more than offset modern led lighting for greenhouses – they even harvest will be much richer. As for care, all you need is to dump snow from the roof, if you have not set the vibrator. You need to drop it gently so as not to damage expensive polycarbonate. But on the glass it will melt itself – will introduce more thermal conductivity. And heat loss that way, of course.
Thanks to the prospecting depth power and solid insulation the safest for delicate seedlings really is a greenhouse thermos: the design of it is that the difference between day and night temperature is not more than 5-7°C – this means that the plants are not facing stress. And therefore to grow in a greenhouse-the thermos can and the berries, fruits, and vegetables, and flowers, and even mushrooms.
Even in severe frosts in a greenhouse temperature will be just above zero. And thanks to the reflective trim in the greenhouse-the thermos without any additional light sources will be almost 2 times lighter than on the street, even on a cloudy day, well that will affect the future crop.published
P. S. And remember, only by changing their consumption — together we change the world! ©
Join us in Facebook , Vkontakte, Odnoklassniki
Source: dachnyj-sad-ogorod.com/teplica-termos-unikalnaya-energosberegayushchaya-tehnologiya


How much is spent by the owner of the car money for the year
The muscle fiber types and rules for their training