608
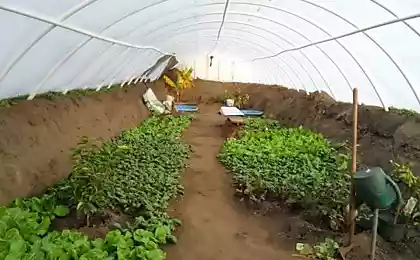
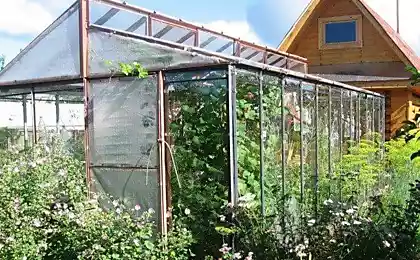
Winter greenhouse with their hands
All the hothouses and greenhouses are divided into two main categories:
In this article, we will be able to present you how to build a winter greenhouse with his own hands.
The typical technology of construction of winter greenhouses and stages
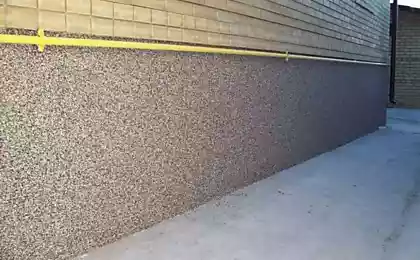
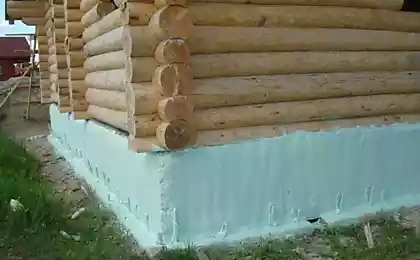
What distinguishes summer from winter greenhouse? First of all, the presence of the Foundation, the heating device and the glazing. Otherwise they are almost identical.
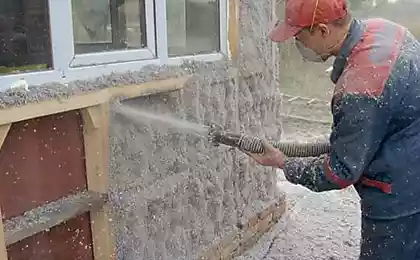
When the greenhouse is installed, you must go to the insulation. To date, the warmest and most reliable greenhouses are made of polycarbonate and the fuel use biotoplivo. If you have the necessary funds for the construction of such of the heifer, it will be the best option.
However, there is another option. If the greenhouse is located directly near the house you can connect to a shared heating system. However, before this is done, it is necessary to calculate the required coefficient of heat for the room.
When the calculated necessary coefficient of heat, you can proceed to the second step — the selection of the heater. Experts advise to use aluminum convector. Why? It distributes heat evenly over the entire area of the design.
The third step — preparing the soil of the greenhouse. Usually, the composition of the soil is made of the following layers: a layer of humus + sand + humus layer. To destroy all pests in the winter time, made a special mixture of one teaspoon of urea and superphosphate.
A fourth step. After all of the heat-conducting pipe or the battery will be laid on the bottom, cover the design of PVC film. This is done for two reasons:
1. The soil does not fall on the battery.
2. Accumulated humus.
The bottom and walls of the greenhouse should be wrapped with plastic film. To the walls, PVC film can be attached using a construction stapler.
Not fertile layer of fill where the track and turf layer, the site of the future garden. Make sure that the roots of the turf were at the top. This will prevent further germination.
Also, before you fill the bed, it is necessary to provide the inner walls and hold them between a solid wire. Otherwise, the soil can inflate. Wire pre-tape and insert in a plastic pipe, it will not rot.
If the greenhouse is not planned to grow cucumbers it will have abundant moisture, the frame of the greenhouse will be cheaper and easier to make from wood. As always, the tree lasts a long time, it is treated with a good antiseptic and transferred to the building structure. Also wood is much easier to work with. For example, it is easy to fasten the metal frame or other consumables.
SUBSCRIBE to OUR youtube channel that allows you to watch online, download from YouTube free video about the recovery, the rejuvenation of man. Love for others and ourselves, as the feeling of high vibrations — an important factor for improvement .
Put LIKES and share with your FRIENDS!
www.youtube.com/channel/UCXd71u0w04qcwk32c8kY2BA/videos
Alternative types of winter greenhouses and how to build
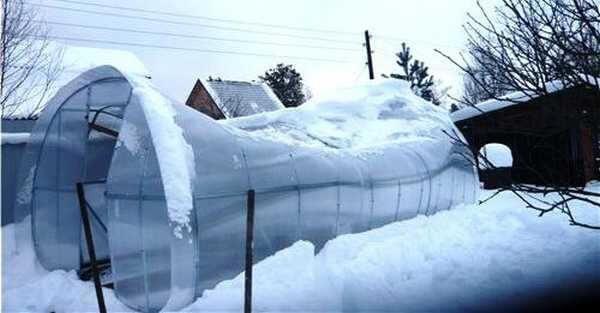
Consider the most modern types of greenhouses:
Consider the construction of greenhouses with a total area of 15 square meters.
First of all, you need to dig a pit length 12 meters, width of 3.5 meters and a depth of 80 inches. Try to foresee the long side was positioned from East to West, and the shed roof was directed to the South.
Next, mark out the pit was dug. To do this, start from the edges of the greenhouse to 60 inches and mark a rectangle the size 2.27*10.60 meters.
Then the corners of the marked rectangle trying to drive pegs and pull the rope. Now you can divide the bed into two parts: 0.8 meter width on one side and 1.47 metres on the other. The remaining distance between the halves is the corridor.
Then begin to dig holes for the fence posts every 2 meters, a depth of two feet. In the end, we need:
The picture below is visible the scheme. On the right side, as it was written above, we have an area of 0.8 meters from the left side of 1.47 meters. Depicted in the center of the middle pillars with a height of 2.30 meters. Here will lie the separating path.
Roof slope of 22 degrees, educated middle pole and South poles form the roof, which should be located to the South. On the other hand, the wall will be poured. But let's talk about this further.

Before post-ground in the ground, they must be covered with resin or to process a good antiseptic. To prevent the rotting wood, it can be annealed.
Then the roof was reliable, at the top of the pillars make the spikes 5 cm in height and cross-section of 4*5 cm.
Next, stack the straps from bars and logs made spikes.
After this horizontal log nailed to the pillars and filled the greenhouse with the outside the earth dug out of the pit. Later, when it will rain, all the moisture will soak into the ground.
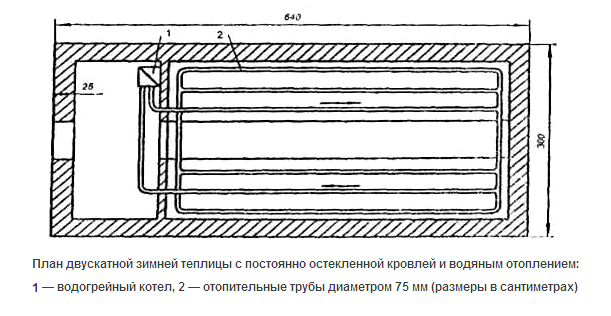
For greenhouses with a size of 10.6 meters will perfectly suit a chimney stove. Perhaps this is the most economical option.
The ceiling of the greenhouse on the North side is stitched the usual boards, and the distance between the roof and the boards clogged with sawdust or other insulating materials.
As for the South side, the roof is made of frames for glass and in subsequent passes the glazing. Frame shall have a minimum thickness of 4 mm.
How to make a gable winter greenhouse.
Gable winter greenhouses can be constructed with his own hands. To protect this design with frames and glazing.
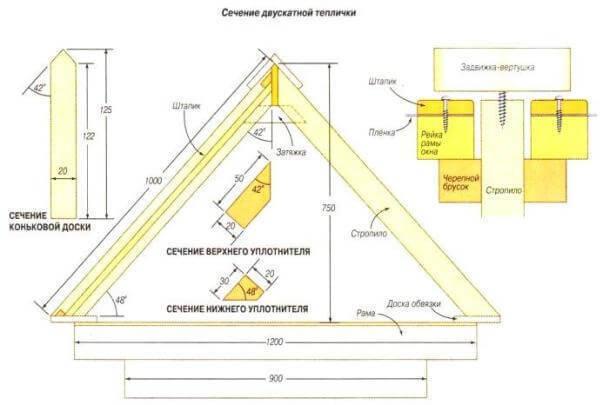
The design of such a greenhouse will look something like this:
1. Is the Foundation with a cross section of 40*40 cm.
2. Laid brick walls in a row, and on top of them fit strapping timber with a section of 15*15 cm provided with slots for greenhouse frames.
3. The rafters are made of boards 10*10 inches and connect the longitudinal bar with a cross section of 12*12 inches. published
Source: hrw.ru/zimnyaya-teplica-svoimi-rukami/
- greenhouses for growing vegetables in the winter season;
- greenhouses and greenhouses for vegetables in the summer season.
In this article, we will be able to present you how to build a winter greenhouse with his own hands.
The typical technology of construction of winter greenhouses and stages
What distinguishes summer from winter greenhouse? First of all, the presence of the Foundation, the heating device and the glazing. Otherwise they are almost identical.
When the greenhouse is installed, you must go to the insulation. To date, the warmest and most reliable greenhouses are made of polycarbonate and the fuel use biotoplivo. If you have the necessary funds for the construction of such of the heifer, it will be the best option.
However, there is another option. If the greenhouse is located directly near the house you can connect to a shared heating system. However, before this is done, it is necessary to calculate the required coefficient of heat for the room.
When the calculated necessary coefficient of heat, you can proceed to the second step — the selection of the heater. Experts advise to use aluminum convector. Why? It distributes heat evenly over the entire area of the design.
The third step — preparing the soil of the greenhouse. Usually, the composition of the soil is made of the following layers: a layer of humus + sand + humus layer. To destroy all pests in the winter time, made a special mixture of one teaspoon of urea and superphosphate.
A fourth step. After all of the heat-conducting pipe or the battery will be laid on the bottom, cover the design of PVC film. This is done for two reasons:
1. The soil does not fall on the battery.
2. Accumulated humus.

The bottom and walls of the greenhouse should be wrapped with plastic film. To the walls, PVC film can be attached using a construction stapler.
Not fertile layer of fill where the track and turf layer, the site of the future garden. Make sure that the roots of the turf were at the top. This will prevent further germination.
Also, before you fill the bed, it is necessary to provide the inner walls and hold them between a solid wire. Otherwise, the soil can inflate. Wire pre-tape and insert in a plastic pipe, it will not rot.

If the greenhouse is not planned to grow cucumbers it will have abundant moisture, the frame of the greenhouse will be cheaper and easier to make from wood. As always, the tree lasts a long time, it is treated with a good antiseptic and transferred to the building structure. Also wood is much easier to work with. For example, it is easy to fasten the metal frame or other consumables.
SUBSCRIBE to OUR youtube channel that allows you to watch online, download from YouTube free video about the recovery, the rejuvenation of man. Love for others and ourselves, as the feeling of high vibrations — an important factor for improvement .
Put LIKES and share with your FRIENDS!
www.youtube.com/channel/UCXd71u0w04qcwk32c8kY2BA/videos
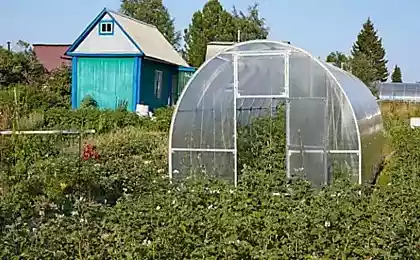
Alternative types of winter greenhouses and how to build
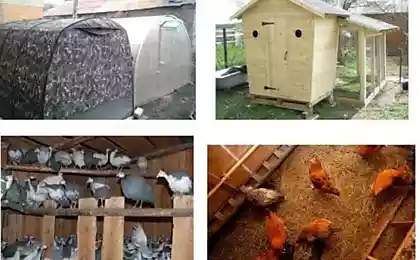
Consider the most modern types of greenhouses:
- Wall lean-to greenhouse.
- Lean-to greenhouse with a dirt dumping.
- Gable greenhouse with walls and a glass roof.
- Greenhouse, consisting of greenhouse frames and a gable roof.
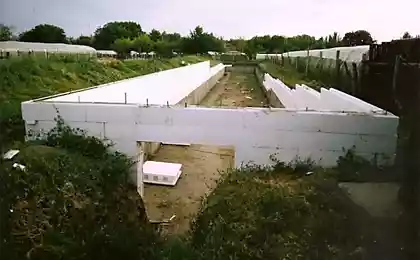
Consider the construction of greenhouses with a total area of 15 square meters.
First of all, you need to dig a pit length 12 meters, width of 3.5 meters and a depth of 80 inches. Try to foresee the long side was positioned from East to West, and the shed roof was directed to the South.
Next, mark out the pit was dug. To do this, start from the edges of the greenhouse to 60 inches and mark a rectangle the size 2.27*10.60 meters.
Then the corners of the marked rectangle trying to drive pegs and pull the rope. Now you can divide the bed into two parts: 0.8 meter width on one side and 1.47 metres on the other. The remaining distance between the halves is the corridor.
Then begin to dig holes for the fence posts every 2 meters, a depth of two feet. In the end, we need:
- 6 poles with a height of 2.30 meters.
- 6 poles with a height of 1.65 meters to the South.
- 6 poles at 2.10 meters to the back wall.
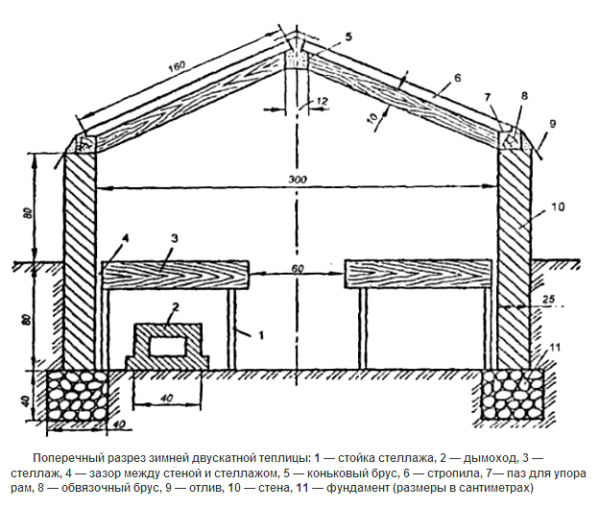
The picture below is visible the scheme. On the right side, as it was written above, we have an area of 0.8 meters from the left side of 1.47 meters. Depicted in the center of the middle pillars with a height of 2.30 meters. Here will lie the separating path.
Roof slope of 22 degrees, educated middle pole and South poles form the roof, which should be located to the South. On the other hand, the wall will be poured. But let's talk about this further.

Before post-ground in the ground, they must be covered with resin or to process a good antiseptic. To prevent the rotting wood, it can be annealed.
Then the roof was reliable, at the top of the pillars make the spikes 5 cm in height and cross-section of 4*5 cm.
Next, stack the straps from bars and logs made spikes.
After this horizontal log nailed to the pillars and filled the greenhouse with the outside the earth dug out of the pit. Later, when it will rain, all the moisture will soak into the ground.
For greenhouses with a size of 10.6 meters will perfectly suit a chimney stove. Perhaps this is the most economical option.
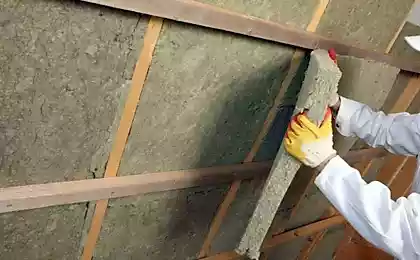
The ceiling of the greenhouse on the North side is stitched the usual boards, and the distance between the roof and the boards clogged with sawdust or other insulating materials.
As for the South side, the roof is made of frames for glass and in subsequent passes the glazing. Frame shall have a minimum thickness of 4 mm.
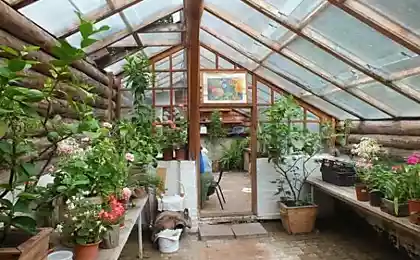
How to make a gable winter greenhouse.
Gable winter greenhouses can be constructed with his own hands. To protect this design with frames and glazing.


The design of such a greenhouse will look something like this:
1. Is the Foundation with a cross section of 40*40 cm.
2. Laid brick walls in a row, and on top of them fit strapping timber with a section of 15*15 cm provided with slots for greenhouse frames.
3. The rafters are made of boards 10*10 inches and connect the longitudinal bar with a cross section of 12*12 inches. published
Source: hrw.ru/zimnyaya-teplica-svoimi-rukami/