138
Manual work - how to make a bracelet
Photo © http://honestlywtf.com
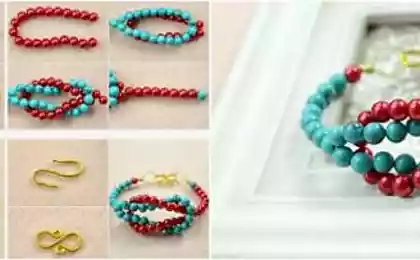
Today, needlework is increasingly gaining popularity. Things made with your own hands are not only beautiful and exclusive, but also affordable. At first glance, it seems that making a bracelet with your own hands is very difficult. The main thing is to have the desire to create something original.
Surely many of you have accessories lying idle: either a beautiful brooch or a favorite earring, the other half of which was once lost. They are completely inapplicable, and to throw away dear things of the heart the hand does not rise. But we can give them a second life. For example, make a bracelet in the macramé technique, weaving an earring or brooch into the base.
Photo: honestlywtf.com
You will need:
3-3.5 meters of paracord (strong nylon cord);
• an earring or small brooch;
• lighter;
• Moment glue;
• Scissors.
Photo: honestlywtf.com1. Choose the desired shade (under the color of the accessory or clothing). Then fold the paracord in half and wrap around your wrist to measure. This will be the base of the bracelet. Then tie the knot at the end and check the length again. Then cut the ends.
Photo: honestlywtf.com2. Divide the remaining cord in half, and attach its center to the base of the bracelet. Bend the right end, making an air loop, run it over the base and then bend under the left end.
Photo: honestlywtf.com3. Stretching the left end under the base of the bracelet, then tighten through the air loop on the right side. It's one half of the knot. Tighten the knot, leaving the loop large enough to extend the cord there later.
Photo: honestlywtf.com4. Repeat the same on the left side to get the second half of the square nodule. Wrap the end, make an air loop, take out through the middle, under the right cord.
Photo: honestlywtf.com5. Pull the right cord, passed under the left and middle strands, then output through the loop to the left side. Tighten up.
Photo: honestlywtf.com6. Continue to make nodes from right to left and vice versa. Once you get to the end, wrap the bracelet around your wrist to see if it fits.
Photo: honestlywtf.com7. Cut off the extra. Then use the lighter to burn the ends. Keep in mind that it is best to do this in the blue part of the flame to avoid heavy melting and prevent smoldering.
Photo: honestlywtf.com8. Now take your favorite jewelry. This is an earring in the photo. Cut off any extra and moving parts. Then apply the glue.
Photo: honestlywtf.com9. Strongly press the decoration in the center of the bracelet and let dry the front side down, leaving for at least 12 hours.
Photo: honestlywtf.com10. Here is an exclusive decoration that can decorate your summer outfit.
Source: domashniy.ru/
Healthy children—the child's development in 7 months
Salvation for dry or damaged hair — homemade masks

