844
How to build a house for a well with their hands
Before you start building the house for well, you should decide how important is the aesthetic aspect of this question – design features and external design. This mainly depends on what materials have to work. Therefore, a specific template can not be. The number of choices depends only on the imagination of the master.
But here are the basic stages of building a house for your well remain unchanged, and the difference can be only in some technological nuances. The meaning of the proposed steps is not to impose on the reader a certain pattern, specific type and size of house, and to help deal with all the peculiarities of each technological stage. If the concept will be, the process of construction no problems call
And you can simplify your life – to buy a house. But, first, at a price below 15,000 rubles find it unlikely. Secondly (a little thinking), something done yourself, it is much easier to repair, especially the stock of unused materials always remains. And the order of Assembly/disassembly is already familiar.
The choice of materialsConsidering that all have to do with your hands should stay on the wood. Arguments – low cost, large range, availability, ease of processing and, if necessary, repair (by replacing individual components). But what breed to choose? Basically all the recommendations are that for softwood. Such a tree is by definition less susceptible to rotting.
The parameters of the line/materials are selected so that the design of the house was solid and stable. It is possible to recommend such linear dimensions of workpieces (cm):
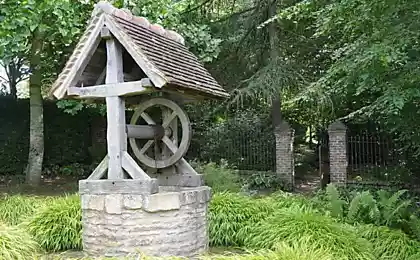
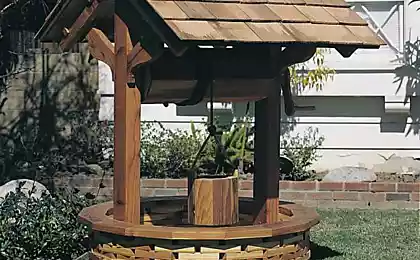
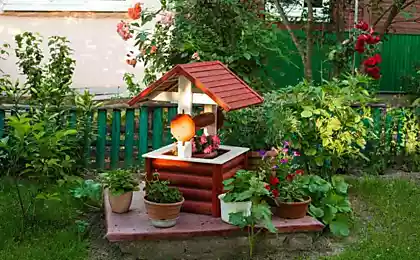
Designthe photo shows a variant which are distinguished by their appeal and will look great on any site.
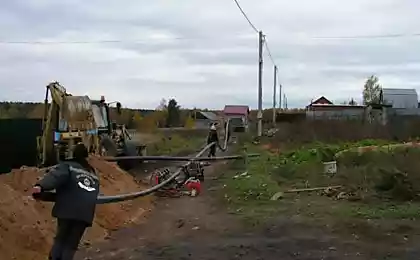
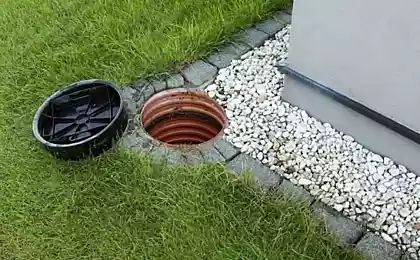
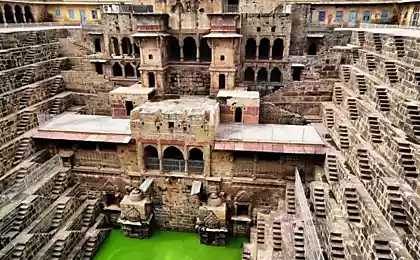
Do not confuse a house and a shed for the well. Examples of the latter.

Looks nice, but dust in the summer and piles of snow in the winter mine well guaranteed. And about her warming to speak of. Will have to be advanced.
What do the walls of the house – the owner decides. But the upper part only of wood. Consider how to collect it.
Work order for construction of a house for the well
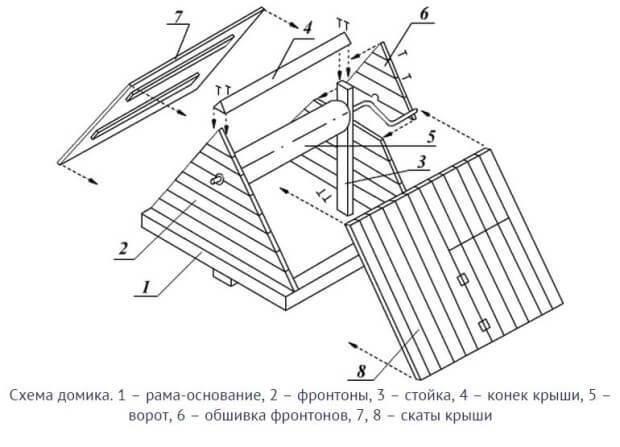
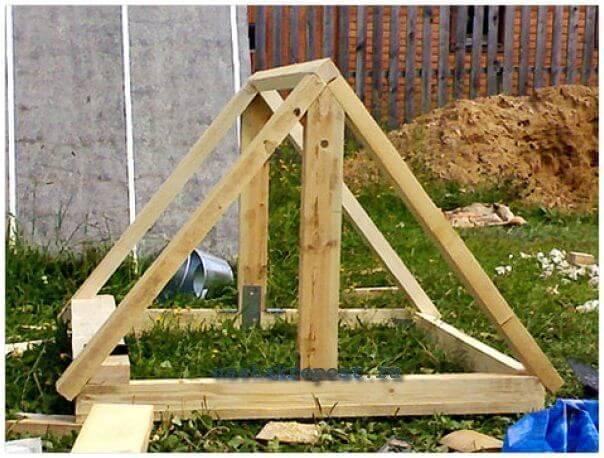
Diagram of the roof shown in the drawing. How to mount?
Karkassiga the device shown in the photo.
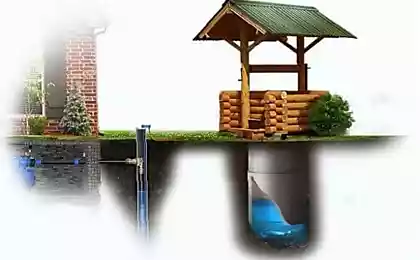
The dimensions of the lower part are determined in accordance with parameters of the shaft of the well. Assemble is easy, but is necessary to ensure its sustainability. The entire Assembly will be subjected not only to static loads (snow present), but also dynamic – the wind, the rotation of the gate while lifting a bucket of water.
Confine banal nailing workpieces impossible. They must be securely fixed. Therefore, as the connecting parts between all elements use inserts and parts made of metal.
The arrangement of the framefirst, have to mount the door. Therefore, in its mounting location on one of the sides of the roof (parallel to) each other, the bars (between the upper rail and the base). To him 2 horizontal. This will be the frame for the door.
Second, somewhere will need to put buckets, therefore, you will need a "shelf". In addition, it partially protects the barrel from clogging. To do this, inside the frame on the base, the stacked Board-"the forty", which will serve as a deck.
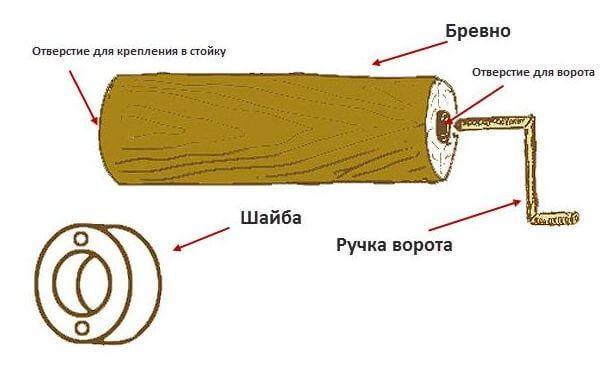
Thirdly, you will need to mount the gate. Even at this technological stage in the rack holes are drilled in which to insert the metal washers. They are easy to produce, for example, of a tube with thick walls. They will serve as "landing spots" for linkage. On both sides (for each stand) to the holes of the superimposed metal plates (of course, with cutouts).
Vertego manufacturer introduces some complexity. Need cut logs with a diameter of 20 cm Length – somewhat less than the distance between the uprights (the rotation should be free). Of course, the workpiece should be processed accordingly. It remains only to drill to drill holes along the axis of the holes (approximately 40 to 50 cm) for installation on the one hand, a support pin, with the other arm.
The design is simple, but there are nuances:
And then – or treated with varnish, paint or water repellent composition. As an option – to decorate the panels of the block-house, metal sheet, metal profile. The choice of materials for "finishing" finishes depends only on financial possibilities. published
SUBSCRIBE to OUR youtube channel that allows you to watch online, download from YouTube free video about the recovery, the rejuvenation of man. Love for others and ourselves, as the feeling of high vibrations — an important factor for improvement .
Put LIKES and share with your FRIENDS!
www.youtube.com/channel/UCXd71u0w04qcwk32c8kY2BA/videos
Subscribe -https://www.facebook.com//
P. S. And remember, only by changing their consumption — together we change the world! ©
Join us in Facebook , Vkontakte, Odnoklassniki
Source: my-fasenda.ru/building/domik-dlya-kolodca-svoimi-rukami/
But here are the basic stages of building a house for your well remain unchanged, and the difference can be only in some technological nuances. The meaning of the proposed steps is not to impose on the reader a certain pattern, specific type and size of house, and to help deal with all the peculiarities of each technological stage. If the concept will be, the process of construction no problems call
And you can simplify your life – to buy a house. But, first, at a price below 15,000 rubles find it unlikely. Secondly (a little thinking), something done yourself, it is much easier to repair, especially the stock of unused materials always remains. And the order of Assembly/disassembly is already familiar.
The choice of materialsConsidering that all have to do with your hands should stay on the wood. Arguments – low cost, large range, availability, ease of processing and, if necessary, repair (by replacing individual components). But what breed to choose? Basically all the recommendations are that for softwood. Such a tree is by definition less susceptible to rotting.
The parameters of the line/materials are selected so that the design of the house was solid and stable. It is possible to recommend such linear dimensions of workpieces (cm):
- timber – 10 x 8;
- Board "sorokovka" – 15 – 20.
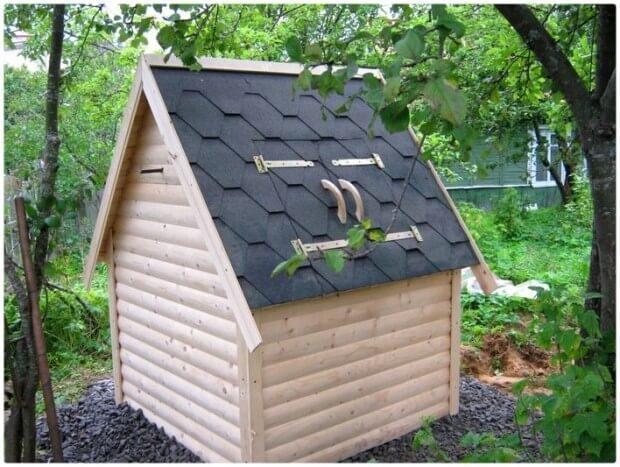

Designthe photo shows a variant which are distinguished by their appeal and will look great on any site.
Do not confuse a house and a shed for the well. Examples of the latter.

Looks nice, but dust in the summer and piles of snow in the winter mine well guaranteed. And about her warming to speak of. Will have to be advanced.
What do the walls of the house – the owner decides. But the upper part only of wood. Consider how to collect it.
Work order for construction of a house for the well
Diagram of the roof shown in the drawing. How to mount?
Karkassiga the device shown in the photo.

The dimensions of the lower part are determined in accordance with parameters of the shaft of the well. Assemble is easy, but is necessary to ensure its sustainability. The entire Assembly will be subjected not only to static loads (snow present), but also dynamic – the wind, the rotation of the gate while lifting a bucket of water.
Confine banal nailing workpieces impossible. They must be securely fixed. Therefore, as the connecting parts between all elements use inserts and parts made of metal.
The arrangement of the framefirst, have to mount the door. Therefore, in its mounting location on one of the sides of the roof (parallel to) each other, the bars (between the upper rail and the base). To him 2 horizontal. This will be the frame for the door.

Second, somewhere will need to put buckets, therefore, you will need a "shelf". In addition, it partially protects the barrel from clogging. To do this, inside the frame on the base, the stacked Board-"the forty", which will serve as a deck.
Thirdly, you will need to mount the gate. Even at this technological stage in the rack holes are drilled in which to insert the metal washers. They are easy to produce, for example, of a tube with thick walls. They will serve as "landing spots" for linkage. On both sides (for each stand) to the holes of the superimposed metal plates (of course, with cutouts).
Vertego manufacturer introduces some complexity. Need cut logs with a diameter of 20 cm Length – somewhat less than the distance between the uprights (the rotation should be free). Of course, the workpiece should be processed accordingly. It remains only to drill to drill holes along the axis of the holes (approximately 40 to 50 cm) for installation on the one hand, a support pin, with the other arm.

The design is simple, but there are nuances:
- Any wood eventually crack. To give the beam additional strength, it is desirable in 4 places to pull. 2 metal strips are placed along the edges and 2 in the Central part, between which is attached a chain for hanging the bucket.
- In the area of the holes (on the ends) also are attached to the plate (and rack).
- The lever shall be sealed with a metal plate on the beam, to transfer the rotation force. How to do it? For example, to weld the lever to the plate (but it should be thick). Or on its end to weld a plate with holes, and with screws to fix at the end of the log.
And then – or treated with varnish, paint or water repellent composition. As an option – to decorate the panels of the block-house, metal sheet, metal profile. The choice of materials for "finishing" finishes depends only on financial possibilities. published
SUBSCRIBE to OUR youtube channel that allows you to watch online, download from YouTube free video about the recovery, the rejuvenation of man. Love for others and ourselves, as the feeling of high vibrations — an important factor for improvement .
Put LIKES and share with your FRIENDS!
www.youtube.com/channel/UCXd71u0w04qcwk32c8kY2BA/videos
Subscribe -https://www.facebook.com//
P. S. And remember, only by changing their consumption — together we change the world! ©
Join us in Facebook , Vkontakte, Odnoklassniki
Source: my-fasenda.ru/building/domik-dlya-kolodca-svoimi-rukami/