1679
Mannequin with their hands
I know that rukozhopov love it here and I will try to join this cheerful company.
There will be many photos (unless you support my parsley ) outline the ending.
This work I have already exposed to competition, so proof
Who cares - you're welcome.

When I conceived to make a mannequin and puzzled that his sun, he asked me a question that I think will repeat all the men of this site: WHY?
I explain for the slow-witted:
Mannequin personally I need in order not to waste time on a trip to the fittings for his portnihe.Delo that I do not buy a ready-made clothes and sew all individually made to order. And this is very burdensome in terms of time, given the extent of my employment. Therefore, by arrangement with her dressmaker, we decided that I will give her an exact copy of the me, and it will not pull me out of work, people on fitting and adjusting.
But in addition to its direct purpose, the dummy can be still and beautiful piece of furniture, and even be a convenient device, for example, the receptionist or personal wardrobe.
Mannequin is indispensable in cases where you need to ironed some thing unreal ironed iron on an ironing board, and on a dummy using steamer you can do it once or twice.
You can certainly go out and buy ready-made mannequin, but it has a standard size and does not repeat the features of your figure. And it costs 6.500-7.000 rubles, and our cost about 1,000 rubles. Saving palpable.
I persuaded her Sun in relevance and usefulness of the device, and we started to build (Rodin in his grave nervous somersaults ...)
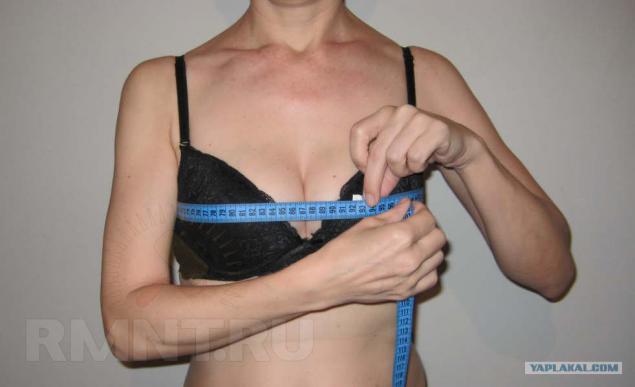
The main purpose of my work will be the creation of an exact copy of it to my shape. To do this, remove the original control measurements on which we will focus in the future.
For work, I needed a diligent, creative and funny assistant. He's a photographer. This is my Suns.
In the beginning, take plastic wrap and gently, without squeezing the body, wrap her body, clipping the edge pieces of tape. You can use a large tselovanovye garbage bags by cutting them. The winding shape is not so important, what is available, then use.
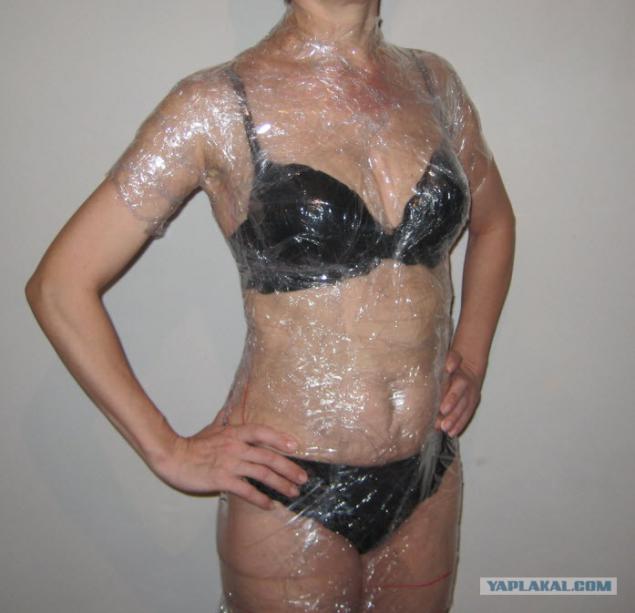
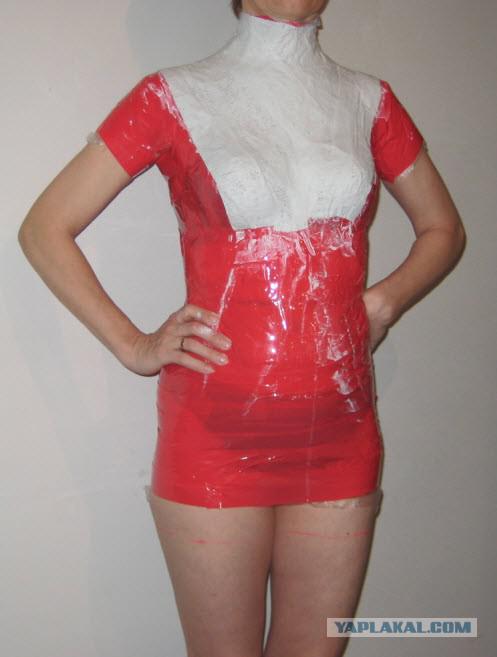
Now we need the whole body, covered with foil, pasted tape. Glue carefully, without compressing or pulling the natural convex figures. It is best to take out small pieces of adhesive tape 5 to 20 cm, and sequentially pasting them on the body with a slight overlap. The textural bulge, the less you need to take the pieces.

Ultimately, that's have a look. Color scotch I took in order to make it more visible in the photo.
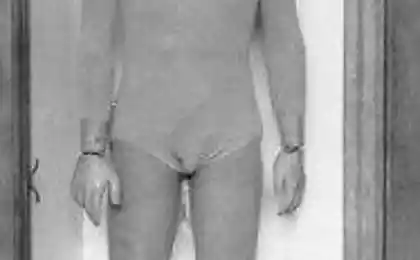
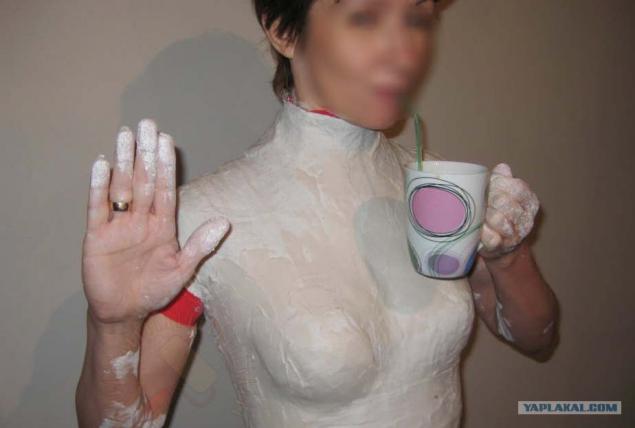
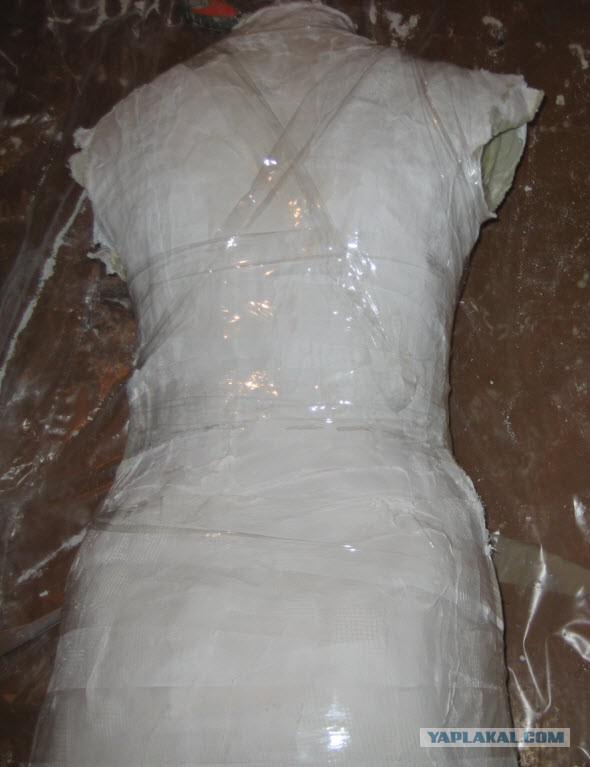
Now that the preparatory stage of the work is finished, we proceed to the most interesting and very important events - will make a plaster cast of a figure. This is best suited medical plaster bandages, which are sold in pharmacies. Getting to impose wetted bandages forehand from the back to the chest through a shoulder crosswise.
It is necessary to wet plaster bandages under its own weight does not slide down the smooth surface of the tape.
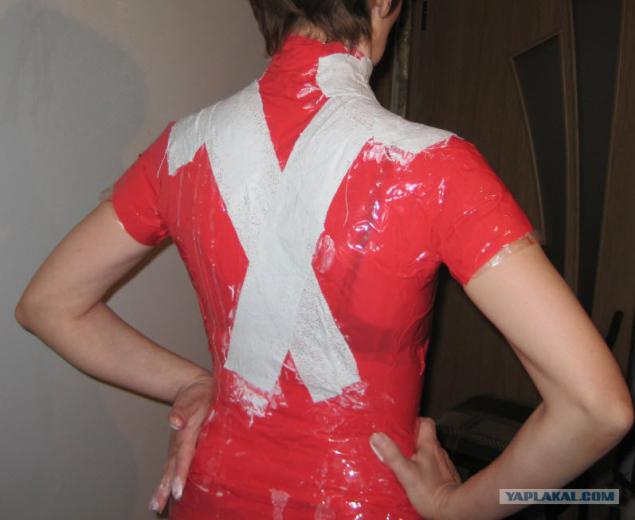
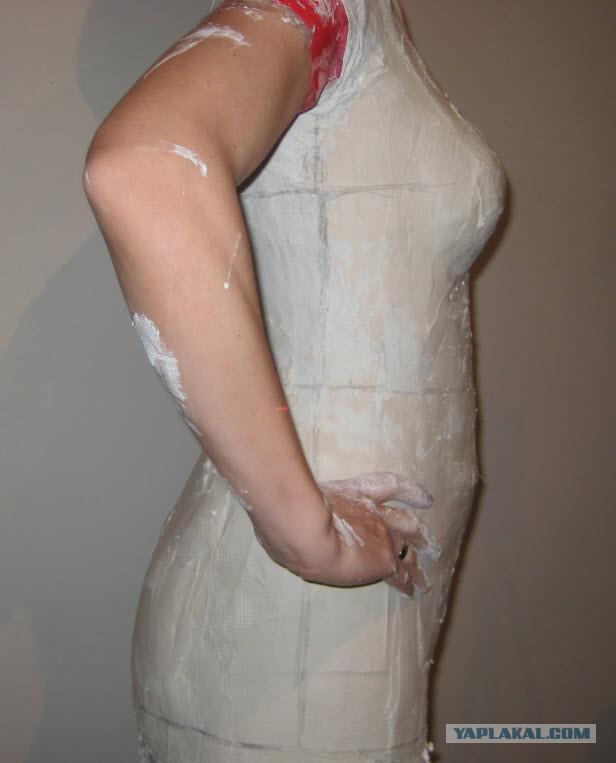
Gradually bandages cover the entire surface of the body to the waist, and then to the thighs.
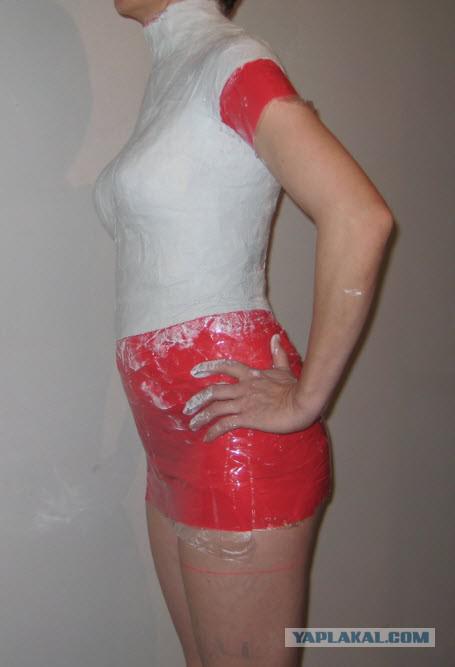
To our cast had the necessary hardness and good to keep the desired shape, plaster bandages we imposed three layers. It could be more, but it is very hard physically survive.
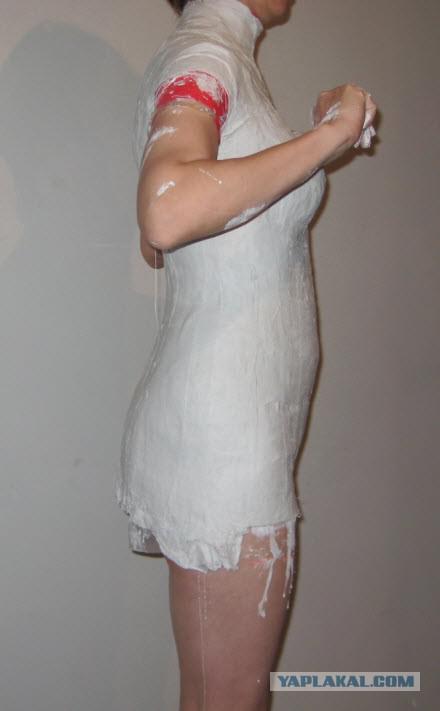
Now, when everything is packed in plaster body capsule nactupaet most unpleasant and dreary - to survive the time to plaster seized and froze. At this point, I held down a plaster shell, understand their helplessness, and my assistant Suns cackles constantly comparing me with an Egyptian mummy. I just can not, that the language of his show, because no neighing, or even take a deep breath fails. And still need to be keeping a natural posture. This, I tell you, not seeds to click. But the mood of both the good and the Suns supports me a glass of strong and hot tea.
Try as the thread is at leisure to drink hot tea through a straw. Unforgettable feels attraction.
Plaster cocoon froze. Now you need to remove it from the body. But first you need to put the check marks on the sides and shoulders, they would be required to align the assembly Dellal. Also, we put a horizontal line below the hip line and vertikalinye bokam.Eti line we will need in the future. We are using a laser level. If someone does not have a laser level, I can not explain how to do it in another way.
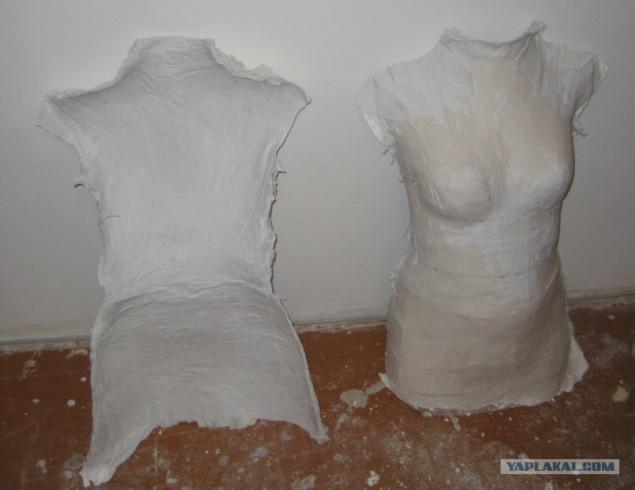
Cut the plaster cast on the sides and shoulders. Suns cut with a sharp knife. This should be done carefully, slowly, carefully, so as not to injure the body and do not accidentally cut appendicitis.
The two halves of the plaster cast can be easily separated from the adhesive tape and that's what we got as a result.
The inner surface of the cast cover with a thin layer of putty, to smooth the resulting irregularities.
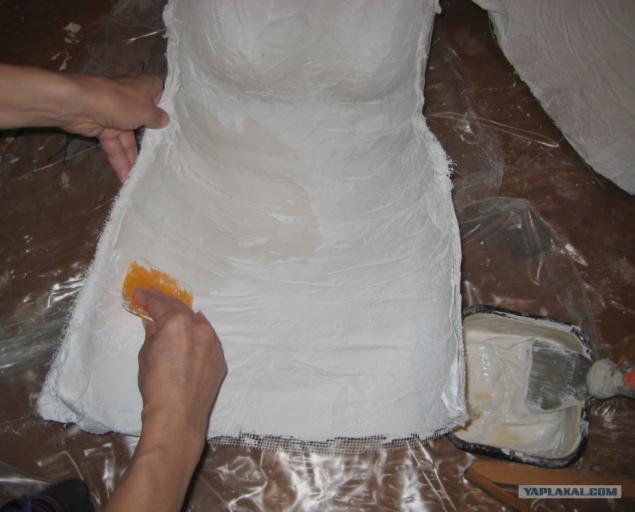
After drying, the entire surface of the inside of the cast cover with melted paraffin from ordinary candle. It took two candles.
Now we need to fill the inside with foam. To foam gripped tightly to the plaster mold, we used paraffin layer.
Fill the two halves form foam gradually layer by layer, waiting time for curing each layer of foam.
In the back half put the hanger. We do it for structural strength, because on the shoulders of the dummy will go to the main load. And the hook is useful for ease in further work.
Apply the last layer of foam on both halves of the form and collect all the pieces together, combining two of the reference marks and seals resulting mummy tape. Now we need time to thoroughly frozen foam inside. I had urgent work and I honestly forgot about his mummy for nearly a week.
It was very interesting to look at the results of our joint labors and my pains. Prior to the opening of an ordinary hacksaw Suns sawed off excess label below the horizontal.
They took scotch. The two halves are well separated from the viscera and zapenennuyu our eyes opened my cloned figure.
In some places we stayed paraffin and gently scraped it with a knife. Using the same laser level plot the horizontal markings shoulders, chest, waist, hips and mid forehand and back and side line. So we check ourselves to see if distortions. We do not.
Of course, the surface of a dummy at this stage is far from perfect, because the foam does not provide a perfectly smooth surface. So, armed with sandpaper gently, not pressing hard ground off large mounds. Appearance has become more attractive.
We continue to sculpt and refine our dummy, do not forget to check with removed at the beginning of the control yardstick considering what else will use putty and batting for a pleasant softness.
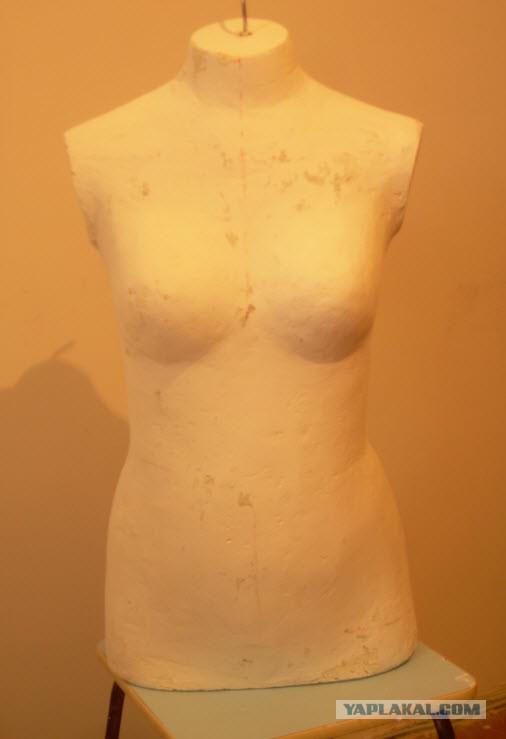
I covered the entire surface of the two layers of plaster. Thus closed the small holes and cavities on the surface of the foam and appeared protected.
In conclusion, the whole surface is polished with fine sandpaper, and get this.
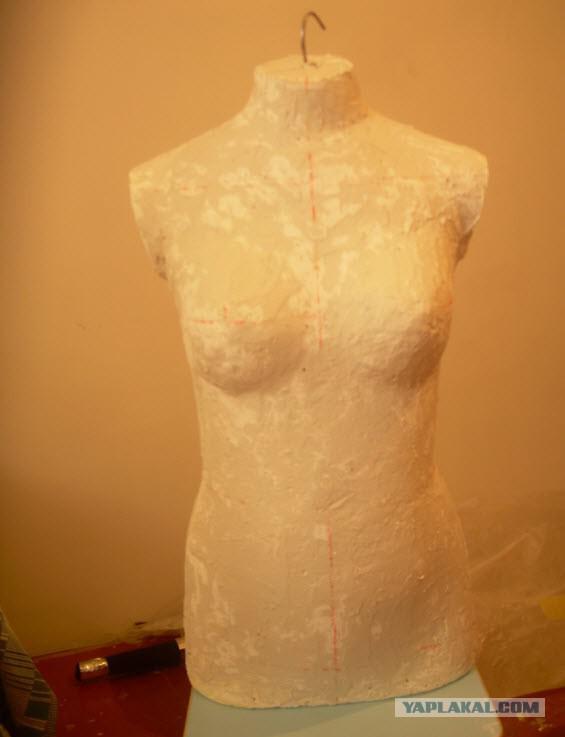
To give even more strength all your copy paste paper on the PVA glue on the principle of papier-mache. During the last control measurements revealed that the width of the chest is less than 1 cm of the original, so adjust this flaw with a thin batting, gluing it with white glue.
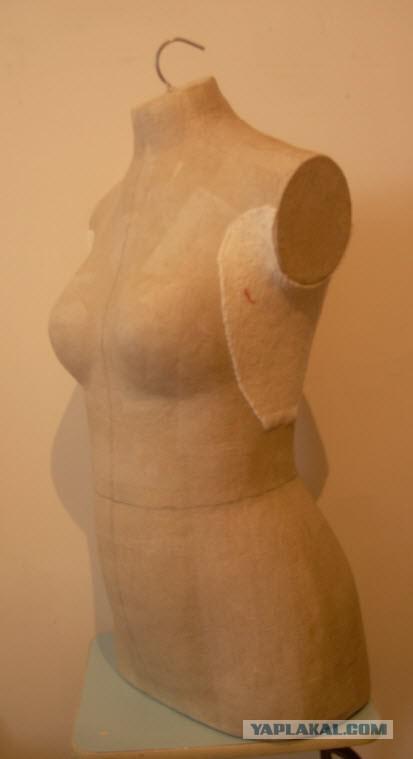
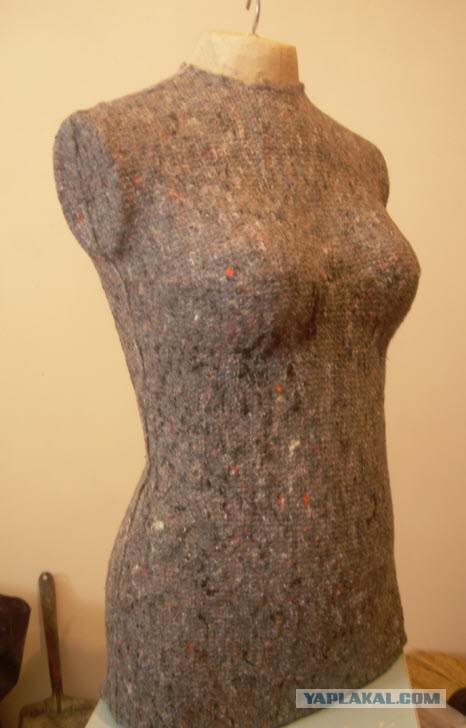
All you need to cover the dummy thin batting or synthetic padding to allow him to stick the needles, pins, and generally just nice to be with the handle (it is said to me by my dressmaker).
At the end you need to make a dummy stand. We produce ordinary spider, both for the Christmas tree, and we buy at a hardware store cutting for shovel, cut the hook from the hanger, the more he will not be needed.
Now it is all put together into a coherent whole. Describe in detail this simple process does not see the point, but if someone is going to be something it is not clear, interesting - tell.
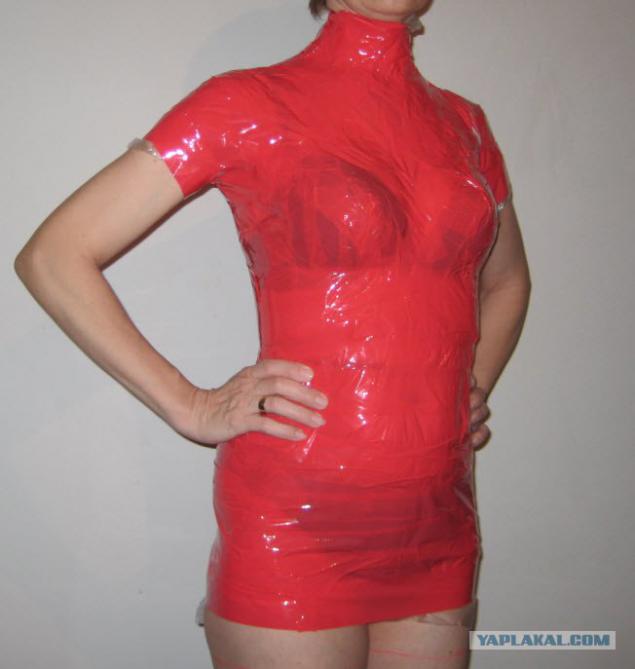
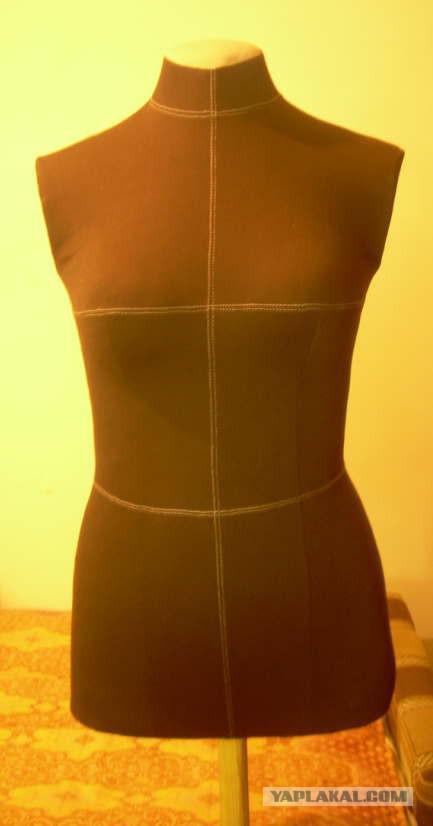
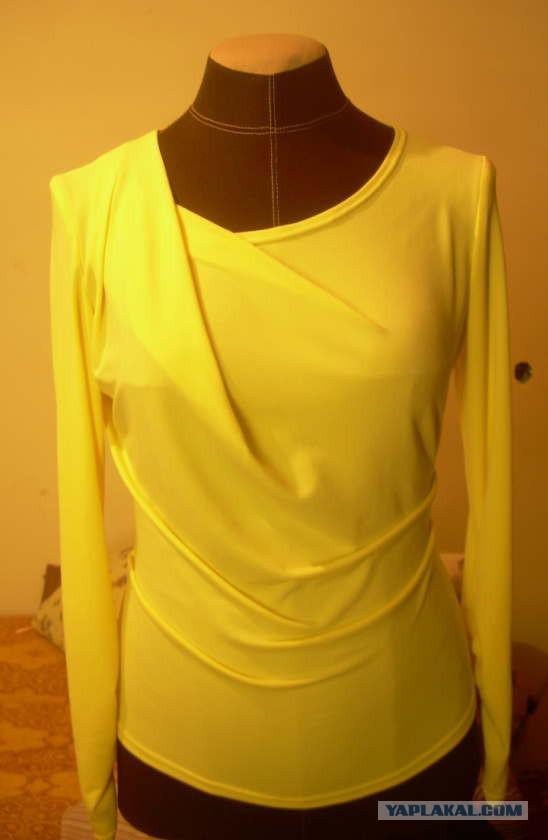
Remained final touch - a mannequin in a dress "clothing" of the trailing jersey. This helped me to my dressmaker.
Well, the job is done, you can now breathe a sigh of relief and enjoy the beauty!
And here's my dummy in the work.
That's all I wanted to say.
Source:
There will be many photos (unless you support my parsley ) outline the ending.
This work I have already exposed to competition, so proof
Who cares - you're welcome.

When I conceived to make a mannequin and puzzled that his sun, he asked me a question that I think will repeat all the men of this site: WHY?
I explain for the slow-witted:
Mannequin personally I need in order not to waste time on a trip to the fittings for his portnihe.Delo that I do not buy a ready-made clothes and sew all individually made to order. And this is very burdensome in terms of time, given the extent of my employment. Therefore, by arrangement with her dressmaker, we decided that I will give her an exact copy of the me, and it will not pull me out of work, people on fitting and adjusting.
But in addition to its direct purpose, the dummy can be still and beautiful piece of furniture, and even be a convenient device, for example, the receptionist or personal wardrobe.
Mannequin is indispensable in cases where you need to ironed some thing unreal ironed iron on an ironing board, and on a dummy using steamer you can do it once or twice.
You can certainly go out and buy ready-made mannequin, but it has a standard size and does not repeat the features of your figure. And it costs 6.500-7.000 rubles, and our cost about 1,000 rubles. Saving palpable.
I persuaded her Sun in relevance and usefulness of the device, and we started to build (Rodin in his grave nervous somersaults ...)
The main purpose of my work will be the creation of an exact copy of it to my shape. To do this, remove the original control measurements on which we will focus in the future.

For work, I needed a diligent, creative and funny assistant. He's a photographer. This is my Suns.
In the beginning, take plastic wrap and gently, without squeezing the body, wrap her body, clipping the edge pieces of tape. You can use a large tselovanovye garbage bags by cutting them. The winding shape is not so important, what is available, then use.

Now we need the whole body, covered with foil, pasted tape. Glue carefully, without compressing or pulling the natural convex figures. It is best to take out small pieces of adhesive tape 5 to 20 cm, and sequentially pasting them on the body with a slight overlap. The textural bulge, the less you need to take the pieces.

Ultimately, that's have a look. Color scotch I took in order to make it more visible in the photo.

Now that the preparatory stage of the work is finished, we proceed to the most interesting and very important events - will make a plaster cast of a figure. This is best suited medical plaster bandages, which are sold in pharmacies. Getting to impose wetted bandages forehand from the back to the chest through a shoulder crosswise.

It is necessary to wet plaster bandages under its own weight does not slide down the smooth surface of the tape.

Gradually bandages cover the entire surface of the body to the waist, and then to the thighs.

To our cast had the necessary hardness and good to keep the desired shape, plaster bandages we imposed three layers. It could be more, but it is very hard physically survive.

Now, when everything is packed in plaster body capsule nactupaet most unpleasant and dreary - to survive the time to plaster seized and froze. At this point, I held down a plaster shell, understand their helplessness, and my assistant Suns cackles constantly comparing me with an Egyptian mummy. I just can not, that the language of his show, because no neighing, or even take a deep breath fails. And still need to be keeping a natural posture. This, I tell you, not seeds to click. But the mood of both the good and the Suns supports me a glass of strong and hot tea.
Try as the thread is at leisure to drink hot tea through a straw. Unforgettable feels attraction.

Plaster cocoon froze. Now you need to remove it from the body. But first you need to put the check marks on the sides and shoulders, they would be required to align the assembly Dellal. Also, we put a horizontal line below the hip line and vertikalinye bokam.Eti line we will need in the future. We are using a laser level. If someone does not have a laser level, I can not explain how to do it in another way.

Cut the plaster cast on the sides and shoulders. Suns cut with a sharp knife. This should be done carefully, slowly, carefully, so as not to injure the body and do not accidentally cut appendicitis.
The two halves of the plaster cast can be easily separated from the adhesive tape and that's what we got as a result.

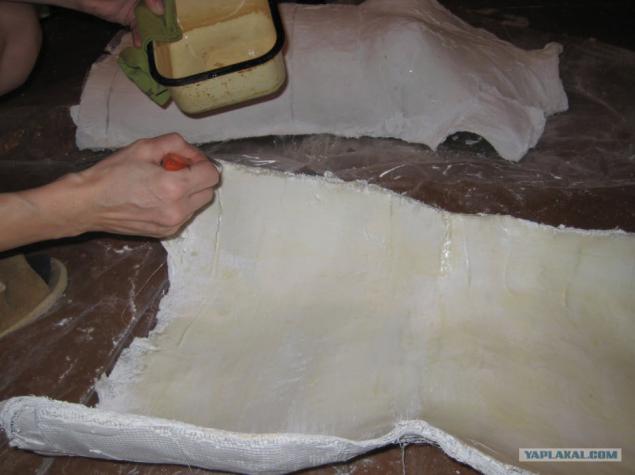
The inner surface of the cast cover with a thin layer of putty, to smooth the resulting irregularities.

After drying, the entire surface of the inside of the cast cover with melted paraffin from ordinary candle. It took two candles.

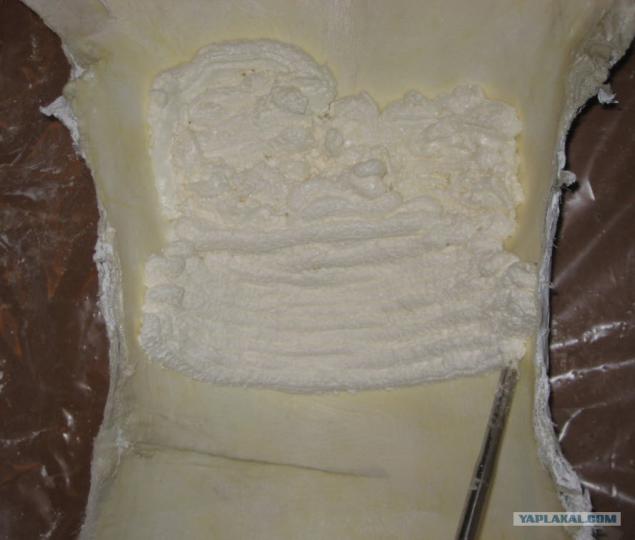
Now we need to fill the inside with foam. To foam gripped tightly to the plaster mold, we used paraffin layer.

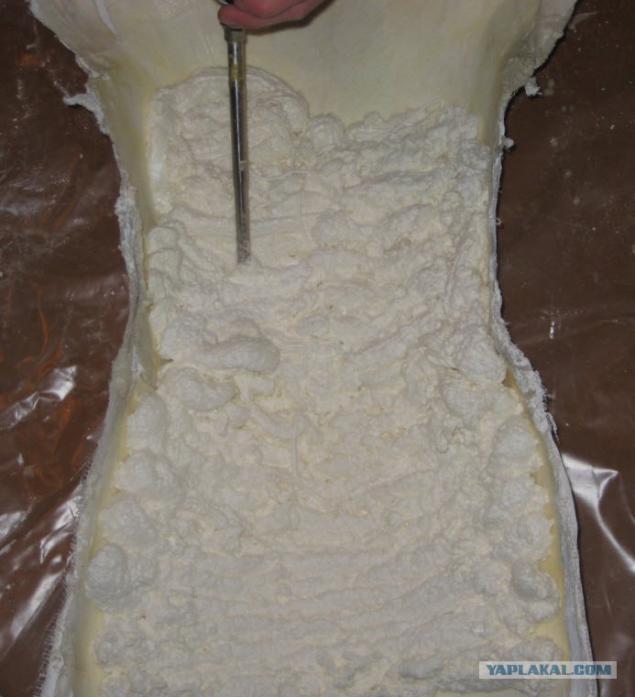
Fill the two halves form foam gradually layer by layer, waiting time for curing each layer of foam.

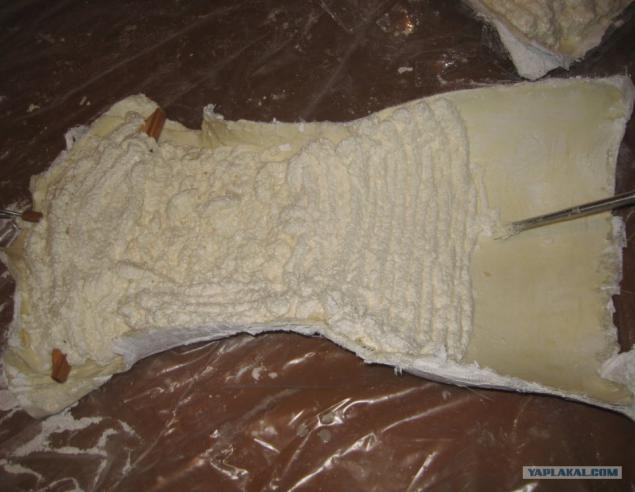
In the back half put the hanger. We do it for structural strength, because on the shoulders of the dummy will go to the main load. And the hook is useful for ease in further work.

Apply the last layer of foam on both halves of the form and collect all the pieces together, combining two of the reference marks and seals resulting mummy tape. Now we need time to thoroughly frozen foam inside. I had urgent work and I honestly forgot about his mummy for nearly a week.

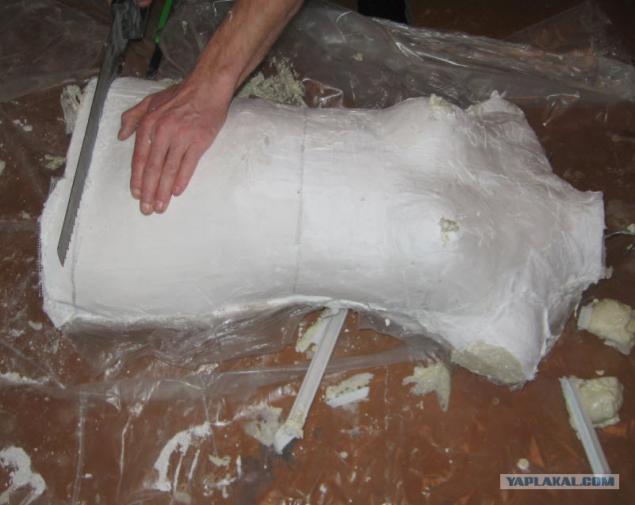
It was very interesting to look at the results of our joint labors and my pains. Prior to the opening of an ordinary hacksaw Suns sawed off excess label below the horizontal.

They took scotch. The two halves are well separated from the viscera and zapenennuyu our eyes opened my cloned figure.
In some places we stayed paraffin and gently scraped it with a knife. Using the same laser level plot the horizontal markings shoulders, chest, waist, hips and mid forehand and back and side line. So we check ourselves to see if distortions. We do not.

Of course, the surface of a dummy at this stage is far from perfect, because the foam does not provide a perfectly smooth surface. So, armed with sandpaper gently, not pressing hard ground off large mounds. Appearance has become more attractive.

We continue to sculpt and refine our dummy, do not forget to check with removed at the beginning of the control yardstick considering what else will use putty and batting for a pleasant softness.
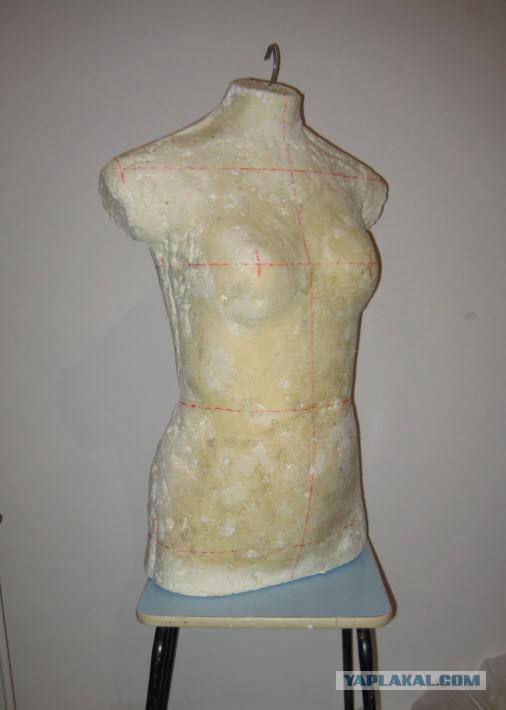
I covered the entire surface of the two layers of plaster. Thus closed the small holes and cavities on the surface of the foam and appeared protected.
In conclusion, the whole surface is polished with fine sandpaper, and get this.

To give even more strength all your copy paste paper on the PVA glue on the principle of papier-mache. During the last control measurements revealed that the width of the chest is less than 1 cm of the original, so adjust this flaw with a thin batting, gluing it with white glue.

All you need to cover the dummy thin batting or synthetic padding to allow him to stick the needles, pins, and generally just nice to be with the handle (it is said to me by my dressmaker).

At the end you need to make a dummy stand. We produce ordinary spider, both for the Christmas tree, and we buy at a hardware store cutting for shovel, cut the hook from the hanger, the more he will not be needed.
Now it is all put together into a coherent whole. Describe in detail this simple process does not see the point, but if someone is going to be something it is not clear, interesting - tell.
Remained final touch - a mannequin in a dress "clothing" of the trailing jersey. This helped me to my dressmaker.
Well, the job is done, you can now breathe a sigh of relief and enjoy the beauty!

And here's my dummy in the work.
That's all I wanted to say.

Source: