809
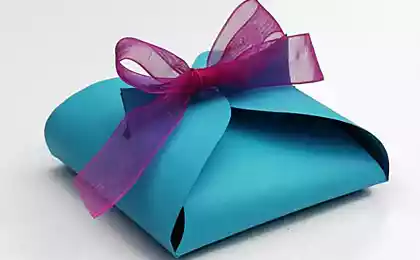
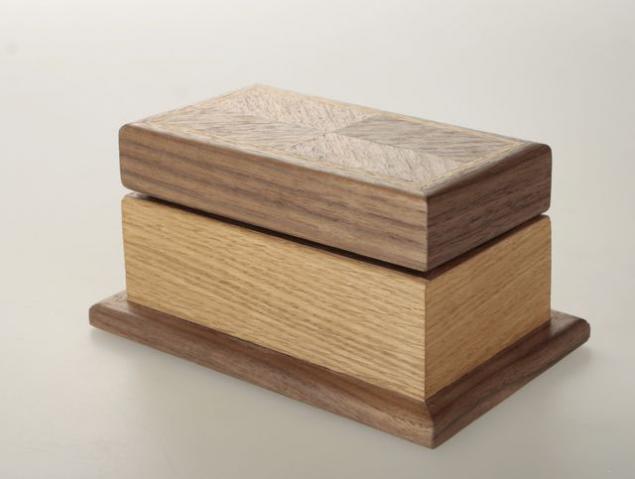
Present your own hands. The box is made of wood.
I propose to introduce its own version of a gift made by hand. No specific skills or materials - is not required. The length of 18cm box. The whole creative process and the necessary decisions have already arrived in the midst of work. Unfortunately the process captured insufficiently.
There will be 16 ph.
© Remfi
Photo1
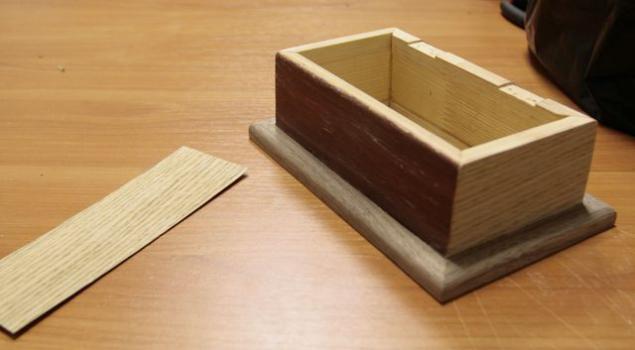
Requires:
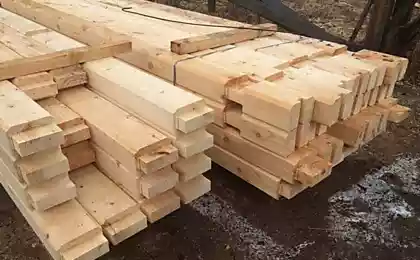
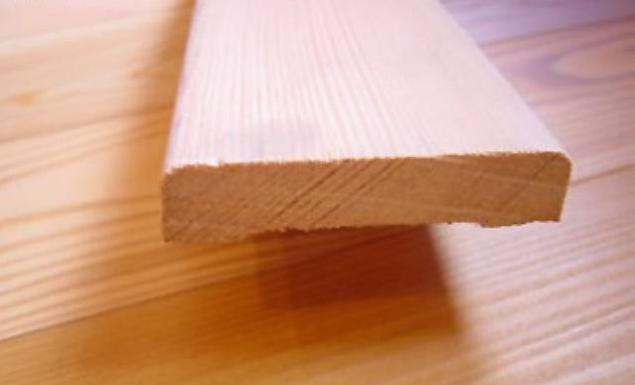
- Wooden casing (or rake the appropriate size)
- Plywood
- Oak and walnut veneer (on sale at the offices of selling precious woods, in large cities such should be exactly)
- Velvet black and red
- Oil for impregnating wood
- Clay, hinges, masking tape.
photo2
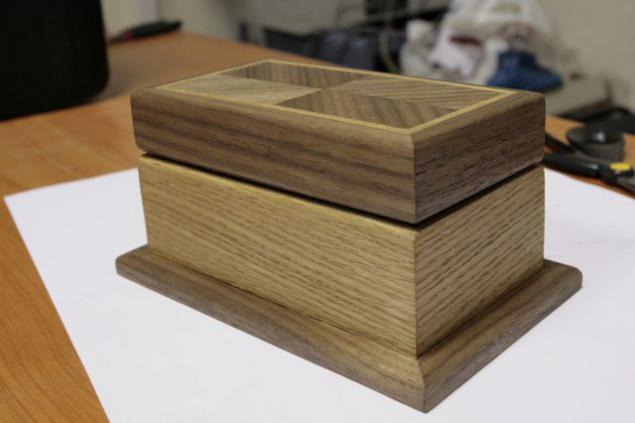
Stash of the "coffin". By selecting the height of the base and lid walls Scrollsaw size. Angles under 45grad. I did methodically soshkurivaya wall to the desired state. PVA glue on the box. The base I decided to do the advanced, for which suitable dosochki sawed and glued it to the walls of the box. So she came bottom.
photo3
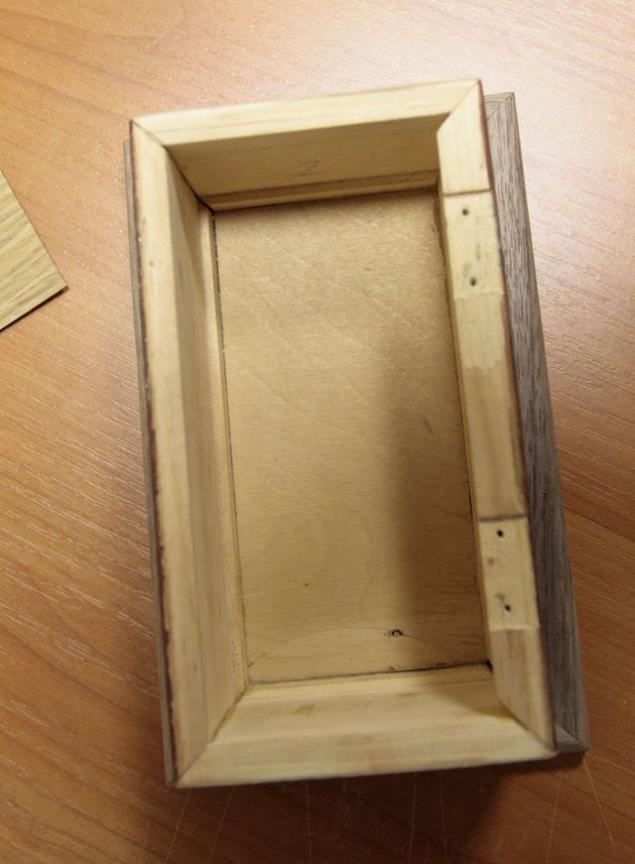
This fote, the foundation boxes already papered with walnut veneer. About how it is done - later.
Photo4
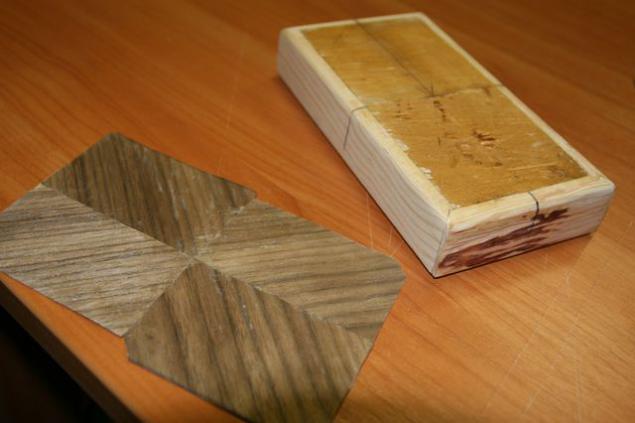
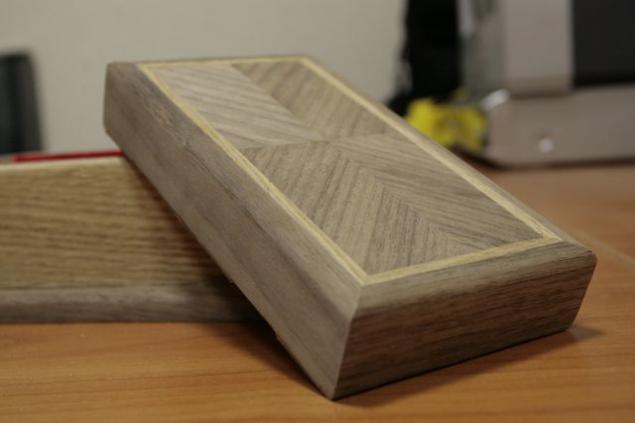
We proceed to the cover. She also glued from small dosochek and plywood insert. Everything rests on the PVA. Veneer 0.6mm thickness and cut bureaucratic knife in several passes by railway line. For the picture on the cover, you must cut here are rectangles with a pattern "to the center." It is important that the edges are smooth and the corners 90grad.
Next, make a cross out of masking tape and put it strips the veneer so that the tape was in the joints. Veneer kept on tape. Spreadable moment the upper side of the veneer and cover, and then glue.
Photo5
Tear off adhesive tape and align the edge of the knife.
Photo6
Because oak veneer I made small stripes (frame) are pasted all natot same time.
Photo7

Lead bends easily, but that would not be cracked, it must be counted on smoothing the wooden leg. And since point - contact adhesive, after touching surfaces that he did not come unstuck and it relies on such a small radius.
In the same way all the surfaces glued boxes.
Photo8
The wall thickness of the cover was insufficient, and it had to step up.
Photo9
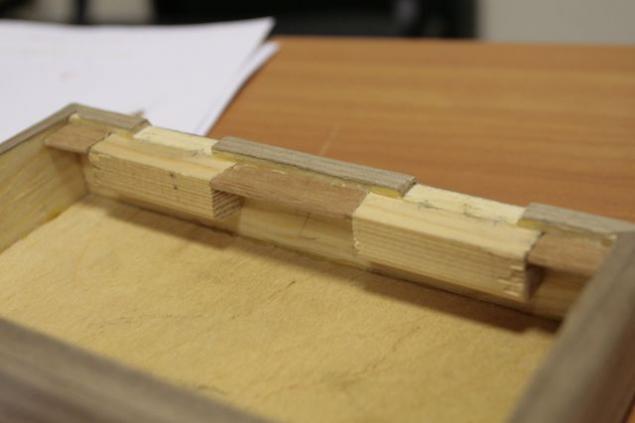
That is almost ready look and drank slots loops.
Photo 10
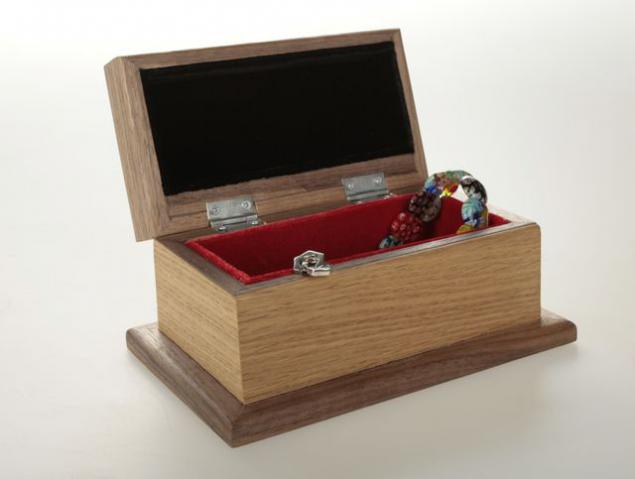
Velvet fabric store bought, I wrapped around slips of veneer 2.5 mm. And fix them "moment." When all the inserts were ready again to "point" to thrust them glued to the walls.
Foto11
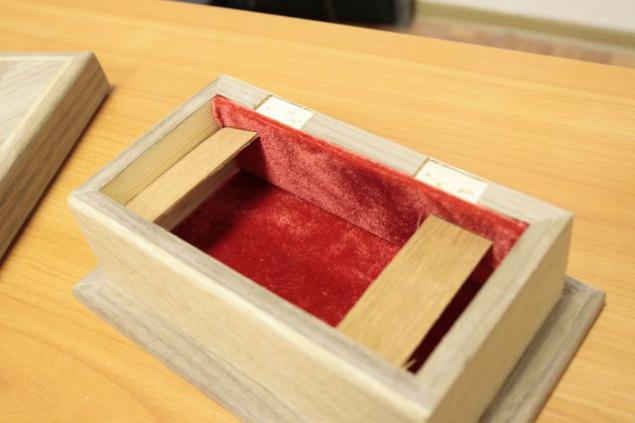
Foto12
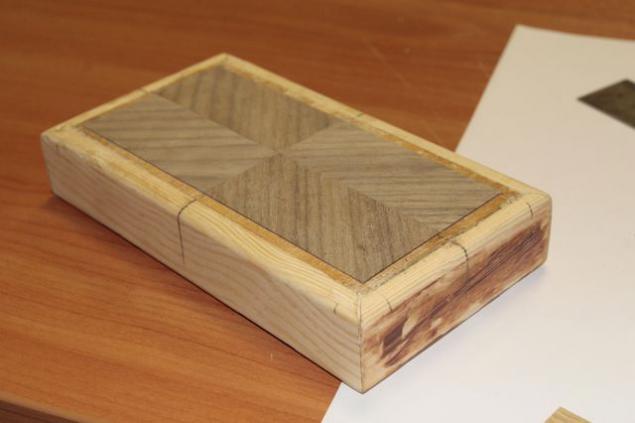
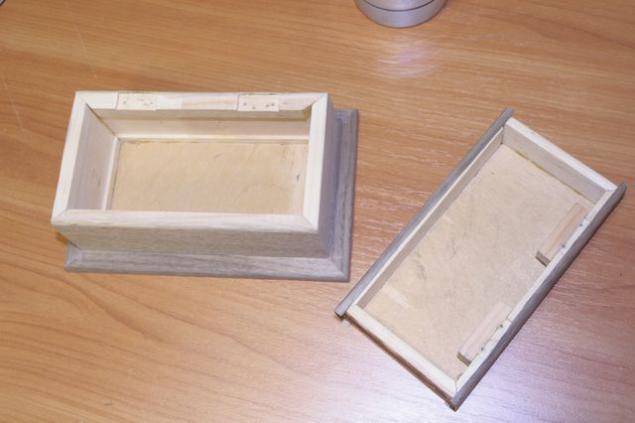
Ready cover. Angles, I clipped in place. When the main part was glued strips, notched a place of a joint knife.
Foto13
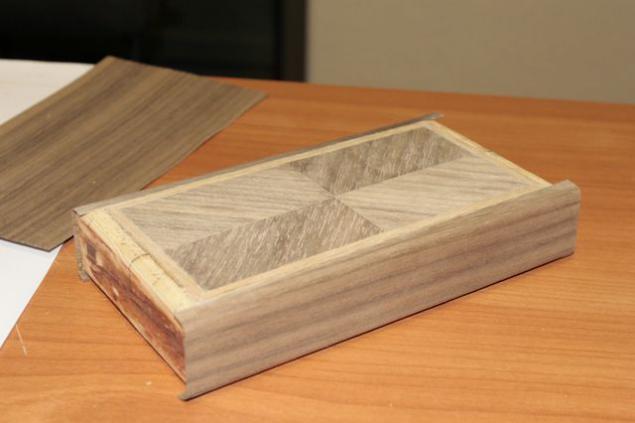
After assembling the need poshkurit paper grit 350, then 600, or 1000.
Foto14
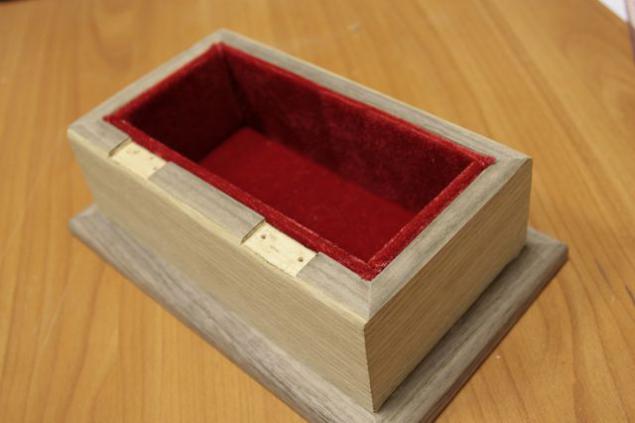
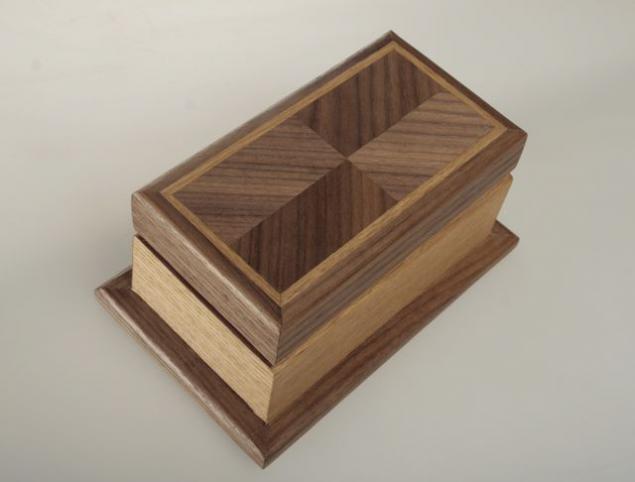
The last phase of the coating oil and water-based wax. It is sold by those who specialize in materials and lacquers for furniture restoration. After two layers of oil, veneer gets saturated color and smoothness.
Foto15
On this I have everything!
Photo 16
Source:
There will be 16 ph.
© Remfi
Photo1

Requires:
- Wooden casing (or rake the appropriate size)
- Plywood
- Oak and walnut veneer (on sale at the offices of selling precious woods, in large cities such should be exactly)
- Velvet black and red
- Oil for impregnating wood
- Clay, hinges, masking tape.
photo2

Stash of the "coffin". By selecting the height of the base and lid walls Scrollsaw size. Angles under 45grad. I did methodically soshkurivaya wall to the desired state. PVA glue on the box. The base I decided to do the advanced, for which suitable dosochki sawed and glued it to the walls of the box. So she came bottom.
photo3

This fote, the foundation boxes already papered with walnut veneer. About how it is done - later.
Photo4

We proceed to the cover. She also glued from small dosochek and plywood insert. Everything rests on the PVA. Veneer 0.6mm thickness and cut bureaucratic knife in several passes by railway line. For the picture on the cover, you must cut here are rectangles with a pattern "to the center." It is important that the edges are smooth and the corners 90grad.
Next, make a cross out of masking tape and put it strips the veneer so that the tape was in the joints. Veneer kept on tape. Spreadable moment the upper side of the veneer and cover, and then glue.
Photo5

Tear off adhesive tape and align the edge of the knife.
Photo6

Because oak veneer I made small stripes (frame) are pasted all natot same time.
Photo7

Lead bends easily, but that would not be cracked, it must be counted on smoothing the wooden leg. And since point - contact adhesive, after touching surfaces that he did not come unstuck and it relies on such a small radius.
In the same way all the surfaces glued boxes.
Photo8

The wall thickness of the cover was insufficient, and it had to step up.
Photo9

That is almost ready look and drank slots loops.
Photo 10

Velvet fabric store bought, I wrapped around slips of veneer 2.5 mm. And fix them "moment." When all the inserts were ready again to "point" to thrust them glued to the walls.
Foto11

Foto12

Ready cover. Angles, I clipped in place. When the main part was glued strips, notched a place of a joint knife.
Foto13

After assembling the need poshkurit paper grit 350, then 600, or 1000.
Foto14

The last phase of the coating oil and water-based wax. It is sold by those who specialize in materials and lacquers for furniture restoration. After two layers of oil, veneer gets saturated color and smoothness.
Foto15

On this I have everything!
Photo 16

Source: