700
How I spent this summer. (Construction)
I must say that I am an IT specialist, not the builder. And construction sites do the first time in my life. So builders with experience please do not kick me if something is not on nanotechnology. The task was to make hozblok place where the pumping station, toilet, water boiler, shower and storage for all bikes, clothes, refrigerator and other things clogging small bungalow. Dimensions were chosen on the basis of the existing free territory and was 5 meters at 2.5 under the very building + supply to go around once.
26 photos + a bit of text
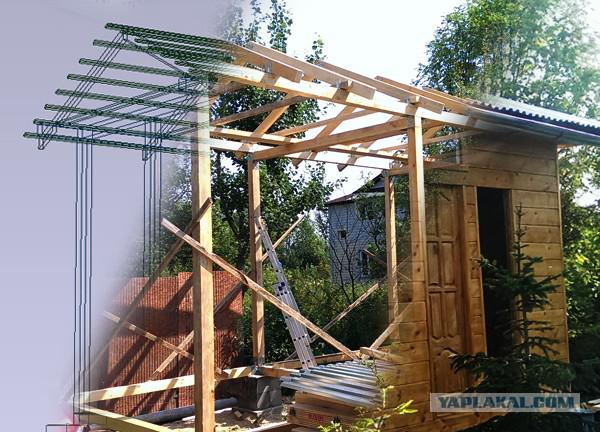
As a real "programmer" It all began in AutoCAD and others. Improvised means.
First, the house was constructed in AutoCAD on a board. There were also determined the size of "details", angulation and their number.
02.
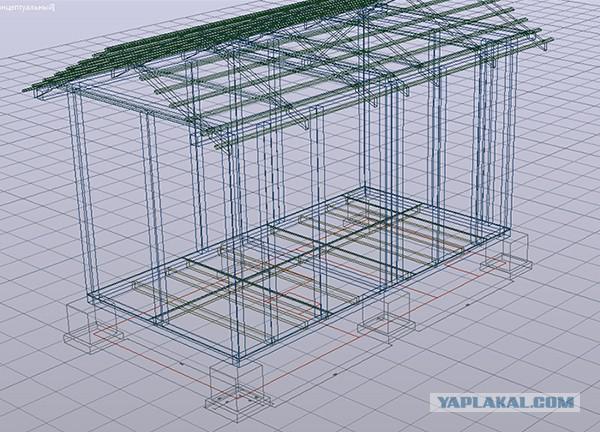
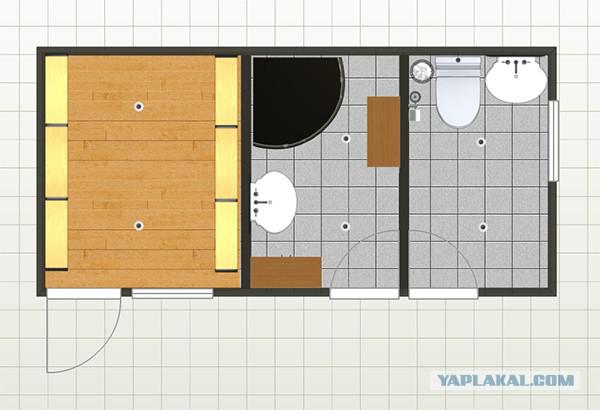
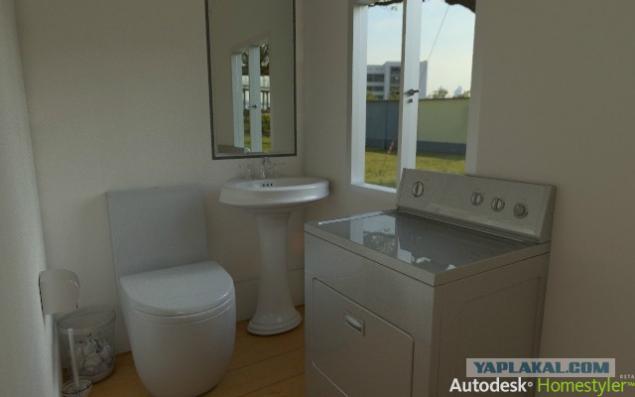
Then in homstaylere estimated plan.
03.
04.
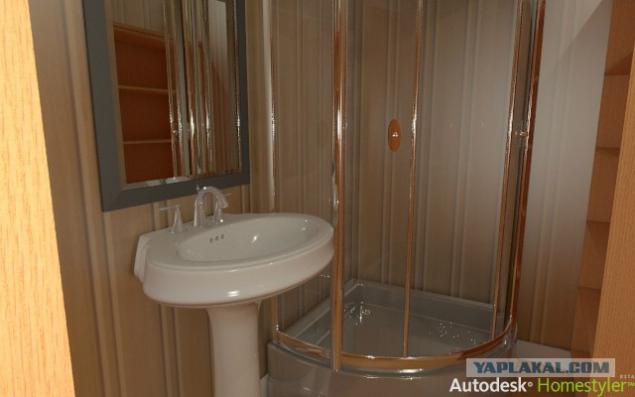
05.
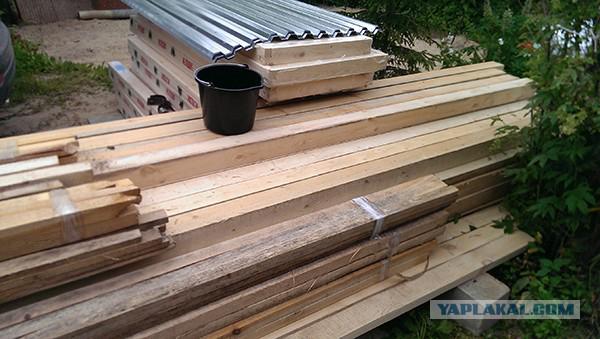
Materials purchased. Since in AutoCAD drawing everything on a single plank, I knew exactly how much and what material I need. In the sawmill aunt's eyes widened from such precision ... "13 pcs., 50x200, 24 pcs. 50x100, etc. ».
06.
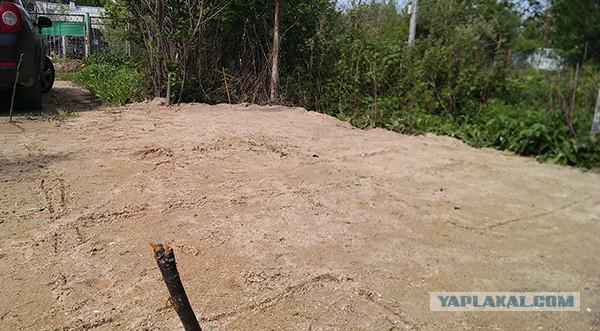
I prepare the site. Sand bed thirty centimeters. Spilled water to a hard state. He checked her car, ride back and forth, the wheels do not fall (the machine 2 tons). All gut, you can build. Of course, I found on the internet bearing capacity of a cushion and estimated weight at home (4-5 tons) realized that I have a supply of large, provided six points of tangency of the total area of 1, 5 m2.
07.
I set six "blocks of the blocks' height base 50 cm. From the ground. 1. Less will absorb moisture, it seems to me. 2. It will be easier to build communication below then.
08.
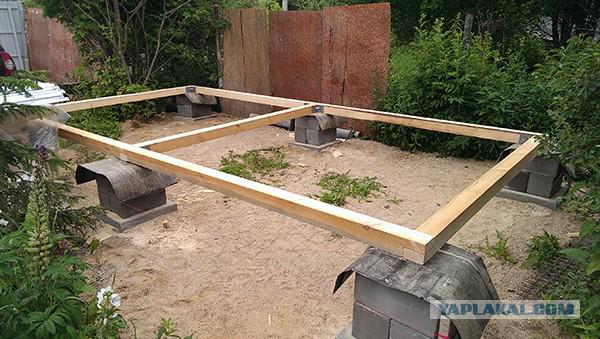
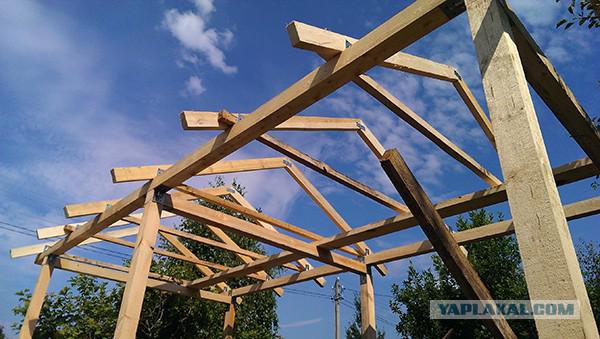
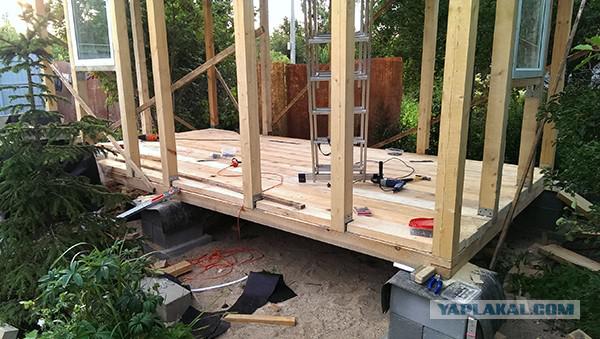
Erect the frame.
09.
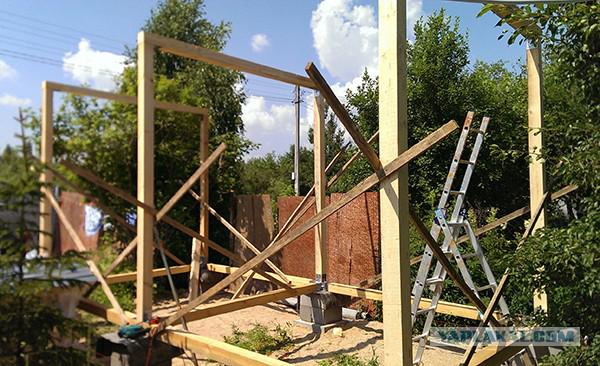
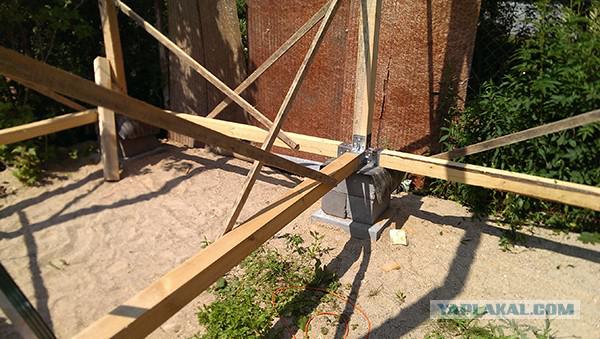
All angles are fastened to the steel. Pleasure is not cheap, this one is worth more than a hundred rubles. But greatly facilitates the process. Especially since I do all alone, with one board 2.5 meters weighs about 17 kg. The hardest thing was to put the longitudinal 5.5 meter high, their weight under 40 kg. it turns out (if you believe that 1 m3 weighs 700 kg). And they need to throw three meters up (0.5 meter base, height 2.5 vertical columns). Raise your hands a beam on top of it was not an easy task. But the solution was found: In the vertical poles on both sides are screwed screws - like steps, and the beam was raised at one end to the "step" and then rush to the other end, to lift and run back to the next step. And so the three approaches provided top of the bar.
10.
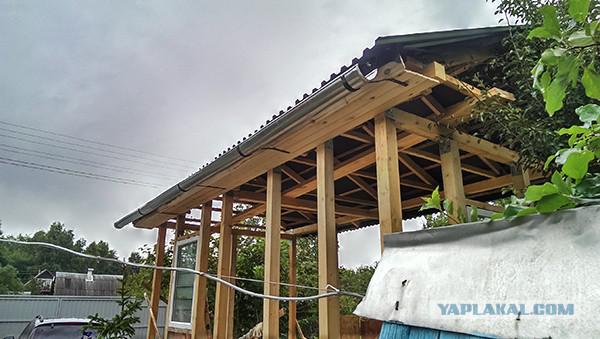
Riveted truss roof.
11.
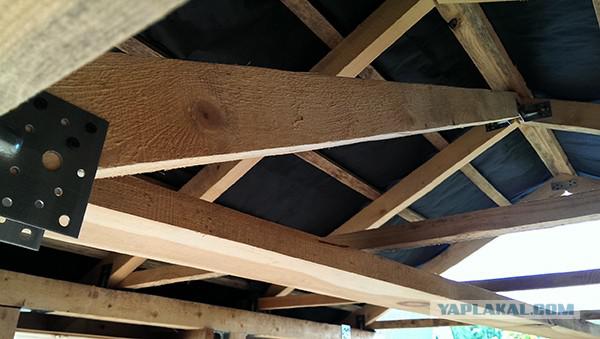
Fasten all the same corners.
12.
Put the roof.
Here the process was not captured, only the result. But there are all trivial. Crate, asphalt and iron.
13.

The reverse side of the roof.
14.
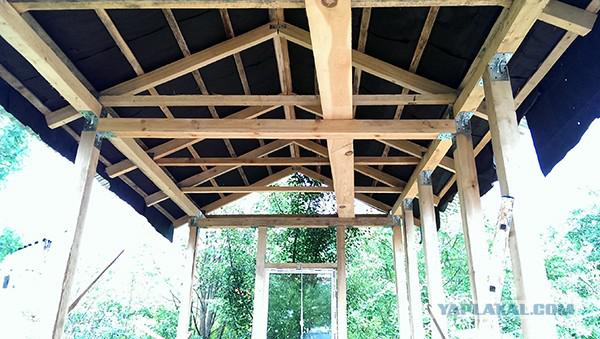
For the stability of the roof - diagonal "stick." I do not know what it's called correctly.
15.
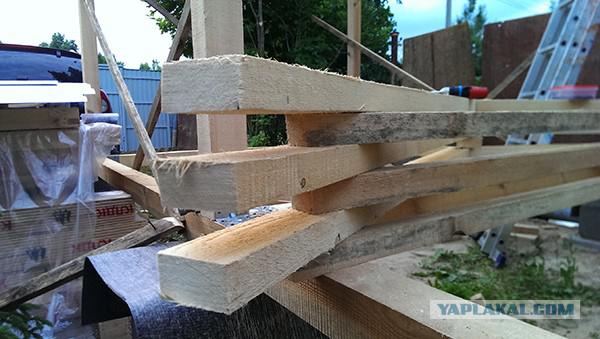
Laghi floor.
16.
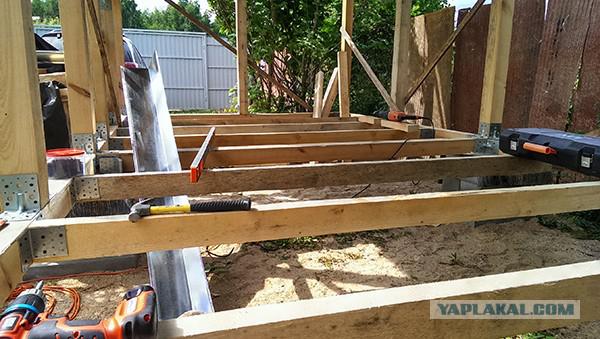
Subfloor. When you finish put another centimeter plywood. A toilet and shower is also on top of the tiles. But this will not be here, because the process has not yet reached this stage.
17.
It started to rain, made out of turn plums, and that much zamokal fumbling under the roof, and a single droplet by the collar.
18.
I purchased the simulation beam. He began to sew up the wall until the rains have not filled all nafig.
19.
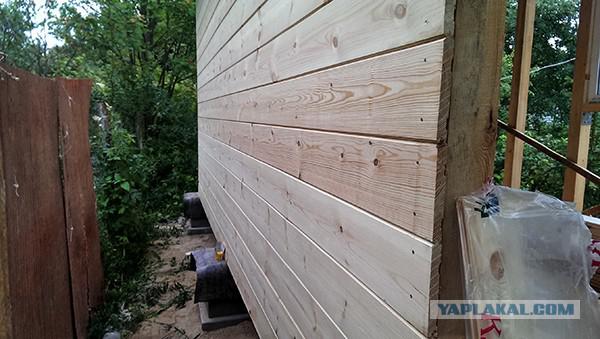
I sewed almost everything. Stay gables.
20.
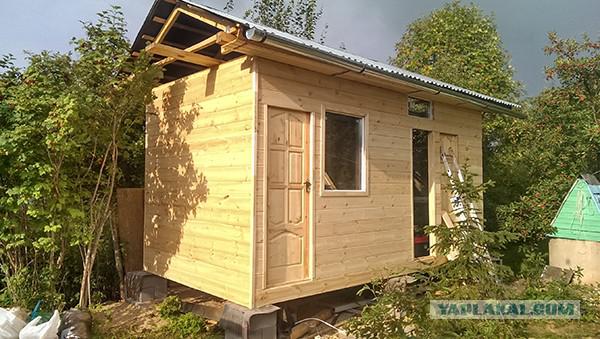
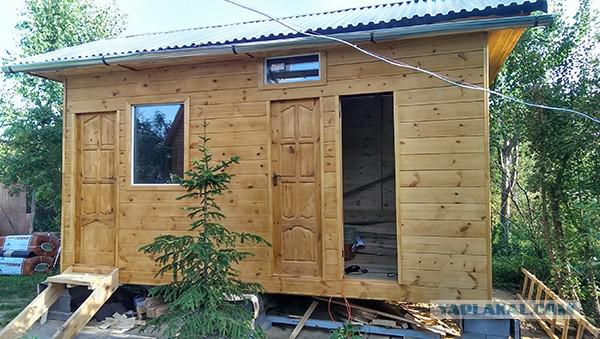
Done.
21.

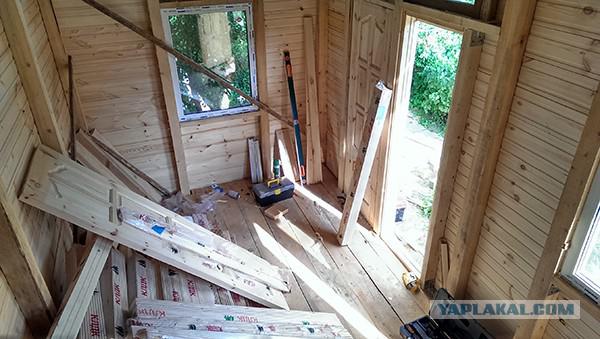
View from inside.
22.
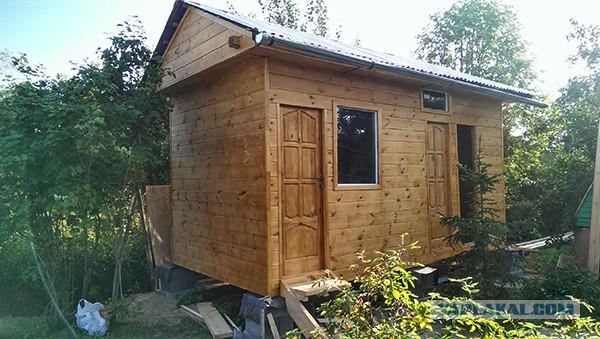
Painting.
Impregnation 3v3. It actively pushes Leroy Merlin. I read the reviews of eyewitnesses say good. Someone is 5 years and "not a single gap." Let's see.
23.
24.
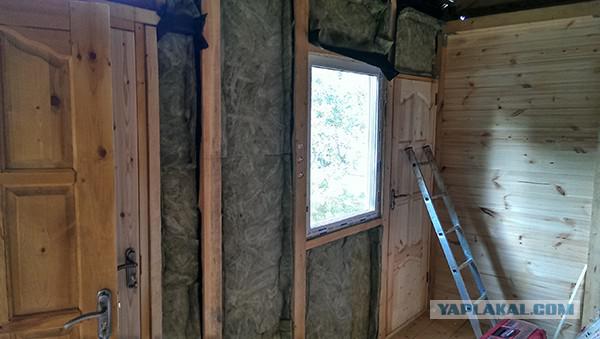
Insulated walls.
It is still a barn, bought it cheaply. Ursa Terra (600r. 6 square meters). Technology is as follows: asphalt then URSA.
25.
I sew up the wall.
26.
Posted in [mergetime] 1376292322 [/ mergetime]
Done!
There is still erect walls, ceiling, electrical, plumbing, drain. Install equipment to dig a septic tank. But that's another story.
Source:
26 photos + a bit of text

As a real "programmer" It all began in AutoCAD and others. Improvised means.
First, the house was constructed in AutoCAD on a board. There were also determined the size of "details", angulation and their number.
02.

Then in homstaylere estimated plan.
03.

04.

05.

Materials purchased. Since in AutoCAD drawing everything on a single plank, I knew exactly how much and what material I need. In the sawmill aunt's eyes widened from such precision ... "13 pcs., 50x200, 24 pcs. 50x100, etc. ».
06.

I prepare the site. Sand bed thirty centimeters. Spilled water to a hard state. He checked her car, ride back and forth, the wheels do not fall (the machine 2 tons). All gut, you can build. Of course, I found on the internet bearing capacity of a cushion and estimated weight at home (4-5 tons) realized that I have a supply of large, provided six points of tangency of the total area of 1, 5 m2.
07.

I set six "blocks of the blocks' height base 50 cm. From the ground. 1. Less will absorb moisture, it seems to me. 2. It will be easier to build communication below then.
08.

Erect the frame.
09.

All angles are fastened to the steel. Pleasure is not cheap, this one is worth more than a hundred rubles. But greatly facilitates the process. Especially since I do all alone, with one board 2.5 meters weighs about 17 kg. The hardest thing was to put the longitudinal 5.5 meter high, their weight under 40 kg. it turns out (if you believe that 1 m3 weighs 700 kg). And they need to throw three meters up (0.5 meter base, height 2.5 vertical columns). Raise your hands a beam on top of it was not an easy task. But the solution was found: In the vertical poles on both sides are screwed screws - like steps, and the beam was raised at one end to the "step" and then rush to the other end, to lift and run back to the next step. And so the three approaches provided top of the bar.
10.

Riveted truss roof.
11.

Fasten all the same corners.
12.

Put the roof.
Here the process was not captured, only the result. But there are all trivial. Crate, asphalt and iron.
13.

The reverse side of the roof.
14.

For the stability of the roof - diagonal "stick." I do not know what it's called correctly.
15.

Laghi floor.
16.

Subfloor. When you finish put another centimeter plywood. A toilet and shower is also on top of the tiles. But this will not be here, because the process has not yet reached this stage.
17.

It started to rain, made out of turn plums, and that much zamokal fumbling under the roof, and a single droplet by the collar.
18.

I purchased the simulation beam. He began to sew up the wall until the rains have not filled all nafig.
19.

I sewed almost everything. Stay gables.
20.

Done.
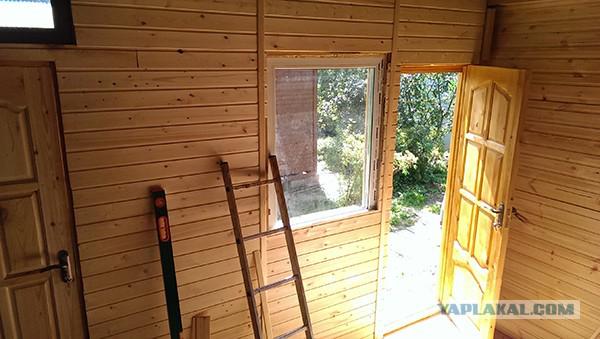
21.

View from inside.
22.

Painting.
Impregnation 3v3. It actively pushes Leroy Merlin. I read the reviews of eyewitnesses say good. Someone is 5 years and "not a single gap." Let's see.
23.

24.

Insulated walls.
It is still a barn, bought it cheaply. Ursa Terra (600r. 6 square meters). Technology is as follows: asphalt then URSA.
25.

I sew up the wall.
26.
Posted in [mergetime] 1376292322 [/ mergetime]
Done!
There is still erect walls, ceiling, electrical, plumbing, drain. Install equipment to dig a septic tank. But that's another story.

Source: