749
Make a column of active passive
This post has prompted me to write the story of a man with straight arms here.
17 photos
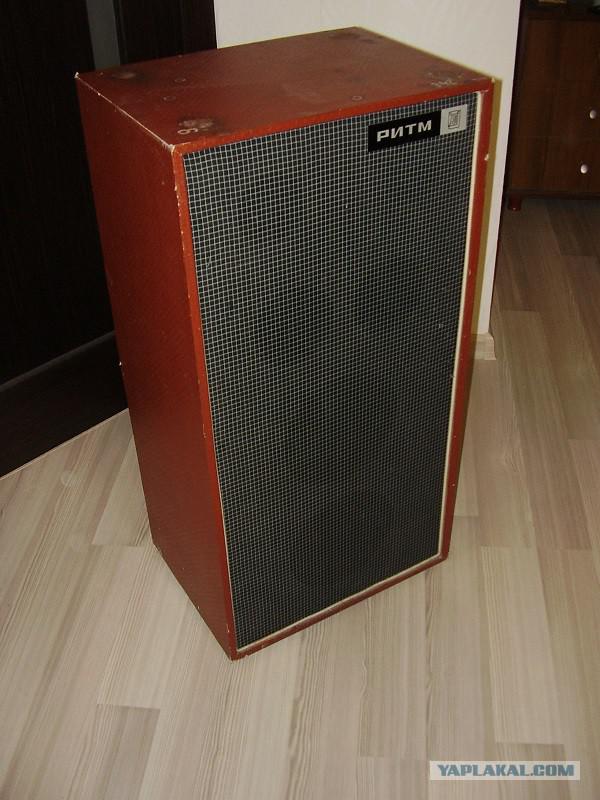
This tragic story krivorukost and rukozhopstva started with what I was given to battered column rhythm of production since the Soviet Union. Behind her was a simple audio jack, which indirectly says that there is no amplifier, and connect it to me was absolutely not what.
A quick view prices amplifiers threw me into a state of deep depression from which I came out suddenly, remembering our little Chinese, and immediately wrote amplifier chip TDA8920 for as much as $ 28
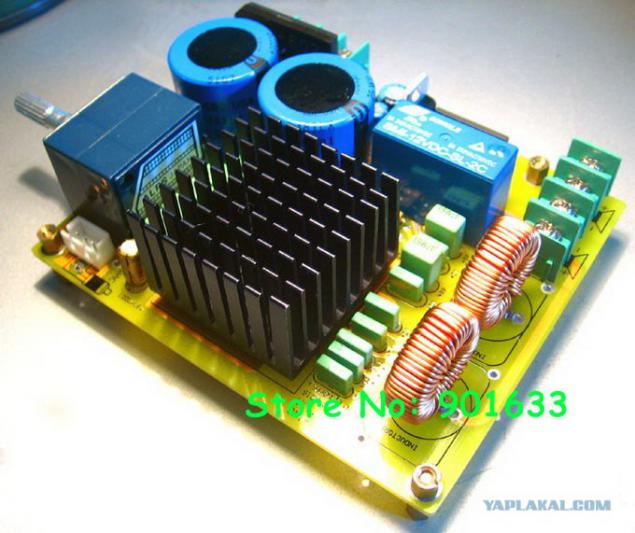
After a couple of months, all of our favorite branch of hell on earth (if you know what I mean), I have labored long-awaited parcel. Anticipating an interesting pastime for a couple of nights (to build the power amplifier and the entire business somehow), went to the post office and get the parcel and touch her, I immediately sensed something was wrong.
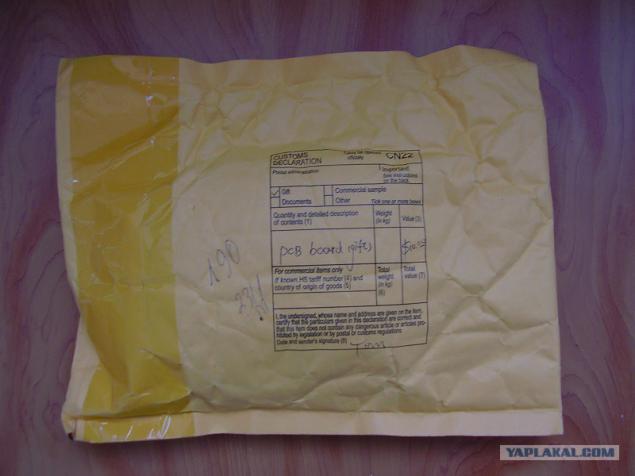
An autopsy showed that intuition did not fail me, instead of the amplifier there lay a bag with a set a la "Do-it-yourself". I immediately climbed back to the site to vent his anger on the Chinese to sell me all this mess, and only now saw in the middle of a very long product name brief little words «kit», that is to say "set, a set of" we. Well cho, fool, it was necessary to read carefully.
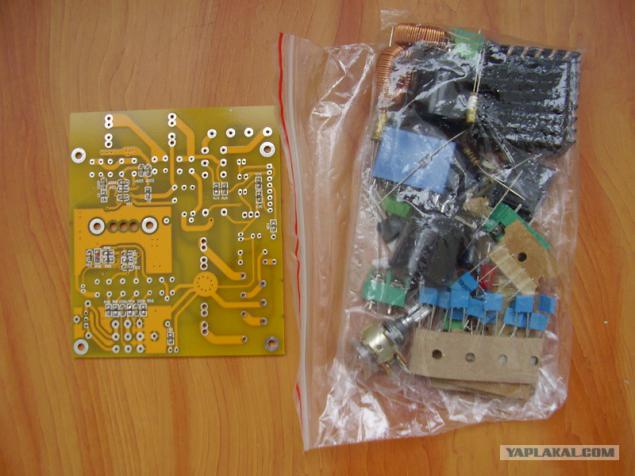
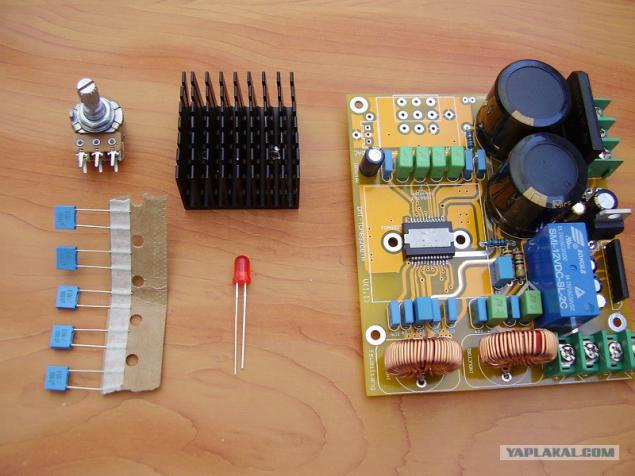
Do not worry, a little know how to solder, so all is not lost. Circuits have been placed in piles, compared with the scheme of the Chinese product. It was given with some difficulty, I had to google the table striped markings and inscriptions resistors capacitors.
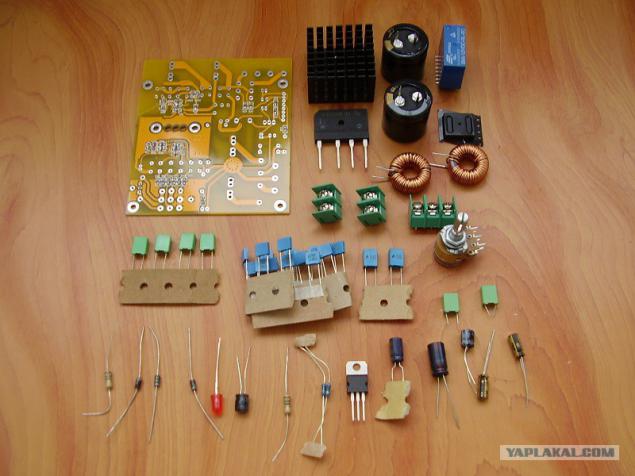
Then I waited for the second surprise, the number of parts and their denominations places do not converge with the scheme. "How can something so» ©, I thought again and climbed to the page of the goods, and precisely in the scheme, and the pictures of the finished amplifier is labeled "revision 1.0," and set that came to me - "revision 1.1." Well no way back, we will insert the details of the principle of least deviation from the scheme. First soldered detail.
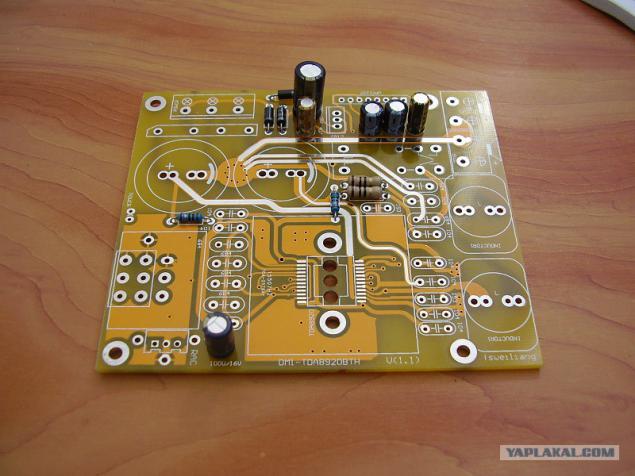
More fines and chip.
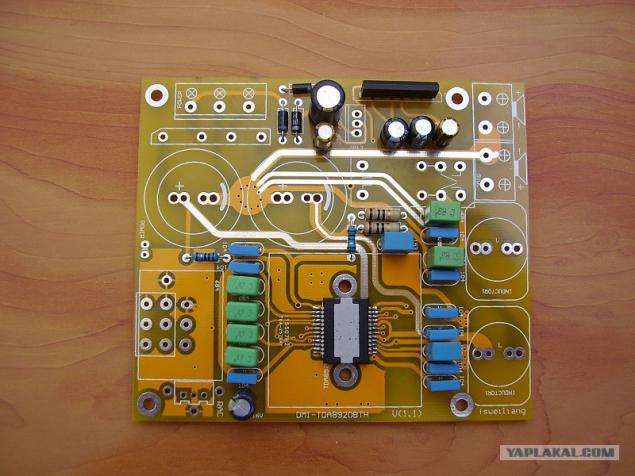
Well, everything except the volume control, it was planned to be mounted on the wall of the column.
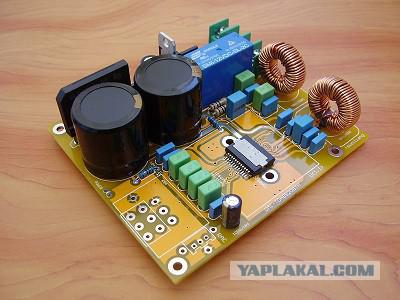
Total remaining to attach the heat sink to the board, the regulator and the LED goes into the column. And I broke the whole head which prisunut five capacitors that are left! They are not in the diagram on the board for them holes either. It is not good because jiving over people, my distant fellow Chinese-seller!
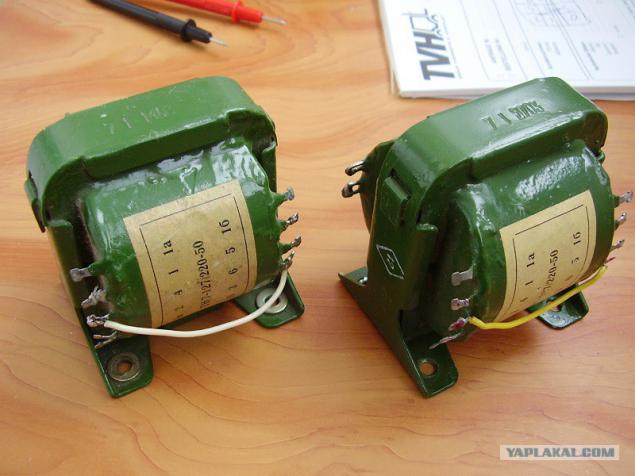
Next meals. It needed bipolar I nirazu in electronics is not strong, it certainly could and could do everything on a single transformer, but I xs how, so I went to the nearest radiobaraholku and bought a couple of the same old shit like mammoth Soviet warm lamp transformers. Also naguglit his scheme to know where some tension.
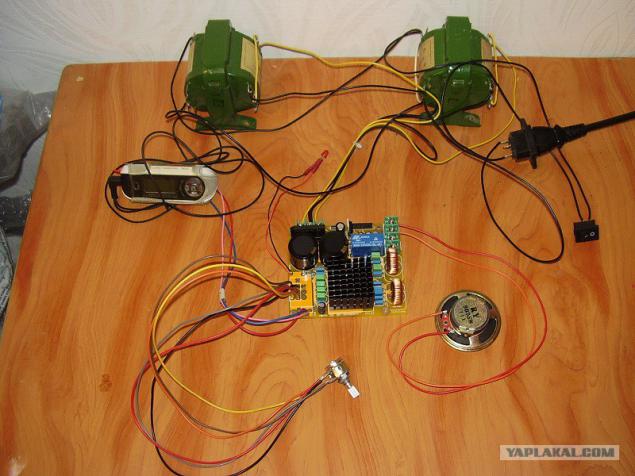
Since I do not know whether it will work at all, so in vain not to bathe with the installation of the column first decided to put everything on the table to check. Additional victims were involved in the experiment iRiver mp3 player and speaker maaalenky not know where once pulling and Valya "and suddenly come in handy." And it was useful! In addition to photo experts know provodochki color of the burned gutted computer power supply. And the switch from a well. In general, it was a real moment of truth, as if all this does not work the first time, I had no clue how to diagnose faults and revitalize the device in case of failure. And it worked !!! To say that I was happy, it's nothing to say! Full catharsis.
It's time to dissect column. Remove the incredible amount of screws (take this opportunity to send rays of diarrhea man who invented the screws under the flat-head screwdriver).
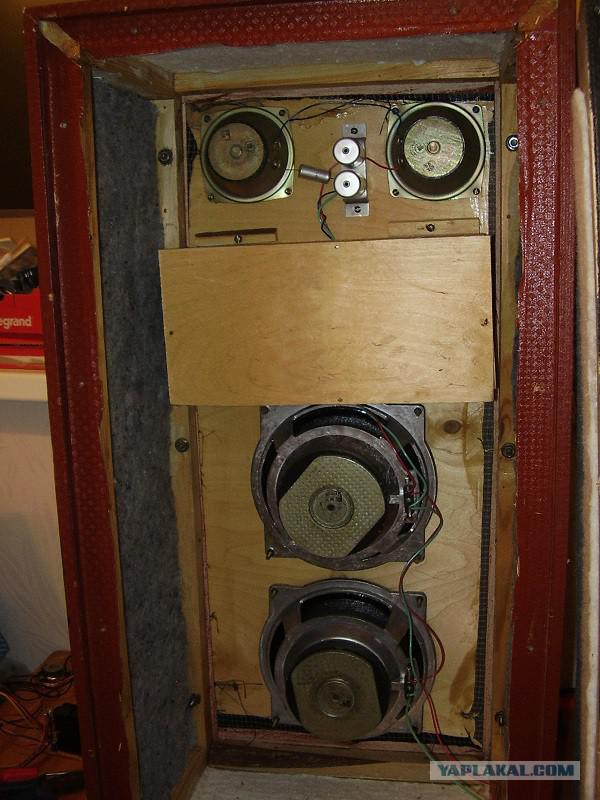
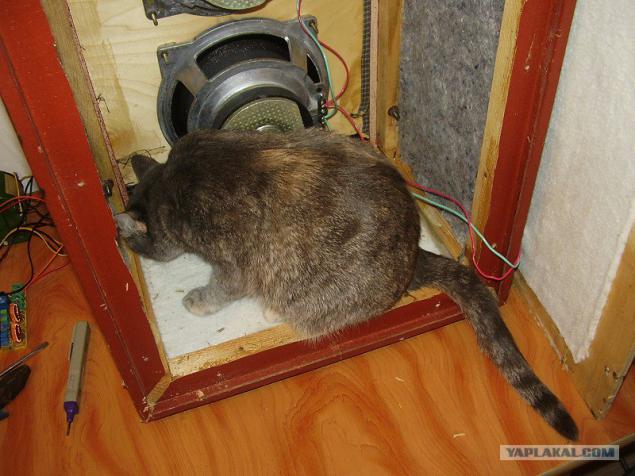
The interior was immediately inspected by the chief engineer.
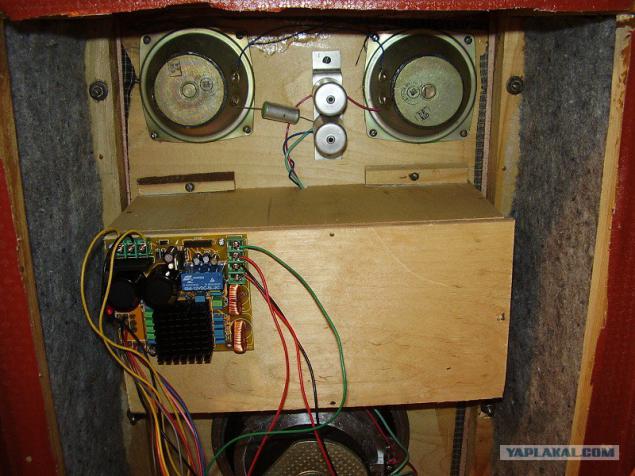
Without further amplifier was fixed with screws sticking out on the plywood contraption.
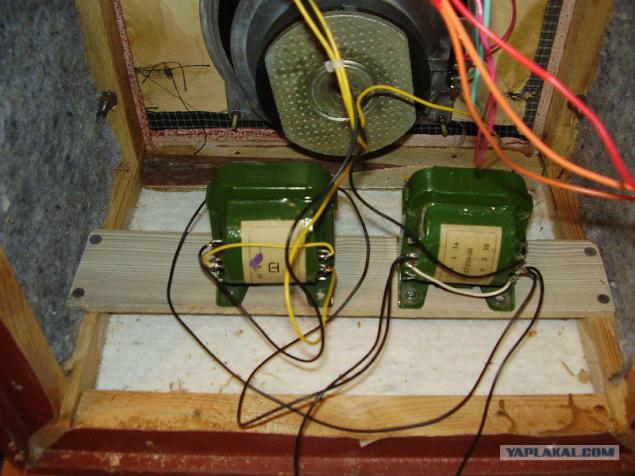
Tranformatory firmly fixed on the stub of the laminate below. Rukozhop cho :)
That's how the whole structure looked assembly, contrary to accepted standards of using the red tape.
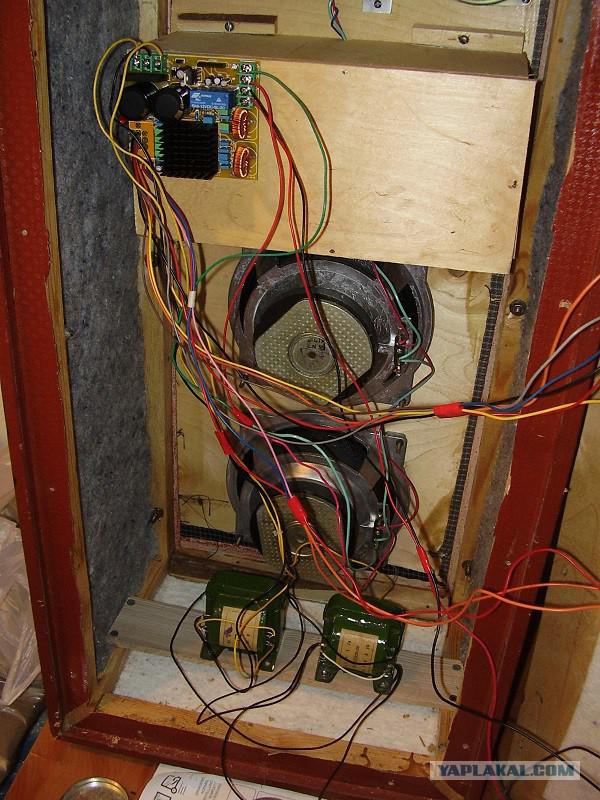
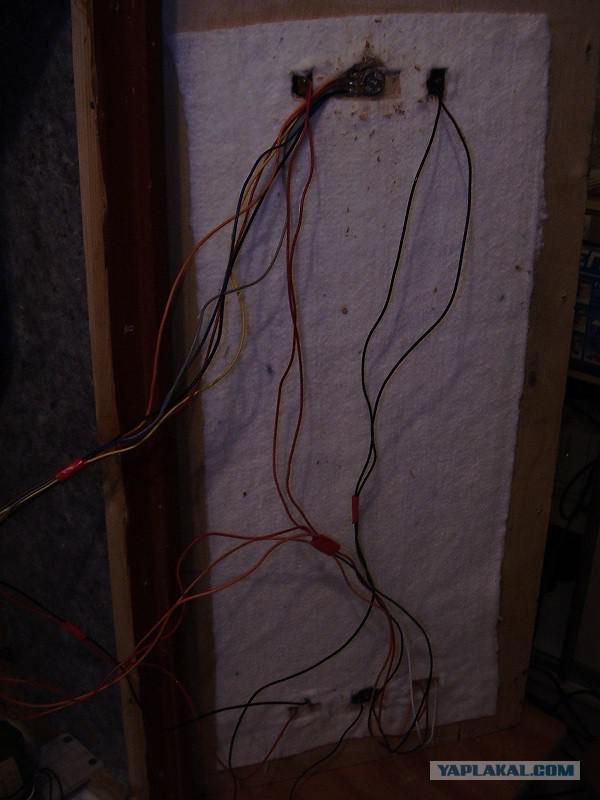
Wires hanging towards the back wall, where the sound insulation in the slots (left to right, top to bottom) switch mono / stereo, volume control, power switch, the output through the contact plate with clothespins on the second column, entry 220, a stereo audio input through the tulips.
Posted in [mergetime] 1385682941 [/ mergetime]
Next, using a large of number of obscene expressions flat screws are screwed back. The device is assembled and pleasantly pleases the ear being connected to a computer.
Here's a story in which it was tested at the same time a lot of excitement and fun of the fact that something made with your hands.
On this I have everything.
Thank you all for your attention.
Source:
17 photos

This tragic story krivorukost and rukozhopstva started with what I was given to battered column rhythm of production since the Soviet Union. Behind her was a simple audio jack, which indirectly says that there is no amplifier, and connect it to me was absolutely not what.
A quick view prices amplifiers threw me into a state of deep depression from which I came out suddenly, remembering our little Chinese, and immediately wrote amplifier chip TDA8920 for as much as $ 28

After a couple of months, all of our favorite branch of hell on earth (if you know what I mean), I have labored long-awaited parcel. Anticipating an interesting pastime for a couple of nights (to build the power amplifier and the entire business somehow), went to the post office and get the parcel and touch her, I immediately sensed something was wrong.

An autopsy showed that intuition did not fail me, instead of the amplifier there lay a bag with a set a la "Do-it-yourself". I immediately climbed back to the site to vent his anger on the Chinese to sell me all this mess, and only now saw in the middle of a very long product name brief little words «kit», that is to say "set, a set of" we. Well cho, fool, it was necessary to read carefully.

Do not worry, a little know how to solder, so all is not lost. Circuits have been placed in piles, compared with the scheme of the Chinese product. It was given with some difficulty, I had to google the table striped markings and inscriptions resistors capacitors.

Then I waited for the second surprise, the number of parts and their denominations places do not converge with the scheme. "How can something so» ©, I thought again and climbed to the page of the goods, and precisely in the scheme, and the pictures of the finished amplifier is labeled "revision 1.0," and set that came to me - "revision 1.1." Well no way back, we will insert the details of the principle of least deviation from the scheme. First soldered detail.

More fines and chip.

Well, everything except the volume control, it was planned to be mounted on the wall of the column.

Total remaining to attach the heat sink to the board, the regulator and the LED goes into the column. And I broke the whole head which prisunut five capacitors that are left! They are not in the diagram on the board for them holes either. It is not good because jiving over people, my distant fellow Chinese-seller!

Next meals. It needed bipolar I nirazu in electronics is not strong, it certainly could and could do everything on a single transformer, but I xs how, so I went to the nearest radiobaraholku and bought a couple of the same old shit like mammoth Soviet warm lamp transformers. Also naguglit his scheme to know where some tension.

Since I do not know whether it will work at all, so in vain not to bathe with the installation of the column first decided to put everything on the table to check. Additional victims were involved in the experiment iRiver mp3 player and speaker maaalenky not know where once pulling and Valya "and suddenly come in handy." And it was useful! In addition to photo experts know provodochki color of the burned gutted computer power supply. And the switch from a well. In general, it was a real moment of truth, as if all this does not work the first time, I had no clue how to diagnose faults and revitalize the device in case of failure. And it worked !!! To say that I was happy, it's nothing to say! Full catharsis.

It's time to dissect column. Remove the incredible amount of screws (take this opportunity to send rays of diarrhea man who invented the screws under the flat-head screwdriver).

The interior was immediately inspected by the chief engineer.

Without further amplifier was fixed with screws sticking out on the plywood contraption.

Tranformatory firmly fixed on the stub of the laminate below. Rukozhop cho :)

That's how the whole structure looked assembly, contrary to accepted standards of using the red tape.

Wires hanging towards the back wall, where the sound insulation in the slots (left to right, top to bottom) switch mono / stereo, volume control, power switch, the output through the contact plate with clothespins on the second column, entry 220, a stereo audio input through the tulips.
Posted in [mergetime] 1385682941 [/ mergetime]
Next, using a large of number of obscene expressions flat screws are screwed back. The device is assembled and pleasantly pleases the ear being connected to a computer.
Here's a story in which it was tested at the same time a lot of excitement and fun of the fact that something made with your hands.
On this I have everything.
Thank you all for your attention.

Source:


