202
The second life of old dishes
You can show your creativity and improve the look of old dishes using simple creative techniques, a little clay and special paint. The resulting do-it-yourself dishes will delight the eyes of the owners, and the guests will certainly take an interest in the price of the "new thing".

In our article today, we will tell you how to make several crafts at once, using different techniques. And at the end we will show a video in which you will see even more interesting and entertaining "craft". The main thing is to understand that the second life of old dishes is impossible without patience and imagination. Try it, this is the "Site" .
DIY dishes Ceramic jug using ready-made molds What you need
Manufacturing
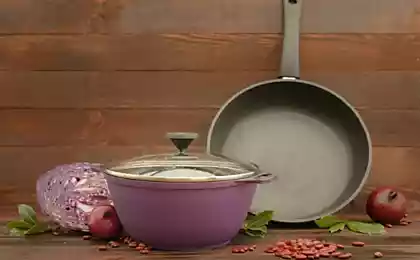
Enamelled container with galvanized effect and embossed inscriptions What you need
Manufacturing
Such crafts not only show the skill and creative orientation of the owners of the house, but also have a meditative property: when you do them, time seems to freeze, and all other problems fade into the background. The more painstaking the work is, the better result you will get in the end!
https://www.youtube.com/watch?v=GInPbSUwMxo
In this video, you will learn interesting techniques in creativity and a lot of useful information.

In our article today, we will tell you how to make several crafts at once, using different techniques. And at the end we will show a video in which you will see even more interesting and entertaining "craft". The main thing is to understand that the second life of old dishes is impossible without patience and imagination. Try it, this is the "Site" .
DIY dishes Ceramic jug using ready-made molds What you need
- old ceramic jug
- water-based primer
- acrylic paint in several colors
- unnecessary sponge
- molds (forms for creativity, soap, candles, etc.)
- self-hardening clay
- PVA glue
- tassel
- pencil
- water
Manufacturing
- Treat the old jug completely with a primer. The water-based primer is odorless. Then use a sponge to paint the dishes in one color tone. Work on the entire outer surface, as well as the visible part of the inner.
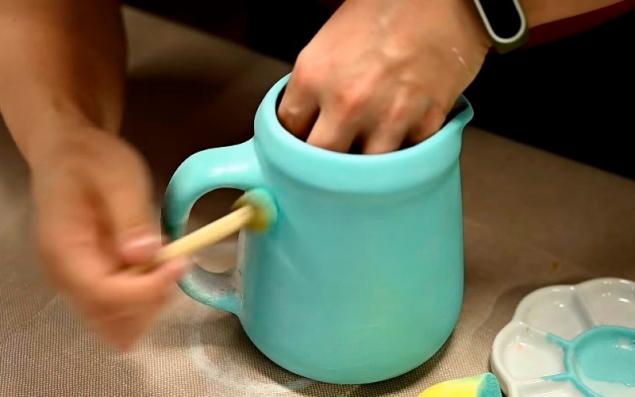
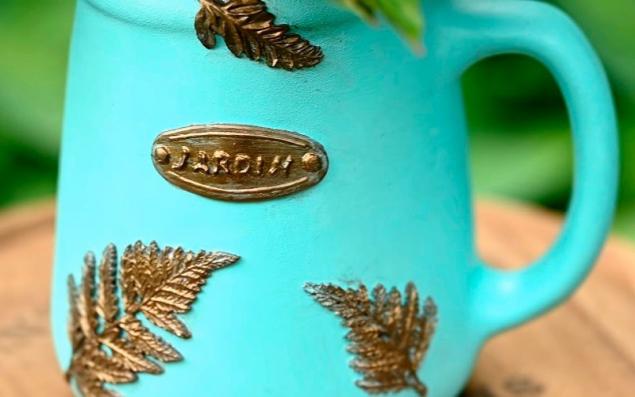
- Using molds or molds, make decorative details from special clay. Paint them a different color and glue them to the jug with regular PVA glue. Create especially complex details as carefully as possible.
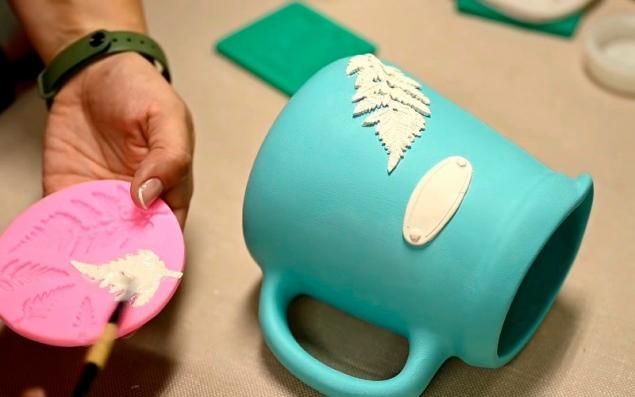
- Apply inscriptions on decorative inserts, if you wish. This can be done with a brush or with a hard pencil.
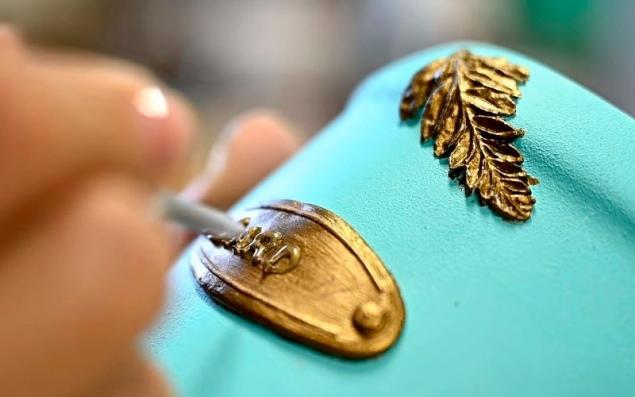
- At the very end, dilute the base paint that was applied to the jug from the very beginning with water and treat the entire surface of the parts. Then quickly go over them with a dry sponge. This will give the crockery a patina effect and thus give it an even more interesting look. Ready!


Enamelled container with galvanized effect and embossed inscriptions What you need
- enamelled container
- water-based primer
- wood putty
- stencil lettering
- masking tape
- fine sandpaper
- sponge
- tassel
- water
- paper towel
- gray acrylic paint
- black acrylic paint
- white acrylic paint
- silver acrylic paint
- glossy varnish
Manufacturing
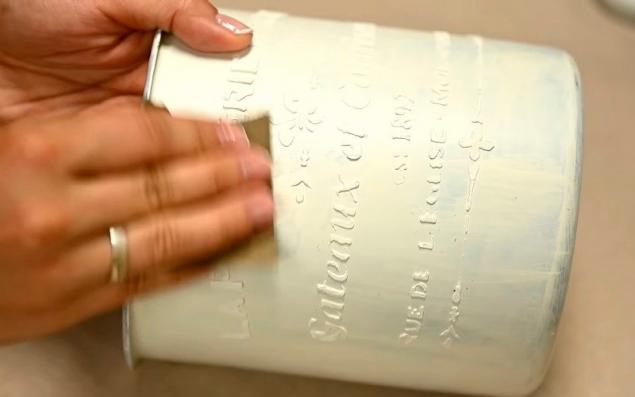
- Prime the enameled container, trying to do everything as carefully as possible. Now the most difficult task: fix the stencil with the inscriptions (it costs a penny in a Chinese online store) with masking tape. Apply a thin layer (1 mm) of wood filler over the stencil beech. Try to keep the layer of putty as uniform as possible. After a couple of minutes, remove the stencil, and straighten the resulting letters with sandpaper.
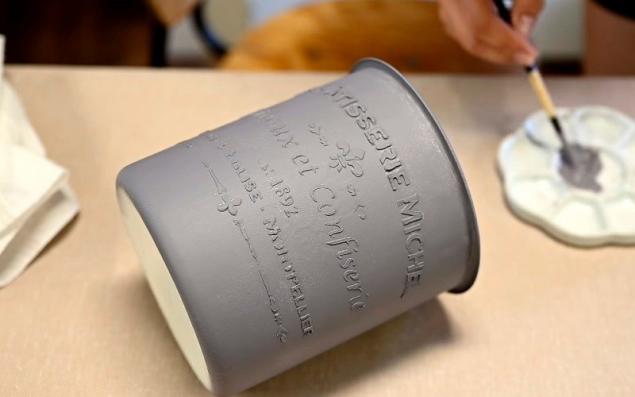
- Apply gray acrylic paint to the sponge and work over the entire surface of the product. Treat the details with a brush. This will be the foundation. Now mix black, gray paint and some water. Use a brush to paint spots of this mixture over the entire surface of the craft. Remove the rest of the mixture with a paper towel. Repeat the same manipulations with white and silver paint.
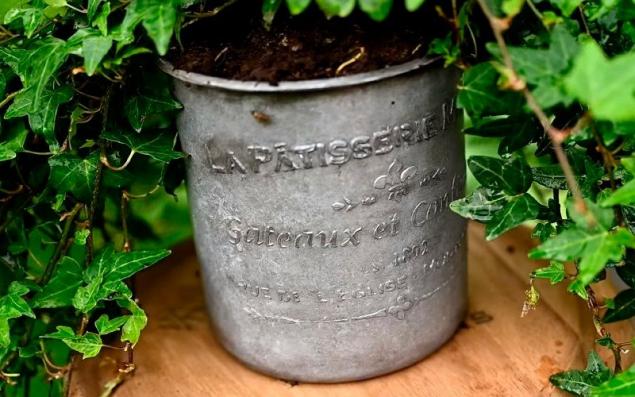
- At the very end, go where you think is necessary with a dry brush with black paint on the surface of the container to shade the details. Fix the result with a glossy varnish. The "old" galvanized planter is ready! Suitable for a summer cottage or home garden.


Such crafts not only show the skill and creative orientation of the owners of the house, but also have a meditative property: when you do them, time seems to freeze, and all other problems fade into the background. The more painstaking the work is, the better result you will get in the end!
https://www.youtube.com/watch?v=GInPbSUwMxo
In this video, you will learn interesting techniques in creativity and a lot of useful information.


Why you should not throw away the container for washing capsules
What messages should not be written to a loved one