207
Installation of metal tile on the roof

Before we start the installation
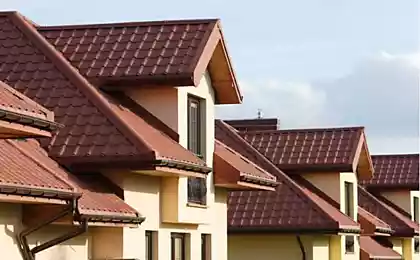
Before starting the installation of the material, we recommend you to familiarize yourself with thematic videos, as well as watch photos of the roof of houses made of metal roofing. Before buying, be sure to calculate the amount of material you need, you can do this using electronic calculators, or by ordering a service in the company where you plan to make a purchase (for example, in RUF-ART). Also be sure to read the instructions from the manufacturer of metal tiles.
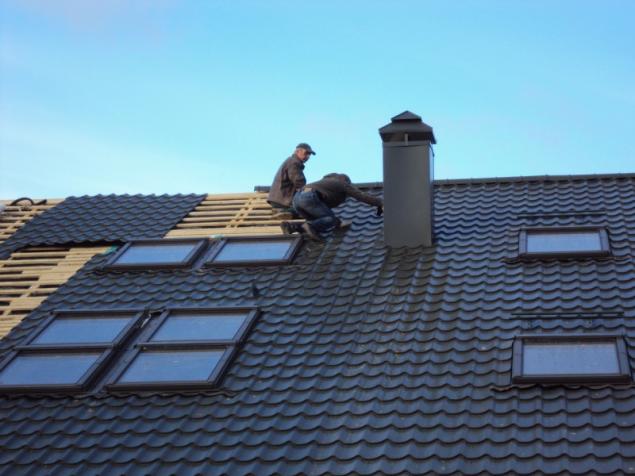
Then you need to ensure reliable waterproofing of the roof, for this it is desirable to use a roll waterproofing membrane. Install it on the truss system so that the absorbent side was turned inside the roof, this will save you from condensation in the attic. Mount waterproofing to the attic with a construction stapler, using galvanized brackets. It is necessary to lay the film from the cornice to the skating flopped (about 150 mm).
After that, a crate is mounted from wooden, pre-treated with an antiseptic, 10×2.5 cm or 10×5 timbers. The crate should provide good ventilation of the roof. The first bar is attached to the cornice, and it should be slightly thicker from the rest (1 cm), the step between the crate should be from 30 to 35 cm.
Installation of metal tile
The length of the sheet should be chosen depending on the length of the ramp, but if it does not exceed 6 meters, in this case it is worth taking sheets with a shorter length, otherwise they will be inconvenient to mount. The beginning of the installation of metal roofing is made depending on the type of roof. The gable begins to install from the end, and the tent from the highest point moving to the sides. Mount metal tile from the bottom up, each subsequent sheet is laid under the wave of the previous one.
In order for the fastening to be reliable and correct, four sheets that should lie on top of each other, first you need to grab onto the hardware. Then the sheets must be aligned and only then fixed. Thickenings that appear at the junction of the four sheets must be either partially cut at the corners or straighten the capillary groove.
Fix the sheets with the help of octahedral screws, using rubber pads that help seal the fastener. The sheet should be fixed in the place where it is adjacent to the crate. If there is no time or desire to deal with the features of the work, it is better to order the installation of the roof at the profile company (several sites: nezhingorstroy.com.ua, https://roof-art.com.ua/, stroitelnye-uslugi.in-ua.com, inkor.com.ua, kolybak.kiev.ua)
Installation of individual elements
Fix the end bar on the profile wave. Its purpose is to protect the roof from the effects of strong wind, and wooden bars from moisture. The wave of the end bar should correspond to the width of the ramp. Then the roofing bar is installed.
So that the rain and snow do not fall under the ridge, an aerorollic is mounted between it and the metal roof. The horse itself must be attached to the bar located on the end of the roofing structure.
Council: If the slope angle is more than 45 ̊, then you should make sure in advance whether the chosen model of the skate bar corresponds to this angle. If this is not done, then such a discrepancy can negatively affect the roofing material and even lead to its complete replacement.
Installation of endova
Endov is needed in order to block the joints and contribute to the removal of moisture from the roof under the metal roof. The feature of installation depends on the type of endowment: upper or lower. The lower endova has an inflection at the edges, which should protect the underroof zone from moisture. It is installed before the installation of metal tiles.
An additional board is required under each endowment. It is necessary to install the endova from the cornice, moving upwards, the sheets are laid overhead from 25 to 30 cm. But from the axis of the endova to the sheet should be a gap from 8 to 10 cm. Screw screws need to be 1.5 cm from the relief line of the cropped metal roofing. At the same time, you need to fasten the sheet at a distance of 25 cm from the endova axial line. With qualitatively produced works, the metal tile should fit tightly to the board on which the endova is installed.
And in order for the design of the roof to have an attractive aesthetic appearance, the trimmed sheets are covered by the upper end. In this case, you do not need to install a seal, installation occurs from the bottom up and overlaid by 10 cm. By the way, it is important that the hardware, which will be attached to the upper endova, do not damage the lower.

The interest rate on the mortgage influences the amount of overpayment?
Search apartments for rent independently or through an Agency


