1772
Brick oven with his own hands —a step by step guide
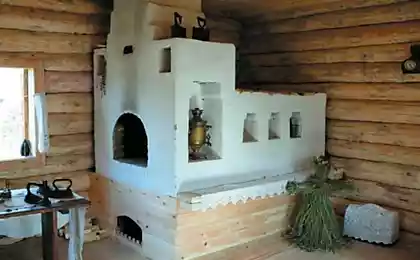
Masonry Russian stove has its own characteristics, because it is impossible to build as a conventional wall.
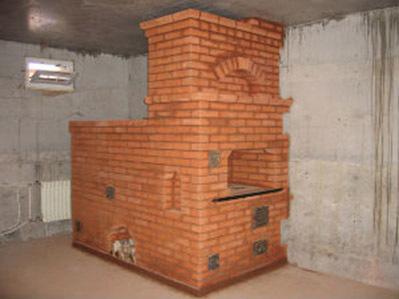
As shown by the drawings of Russian stoves, there are three basic sizes of constructed structures:
Big — 2310 to 1600 mm;
Medium — 2130 on 1470 mm;
Small — 1780 1240 mm.
Most often furnaces are built in the following sizes:
Height about 180 cm;
With a length of approximately 213 cm;
Width 142 cm
It is worth noting that the Russian ovens require careful control observations during firing and cooking, so cook, usually, uncomfortable. The disadvantage of the Russian stove is that the heat begins to stand out at the level not below the hearth. The fact that this level is located at an altitude of 900 ml from the floor.
The Russian stove lining and masonry
Masonry Russian stove has its own characteristics, because it is impossible to build as a conventional wall.
The fact that all of masonry is different for each row, only following which you can make a good choice.
The first row of the furnace is laid out thus – the outside being built of a brick, and the empty space is filled with broken pieces or stones.
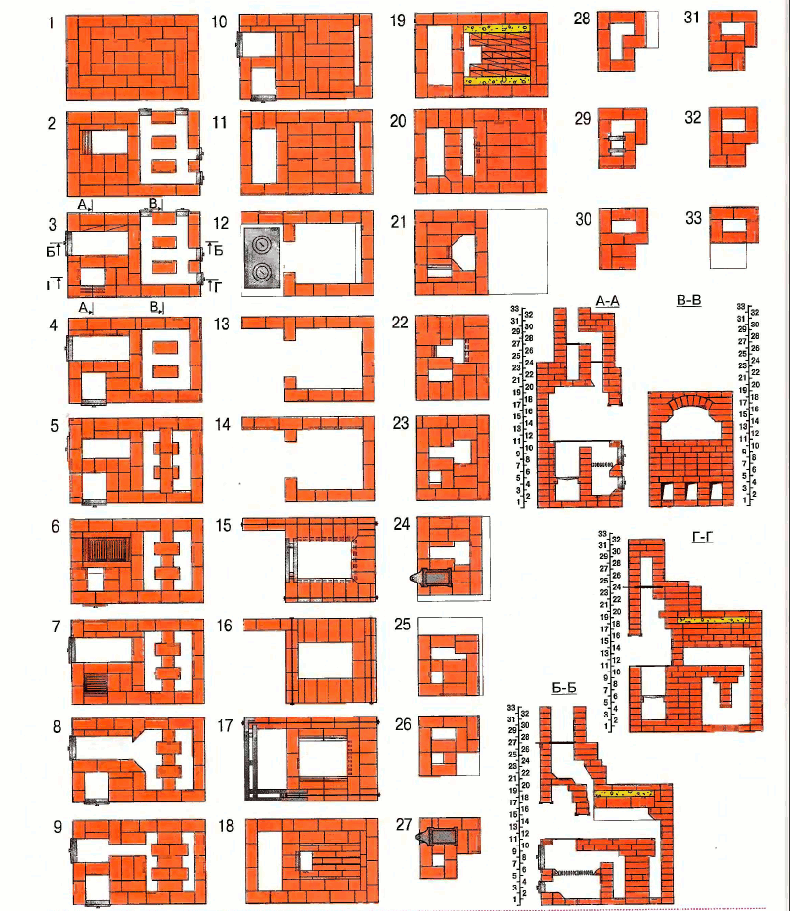
On the second row are laid out 2 walls of bricks. This is necessary for columns of a partition. Misplacing the wall, leave 2-4 Windows which will act as wells (openings for cleaning the stove). Also save room for the blower.
On the third lining is the construction of a large furnace door and blower. After being laid low ash pit of the furnace.
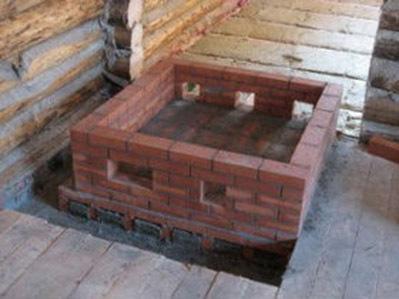
At the 4th clutch installed doors blew. Using bricks mounted partitions for wells. If you can't make the doors blew, the place remains open until the end of construction. In the last step through the door to remove the remains of grout. At the end, it is necessary to build the design so that the edges of the doors do not protrude from the plane of the walls of the Russian stove.
Further to the posts fit the wall of bricks, which are fixed in the furnace walls, the locking method. The door blew overlap bricks. Further, under the partition, you must do three holes, each of which must be 12х21 see It is necessary that the hot gases came in the second compartment from the first. You then need to narrow down the set blew a large furnace. This is necessary for mounting the grate.
Grate two fire boxes overlap with bricks. To fuel themselves pushed on the grate and burned faster, you need front and rear brick small furnace just to stesti. This will allow a better burn of the wood that is not perfectly dry.
Is the door large firebox. Then built a small firebox.
The installation of the small door of the firebox.
To ensure uniform heating furnace, it is necessary to increase the horizontal passage from the large firebox before partition.
The horizontal channel need to narrow bricks, nadisauskiene over them.
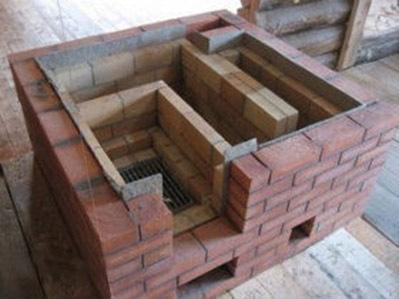
Next you need to close the partition and the horizontal channel. This is achieved by putting some pod (height 900mm). The rear wall must have a span (length 65 and width 7 cm).
Covered with another layer of the hearth and leave a gap. We close the doors of the fire boxes.
The construction of the Russian stove with your hands allows you to build each row with maximum quality, while saving money.
Apply a layer of mortar. Then put a plate of cast iron. Plate with lateral and front sides are finished with faience. Simple, the other six of the series just becomes stronger.
13 and 14, the rows of carefully strengthened by means of bandaging of seams.
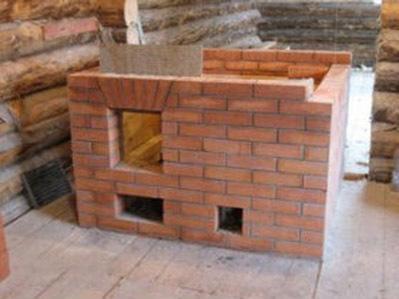
Strengthen the masonry on the side walls by fastening with nails, wire nuts, and washers. You can also use strips of steel with a threaded tail. The front side to simplify the work done rectangular (WxH — 42 cm), where the overlap began you need to perform with the size 1х4х85 cm is the unit of the Russian furnace.
Of brick, which cut off at the bottom, running the wall above the cooking chamber, the thickness of one brick.
Initially, you need to make the overlap of the masonry and the front side, i.e. "forehead", and then put the connection on the width of the furnace. On three sides, around the cooking chamber is being built for the second row of bricks. The trimming is not done!
The design of the Russian stove is that the number of re-cords, as on the 15th. Make a base under peretrube by means of steel bands. It is necessary that it supported the steel rod whose diameter should be 1.6 cm otherwise you can use a tube of appropriate size. Strips of steel are placed in special "nests" that are done in brick.
This row starts the bookmark set. This is done with the bricks of number 16. The scheme of the Russian furnace is that inside the cooking chamber, the bricks of the first row are tilted, where is filled with a thick layer of cement mortar with glinobeton or gravel. The bricks of the front and side walls peretrubja are placed on sheets.
To make it clear how to fold a Russian stove, this series should connect all the holes.
Wall peretrubja, on the right side, fix the lock. 20 number of teams is done by the channel. Happens after narrowing peretrubja from 25 to 18 cm, relative to the previous row.
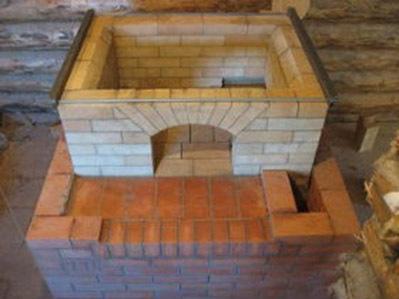
Next you need precast channel shaped as desired. Peretrube laid next to the vent. Its cross section is equal to 7х25 see It is necessary to create hoods, gases accumulating in peretrube furnace.
Then the decrease of the collapsible channel. The front row of bricks under stesyvaja conical shape. Next, you need the vent to be rectangular with a cross section of 12х19 see
On this line, the vent is square.
In the area over the air channels, installation of valves.
Performed narrowing precast channel and create a smoke channel.
Repeat the steps of the previous row. The construction of the Russian stove very hard work, so often have to repeat the previous masonry.
Put a damper over the flue duct.
Next, combine the flue and the duct in the horizontal plane. After this, the internal design is similar to the letter "G".
On the combined channel two is placed the steel sheet. United channel acts as the base, which covers a ventilation shaft.
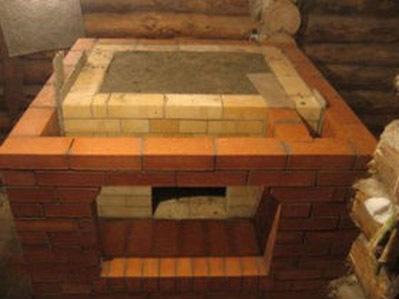
The chimney is a hole, the size of which 12х26 see further over the vent barrel is built with three layers of brick. It is necessary, according to the fire requirements.
Further repeats of the previous series
The construction of the pipe, thickness of which must be the size of a brick. Just need 5 bricks, the size of which 13х26 see
Walls continues to the ceiling. Then the fuzz, the thickness of 1.5 bricks. Please note that this must run on four rows above the rolling of the attic. As a chimney it is possible to perform the continuation of the laying or use pipe. Pipe on both sides should be lined with a fireproof material to conform to the dimensions of the internal cross-section.
Now You will not have issues, such as how to build a Russian stove? After all, masonry Russian stoves are painted on the steps, so just follow them.
Recipe antique stove Polish
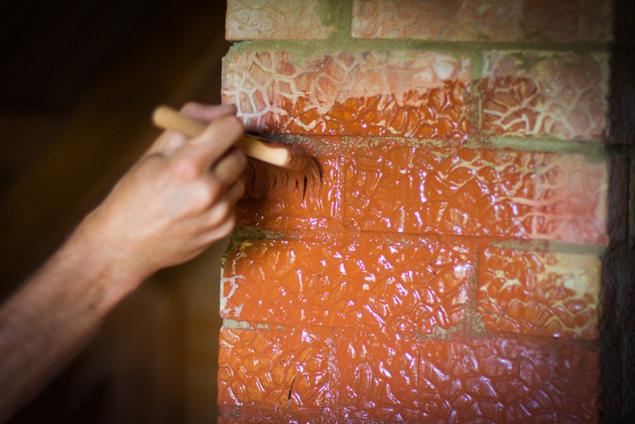
Many old recipes undeservedly forgotten, this recipe applies the furnace varnish. It consists of two components – tar and iron sulfate. 1 kg of tar have 50 grams of iron sulphate. The tar must be heated to boiling, and then add iron sulfate. A hot solution of dye pre-heated oven. I want to warn all the work is preferably carried out in the open air. published
P. S. And remember, only by changing their consumption — together we change the world! ©
Join us in Facebook , Vkontakte, Odnoklassniki
Source: vse-svoe.com/?p=4485

As shown by the drawings of Russian stoves, there are three basic sizes of constructed structures:
Big — 2310 to 1600 mm;
Medium — 2130 on 1470 mm;
Small — 1780 1240 mm.
Most often furnaces are built in the following sizes:
Height about 180 cm;
With a length of approximately 213 cm;
Width 142 cm
It is worth noting that the Russian ovens require careful control observations during firing and cooking, so cook, usually, uncomfortable. The disadvantage of the Russian stove is that the heat begins to stand out at the level not below the hearth. The fact that this level is located at an altitude of 900 ml from the floor.
The Russian stove lining and masonry
Masonry Russian stove has its own characteristics, because it is impossible to build as a conventional wall.
The fact that all of masonry is different for each row, only following which you can make a good choice.
The first row of the furnace is laid out thus – the outside being built of a brick, and the empty space is filled with broken pieces or stones.

On the second row are laid out 2 walls of bricks. This is necessary for columns of a partition. Misplacing the wall, leave 2-4 Windows which will act as wells (openings for cleaning the stove). Also save room for the blower.
On the third lining is the construction of a large furnace door and blower. After being laid low ash pit of the furnace.

At the 4th clutch installed doors blew. Using bricks mounted partitions for wells. If you can't make the doors blew, the place remains open until the end of construction. In the last step through the door to remove the remains of grout. At the end, it is necessary to build the design so that the edges of the doors do not protrude from the plane of the walls of the Russian stove.
Further to the posts fit the wall of bricks, which are fixed in the furnace walls, the locking method. The door blew overlap bricks. Further, under the partition, you must do three holes, each of which must be 12х21 see It is necessary that the hot gases came in the second compartment from the first. You then need to narrow down the set blew a large furnace. This is necessary for mounting the grate.
Grate two fire boxes overlap with bricks. To fuel themselves pushed on the grate and burned faster, you need front and rear brick small furnace just to stesti. This will allow a better burn of the wood that is not perfectly dry.
Is the door large firebox. Then built a small firebox.
The installation of the small door of the firebox.
To ensure uniform heating furnace, it is necessary to increase the horizontal passage from the large firebox before partition.
The horizontal channel need to narrow bricks, nadisauskiene over them.

Next you need to close the partition and the horizontal channel. This is achieved by putting some pod (height 900mm). The rear wall must have a span (length 65 and width 7 cm).
Covered with another layer of the hearth and leave a gap. We close the doors of the fire boxes.
The construction of the Russian stove with your hands allows you to build each row with maximum quality, while saving money.
Apply a layer of mortar. Then put a plate of cast iron. Plate with lateral and front sides are finished with faience. Simple, the other six of the series just becomes stronger.
13 and 14, the rows of carefully strengthened by means of bandaging of seams.

Strengthen the masonry on the side walls by fastening with nails, wire nuts, and washers. You can also use strips of steel with a threaded tail. The front side to simplify the work done rectangular (WxH — 42 cm), where the overlap began you need to perform with the size 1х4х85 cm is the unit of the Russian furnace.
Of brick, which cut off at the bottom, running the wall above the cooking chamber, the thickness of one brick.
Initially, you need to make the overlap of the masonry and the front side, i.e. "forehead", and then put the connection on the width of the furnace. On three sides, around the cooking chamber is being built for the second row of bricks. The trimming is not done!
The design of the Russian stove is that the number of re-cords, as on the 15th. Make a base under peretrube by means of steel bands. It is necessary that it supported the steel rod whose diameter should be 1.6 cm otherwise you can use a tube of appropriate size. Strips of steel are placed in special "nests" that are done in brick.
This row starts the bookmark set. This is done with the bricks of number 16. The scheme of the Russian furnace is that inside the cooking chamber, the bricks of the first row are tilted, where is filled with a thick layer of cement mortar with glinobeton or gravel. The bricks of the front and side walls peretrubja are placed on sheets.
To make it clear how to fold a Russian stove, this series should connect all the holes.
Wall peretrubja, on the right side, fix the lock. 20 number of teams is done by the channel. Happens after narrowing peretrubja from 25 to 18 cm, relative to the previous row.

Next you need precast channel shaped as desired. Peretrube laid next to the vent. Its cross section is equal to 7х25 see It is necessary to create hoods, gases accumulating in peretrube furnace.
Then the decrease of the collapsible channel. The front row of bricks under stesyvaja conical shape. Next, you need the vent to be rectangular with a cross section of 12х19 see
On this line, the vent is square.
In the area over the air channels, installation of valves.
Performed narrowing precast channel and create a smoke channel.
Repeat the steps of the previous row. The construction of the Russian stove very hard work, so often have to repeat the previous masonry.
Put a damper over the flue duct.
Next, combine the flue and the duct in the horizontal plane. After this, the internal design is similar to the letter "G".
On the combined channel two is placed the steel sheet. United channel acts as the base, which covers a ventilation shaft.

The chimney is a hole, the size of which 12х26 see further over the vent barrel is built with three layers of brick. It is necessary, according to the fire requirements.
Further repeats of the previous series
The construction of the pipe, thickness of which must be the size of a brick. Just need 5 bricks, the size of which 13х26 see
Walls continues to the ceiling. Then the fuzz, the thickness of 1.5 bricks. Please note that this must run on four rows above the rolling of the attic. As a chimney it is possible to perform the continuation of the laying or use pipe. Pipe on both sides should be lined with a fireproof material to conform to the dimensions of the internal cross-section.
Now You will not have issues, such as how to build a Russian stove? After all, masonry Russian stoves are painted on the steps, so just follow them.
Recipe antique stove Polish

Many old recipes undeservedly forgotten, this recipe applies the furnace varnish. It consists of two components – tar and iron sulfate. 1 kg of tar have 50 grams of iron sulphate. The tar must be heated to boiling, and then add iron sulfate. A hot solution of dye pre-heated oven. I want to warn all the work is preferably carried out in the open air. published
P. S. And remember, only by changing their consumption — together we change the world! ©
Join us in Facebook , Vkontakte, Odnoklassniki
Source: vse-svoe.com/?p=4485
Supervolcanoes that could restore the planet into an eternal winter
5 tips for enhancing personal productivity
