1108
How to make a TREE of HAPPINESS with his own hands
Want an original way to decorate the house or smallholding? Try to make a topiary with their hands decorative miracle tree in a bizarre fantasy bowl on high foot, also called tree of happiness.
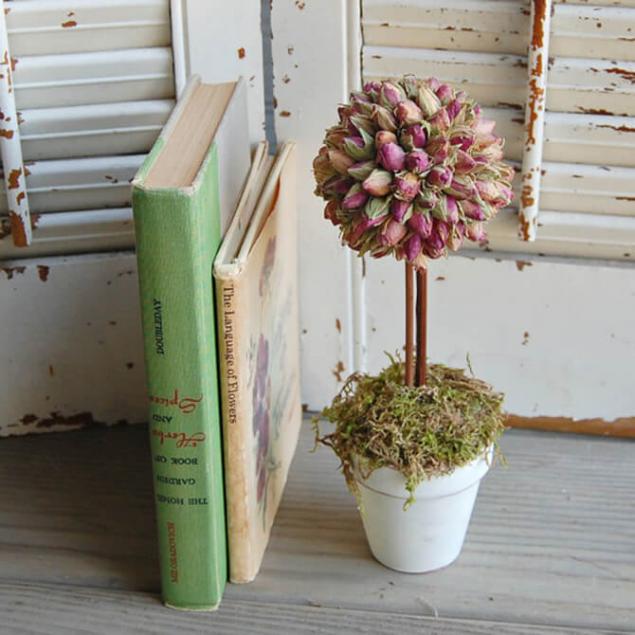
Domesticated artificial topiary are relatives living topiary sculptures. For topiary plants in the suburban area will require a lot of skill, but to grow your own tree of happiness everyone.
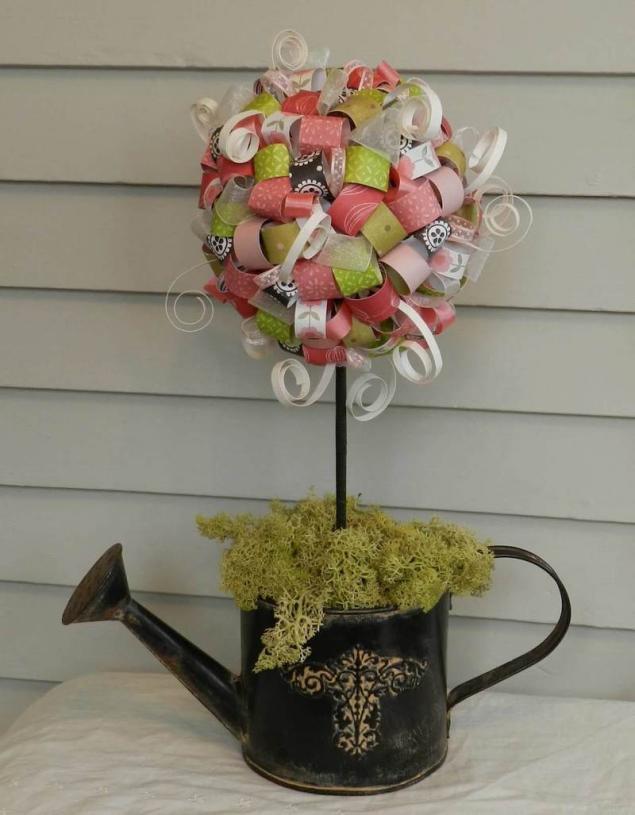
Buy ready-made tree, and even in the most luxurious design that is amethyst, citrine, coral, or crystal, will not be easy, but you can't buy happiness? It is in our hands! By them we will "sculpt" your happiness.
Create a topiary from a variety of natural and decorative materials – natural and artificial flowers, coffee beans, beautiful shells, pebbles, dried flowers, paper, candy, cocktail umbrellas...
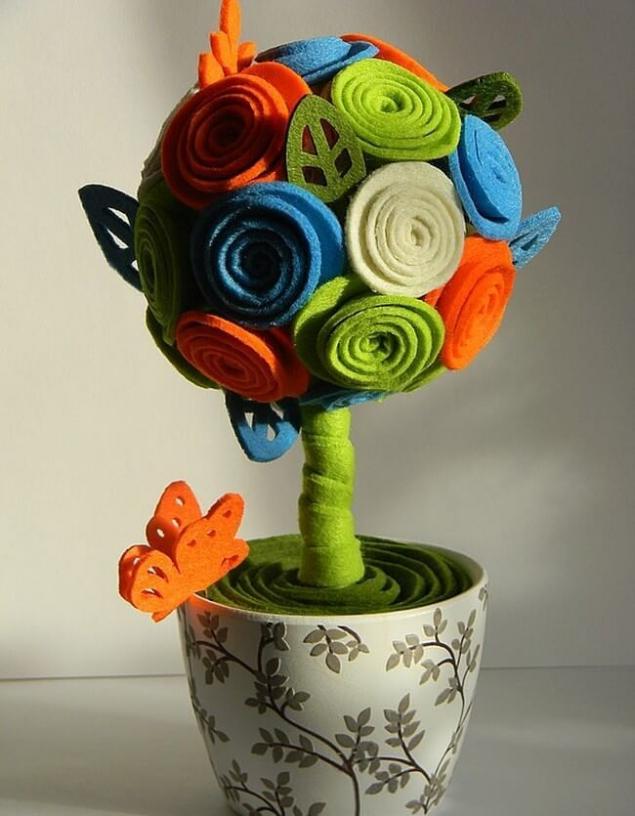
Topiary can serve as a simulation of a real plant, or to purchase absolutely fabulous shapes and colors. Dimensions of the topiary range from tiny dwarf songs a La bonsai to the dimensions of the solid potted trees. A great gift option – topiary fresh fruit. That's just the longevity of such a masterpiece can not boast. A very popular topiary from aromatic plants that serve not only a wonderful decoration, but also filling the air with wonderful aromas. Learning how to do topiary: the "anatomy" of the tree of happiness to Master the art of creating pet topiary easy. With this task perfectly handle even a beginner in hand-made. In addition, all necessary for the topiary materials are affordable and you can always find them on sale.
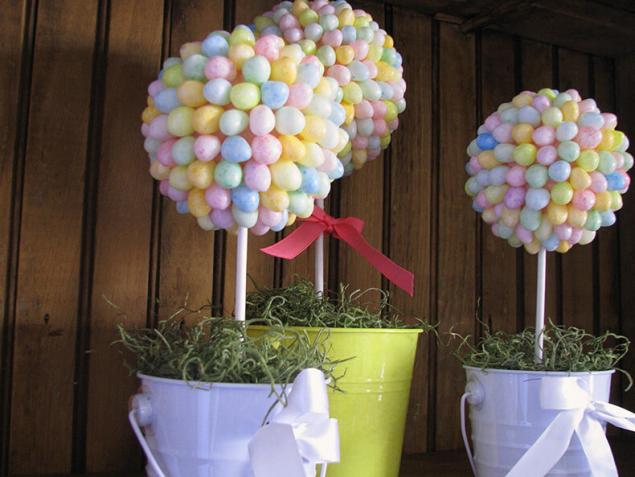
To make the topiary, you will need:
Pot
Diameter of pot should not exceed the diameter of the ball-crown. You can buy ready-made pot or make it yourself from the tank the desired shape, and then paint, cover with fabric or something original to decorate. In fact, to choose a suitable products by style and color the pot – it is not simple, so if you bought a pot, most likely, the song will have to do for him.
Balloon crown
To create the crown will need a plastic or paper bowl. To make paper ball of crumpled paper or newspaper and then cover the ball with glue or wrapping thread. Rubber balls are harder to use, since the perforation they lose their shape. If the decorative items will not stick, and stick, perfect ball of Styrofoam for floral arrangements.
Stick to the barrel
Will fit any suitable branch or stick, such as stick from the blinds, which subsequently colored, or wrapped with ribbons. Stick it is advisable to choose longer, because it is almost to the base will be attached in the pot and put on a ball. Too short a barrel can spoil the whole composition.
Glue
Well, you can use any universal adhesive. For individual items you may need super glue, a glue gun or liquid nails.
Cement, gypsum, alabaster
In the bottom of the pot to seal the hole. After preparing the solution, quickly stir, pour into a container and immediately insert the stick in the barrel until the solution is frozen. The cement will not allow the ball-crown to outweigh the pot. But if the pot is heavy enough as it is, the cement can be replaced with foam.
Pebbles, sand, shells, colored salt, beans...
Stick on top of the solution at the base of the tree.
Accessories for decorating the tree
Dried flowers, artificial flowers, shells, pebbles, cones, bows, cocktail umbrellas, coffee beans, beans, pistachios, egg shells, corrugated paper and whatever else comes to mind.
Photo master class:
1. With scissors in a plastic ball gently make one little hole, where a little later we insert the "trunk" of our tree.
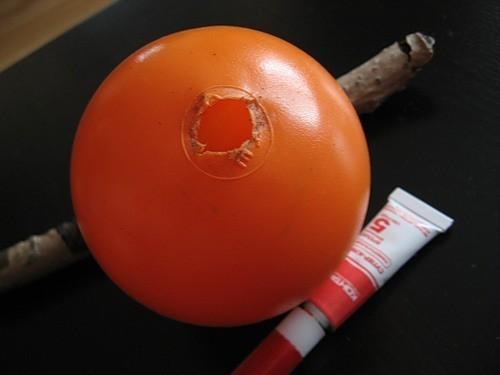
2. Take pobelochnye brush and draw from it a strand of bast or removing the rope, completely dismantle the brush.
3. With a rubber band for money to fix the thread of bast at one end of the branch. Lubricates thread universal glue and spiral the paste future "trunk" thread. The other end of the branch again fix thread cash with a rubber band and insert "trunk" in the ball, which will play the role of the crown.
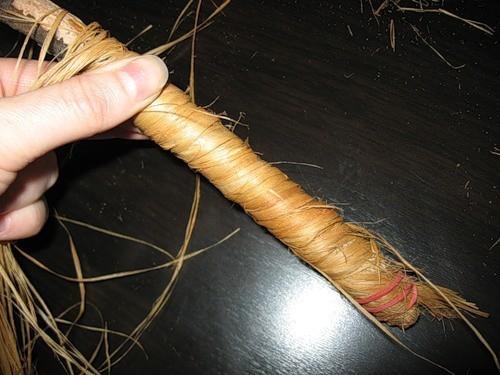
4. Using a universal adhesive paste ball of brown thread, to greatly simplify and accelerate the process of gluing the coffee beans. For pasting the ball you can also use strands from the brush to paint, but thread is much better and easier.
5. Now start wrapping the balloon with the first layer of coffee beans. For this we need transparent super-glue. Grains preferably stick in a different order – borodachi then down, then up. Glue is applied directly on each grain. Use super-glue should be very carefully, because it leaves a dark bean with white spots, quickly adhered tightly to the hands and has a strong odor, so "grow" your tree of happiness, preferably in a well ventilated area. You can also use a glue gun or liquid nails.
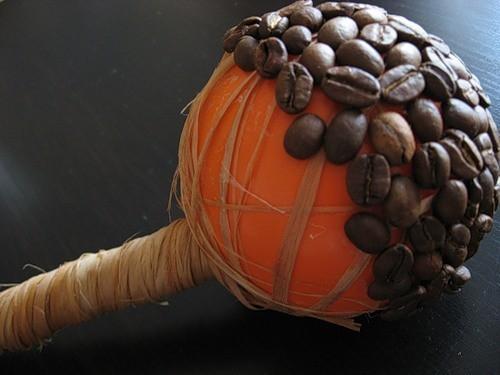
6. One layer of beans is not enough, so be sure to do and the second. To give the surface more of the bump do not forget to alternate the smooth side of the seeds with that from the groove.
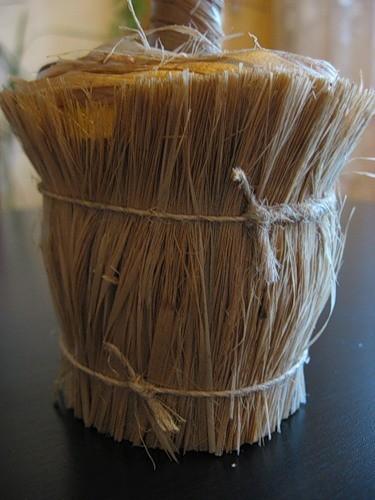
7. It is time to start creating original pot for our tree of happiness. First of all, cut off from the brush a little bit of bast, the length of which should be slightly larger than the diameter of the bottom of the glass. Then grease the bottom of a universal glue and put on the prepared urine. Protruding over the edge of the bottom of the thread cut.
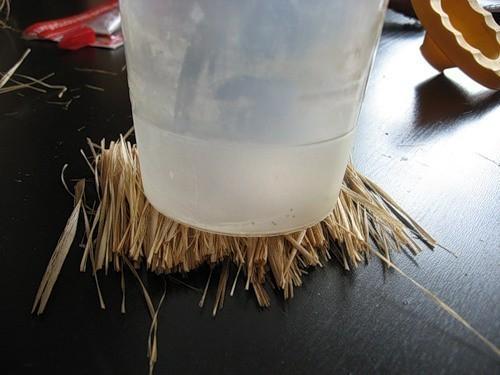
8. Now cut the bass from the brush so that it was 3 cm longer than the height of the glass. On the lateral surface of the glass, apply all-purpose adhesive, 2.5-3 cm before reaching the top, and gradually a glass paste prepared by the bast. Glued the glass is banded at the bottom with twine and cut the excess edges. Trim the ends and top to the threads above the edge of the Cup approximately 2 cm.
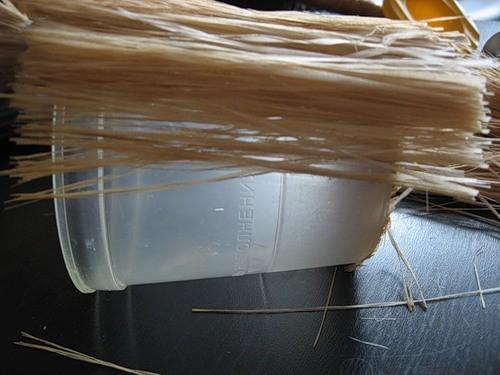
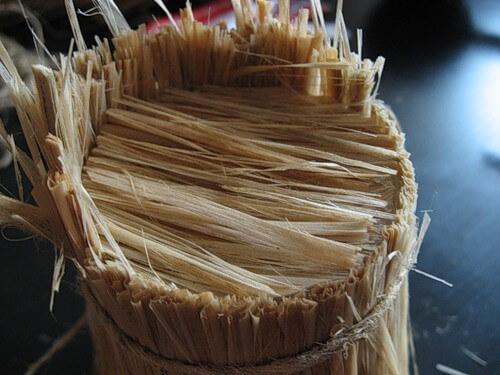
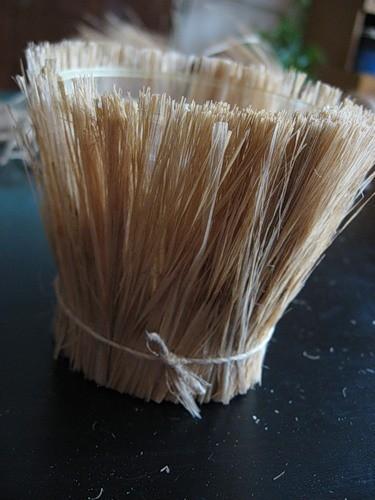
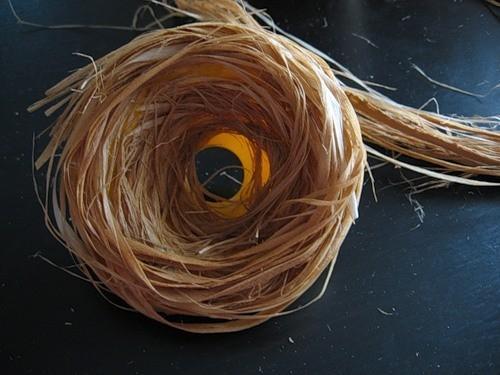
9. Using the universal glue long strands of bast of the paste in a circle the funnel and screw it in the trunk of a tree.
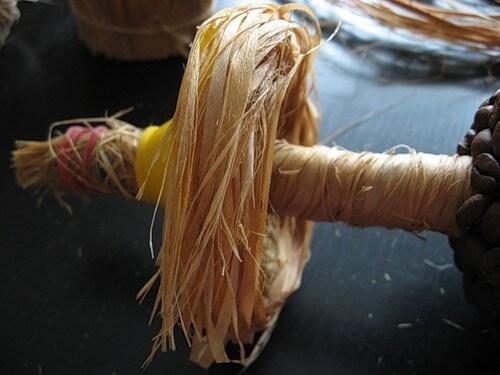
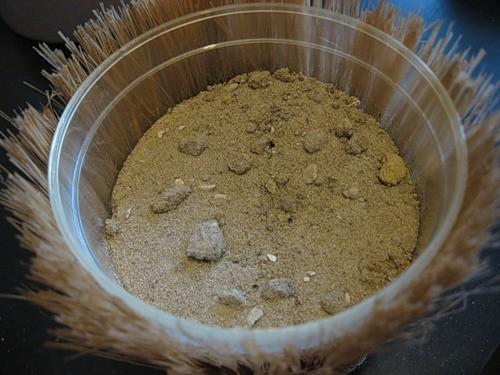
10. In the glass pours the sand. Instead of sand you can use foam or plaster. Snips carefully move aside the top "fringe" and put on a glass funnel with the barrel.
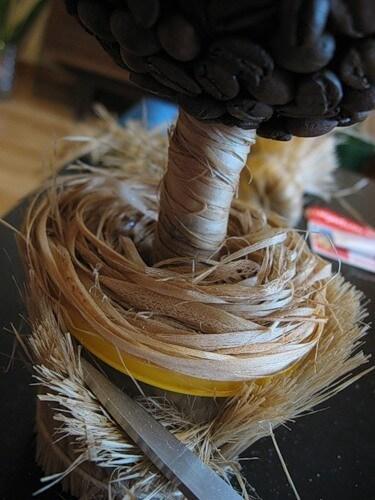
11. The upper part of the Cup tied with twine and, if necessary, trim the top edge.
12. A few coffee beans thrown by the trunk. They will associate with fallen leaves. As a "ground cover" at the base of trees you can also use moss. On the crown you can put a cute butterfly or ladybug.
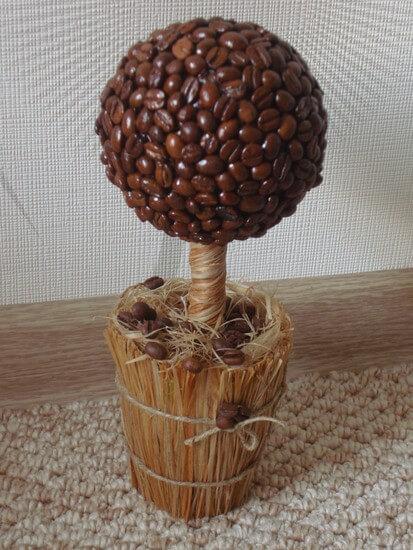
Well, actually, everything! Tree of happiness grown! Left to find a cozy place where it will delight you and your guests, because "when you are happy, happiness to share with others." published
P. S. And remember, only by changing their consumption — together we change the world! ©
Join us in Facebook , Vkontakte, Odnoklassniki
Source: 101dizain.com/dekor/podelki/topiarij-svoimi-rukami.html

Domesticated artificial topiary are relatives living topiary sculptures. For topiary plants in the suburban area will require a lot of skill, but to grow your own tree of happiness everyone.

Buy ready-made tree, and even in the most luxurious design that is amethyst, citrine, coral, or crystal, will not be easy, but you can't buy happiness? It is in our hands! By them we will "sculpt" your happiness.
Create a topiary from a variety of natural and decorative materials – natural and artificial flowers, coffee beans, beautiful shells, pebbles, dried flowers, paper, candy, cocktail umbrellas...

Topiary can serve as a simulation of a real plant, or to purchase absolutely fabulous shapes and colors. Dimensions of the topiary range from tiny dwarf songs a La bonsai to the dimensions of the solid potted trees. A great gift option – topiary fresh fruit. That's just the longevity of such a masterpiece can not boast. A very popular topiary from aromatic plants that serve not only a wonderful decoration, but also filling the air with wonderful aromas. Learning how to do topiary: the "anatomy" of the tree of happiness to Master the art of creating pet topiary easy. With this task perfectly handle even a beginner in hand-made. In addition, all necessary for the topiary materials are affordable and you can always find them on sale.

To make the topiary, you will need:
Pot
Diameter of pot should not exceed the diameter of the ball-crown. You can buy ready-made pot or make it yourself from the tank the desired shape, and then paint, cover with fabric or something original to decorate. In fact, to choose a suitable products by style and color the pot – it is not simple, so if you bought a pot, most likely, the song will have to do for him.
Balloon crown
To create the crown will need a plastic or paper bowl. To make paper ball of crumpled paper or newspaper and then cover the ball with glue or wrapping thread. Rubber balls are harder to use, since the perforation they lose their shape. If the decorative items will not stick, and stick, perfect ball of Styrofoam for floral arrangements.
Stick to the barrel
Will fit any suitable branch or stick, such as stick from the blinds, which subsequently colored, or wrapped with ribbons. Stick it is advisable to choose longer, because it is almost to the base will be attached in the pot and put on a ball. Too short a barrel can spoil the whole composition.
Glue
Well, you can use any universal adhesive. For individual items you may need super glue, a glue gun or liquid nails.
Cement, gypsum, alabaster
In the bottom of the pot to seal the hole. After preparing the solution, quickly stir, pour into a container and immediately insert the stick in the barrel until the solution is frozen. The cement will not allow the ball-crown to outweigh the pot. But if the pot is heavy enough as it is, the cement can be replaced with foam.
Pebbles, sand, shells, colored salt, beans...
Stick on top of the solution at the base of the tree.
Accessories for decorating the tree
Dried flowers, artificial flowers, shells, pebbles, cones, bows, cocktail umbrellas, coffee beans, beans, pistachios, egg shells, corrugated paper and whatever else comes to mind.
Photo master class:
- Materials needed:
- 100 grams of roasted bean coffee Cup-pot (can be purchased at the office supply store)
- mochalny brush to wash (you can buy in the hardware, construction store or market)
- 1 plastic ball, diameter 8-9 cm (such balls are widely used in children's game rooms and individually sold on the market)
- scissors
- the brown spool of thread
- 2 gum for money
- universal transparent glue
- transparent super glue
- glass sand, cement or gypsum
- wooden stick or branch with a length of 20 cm and thickness of 1,5-2 cm
- rope-twine 50 cm
1. With scissors in a plastic ball gently make one little hole, where a little later we insert the "trunk" of our tree.

2. Take pobelochnye brush and draw from it a strand of bast or removing the rope, completely dismantle the brush.
3. With a rubber band for money to fix the thread of bast at one end of the branch. Lubricates thread universal glue and spiral the paste future "trunk" thread. The other end of the branch again fix thread cash with a rubber band and insert "trunk" in the ball, which will play the role of the crown.

4. Using a universal adhesive paste ball of brown thread, to greatly simplify and accelerate the process of gluing the coffee beans. For pasting the ball you can also use strands from the brush to paint, but thread is much better and easier.
5. Now start wrapping the balloon with the first layer of coffee beans. For this we need transparent super-glue. Grains preferably stick in a different order – borodachi then down, then up. Glue is applied directly on each grain. Use super-glue should be very carefully, because it leaves a dark bean with white spots, quickly adhered tightly to the hands and has a strong odor, so "grow" your tree of happiness, preferably in a well ventilated area. You can also use a glue gun or liquid nails.

6. One layer of beans is not enough, so be sure to do and the second. To give the surface more of the bump do not forget to alternate the smooth side of the seeds with that from the groove.
7. It is time to start creating original pot for our tree of happiness. First of all, cut off from the brush a little bit of bast, the length of which should be slightly larger than the diameter of the bottom of the glass. Then grease the bottom of a universal glue and put on the prepared urine. Protruding over the edge of the bottom of the thread cut.

8. Now cut the bass from the brush so that it was 3 cm longer than the height of the glass. On the lateral surface of the glass, apply all-purpose adhesive, 2.5-3 cm before reaching the top, and gradually a glass paste prepared by the bast. Glued the glass is banded at the bottom with twine and cut the excess edges. Trim the ends and top to the threads above the edge of the Cup approximately 2 cm.


9. Using the universal glue long strands of bast of the paste in a circle the funnel and screw it in the trunk of a tree.


10. In the glass pours the sand. Instead of sand you can use foam or plaster. Snips carefully move aside the top "fringe" and put on a glass funnel with the barrel.


11. The upper part of the Cup tied with twine and, if necessary, trim the top edge.

12. A few coffee beans thrown by the trunk. They will associate with fallen leaves. As a "ground cover" at the base of trees you can also use moss. On the crown you can put a cute butterfly or ladybug.

Well, actually, everything! Tree of happiness grown! Left to find a cozy place where it will delight you and your guests, because "when you are happy, happiness to share with others." published
P. S. And remember, only by changing their consumption — together we change the world! ©
Join us in Facebook , Vkontakte, Odnoklassniki
Source: 101dizain.com/dekor/podelki/topiarij-svoimi-rukami.html
The catalyst, increasing the effectiveness of hydrogen fuel
CELIACIA – Learn all about gluten intolerance!
