1717
As my father put BBQ.
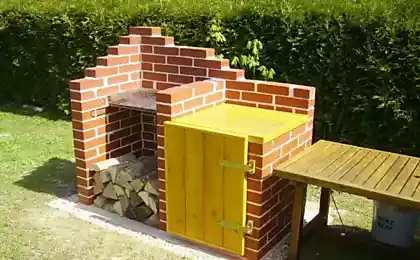
I'll tell you and show you how my Dad put BBQ. So let's start.
23 photos
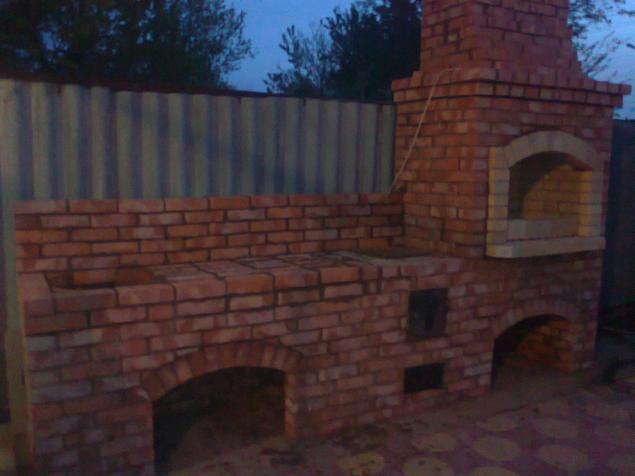
We came, so utrechkom, at half past six in the morning. While I was kneading solution and dragged brick, father, bed roofing material, began to spread the barbecue circuit. In this case the role of the foundation slab carries concreted. And there is quite a big layer.
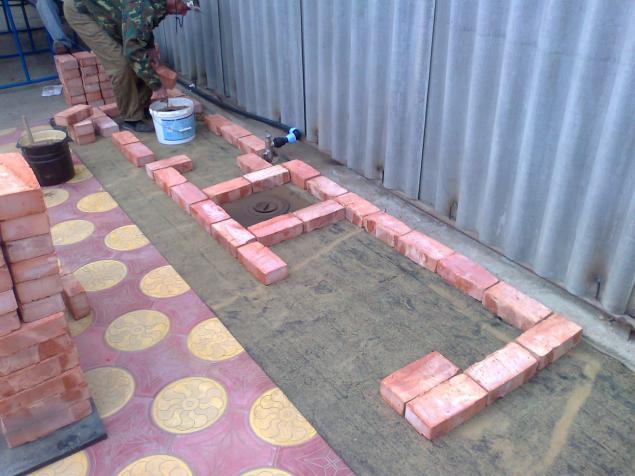
Spread the rear and side walls.
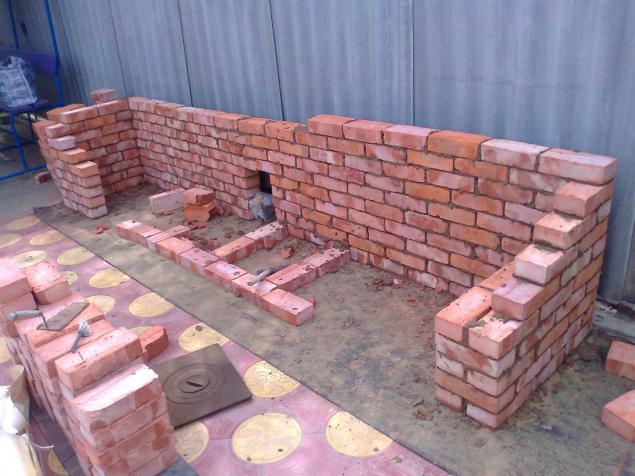
Further laid the oven burner stove with removable circles, it can be seen in the photo above (there saucepan set, pans and so on.) That is, the conventional stove, wood only. First there is a small door in the ash pit, as in a conventional oven. All doors are mounted with the help of wire (for it is a hole in the frame), which is laid between the bricks.
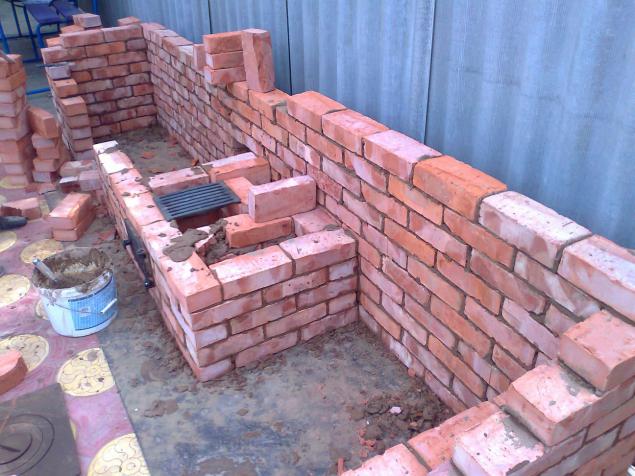
Here's a close-up with the grate ash pit. Right peppered sand to save the solution and brick.
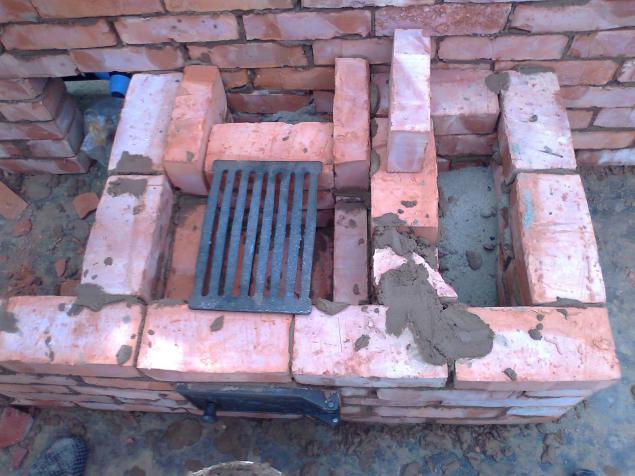
Begin to lay out a set of woodsheds, which will be under the grill. Father made a special template for this. The Code will be 75 cm wide.
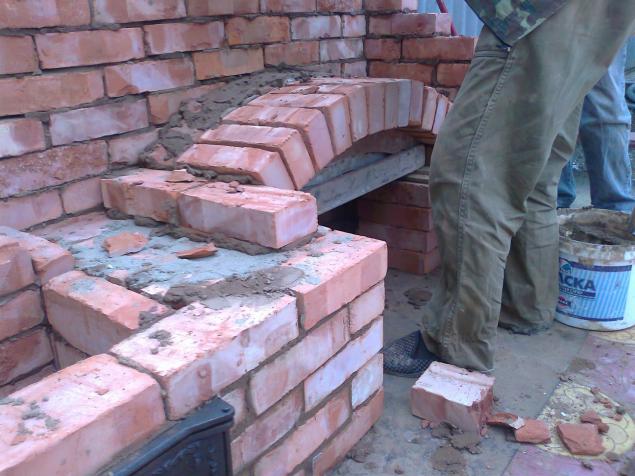
Brick vaults first wedged brick rubble, and then smeared heavily solution. Yes, about the solution: in any case, you can not use cement, since due to the heat it begins to break and he drags brick. Therefore, the solution - just clay and sand.
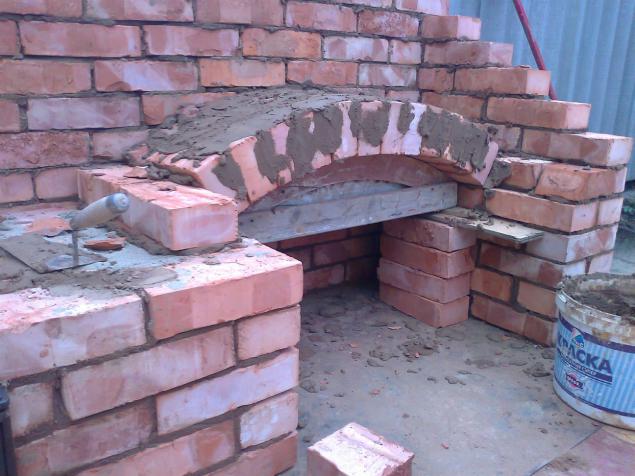
Put the front edge of the arch, rasklinili, slipped.
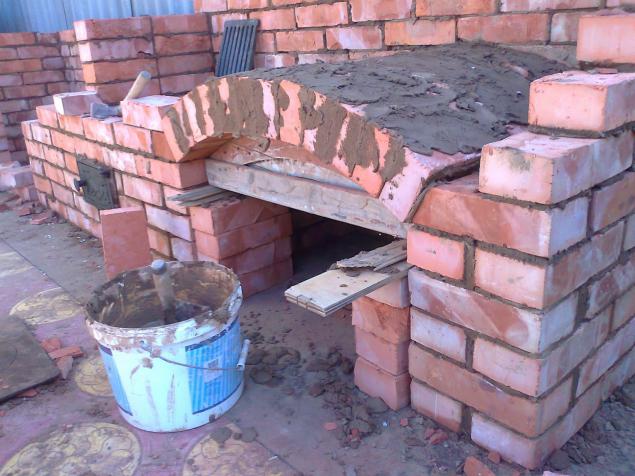
Lay the body of the front. Between the front and rear wall and fall asleep sand, because the economy must be economical.
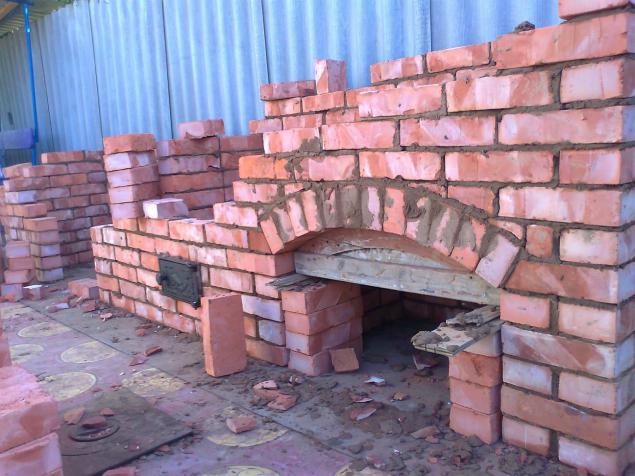
That is to say, that's right. Fall asleep and ramming that it does not subsided with time.
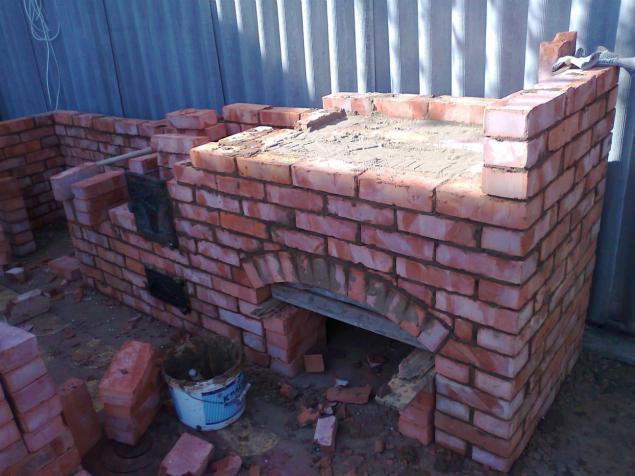
We install the stove top door. That is, f the furnace.
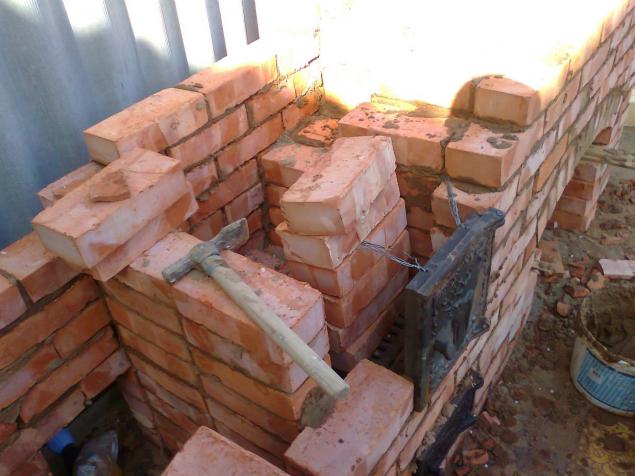
The same set of Makar posted at sinks halves of bricks and laid it on top. Between the sink and the stove will worktop.
Posted in [mergetime] 1413597162 [/ mergetime]
Have begun to spread the furnace of the barbecue in refractory (fireclay) brick. 48 rubles apiece was then. The usual red - 8-9. Just customer decided that it is necessary to use fireclay clay for furnaces, although personally we do not see the point in it. The result is the same, but the price ...
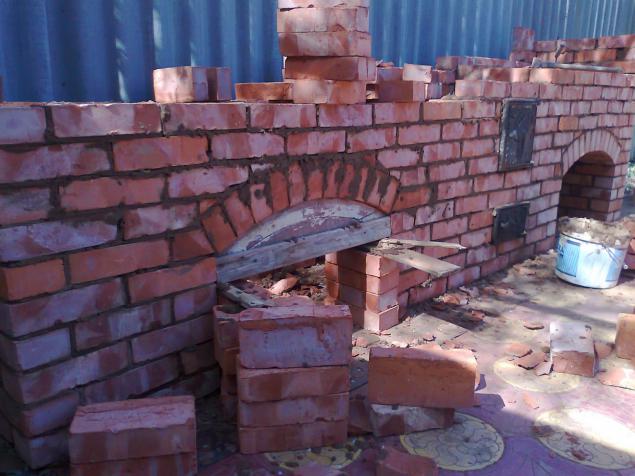
In this case, firebrick performs a purely aesthetic function, as for conventional ovens and barbecues are not really needed, because there is no constant heat and very high temperatures, as in blast furnaces and boilers.
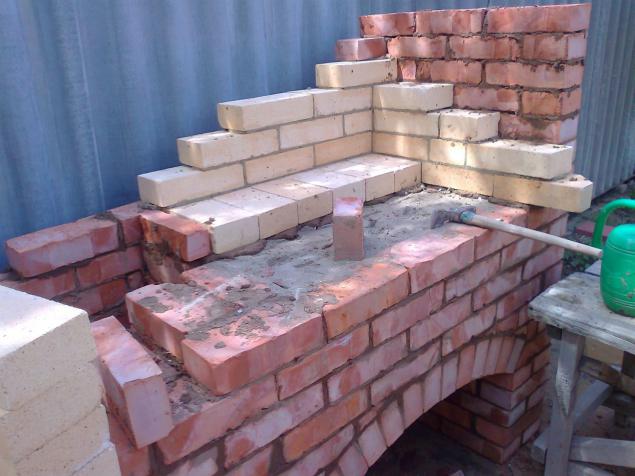
We spread the furnace stove just refractory brick. On the far right edge of the cut-off is seen firing of bricks, in order to heat, skirting it, heats the far edge of the plate, and do not pass by.
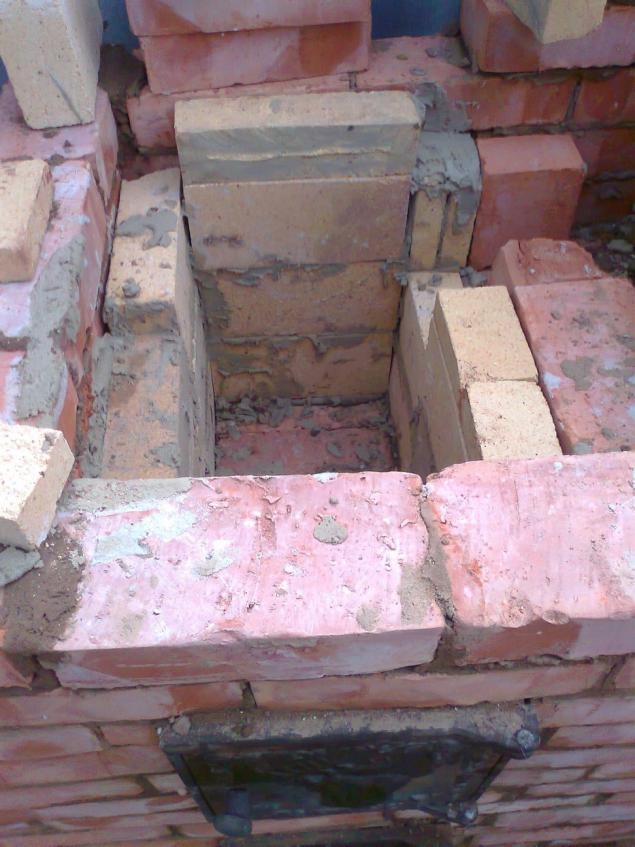
put on.
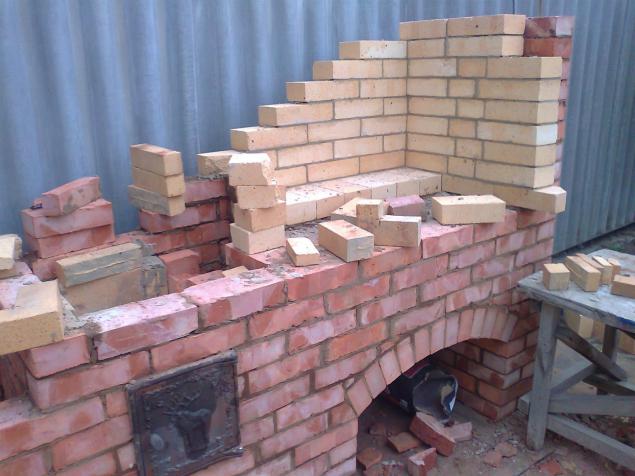
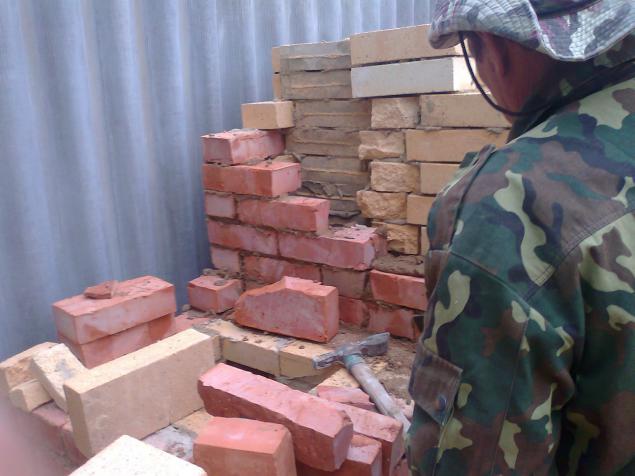
We spread the left wall barbecue. As can be seen in the photo, the chimney of the stove is this wall. Stabbing and cutting bricks really had a lot to do. But it was worth it.
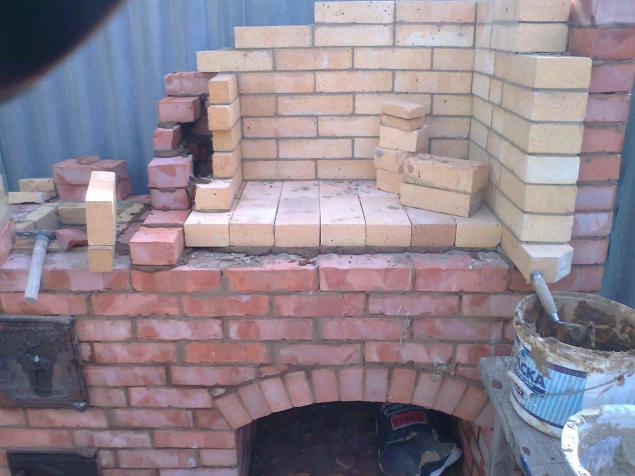
Posted brazier and bottom shelf krasivishnuyu. In the photo is my Dad, a stove.
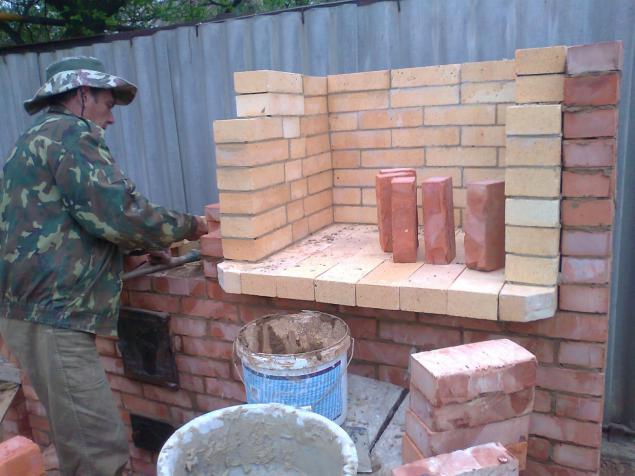
Laying the outer wall of the left BBQ, that is to say, the chimney stove.
Laid side wall and put a set. Sorry, this moment, I somehow missed that time, so that was between this and the previous fotoy not filmed.
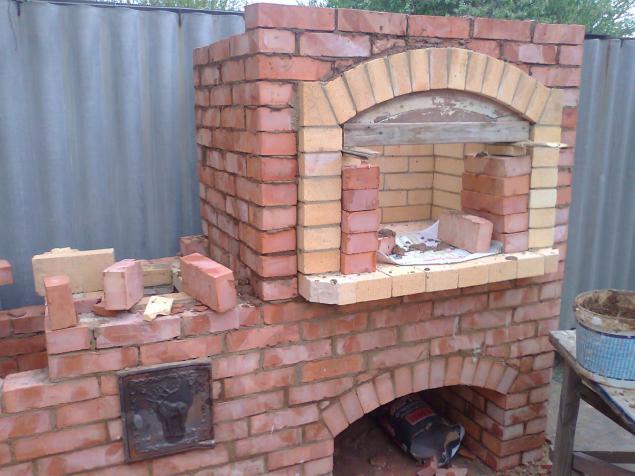
We spread krasivishny ledge above.
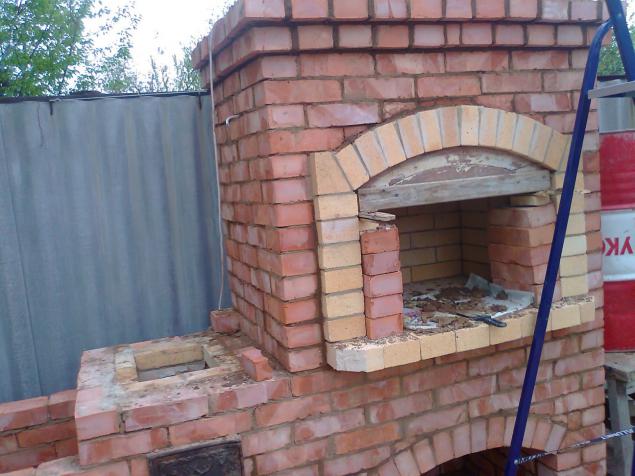
Put the pipe. A number of her - 8 bricks. Without the stove would be 6. Inside the barbecue is a "tooth". This regiment needed to blow the wind does not come from the top into the furnace, and beat in the "tooth" and came back up. Because of patterns and brick, I was not able to climb up there and take a picture.
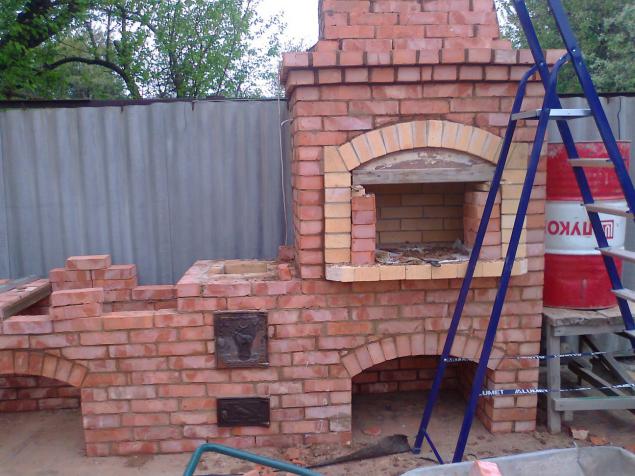
Putting the beginning of the pipe had a barrel, set on a table. Although, I've had worse. Barrel on the barrel, and even two barrels lined hole under the sink, with metal corners, with all the chores. As cleans masonry BBQ spatula.
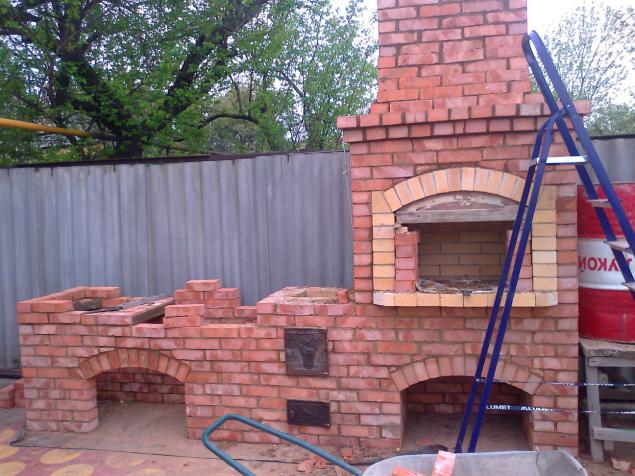
Put the grill for three days. Finished in the dark. Photographed on a brick, zvinyayte. With more photos first mistake, hitting several identical. That's all. Kick me completely!
23 photos

We came, so utrechkom, at half past six in the morning. While I was kneading solution and dragged brick, father, bed roofing material, began to spread the barbecue circuit. In this case the role of the foundation slab carries concreted. And there is quite a big layer.

Spread the rear and side walls.

Further laid the oven burner stove with removable circles, it can be seen in the photo above (there saucepan set, pans and so on.) That is, the conventional stove, wood only. First there is a small door in the ash pit, as in a conventional oven. All doors are mounted with the help of wire (for it is a hole in the frame), which is laid between the bricks.

Here's a close-up with the grate ash pit. Right peppered sand to save the solution and brick.

Begin to lay out a set of woodsheds, which will be under the grill. Father made a special template for this. The Code will be 75 cm wide.

Brick vaults first wedged brick rubble, and then smeared heavily solution. Yes, about the solution: in any case, you can not use cement, since due to the heat it begins to break and he drags brick. Therefore, the solution - just clay and sand.

Put the front edge of the arch, rasklinili, slipped.

Lay the body of the front. Between the front and rear wall and fall asleep sand, because the economy must be economical.

That is to say, that's right. Fall asleep and ramming that it does not subsided with time.

We install the stove top door. That is, f the furnace.

The same set of Makar posted at sinks halves of bricks and laid it on top. Between the sink and the stove will worktop.
Posted in [mergetime] 1413597162 [/ mergetime]
Have begun to spread the furnace of the barbecue in refractory (fireclay) brick. 48 rubles apiece was then. The usual red - 8-9. Just customer decided that it is necessary to use fireclay clay for furnaces, although personally we do not see the point in it. The result is the same, but the price ...

In this case, firebrick performs a purely aesthetic function, as for conventional ovens and barbecues are not really needed, because there is no constant heat and very high temperatures, as in blast furnaces and boilers.

We spread the furnace stove just refractory brick. On the far right edge of the cut-off is seen firing of bricks, in order to heat, skirting it, heats the far edge of the plate, and do not pass by.

put on.

We spread the left wall barbecue. As can be seen in the photo, the chimney of the stove is this wall. Stabbing and cutting bricks really had a lot to do. But it was worth it.

Posted brazier and bottom shelf krasivishnuyu. In the photo is my Dad, a stove.

Laying the outer wall of the left BBQ, that is to say, the chimney stove.

Laid side wall and put a set. Sorry, this moment, I somehow missed that time, so that was between this and the previous fotoy not filmed.

We spread krasivishny ledge above.

Put the pipe. A number of her - 8 bricks. Without the stove would be 6. Inside the barbecue is a "tooth". This regiment needed to blow the wind does not come from the top into the furnace, and beat in the "tooth" and came back up. Because of patterns and brick, I was not able to climb up there and take a picture.

Putting the beginning of the pipe had a barrel, set on a table. Although, I've had worse. Barrel on the barrel, and even two barrels lined hole under the sink, with metal corners, with all the chores. As cleans masonry BBQ spatula.

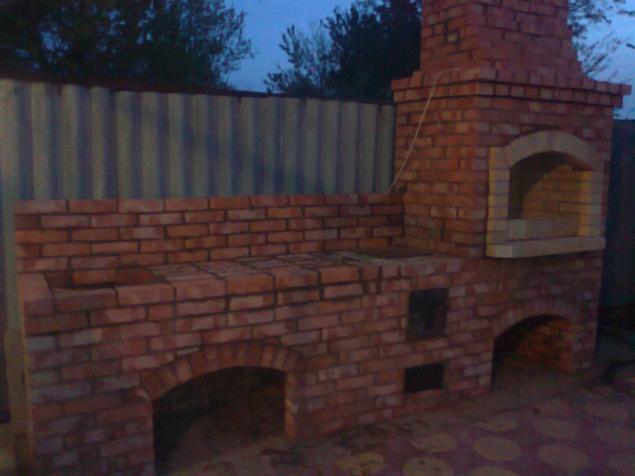
Put the grill for three days. Finished in the dark. Photographed on a brick, zvinyayte. With more photos first mistake, hitting several identical. That's all. Kick me completely!

