1510
Flying to the moon landing on the moon base
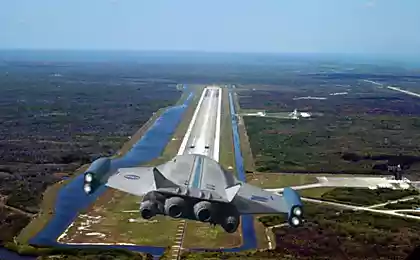
Long time I have not had new posts by Orbiter'u. So today we'll talk about the regular staff of the game called Delta-glider, and aircraft coming from the Earth, fly to the moon base. Despite the fantastic job, it should be interesting enough - the problem of braking and landing on the moon is not as simple as it may seem. The fact that the Moon has no atmosphere, so will have to brake motors.
Delta-glider h4> This ship comes in basic version of the game. He has fantastic options:
- Empty weight The mass of fuel Length Wingspan Do-17 ) or attack aircraft A-10 .
- < Thrust propulsion engines RD-0124 < / a>)
Also, the device has a lifting engines, which enables to perform vertical takeoff and landing, and the wings that allow maneuver in the atmosphere. The combination of these properties makes the Delta-glider excellent device for learning and for pleasure flights.
Preparing to fly h4> addition of Orbiter'a any addons do not need.
flight plan h4> Our mission will be broken down into simple steps. Therefore, on the one hand, it would be very inefficient in terms of fuel (and we turn on the "endless fuel"). Also, it would be unrealistic - the actual product trajectories calculated ballistics groups, making flying much more efficiently. But, on the other hand, the individual steps are simple and will clearly explain the physics of flight. Our flight plan will consist of the following stages:
Start with the Earth and out into low circular orbit. The combination of orbital planes. Overclocking to the moon. The output of the orbit of the Moon. The combination of the orbital plane from the landing site. Braking and landing. definitions used h4> Apoapsis - the highest point of the orbit. To orbit around the Earth also used the name "Apogee».
Periapsis - the lowest point of the orbit. To orbit around the Earth also used the name "perigee».
The orbital inclination - the angle between the plane of the orbit and the other plane (the plane passing through the equator of the Earth's orbital plane, or other body)
Ascending node - the point at which the orbit crosses the equatorial plane of the Earth's orbital plane, or other body, they find themselves "above" it. "Above" and "below" are defined conditional north and south poles.
Descending node - the point at which the orbit crosses the equatorial plane of the Earth's orbital plane, or another body, appearing "below" it. "Above" and "below" are defined conditional north and south poles.
For example, if we talk about the orbit of the Moon around the Earth, the picture is as follows:
Step 1: Start with the Earth and out into low circular orbit h4> When the game first of all go to "Settings" and set the mode of the infinite fuel:
Besides the obvious bonus of errors allowed on the flight, this mode will give us a constant acceleration of the ship, which will be very convenient landing.
Then run the script «DG-S ready for takeoff»:
DG-S - a version with jet engines, we do not need them, but this scenario is convenient that we are already on the runway.
Switch to the view from the cockpit by pressing F1 F8 sequence switches in the cockpit mode "glass cockpit».
Both multi-function display stands to switch to something more comfortable than landing lights and map. Switch the left MFD mode "Surface" by pressing Left Shift - F1 , Left Shift - S Right Shift - F1 , Right Shift - O PRJ on the MFD), and the height of the orbit is counted from the surface and not the center of the Earth (the desired mode - small values of ApA and PeA - periapsis and apocenter, the button DST on the MFD). The correct result should look like this:
To control the maneuvers of the ship using the numeric keypad. At the beginning of the script engines are off orientation, and the numeric keypad controls only aerodynamic surfaces - ailerons and rudders. Before takeoff establish elevator trim all the way up, press and hold the Delete on the block cursor keys. Start the main engine and fix it by pressing Num + and not releasing, Ctrl
After takeoff, landing gear ( G ) and begin to turn at an azimuth of 90 °. Why 90 °? In this case, we will accelerate in the direction of rotation of the Earth, and our inclination of the orbit is equal to the latitude of the launch site (~ 30 ° to Cape Canaveral, from where we took off). After turning pitch angle set 30 °, manipulating trimmer ( Insert - down, Delete - up).
With increasing altitude the air will become rarer and trimmers will be enough to maintain a constant pitch of 30 °. Including the engine orientation by pressing ROT on the left-top and keeping the pitch angle in the stabilization mode KillRot ( Num 5 ). But at the height of about 20 km, this mode is not working properly cope. You can help trimmers active control (handy if you have a joystick). But the most elegant option - it is the turn of the main engines. The fact that the Delta-glider, like many modern missiles, boosters can turn on gimbals, creating a control point. To change the angle of rotation of motors, switch the cockpit mode 2D (pressing F8 ). Managing the vertical angle from the top-left of the engines, clicking on the yellow dots changes the position of both engines at once:
Soaking pitch 30 ° continuing crackdown. Above 50 km you can leave only mode KillRot, set the angle of 0 ° Engine Center button under control keys vertical angle motors, and switch to a more convenient mode of "glass cockpit". At an altitude of ~ 70 km while maintaining the pitch angle of 30 ° is a small portion of the decline, this need not be frightened. When the machine is lifted up to 70 km, the rate becomes insufficient to generate any significant lift. But for the lifting of inertia and small shutter speed again begins to miss out on the creation of wing lift, and begins the second cycle upturn. You can clearly see on this process, including the display of the forces acting on the device ( Ctrl - F9 , tab Forces tick the box).
We continue to disperse until the indicator on the orbital altitude apocentre not be 200 km. Once this option turns off the engine by pressing Num *
Translate the display on the windshield in an orbital mode (button H ) and takes a position on the orbital velocity vector (nose forward) - the button [ or PROGRD downstairs.
Near the point apocentre (transparent circle on the MFD "Orbit") includes an engine again. Accelerate to approximately circular orbit periapsis distance should not be less than 150 km. Result:
Set this unit to the orbital configuration. The fact that the brake motors are located in the toe wing and the aerodynamic fairing launch covered. They can be opened and at the start - the damage model in Orbiter not, but so interesting. So, open the menu "controls» ( Ctrl - Space ) and press the button Retro Doors - Open.
Now we can not only accelerate at Num + and the brake on the Num -
So we are on a low Earth orbit. This orbit is stable, therefore recommended to keep pressing Ctrl-S
Step 2. Combining orbital planes h4> To find the difference orbital inclination, switch the right MFD mode "Combining orbital planes» - Right Shift -F1 , Right Shift - A Right Shift - T , in the menu select Celestial bodies - Moon
The angle of 47 ° illustrates the saying "there is strength - do not mind." In real life vehicles to the moon trying to start up in the so-called start-ups when the angle between the planes will be minimal. The window opens to the moon every lunar month. Besides, the team is able to calculate ballistics launch window, the angle between the planes of the orbits beautifully transformed into orbit inclination apparatus around the moon. We use fairly limited instrument and, moreover, we want to go to the moon right now, without waiting. Therefore it is necessary to combine the orbital planes, so that we can start acceleration to the moon from any point of its orbit.
To align the planes of the orbits we must accelerate the "up" on the descending node and "down" on the upstream. The closest node downward (DN - Descending node), therefore occupy the position of the normal to the plane of the orbit. This will help us to auto-orientation. Button ; the keyboard or button NML + on the screen at the bottom - it's automatic time position "up" perpendicular to the plane of the orbit, ', it is e , or NML - on screen - down.
In the area of the node starts acceleration. Such a large angle means that it will take a few maneuvers.
After the first maneuver angle halved. Repeat at the ascending node. In order not to be bored to expect a node, use the acceleration of time - the button T speeds up the time in 10 time, R - slow down 10 times. Do not abuse the acceleration, while the automatic mode, the orientation of the ship can tumble on accelerating 1000x more.
After the second or third maneuver relative angle will tend to 0:
Stage is completed, be sure to save.
Step 3: Acceleration to the Moon h4> To overclock to the moon, we need MFD "Transition". Turn it to the right - Right Shift - F1 , Right Shift - X Right Shift - T , Celestial bodies - Moon). Including the mode of planning maneuver - the button HTO on the MFD. HTO - it Hohmann Transfer Orbit - гомановская trajectory , way of moving between the orbits of the minimum of fuel. Appears dotted radius. This range indicates the point maneuver. We can move it around the buttons Right Shift - & lt; and & gt; Right Shift - + and -
We combine our expected point position to the expected position of the moon.
Parameter DTe - time prior to a maneuver. DV - required velocity increment. We should start acceleration for some time before reaching the point of maneuver to at least partially compensate for the lateral component of the acceleration along the orbital velocity vector:
Do not forget to pre-occupy the position on the orbital velocity vector. Overclock:
It is important to remember our speed acceleration - 11, 8 m / s. This is the rate at which we will slow down the Moon, and it is useful to us for payment.
Dispersal over. Flights for the Earth-Moon this accuracy is sufficient, additional correction is required. Remember to save.
Step 4. Exit the orbit of the Moon h4> Getting ready for the flight to the Moon. Stabilize the device mode KillRot. It turns off automatically, and we can safely accelerate time.
To not be bored, turn on the music:
During the trip to the moon would recommend to pay attention to us and the mutual position of the moon. First we surpass it, but closer to apocentre our speed will be virtually invisible, and already the moon will overtake us. All of the второму Kepler law . When approaching the moon note the change in our orbit - the moon is behind us and hinders our progress its gravity.
When the distance to the moon will fall, it's worth checking our orbit - we took aim not too accurate and not Vrezh Does the moon. Switch the right MFD mode "Orbit» ( Right Shift - F1 , Right Shift - O ). You must ensure that the IDF stands mode orbit around the moon. If the MFD is in orbit around the Earth or the Sun, you must manually switch it into orbit around the moon by pressing Right Shift - R , in the menu select Moon Orbit Moon
Necessary to make the correction maneuver trajectory. To do this, turn the ship at 90 ° to the right of the direction of motion (in the interface has a goniometer). Why right? Marker direction of our movement is to the right from the center of the moon, so we will have less maneuver. But you can move to the left, up or down. Autopilot for this mode is not present, it will be necessary to hold a course of 90 ° to the right hand. Getting maneuver:
When periapsis be 40-80 km, finishing maneuver.
Shortly before pericenter takes a position against the orbital velocity vector (feed forward) and brakes, moving on a circular orbit:
Ok, we are on a low circular orbit around the moon. Remember to save.
Step 5. Combining the orbital plane from the landing h4> Enables map on the right MFD ( Right Shift - F1 , Right Shift - M ). Choose a lunar base, "Brighton Beach" as a goal ( Right Shift - T , in the menu select Spaceports - Brighton Beach ):
Green line - our trajectory. Yeah, so we have to Brighton Beach not falling. It is necessary to change the inclination of the orbit to fly over the base. For this, he held the position of NML + NML- or normal to the orbital velocity vector up or down (for an orbit with an inclination of almost zero it does not matter) and change the inclination of the orbit as long as the green thread path does not pass over the base. Change the inclination of the orbit is better not to anywhere, and in the region of 90 ° latitude left or right of the base. One cell Map - This 30 ° of latitude and longitude.
Result maneuver:
Unfortunately, the automatic did not have time to hold the ship strictly perpendicular to the orbital velocity vector, and we spoiled orbit. You will need to switch to the MFD "Orbit" and return to a circular orbit. Spend one more round on two tasks:
Make sure that we accurately aim. Reduce the orbit of 10-15 km. The scale of the map changes ZM + buttons and ZM-. Ship maintenance mode button switch TRK. After that, be sure to save. The fun begins - we're going to land.

