701
As I was doing the headlamp for a bicycle
LED velofara 1000 lm with his hands.
Spring came, and I decided to think about their health: bought a bicycle. And how so? Engage in light-emitting diodes, ultra-bright flashlight to do, and to ride a bicycle without lights ?! Well, I do not! Laziness was born a little before me, and I decided not to bother and buy a ready-made spotlight. Proiskal on Chinese sites like Dealexterme.com, anything that would suit me in terms of price / quality (read price / brightness), is not found. Then I went on veloforumam where the people make their own lights, even read the article on Habré. But no one option I did not like: the tricky design, it is clearly not under my LED (CREE XM-L -H 10 W) in all of the searches I learned the idea that in addition to the LED parabolic reflector, it is desirable to set a focusing lens to form an optimal luminous flux.
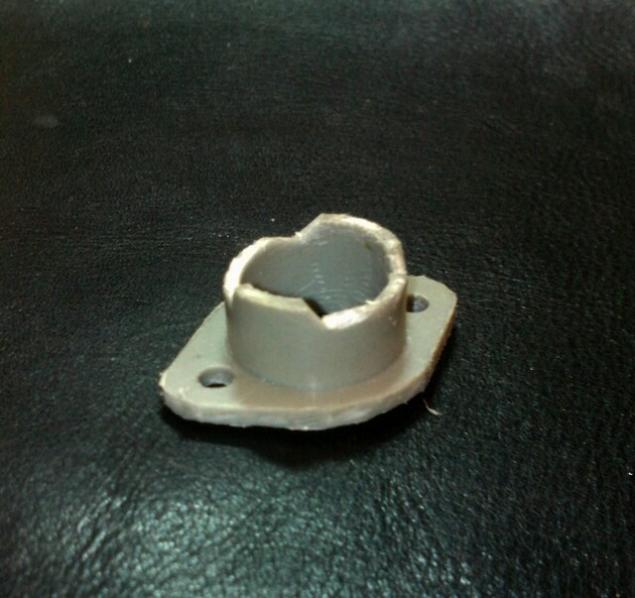
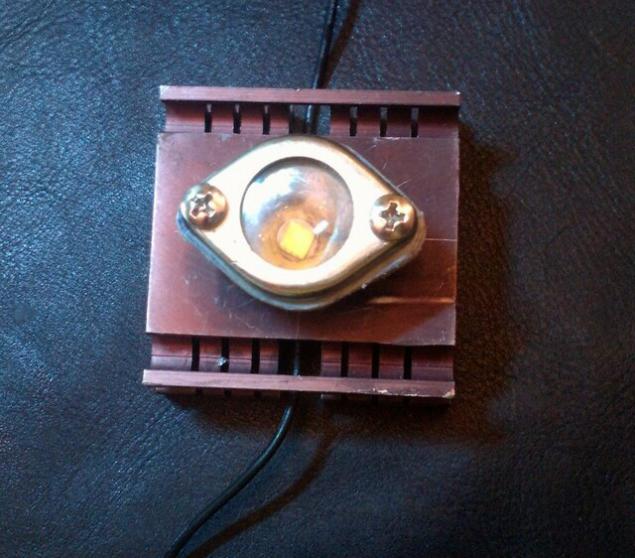
The bins of the motherland was found heatsink from the processor P III, which I decided to consolidate its LED.
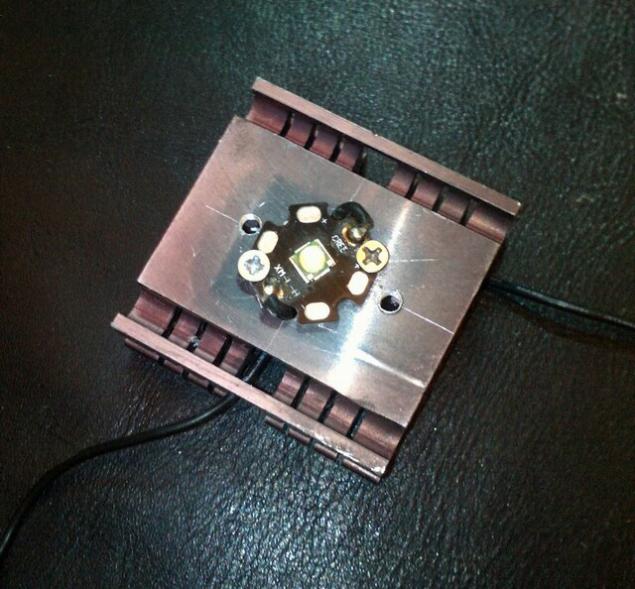
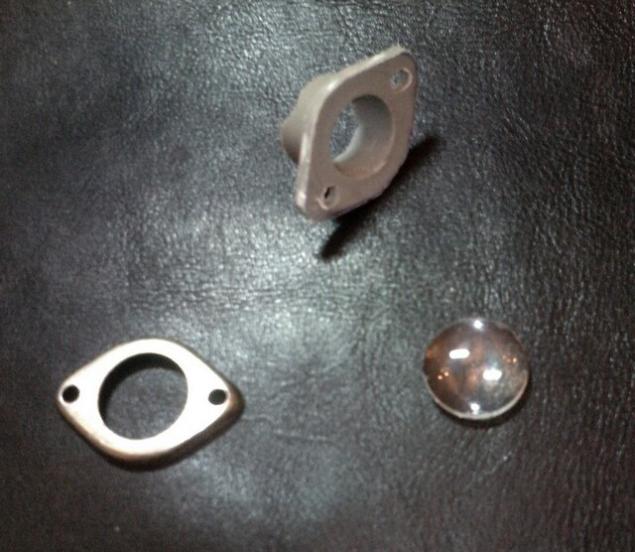
More in the bins was a small piece of glass magnifying and a flange for mounting the transistor P213, which is miraculously perfect fit to the glass as the mandrel.
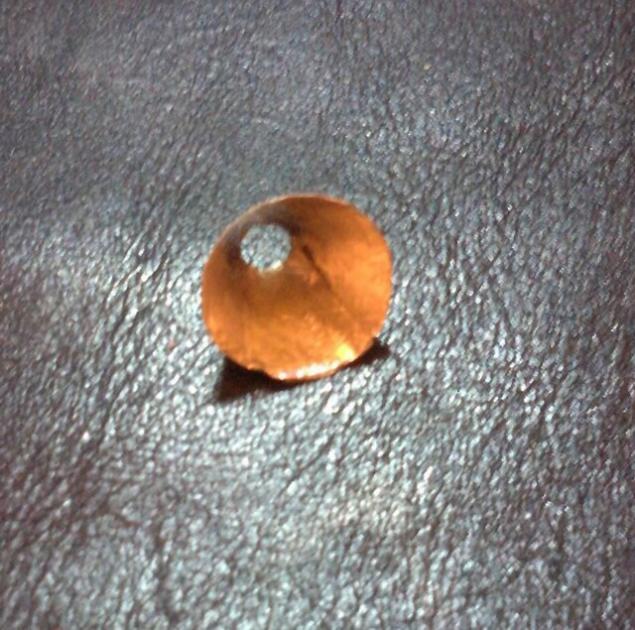
To fix the magnifying glass at a desired distance from the LED, I used a piece of a plastic coil of tin solder - it was ideal size:
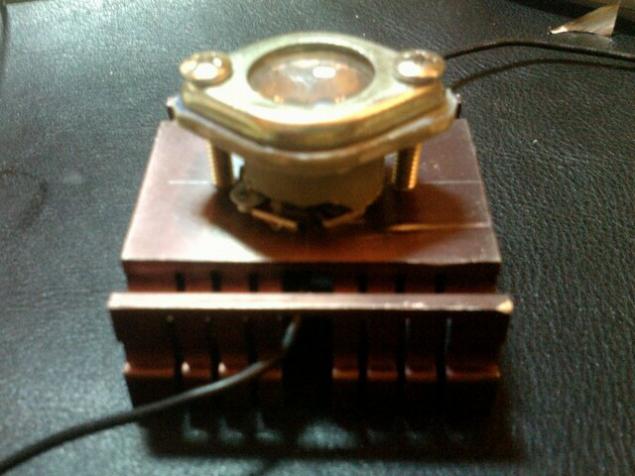
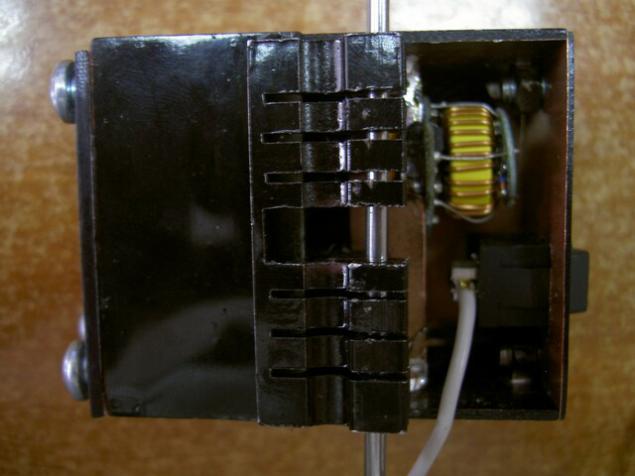
Now we need to make a reflector to the light that is emitted by the LED to the side (angle of illumination from CREE XM-LH is 160 degrees), the reflector is needed. I decided to make it out of construction paper, glued on top of it with aluminum foil.
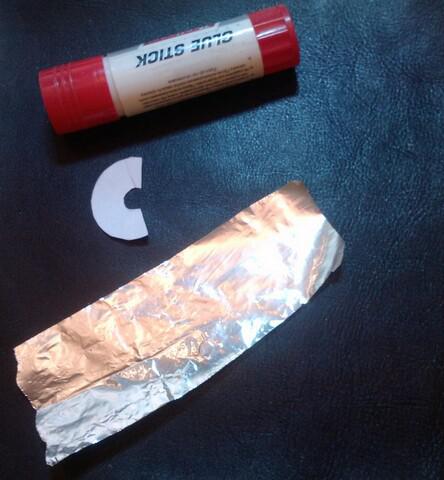
Few remembered geometry, and made a sketch for the sweep of its reflector, conducted tests, and stick to it foil. It turned out pretty well
Then gathered the resulting structure
side view
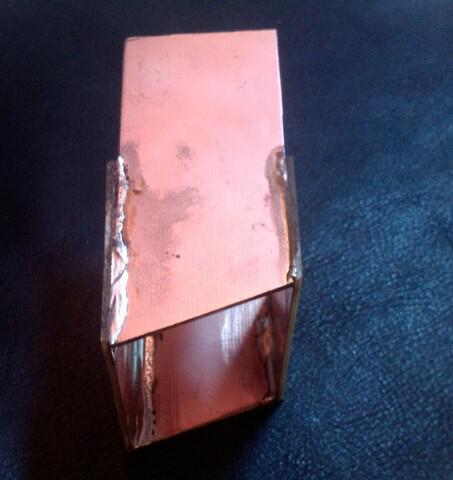
Everything is good, everything is working, but the body needs. Thinking, I have not found anything suitable, so decided to make the body of the foil stekloteksolita. This is an excellent material for the manufacture of printed circuit boards, but not only. From it you can easily make any design. It is enough to know how to solder.
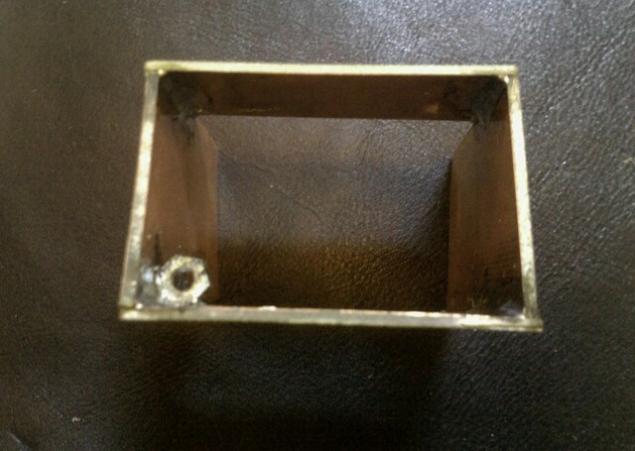
The lens is a good idea to protect against water, dirt and dust, glass. Therefore, the front lights in the building were soldered nuts for Plexiglas.
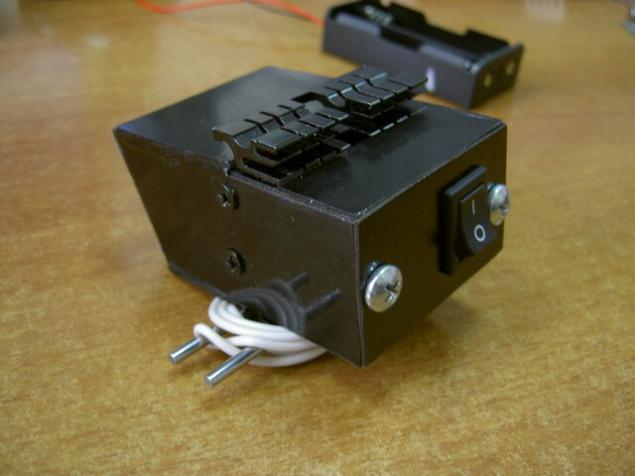
For the radiator I left the place for the installation of the driver board for the LED and a switch

After the final assembly, the lamp housing and the heat sink from a container were painted black
As a stand when taking pictures using the bay for couples Li-ION batteries.

and this side
But so modestly hid driver power LED. It has three modes of operation:
Maximum brightness (provides time to two hours of battery life from two Li-Ion battery)
High brightness (up to 5 hours of battery of the same)
Strobe (created to annoy everyone and everything =))
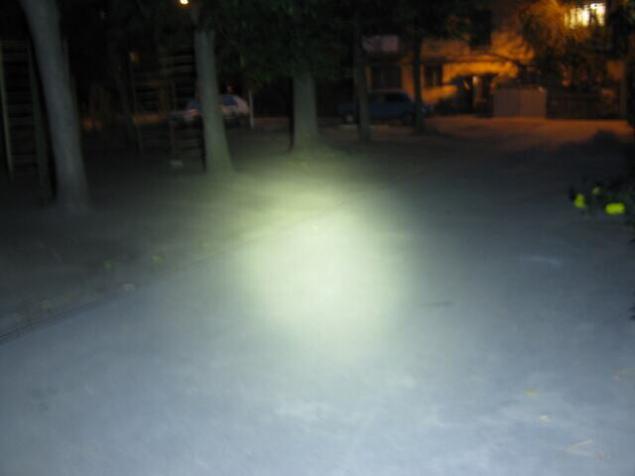
Picture how shine spotlight on the battlefield is to apply can not, because the window slush and mud. It will update the article later. In the meantime, a photo from another article about the flashlight on this same LED, so you can judge the brightness
Posted in [mergetime] 1334250295 [/ mergetime]
Thank you all for your attention)
Posted in [mergetime] 1334250448 [/ mergetime]
Source: big-led.ru/diy/svetodiodnaya-velofa...-svoimi-rukami/
Source:
Spring came, and I decided to think about their health: bought a bicycle. And how so? Engage in light-emitting diodes, ultra-bright flashlight to do, and to ride a bicycle without lights ?! Well, I do not! Laziness was born a little before me, and I decided not to bother and buy a ready-made spotlight. Proiskal on Chinese sites like Dealexterme.com, anything that would suit me in terms of price / quality (read price / brightness), is not found. Then I went on veloforumam where the people make their own lights, even read the article on Habré. But no one option I did not like: the tricky design, it is clearly not under my LED (CREE XM-L -H 10 W) in all of the searches I learned the idea that in addition to the LED parabolic reflector, it is desirable to set a focusing lens to form an optimal luminous flux.
The bins of the motherland was found heatsink from the processor P III, which I decided to consolidate its LED.

More in the bins was a small piece of glass magnifying and a flange for mounting the transistor P213, which is miraculously perfect fit to the glass as the mandrel.

To fix the magnifying glass at a desired distance from the LED, I used a piece of a plastic coil of tin solder - it was ideal size:

Now we need to make a reflector to the light that is emitted by the LED to the side (angle of illumination from CREE XM-LH is 160 degrees), the reflector is needed. I decided to make it out of construction paper, glued on top of it with aluminum foil.

Few remembered geometry, and made a sketch for the sweep of its reflector, conducted tests, and stick to it foil. It turned out pretty well

Then gathered the resulting structure

side view

Everything is good, everything is working, but the body needs. Thinking, I have not found anything suitable, so decided to make the body of the foil stekloteksolita. This is an excellent material for the manufacture of printed circuit boards, but not only. From it you can easily make any design. It is enough to know how to solder.

The lens is a good idea to protect against water, dirt and dust, glass. Therefore, the front lights in the building were soldered nuts for Plexiglas.

For the radiator I left the place for the installation of the driver board for the LED and a switch

After the final assembly, the lamp housing and the heat sink from a container were painted black
As a stand when taking pictures using the bay for couples Li-ION batteries.

and this side

But so modestly hid driver power LED. It has three modes of operation:
Maximum brightness (provides time to two hours of battery life from two Li-Ion battery)
High brightness (up to 5 hours of battery of the same)
Strobe (created to annoy everyone and everything =))

Picture how shine spotlight on the battlefield is to apply can not, because the window slush and mud. It will update the article later. In the meantime, a photo from another article about the flashlight on this same LED, so you can judge the brightness
Posted in [mergetime] 1334250295 [/ mergetime]
Thank you all for your attention)
Posted in [mergetime] 1334250448 [/ mergetime]
Source: big-led.ru/diy/svetodiodnaya-velofa...-svoimi-rukami/

Source: