1031
Warm water floor, in a wooden house
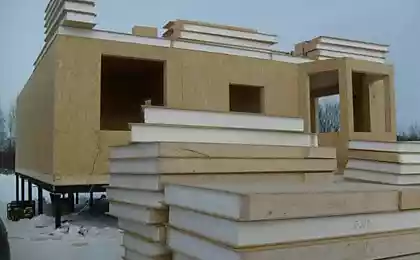
Yesterday's topic about how I built the house has caused a lot of feedback, so continue with your consent.
As promised, today I will tell you in detail about some of the features of heating in my house, and a little about plumbing.
79 pictures.

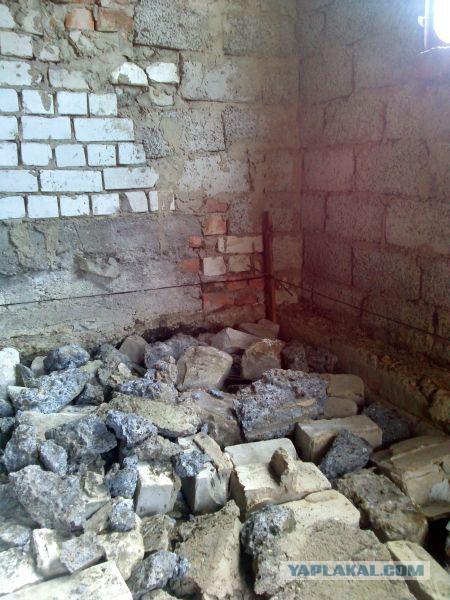
2. First you need to pour gravel floor, or ASG
3. Expose level laser tag subfloor (level of dumping)
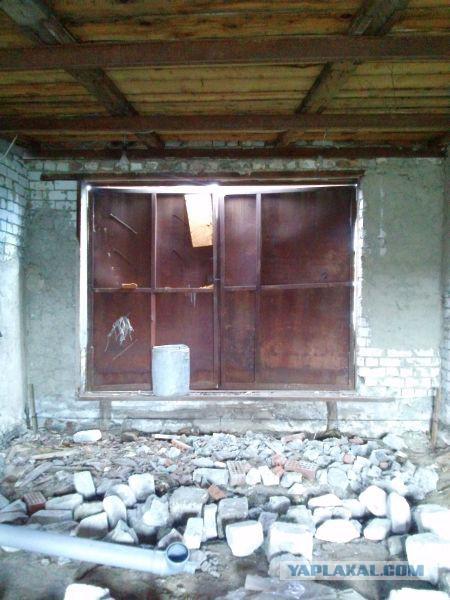
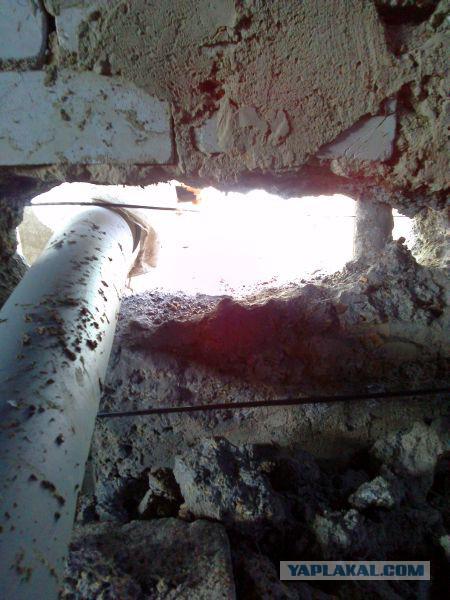
4. Do not forget about communication. Punched holes for sewers and water
5. After dumping the stone, stopped all the sand from the intermediate pouring some water and rammer. It is best to use a vibration plate. It took me three cars of sand.
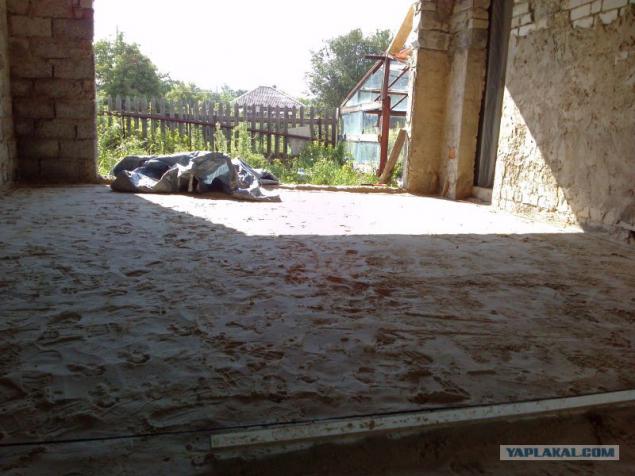
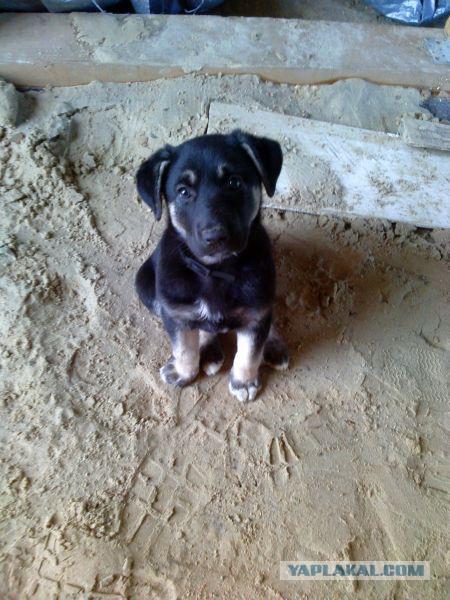
6. Little Helper and future defenders of the house :) The sand must be level, almost like a tie.
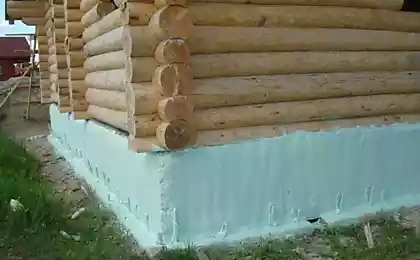
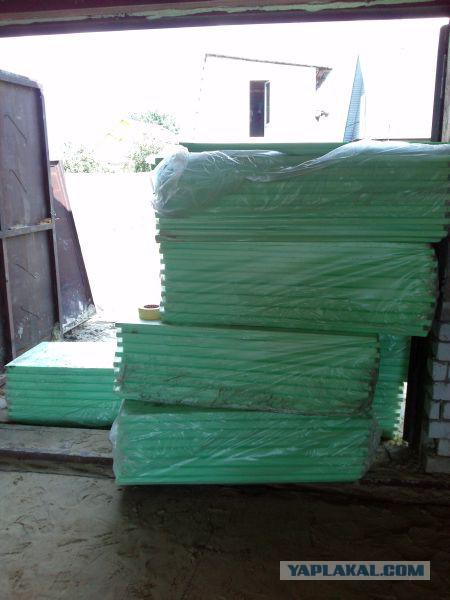
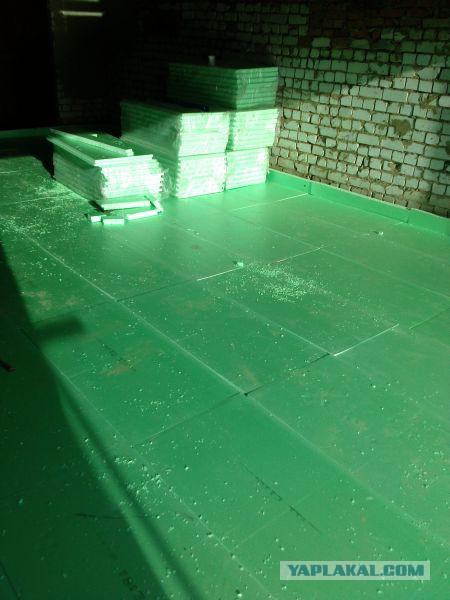
7. The next phase insulation. For this I use Epps (extruded polystyrene) material does not become wet and keeps the monstrous load compression. He even placed under concrete slabs runways. It is worth 1440 rubles packing, 180 rubles a sheet 50 mm.
8. Puts joint to joint
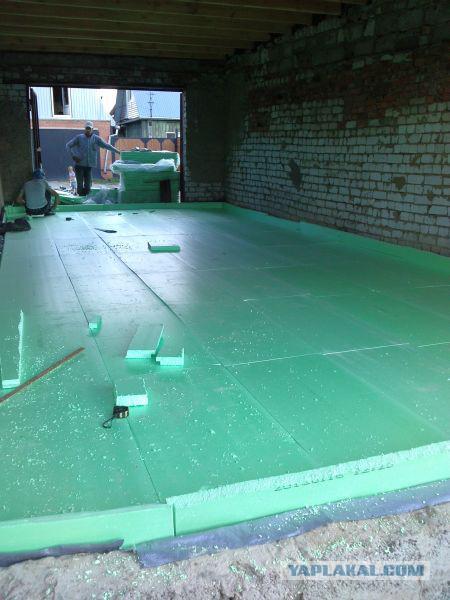
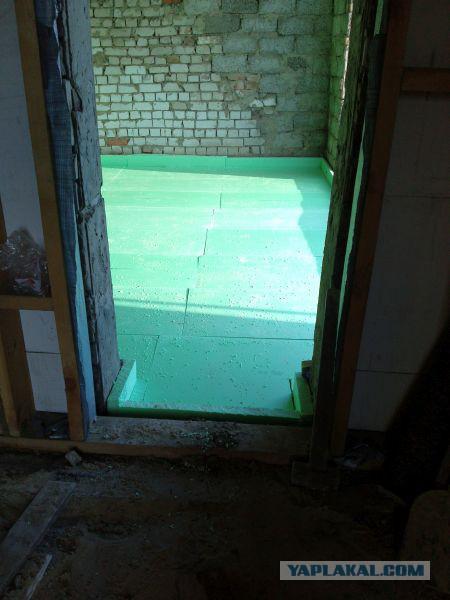
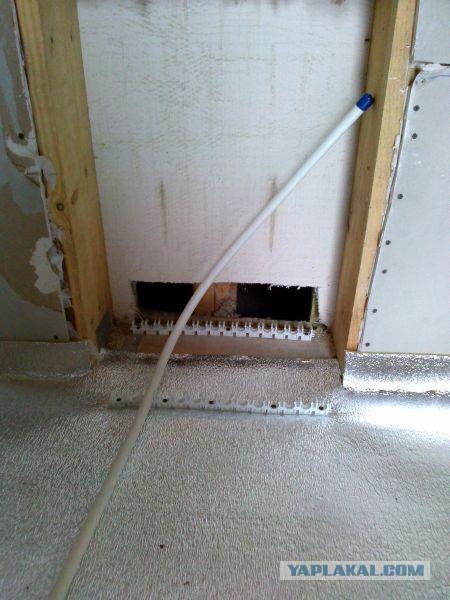
9. On each side is required to make small skirting of the same material. This is the future we teploizoliruem warm floor from the wall and make the edge of the damper for possible expansion boards. It should get a "bath" of Epps
10. Ideally, you need two layers with overlapping joints, but as the load I will not be here, I decided to save.
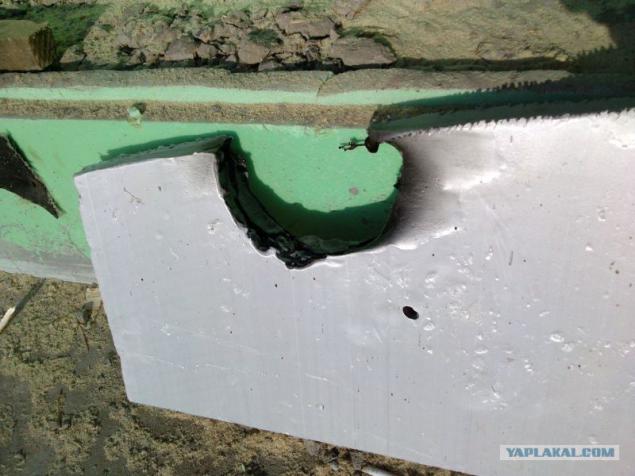
11. Recall that the material is very flammable, so they insulate walls and especially inside buildings can not be! That's what happened on the grinder with sparks. Thirty seconds and a hole the size of a fist.
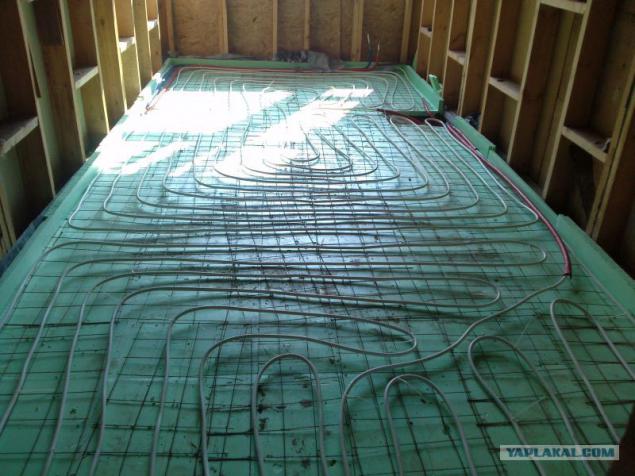
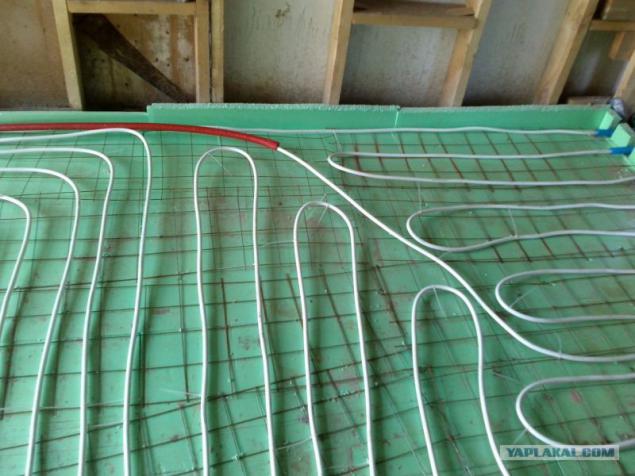
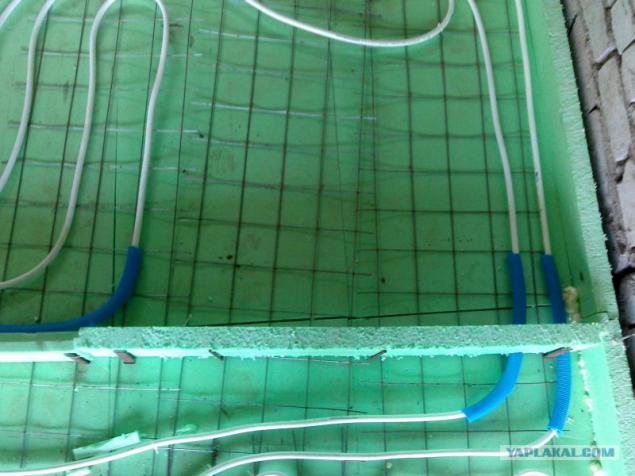
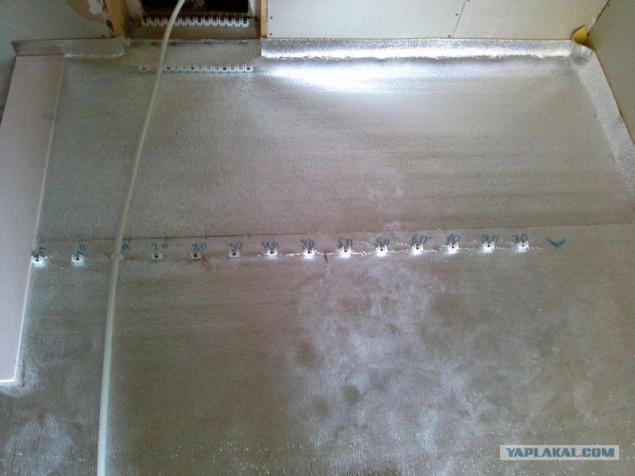
12. Epps we put masonry mesh with a mesh size of 10x10 centimeters. To it we tie the pipe
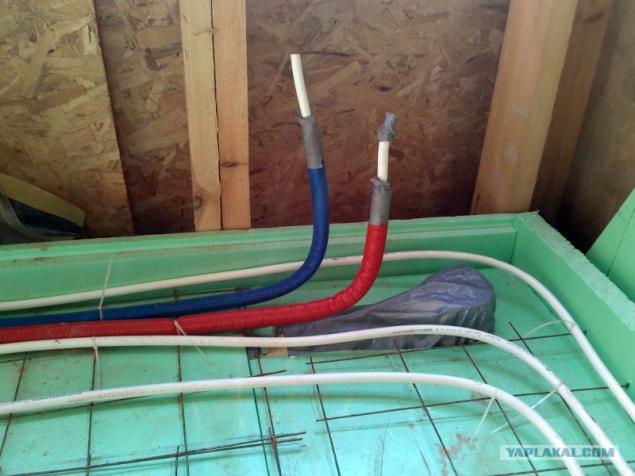
13. The point of entry to other premises isolate with special tubular heaters.
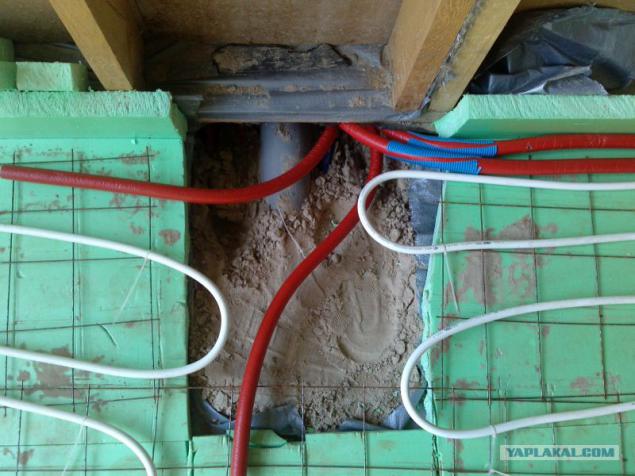
14. In place of the corrugated pipe bends
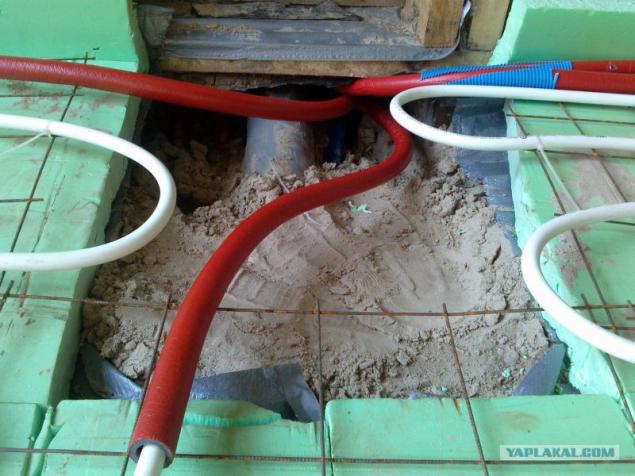
15. The conclusions sewers and running water. It is convenient to denote water colored insulators.
16. All inputs and outputs are closed again and carefully Epps zapenivaem
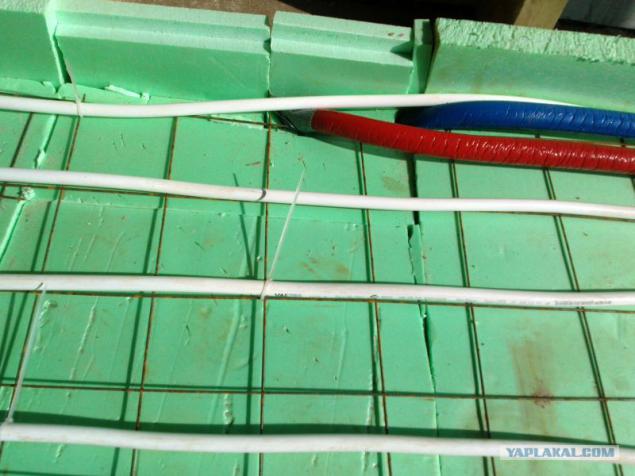
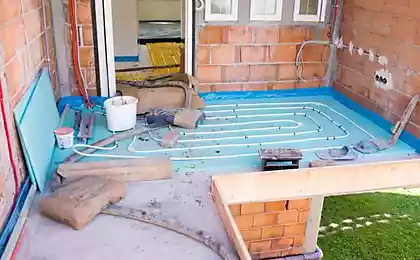
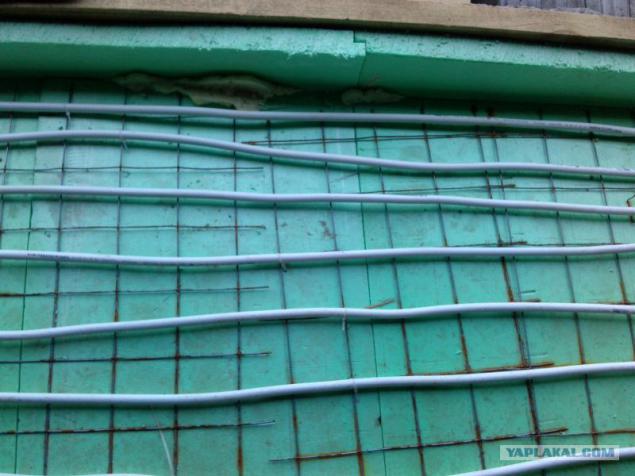
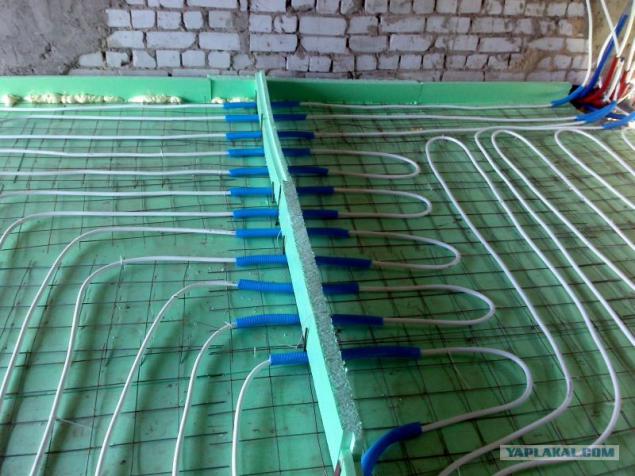
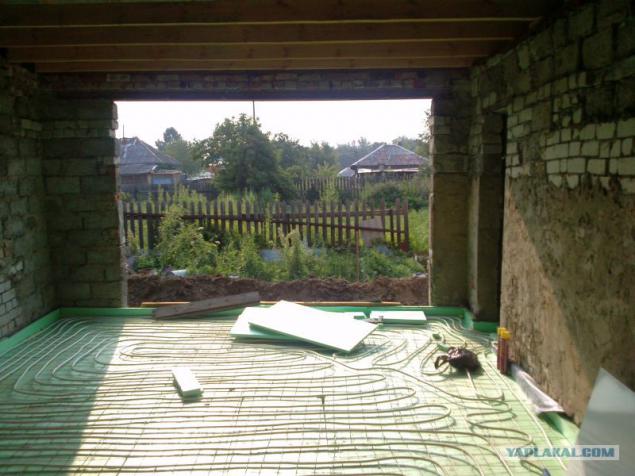
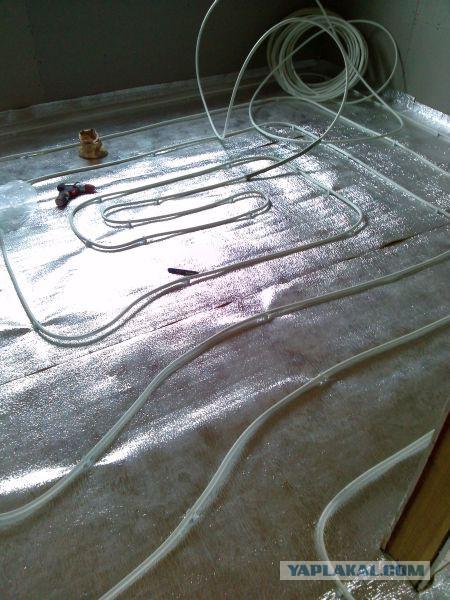
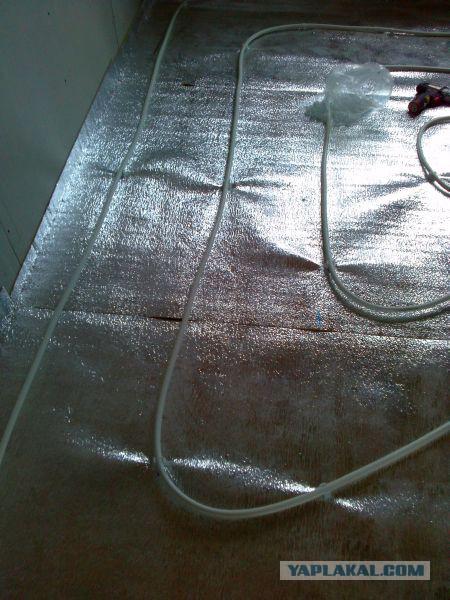
17. We continue to lay the pipe. It is simple enough, you can even one. But it is better with the assistant. One spins the tube, the second tie with plastic cable ties. The distance between the pipes 10 to 15 centimeters
18. Under the partitions should be laid in corrugated tube to protect against friction and load izgibayuschik
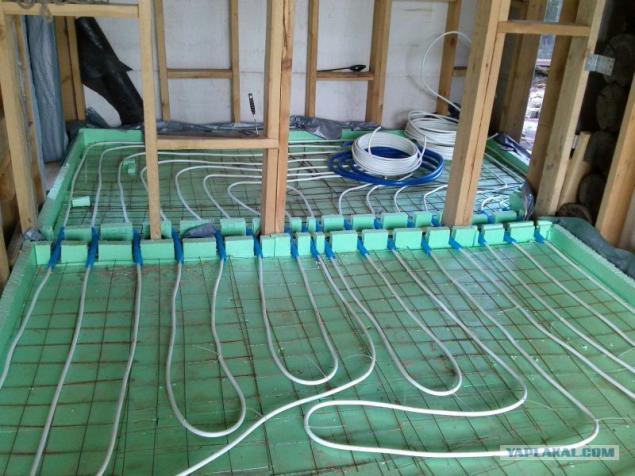
19. If the plate more than 8 meters, it is necessary to divide, to compensate for thermal expansion. I did it with the help of Epps. Can ordinary board or plywood.
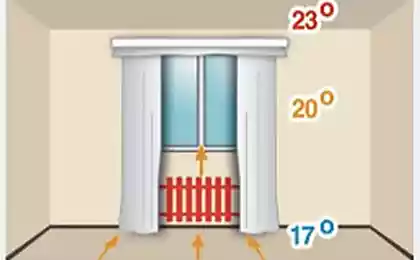
20. Near the panoramic windows and outside walls of the distance between the tubes is reduced to 8-10 centimeters, to compensate for the outside temperature.
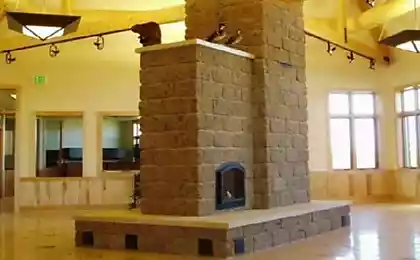
21. Under massive objects, which will not move to do a better floor. It is a place under the stove in the sauna.
22. Passage through the barrier in the ripple
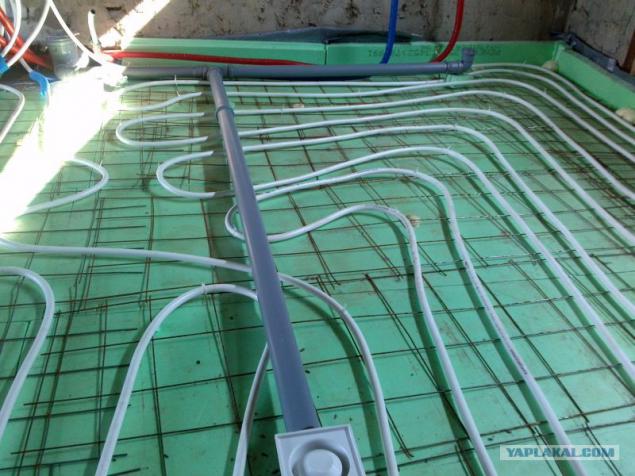
23. Puts sewage pipes based on inclination of 3 centimeters per meter.
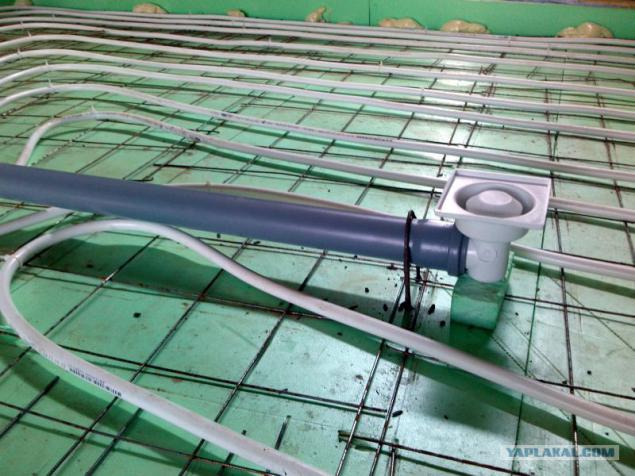
24. sewage pipes must be carefully fastened. Concrete simply will carry!
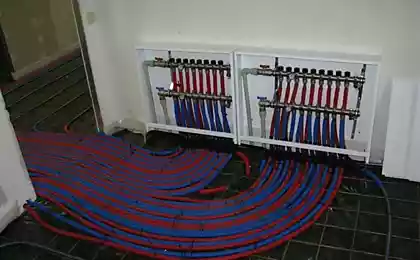
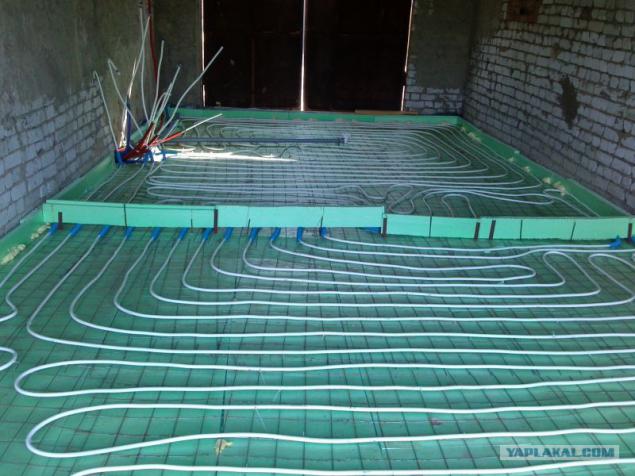
25. Withdraw all the loops in one place, where there will be manifold block. Here I have 5 loops, ie 10 pipes. And this is only the first floor. It took about 400 meters of the pipe on Valtek 16.
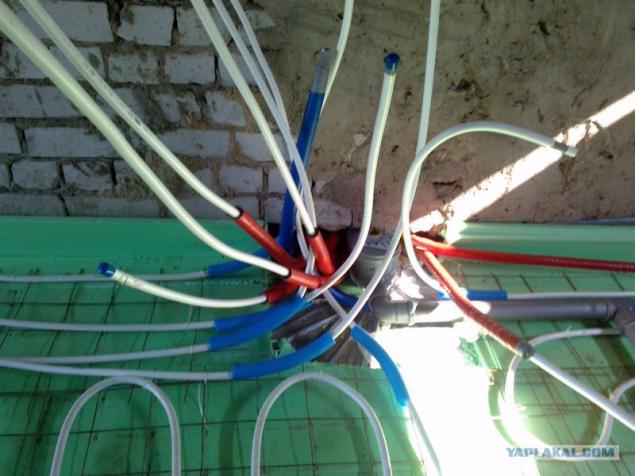
26. Loop over 100 meters is not recommended, because of the problems with balancing. But one loop I still got 111 meters. Therefore it is better to take the rolls of 200 meters. Joining pipes inside the screed can not. They laid there for 50 years!
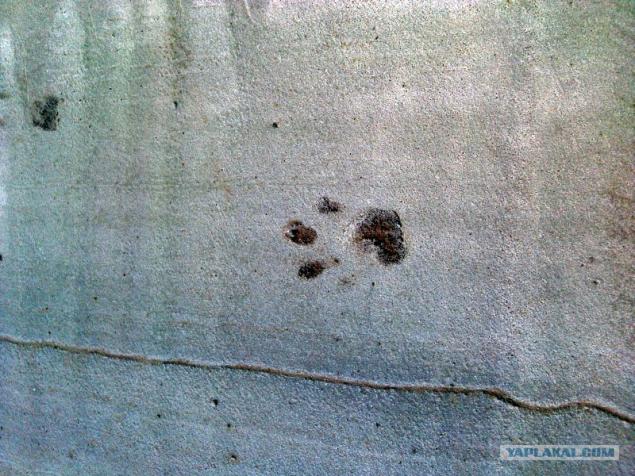
There is a panoramic window, so the pipe took more than the calculated amount.
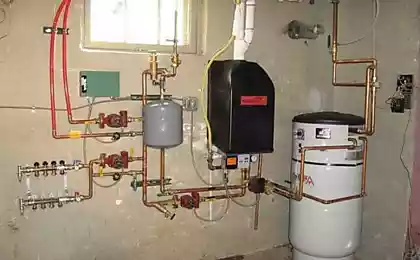
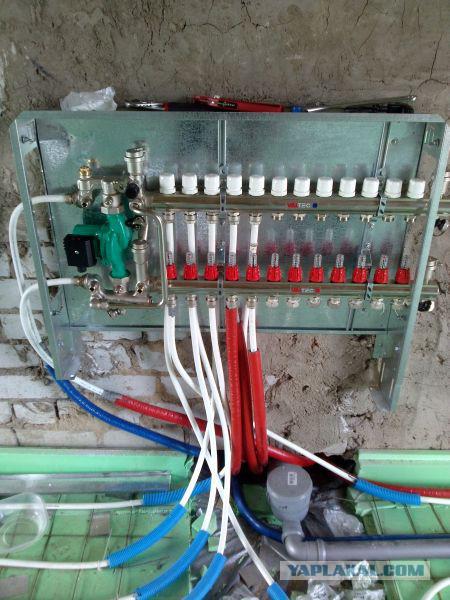
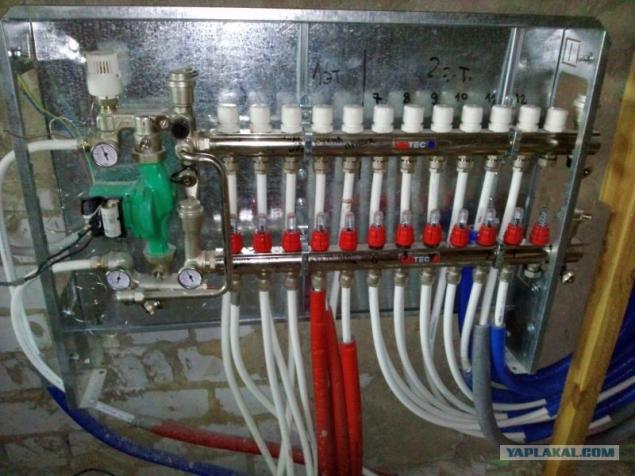
27. Getting to the assembly of pump and mixing unit. In principle, nothing complicated, but I still nakosyachil :) mixed up flow and return manifolds. Logically, that submission is to be always on top. But seeing the training video on the website of the company realized that was wrong and quickly remade. The logic of this is not clear: the mixing unit must always be left to supply overhand knot and feed the collector BELOW!
Pumping and mixing unit for underfloor heating VALTEC COMBI
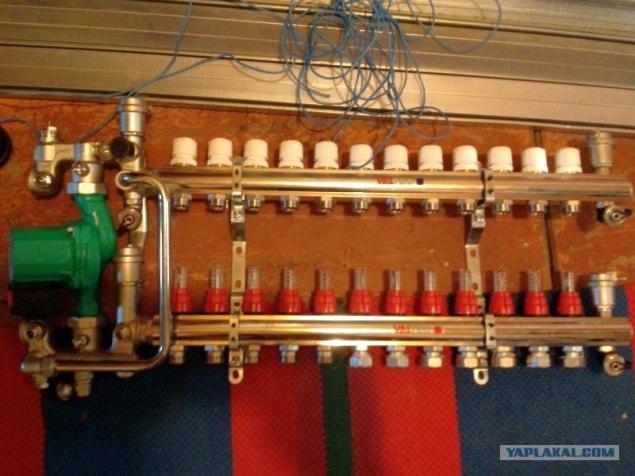
28. to pick up all five circuits of the first floor.
Manifold block for hot water radiator and underfloor heating (radiant floor heating) with control valves with flow meters and manual (with optional electro-thermal actuator) shut-off valves, automatic air vent and drain. The diameter of the reservoir - 1 or 1 1/4 & quot ;. Number of outputs - from 3 to 12. The diameter of the pipes - 3/4 & quot ;, thread - external standard connection - "cone". Operating temperature of coolant - up to 90 ° C, pressure - 10 bar.
The pump-mixing unit VALTEC COMBI for preparing water underfloor heating medium with a temperature of 20 to 60 ° C is due to the mixing of the liquid return line. Regulation is carried out the two-way valve in the supply manifold and controlled thermostatic head with remote immersion sensor, which is placed at the outlet of the mixing unit. (If you use the controller heating function of the valve control is passed to him.) The balancing valve in the mixing sets the ratio of the coolant coming from the back of the line secondary circuit and primary straight line. Other key elements of the site: the bypass with bypass valve; built-in ball valve to turn off the circulation pump; automatic air vent; Insertion thermometers.
The pump Wilo Star-RS 25/4
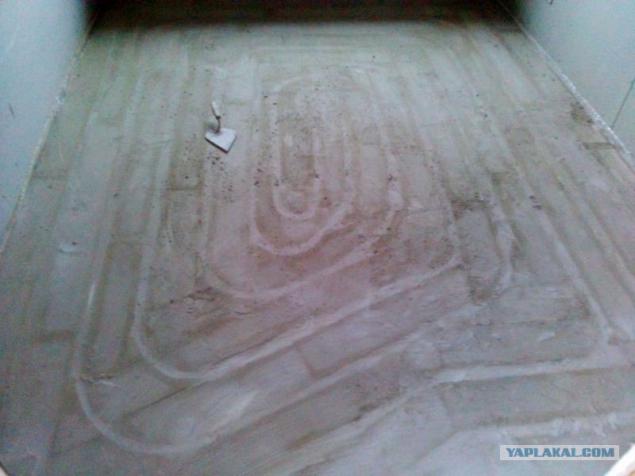
29. They brought concrete. Ordered mixer 8 cubic meters of sand and cement mixture M-150 with plasticizers for underfloor heating. The three scattered it for half a day. Very hard!
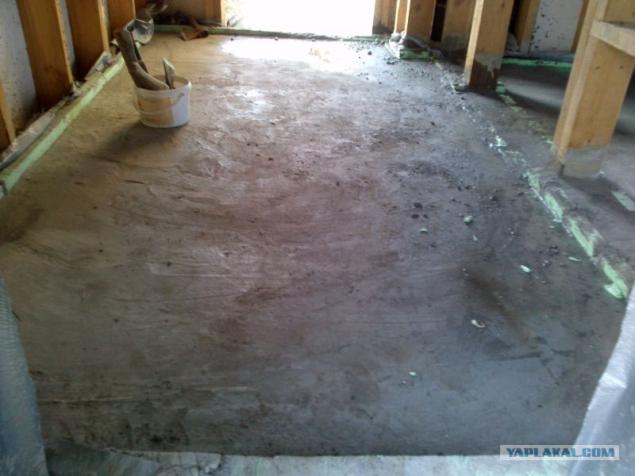
30. The cat tried to help, but no hard boots :)
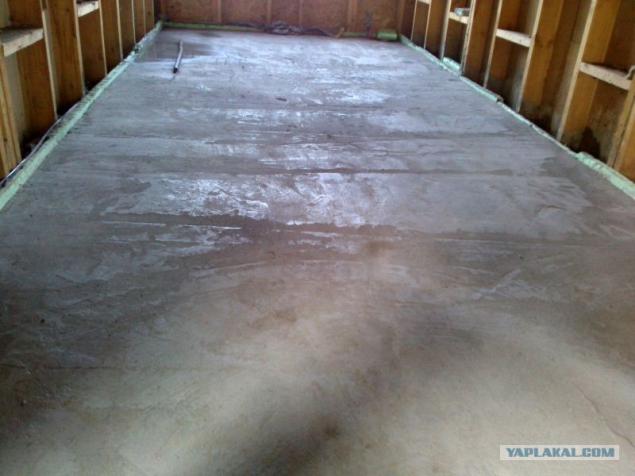
31. aligns even the next day, with spades and axes, the burrs removed as soon expose the level of difficult.
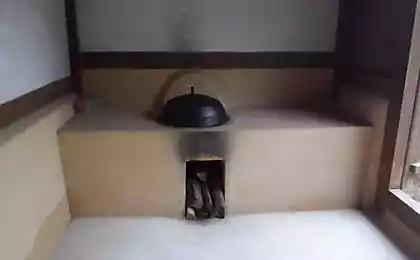
32. In the meantime, until the concrete dries, I started to build a temporary, guest bathroom.
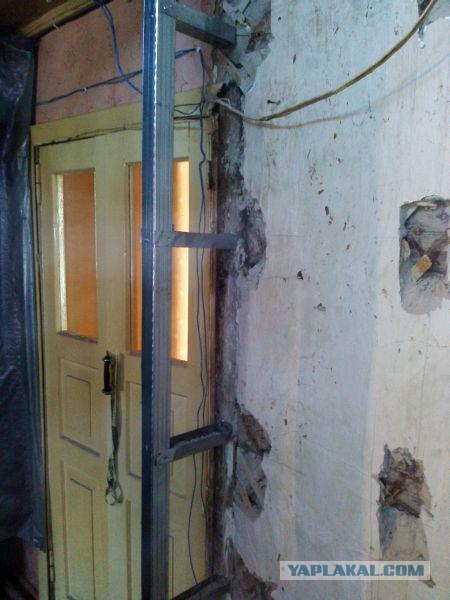
There was a stove. The walls are very uneven.
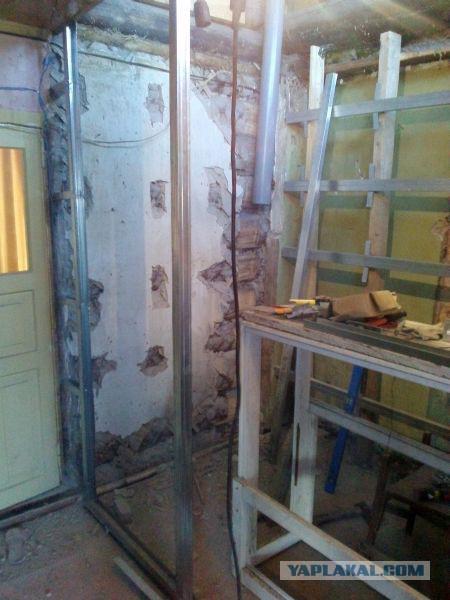
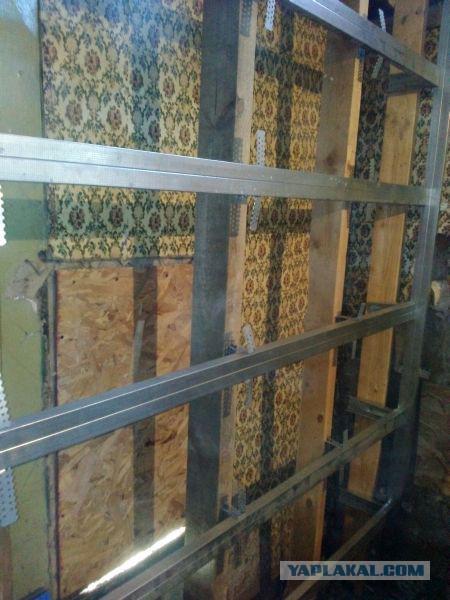
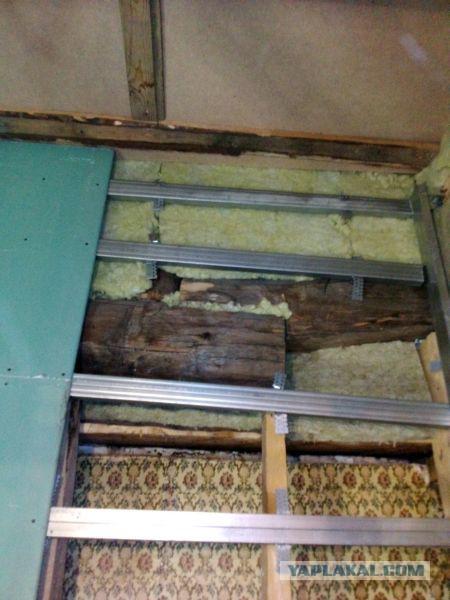
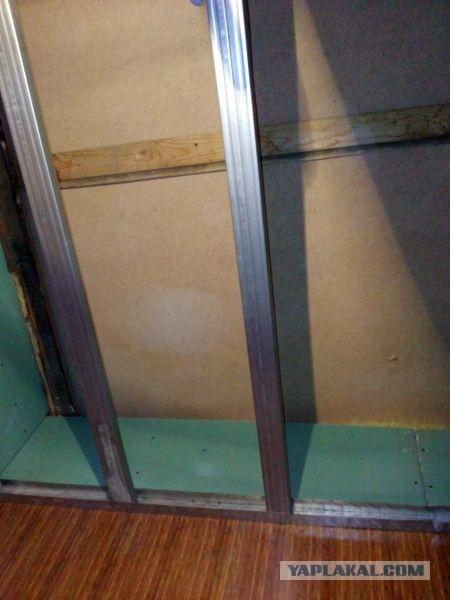
33 Aligns wall profile and do not tell me that it is impossible to ceiling and horizontally :)
34. The level of the ceiling lift on the meter, which would have climbed shower
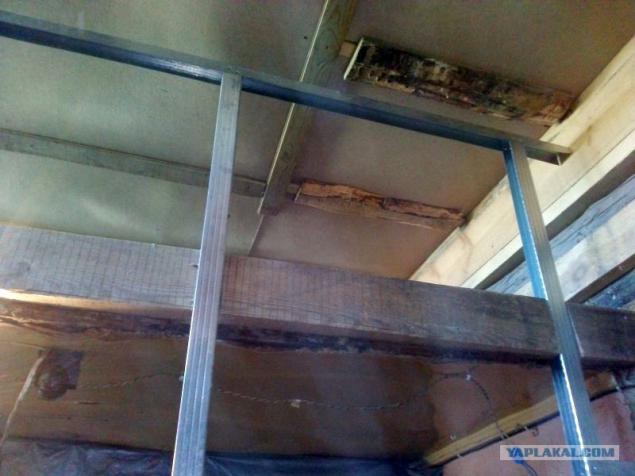
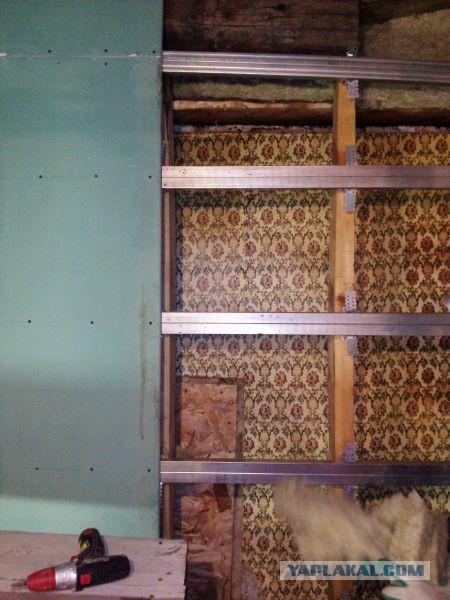
35. Indent from the walls of the giant. All the empty space and then fill with pieces of mineral wool. Fortunately I have a lot of waste.
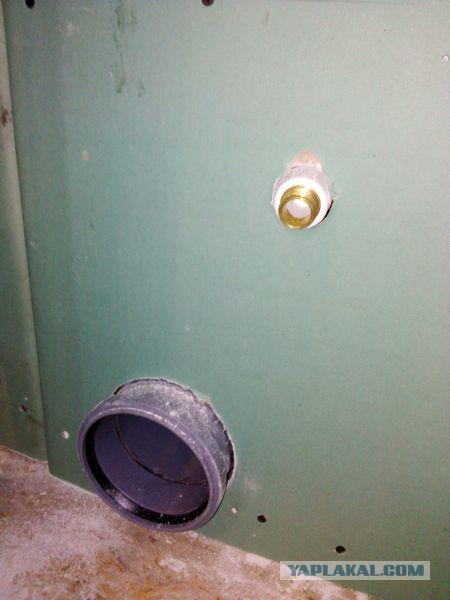
36. sutured moisture-resistant gypsum fiber board is colored green. Paul has been processed rubber mastic asphalt.
37. All cavity is filled with mineral wool. It is not for the heat and sound insulation
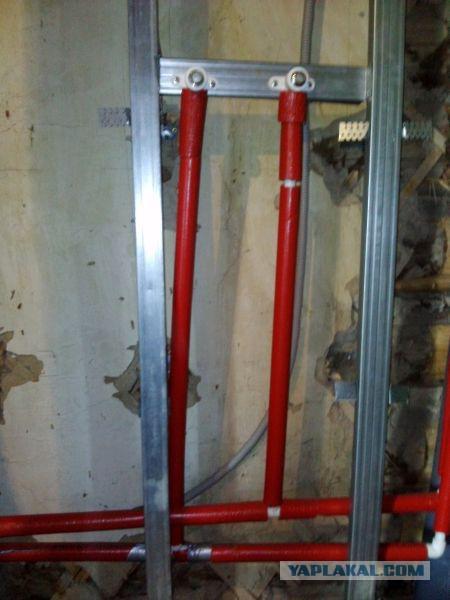
38. Begin to mount the water supply of polypropylene. I bought a welding machine for 2000 rubles. Rental costs 500 rubles per day, 4 days will pay off. And I cook a lot of things have to :)
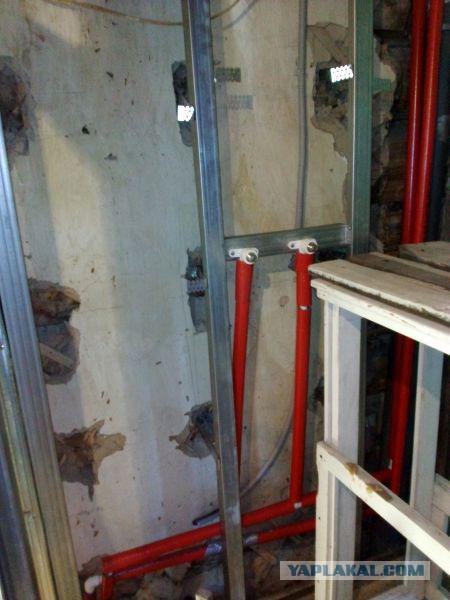
39. It is necessary to mount the pipe povydelyvatsya
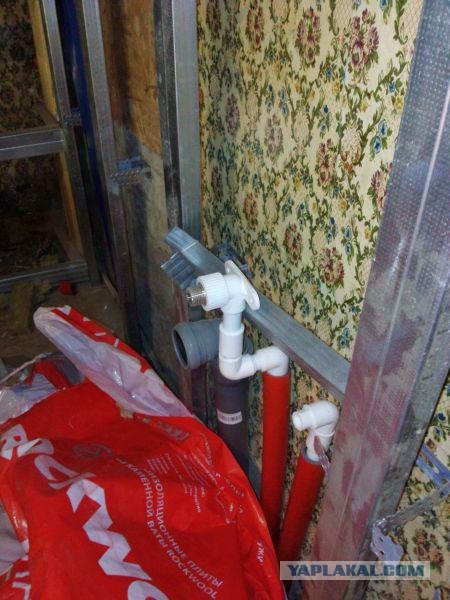
40. As a result, so did
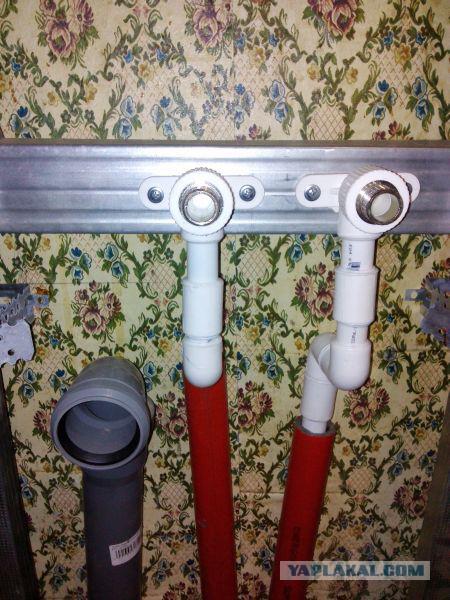
41. All the pipes for plasterboard, sewage, too.
42. Motley insulation is no more. Let all the water is hot :)
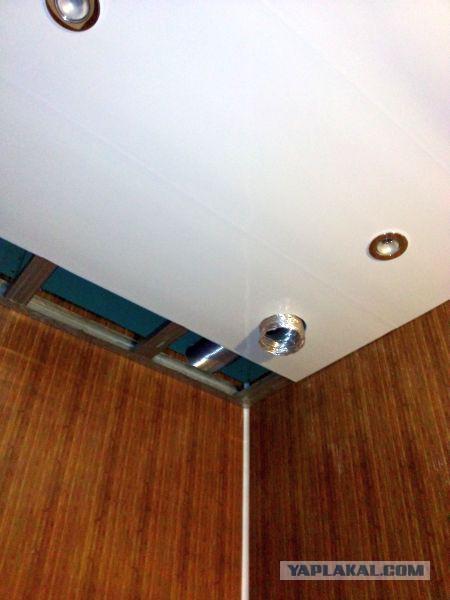
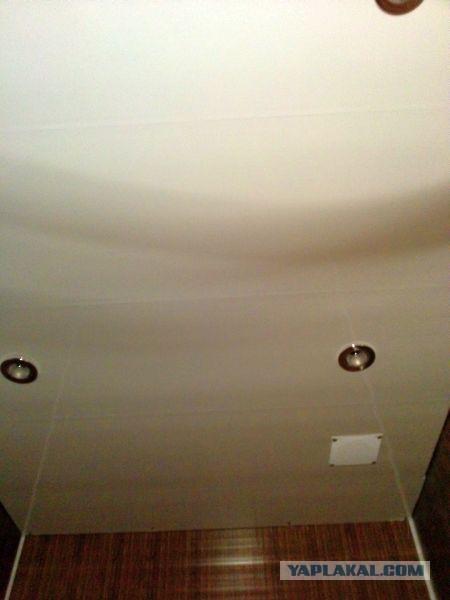
43. It is the ceiling, or rather his skeleton
44. Visible ventilation. It is displayed on the roof.
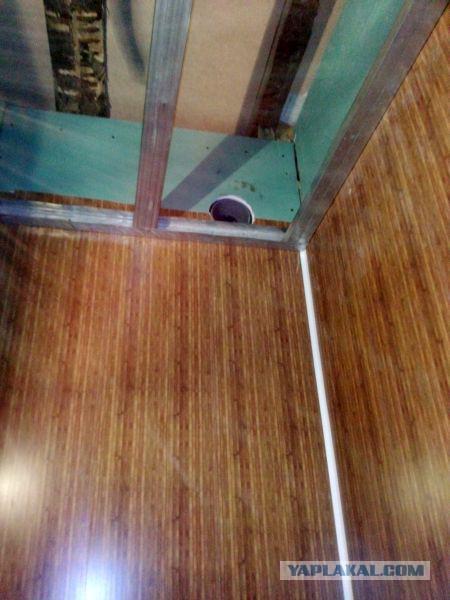
45. The ceiling is sheathed with plastic panels width of 30 centimeters
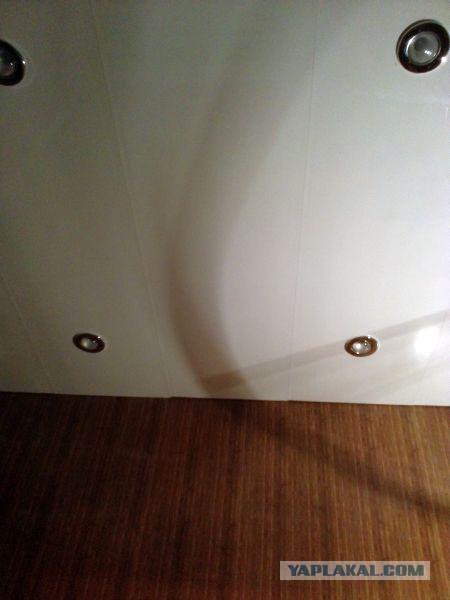
46. I install spotlights and deduce corrugation for ventilation
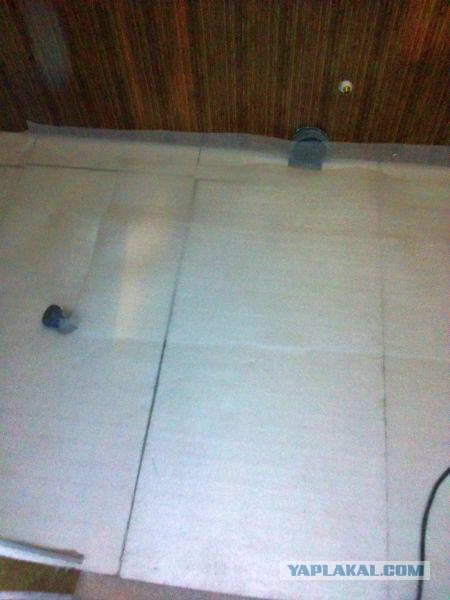
47. Paul prepared under tiles and screed. Below 150h50 board on edge, 30 cm with jumpers on her floor board 40 mm, decking, missed rubber mastic asphalt on top of soul and OSB-3 water-resistant. It Epps 50 MW and steam
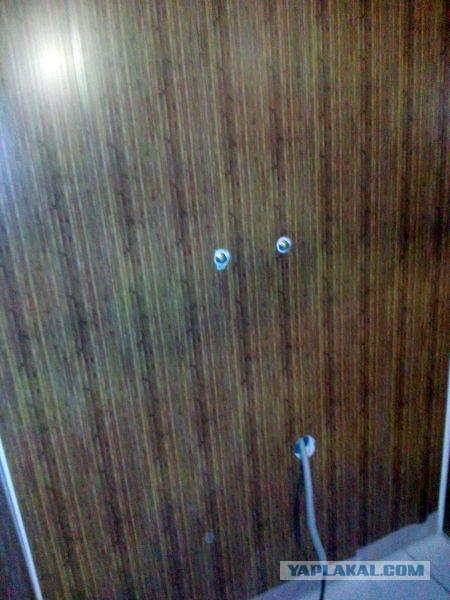
48. The walls as you understand from plastic panels, because it is necessary to make a fast start and a bathroom. In the house of a family of 5 for three days washed :)
49. The final touch plastic grille for ventilation. Under the doors do not forget to leave a gap of 2-3 cm of free running air from the other rooms.
50. Getting to the cabin assembly. My wife wanted to call experts for 4000 rubles, but we all know that it is almost 20 liters of beer :)
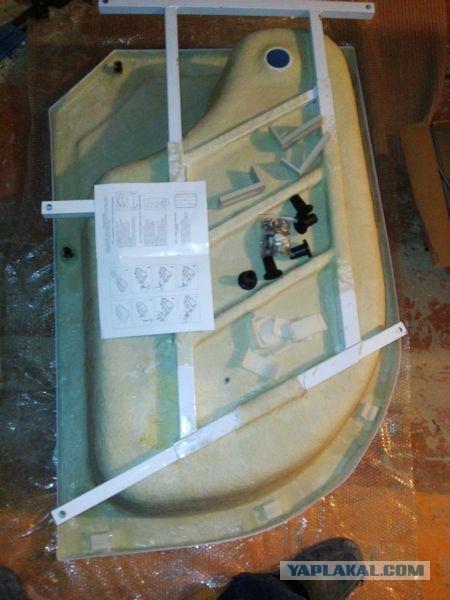
51. Smoke manual, while like all skhoditya
52. Try on bath. Vlazit, but the place is small.
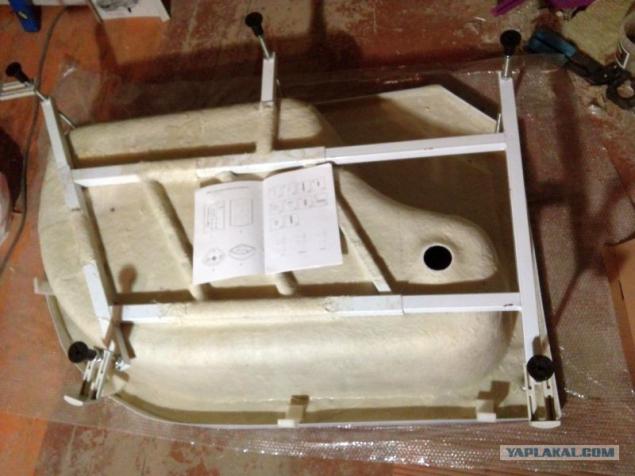
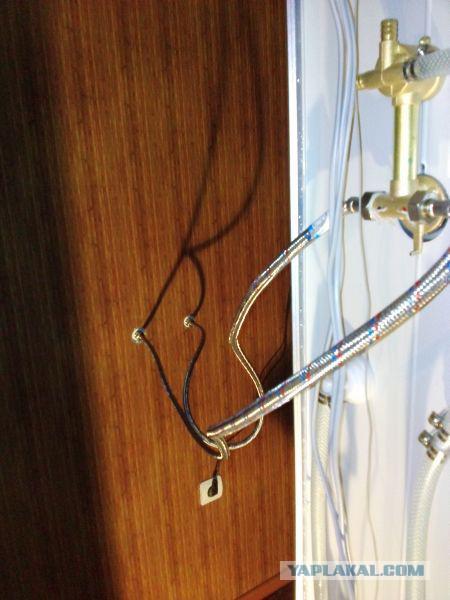
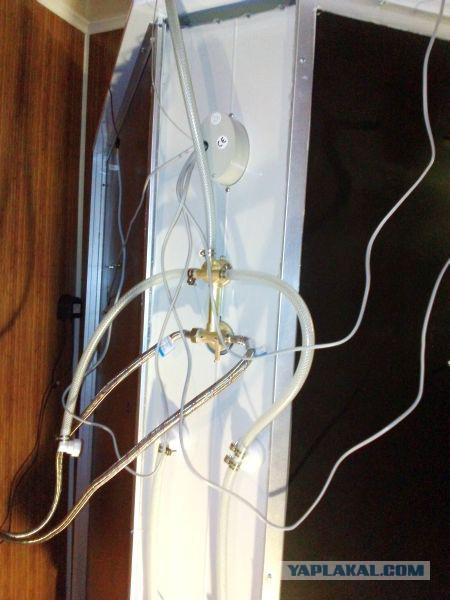
53. I collect mixer using Tibetan magic and tambourine
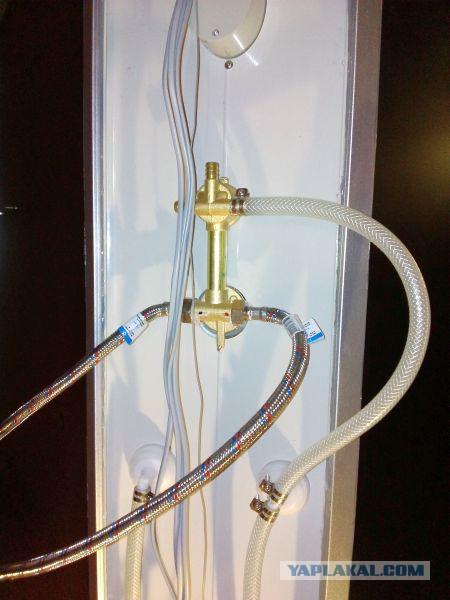
54. Sobral. Since the place had to take a little longer hoses 1.5 meters
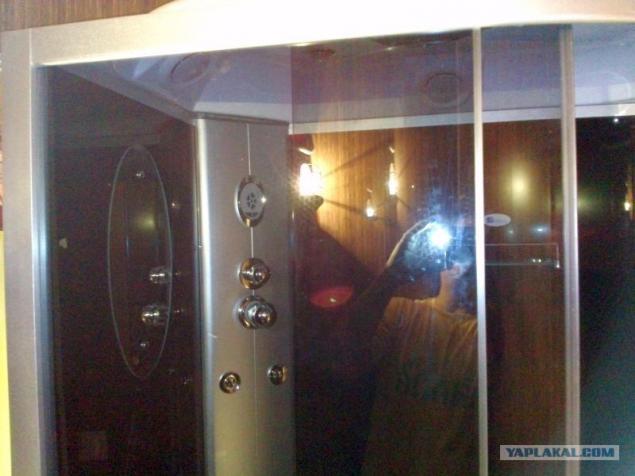
55. Collect the rear and side walls. Here I had to turn on the PL. The guys helped councils and even sent pictures of their booths. Respect and uvazhuha!
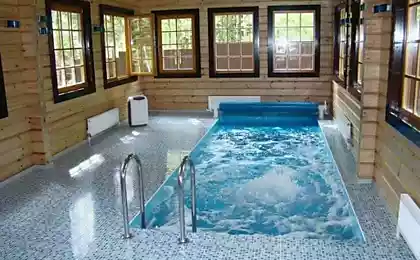
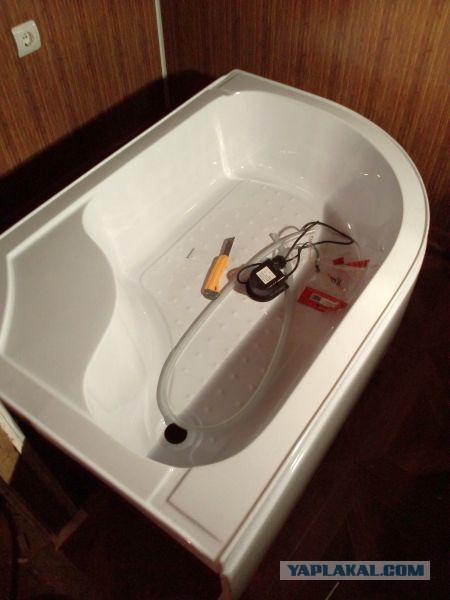
56. It is alive! Everything works, radio, shower and massage. On the whole process took 3 days. Do not forget prosilikonit all the cracks!
57. The toilet is also seated.
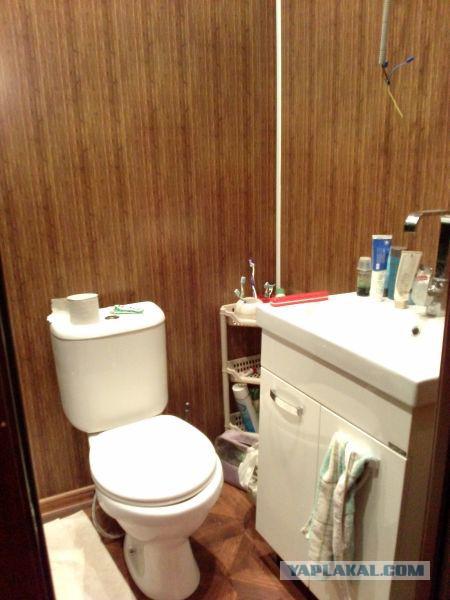
58. Mixer. I'm 10 years old buy mixers company Calorie, China of course, but the industrial assembly. The quality is excellent and the price is democratic about 3000 rubles such feature is.
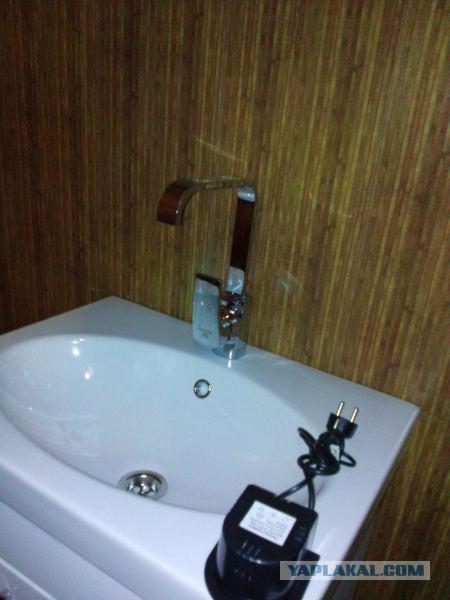
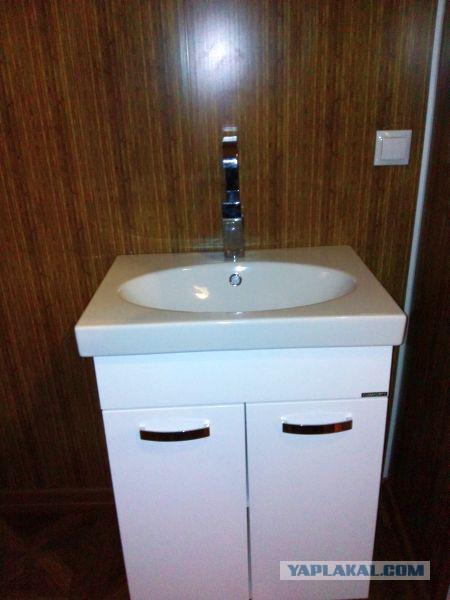
59. But the sink was not easy. Water splashes out of it.
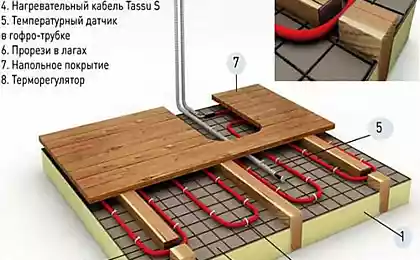
60. It's time to do a warm floor on the second floor.
Pie floors from the bottom up:
The log is 6.5 meters by 30 centimeters, 2 meters
200x50 board on edge, 60 cm with spacers
Board 150h50 as subfloors
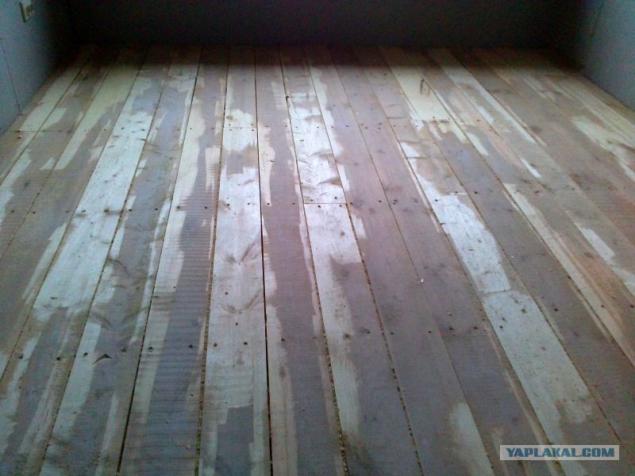
61. The floor must be dry! I have it aged for 3-4 months in a warm, dry, well-ventilated area. During this time, the gap increased to 1 cm, and in some places there were "helicopters" to hammer nails and tsiklyuem usual dobojnika a plane for 2000 rubles. it is enough for 100 squares.
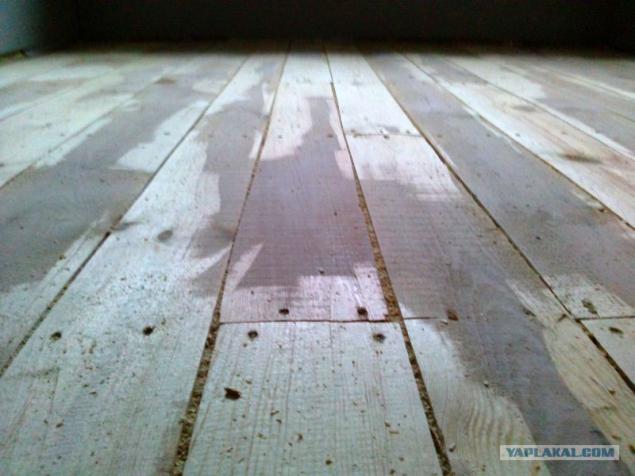
62. In humid areas of the board handle rubber mastic asphalt. On her glue reflective vapor barrier
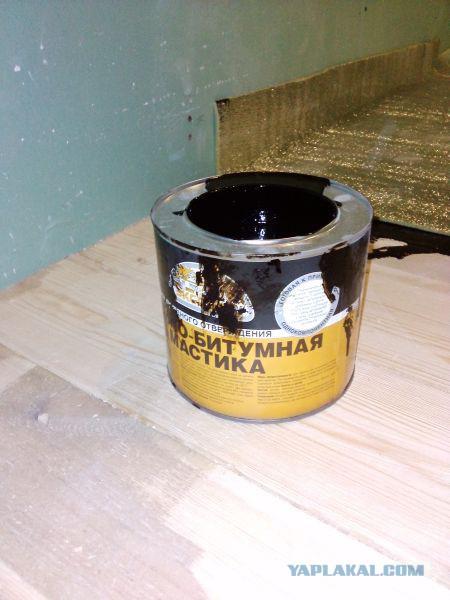
63. Technology takaya- Mastic warm on a hot plate (on the electrical!) To a liquid state and spread the width of the insulation board.
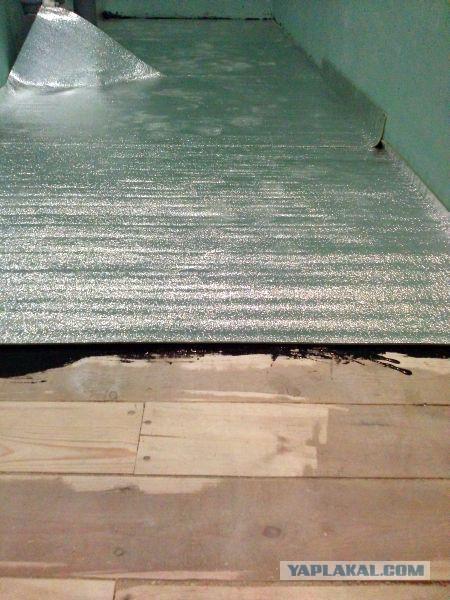
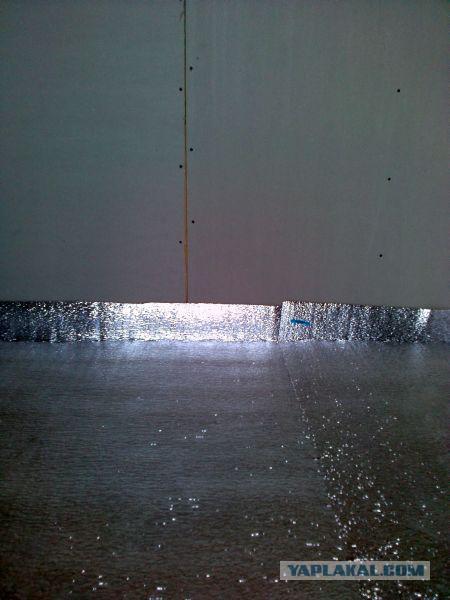
64. Finally, we obtain a uniform coating, protection from moisture and heat down

65. on the walls leave allowance of 7-10 cm to compensate for thermal expansion of the plate floor heating
66. On the second floor, I made a cut-out at the collector cabinet
67. The pipes go through the attic bath. She is a little below the main house. Fasten the pipe to the usual clips, pipes or electrical. They are virtually identical.
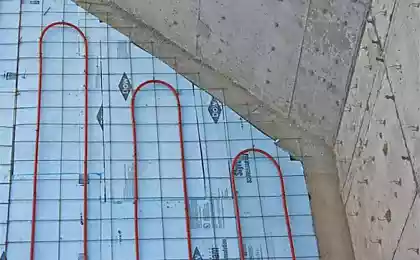
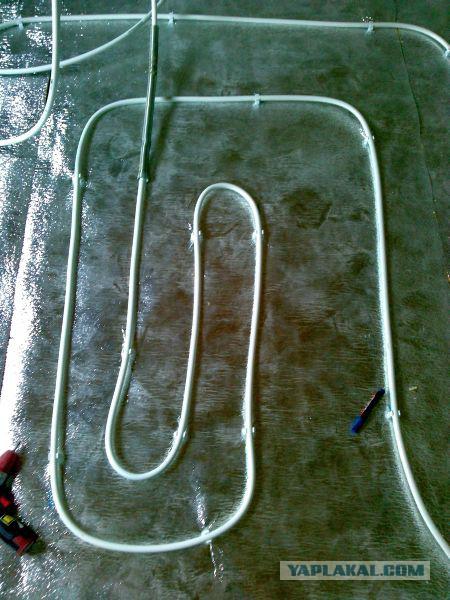
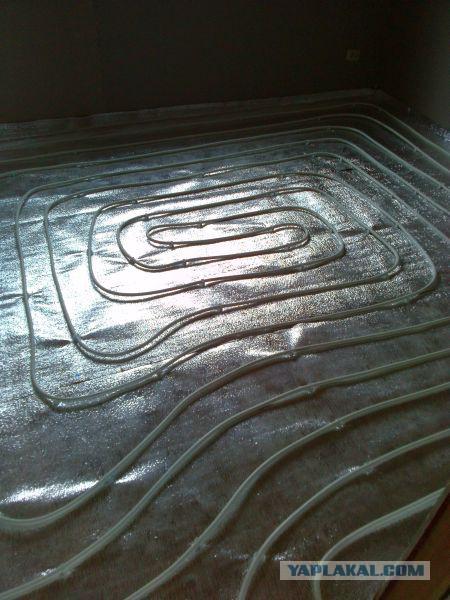
68. Puts the first loop, all of them will be 6. Installation procedure - a snail. Please be laid with a double step 36 centimeters, then the center of the tank line 15 centimeters. Bedroom optimally.
69.
70. The distance between the pipes 36 cm with the width of the clip.
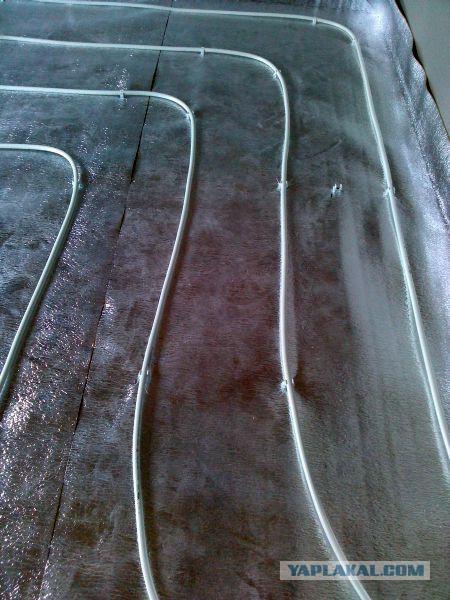
71. The return line from the center of the cochlea. The photo shows pruzhinka- jig for folding in difficult places. If the pipe to bend, have to do all over again, and throw the pipe. All the 100 meters!
72.
73. When all the pipes are laid in between two layers of stacked strips of gypsum fiber board (gypsum fiber sheet) can not lay down a simple drywall!
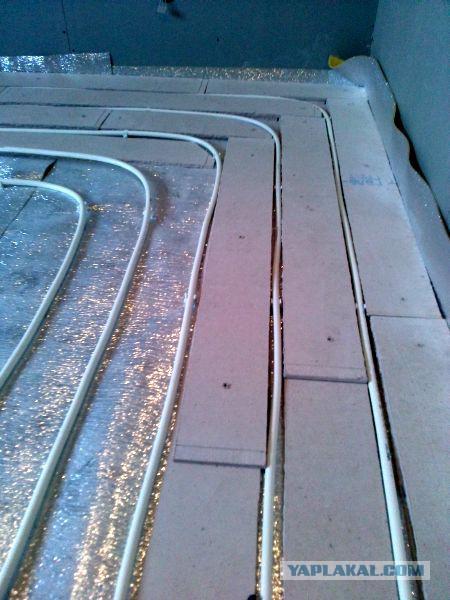
74. It turns out almost monolithic slab
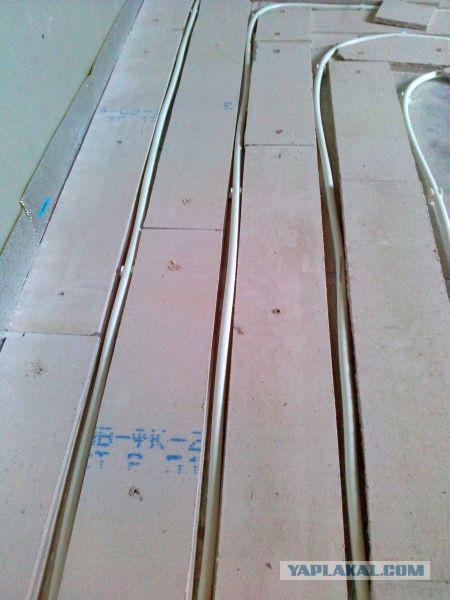
75. All the grooves fill with DSP solution or tile adhesive. We get ministyazhku low weight with good heat dissipation.
On top of the tile adhesive is laid another layer of gypsum fiber board. We get the perfect rough floor under the laminate and tile.
76. Here are 24 of the pipe so the top. They will be hidden in the wall. In the attic of a double insulation.
77. According to intelligence collector had to put here. To display the air put automatic air vent. In the photo number and loop length in meters.

78. End. Despite much controversy and dissuasion, I assembled the system itself, without any practical experience. Stacked about 1 kilometer pipe. Everything works and warm. Setup is quite complicated, but I just put everything in the middle position. Now floor temperature of 26 degrees, the temperature about 25. The power margin of 80%. Very comfortable warmth.
Be of good cheer!
Source:
As promised, today I will tell you in detail about some of the features of heating in my house, and a little about plumbing.
79 pictures.

2. First you need to pour gravel floor, or ASG

3. Expose level laser tag subfloor (level of dumping)

4. Do not forget about communication. Punched holes for sewers and water

5. After dumping the stone, stopped all the sand from the intermediate pouring some water and rammer. It is best to use a vibration plate. It took me three cars of sand.

6. Little Helper and future defenders of the house :) The sand must be level, almost like a tie.

7. The next phase insulation. For this I use Epps (extruded polystyrene) material does not become wet and keeps the monstrous load compression. He even placed under concrete slabs runways. It is worth 1440 rubles packing, 180 rubles a sheet 50 mm.

8. Puts joint to joint

9. On each side is required to make small skirting of the same material. This is the future we teploizoliruem warm floor from the wall and make the edge of the damper for possible expansion boards. It should get a "bath" of Epps

10. Ideally, you need two layers with overlapping joints, but as the load I will not be here, I decided to save.

11. Recall that the material is very flammable, so they insulate walls and especially inside buildings can not be! That's what happened on the grinder with sparks. Thirty seconds and a hole the size of a fist.

12. Epps we put masonry mesh with a mesh size of 10x10 centimeters. To it we tie the pipe

13. The point of entry to other premises isolate with special tubular heaters.

14. In place of the corrugated pipe bends

15. The conclusions sewers and running water. It is convenient to denote water colored insulators.

16. All inputs and outputs are closed again and carefully Epps zapenivaem

17. We continue to lay the pipe. It is simple enough, you can even one. But it is better with the assistant. One spins the tube, the second tie with plastic cable ties. The distance between the pipes 10 to 15 centimeters

18. Under the partitions should be laid in corrugated tube to protect against friction and load izgibayuschik

19. If the plate more than 8 meters, it is necessary to divide, to compensate for thermal expansion. I did it with the help of Epps. Can ordinary board or plywood.

20. Near the panoramic windows and outside walls of the distance between the tubes is reduced to 8-10 centimeters, to compensate for the outside temperature.

21. Under massive objects, which will not move to do a better floor. It is a place under the stove in the sauna.

22. Passage through the barrier in the ripple

23. Puts sewage pipes based on inclination of 3 centimeters per meter.

24. sewage pipes must be carefully fastened. Concrete simply will carry!

25. Withdraw all the loops in one place, where there will be manifold block. Here I have 5 loops, ie 10 pipes. And this is only the first floor. It took about 400 meters of the pipe on Valtek 16.

26. Loop over 100 meters is not recommended, because of the problems with balancing. But one loop I still got 111 meters. Therefore it is better to take the rolls of 200 meters. Joining pipes inside the screed can not. They laid there for 50 years!
There is a panoramic window, so the pipe took more than the calculated amount.

27. Getting to the assembly of pump and mixing unit. In principle, nothing complicated, but I still nakosyachil :) mixed up flow and return manifolds. Logically, that submission is to be always on top. But seeing the training video on the website of the company realized that was wrong and quickly remade. The logic of this is not clear: the mixing unit must always be left to supply overhand knot and feed the collector BELOW!
Pumping and mixing unit for underfloor heating VALTEC COMBI

28. to pick up all five circuits of the first floor.
Manifold block for hot water radiator and underfloor heating (radiant floor heating) with control valves with flow meters and manual (with optional electro-thermal actuator) shut-off valves, automatic air vent and drain. The diameter of the reservoir - 1 or 1 1/4 & quot ;. Number of outputs - from 3 to 12. The diameter of the pipes - 3/4 & quot ;, thread - external standard connection - "cone". Operating temperature of coolant - up to 90 ° C, pressure - 10 bar.
The pump-mixing unit VALTEC COMBI for preparing water underfloor heating medium with a temperature of 20 to 60 ° C is due to the mixing of the liquid return line. Regulation is carried out the two-way valve in the supply manifold and controlled thermostatic head with remote immersion sensor, which is placed at the outlet of the mixing unit. (If you use the controller heating function of the valve control is passed to him.) The balancing valve in the mixing sets the ratio of the coolant coming from the back of the line secondary circuit and primary straight line. Other key elements of the site: the bypass with bypass valve; built-in ball valve to turn off the circulation pump; automatic air vent; Insertion thermometers.
The pump Wilo Star-RS 25/4

29. They brought concrete. Ordered mixer 8 cubic meters of sand and cement mixture M-150 with plasticizers for underfloor heating. The three scattered it for half a day. Very hard!

30. The cat tried to help, but no hard boots :)

31. aligns even the next day, with spades and axes, the burrs removed as soon expose the level of difficult.

32. In the meantime, until the concrete dries, I started to build a temporary, guest bathroom.
There was a stove. The walls are very uneven.

33 Aligns wall profile and do not tell me that it is impossible to ceiling and horizontally :)

34. The level of the ceiling lift on the meter, which would have climbed shower

35. Indent from the walls of the giant. All the empty space and then fill with pieces of mineral wool. Fortunately I have a lot of waste.

36. sutured moisture-resistant gypsum fiber board is colored green. Paul has been processed rubber mastic asphalt.

37. All cavity is filled with mineral wool. It is not for the heat and sound insulation

38. Begin to mount the water supply of polypropylene. I bought a welding machine for 2000 rubles. Rental costs 500 rubles per day, 4 days will pay off. And I cook a lot of things have to :)

39. It is necessary to mount the pipe povydelyvatsya

40. As a result, so did

41. All the pipes for plasterboard, sewage, too.

42. Motley insulation is no more. Let all the water is hot :)

43. It is the ceiling, or rather his skeleton

44. Visible ventilation. It is displayed on the roof.

45. The ceiling is sheathed with plastic panels width of 30 centimeters

46. I install spotlights and deduce corrugation for ventilation

47. Paul prepared under tiles and screed. Below 150h50 board on edge, 30 cm with jumpers on her floor board 40 mm, decking, missed rubber mastic asphalt on top of soul and OSB-3 water-resistant. It Epps 50 MW and steam

48. The walls as you understand from plastic panels, because it is necessary to make a fast start and a bathroom. In the house of a family of 5 for three days washed :)

49. The final touch plastic grille for ventilation. Under the doors do not forget to leave a gap of 2-3 cm of free running air from the other rooms.

50. Getting to the cabin assembly. My wife wanted to call experts for 4000 rubles, but we all know that it is almost 20 liters of beer :)

51. Smoke manual, while like all skhoditya

52. Try on bath. Vlazit, but the place is small.

53. I collect mixer using Tibetan magic and tambourine

54. Sobral. Since the place had to take a little longer hoses 1.5 meters

55. Collect the rear and side walls. Here I had to turn on the PL. The guys helped councils and even sent pictures of their booths. Respect and uvazhuha!

56. It is alive! Everything works, radio, shower and massage. On the whole process took 3 days. Do not forget prosilikonit all the cracks!

57. The toilet is also seated.

58. Mixer. I'm 10 years old buy mixers company Calorie, China of course, but the industrial assembly. The quality is excellent and the price is democratic about 3000 rubles such feature is.

59. But the sink was not easy. Water splashes out of it.

60. It's time to do a warm floor on the second floor.
Pie floors from the bottom up:
The log is 6.5 meters by 30 centimeters, 2 meters
200x50 board on edge, 60 cm with spacers
Board 150h50 as subfloors

61. The floor must be dry! I have it aged for 3-4 months in a warm, dry, well-ventilated area. During this time, the gap increased to 1 cm, and in some places there were "helicopters" to hammer nails and tsiklyuem usual dobojnika a plane for 2000 rubles. it is enough for 100 squares.

62. In humid areas of the board handle rubber mastic asphalt. On her glue reflective vapor barrier

63. Technology takaya- Mastic warm on a hot plate (on the electrical!) To a liquid state and spread the width of the insulation board.

64. Finally, we obtain a uniform coating, protection from moisture and heat down

65. on the walls leave allowance of 7-10 cm to compensate for thermal expansion of the plate floor heating

66. On the second floor, I made a cut-out at the collector cabinet

67. The pipes go through the attic bath. She is a little below the main house. Fasten the pipe to the usual clips, pipes or electrical. They are virtually identical.

68. Puts the first loop, all of them will be 6. Installation procedure - a snail. Please be laid with a double step 36 centimeters, then the center of the tank line 15 centimeters. Bedroom optimally.

69.

70. The distance between the pipes 36 cm with the width of the clip.

71. The return line from the center of the cochlea. The photo shows pruzhinka- jig for folding in difficult places. If the pipe to bend, have to do all over again, and throw the pipe. All the 100 meters!

72.

73. When all the pipes are laid in between two layers of stacked strips of gypsum fiber board (gypsum fiber sheet) can not lay down a simple drywall!

74. It turns out almost monolithic slab

75. All the grooves fill with DSP solution or tile adhesive. We get ministyazhku low weight with good heat dissipation.
On top of the tile adhesive is laid another layer of gypsum fiber board. We get the perfect rough floor under the laminate and tile.

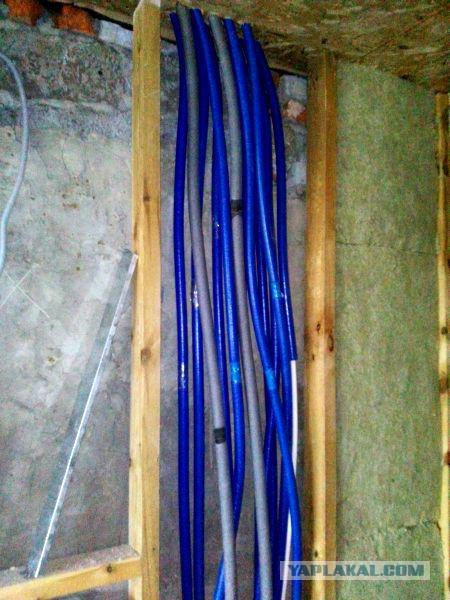
76. Here are 24 of the pipe so the top. They will be hidden in the wall. In the attic of a double insulation.

77. According to intelligence collector had to put here. To display the air put automatic air vent. In the photo number and loop length in meters.

78. End. Despite much controversy and dissuasion, I assembled the system itself, without any practical experience. Stacked about 1 kilometer pipe. Everything works and warm. Setup is quite complicated, but I just put everything in the middle position. Now floor temperature of 26 degrees, the temperature about 25. The power margin of 80%. Very comfortable warmth.
Be of good cheer!

Source: