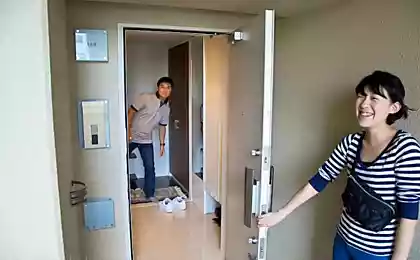
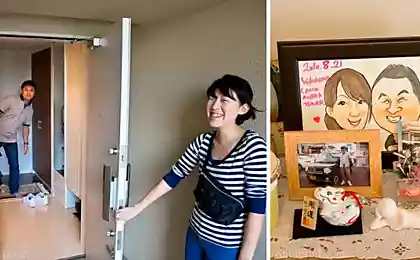
908
How do I insulate a loggia
In general, the background is as follows:
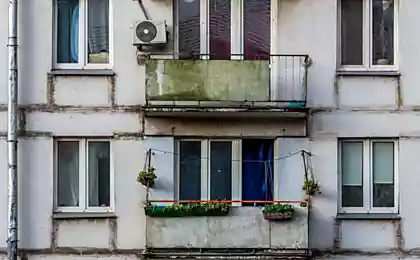
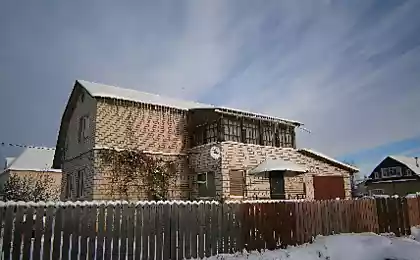
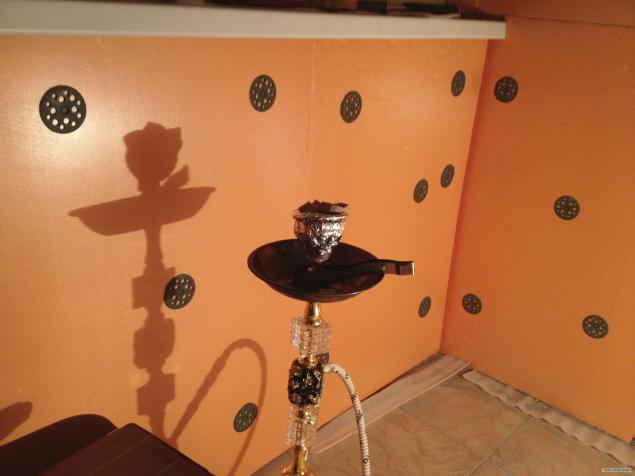
In my apartment I have a favorite place - loggia, where after work, I sit with a coffee and smoke a hookah, reading news and PL on the Internet.
Initially, when the apartment repairs done by the hired Tajiks were asked to warm a loggia. To this end, the foreman offered to make on the balcony floor heating and glue wall penofolom that, according to him was to ensure a comfortable temperature on the balcony at any time of the year. Also, the balcony we put good windows. While repairs to the apartment was made from scratch, it was a lot of work, technologies for repair I do not own and control all could not. That is why, with the onset of the first frost, I found that sucks warmed balcony and sit on it in the cold, it was very uncomfortable. Moreover, floor heating can not properly heat the tiles and just spent electricity. Of all the gaps in the balcony very cool barrel.
On the balcony began to form things that are simply dumped in the corner and spoils the appearance that led to the idea that there just needs a wardrobe, as a small apartment, and a lot of things do not fit in the closet.
As a result, a little reflection, I have decided to slightly increase the useful area of the apartment and balcony insulated do.
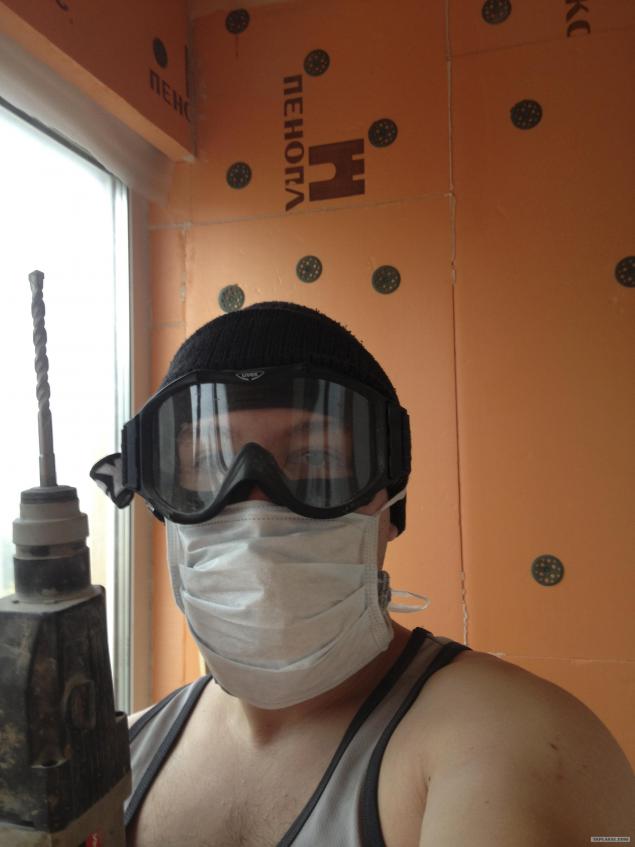
I have to say - I work in the IT and tools to this in the hands of almost held. Maybe in the process of warming have been mistakes.
Will be 49 photos.
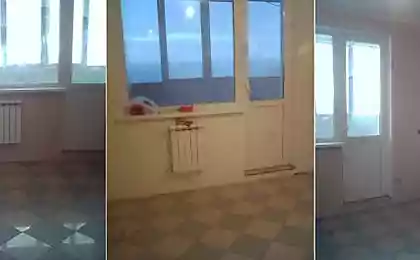
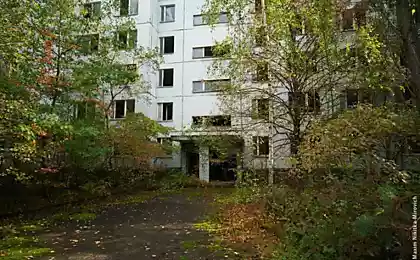
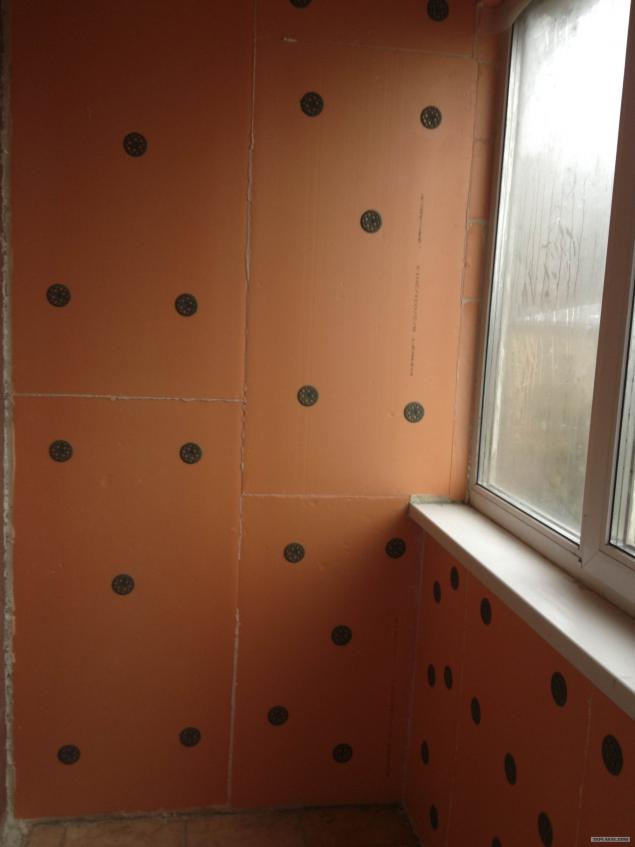
Loggia is a rectangular area. Two walls on each side - one to the neighbors, the other - in the room, the capital.
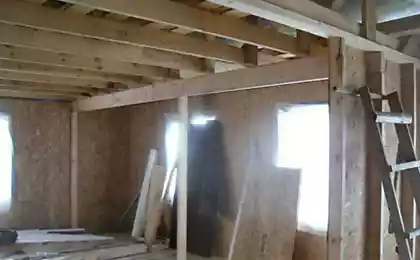
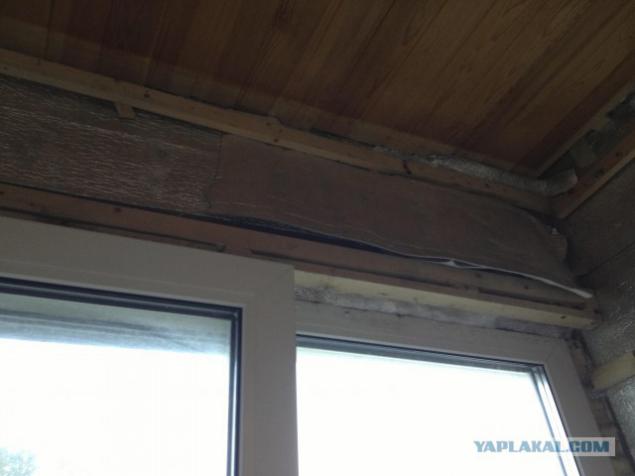
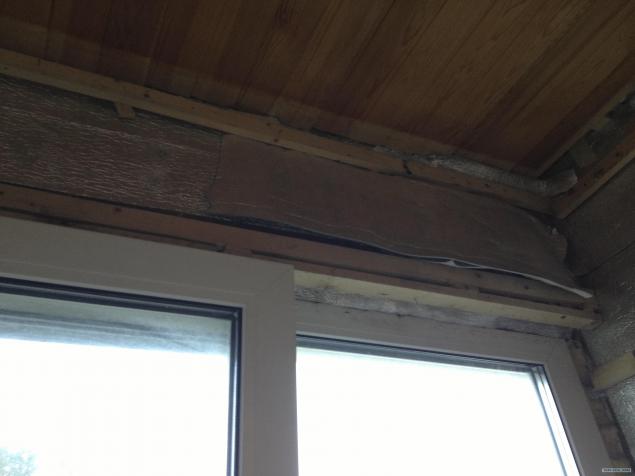
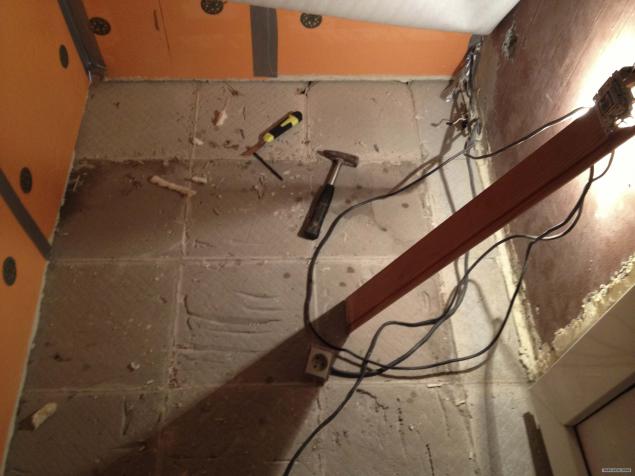
For a start I began to dismantle the old boards, which was in good condition. The only thing that the builders ended klyamery (not buy fate was probably at a cost of 50 rubles. Over 100 pieces), they began to beat battens to the guides in the slot. Unstick it, while taking care not to damage, it was very difficult. Here are some warming appeared before my eyes - super quality!
1.
Loggia is a rectangular area. Two walls on each side - one to the neighbors, the other - in the room, the capital.
For a start I began to dismantle the old boards, which was in good condition. The only thing that the builders ended klyamery (not buy fate was probably at a cost of 50 rubles. Over 100 pieces), they began to beat battens to the guides in the slot. Unstick it, while taking care not to damage, it was very difficult.
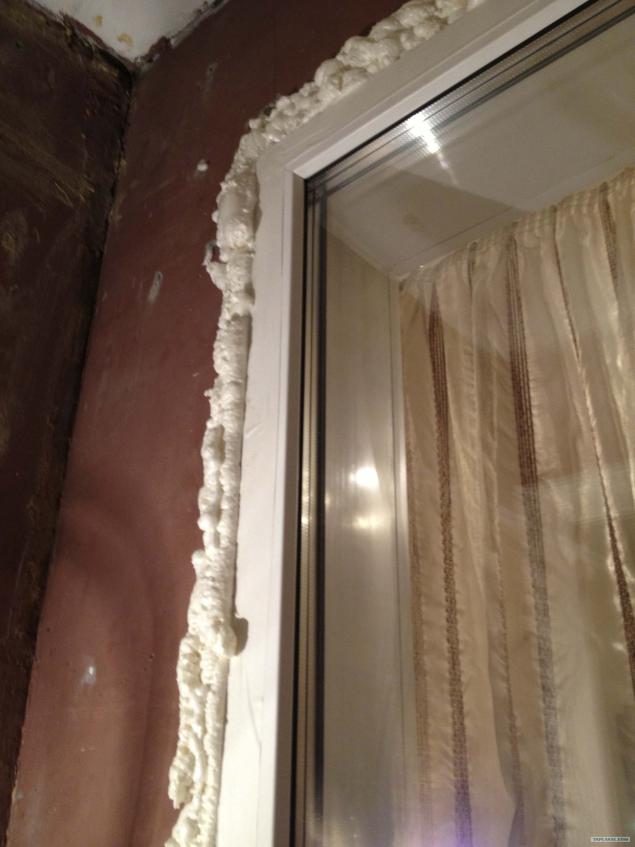
Next, I tore all the bunk and began to froth seams. Just want to give some advice - buy a gun for foam - is worth a penny, and the benefits and savings of nerves - in a million.
PS: By the end of the repair learned fine froth, so as not to cut the foam and then 80%.
ZZY: Foam is never too much))
ZZZY: They say there are winter foam with toluene, which erodes Penoplex. It is not necessary to use, but I have not seen such.
3.
4.
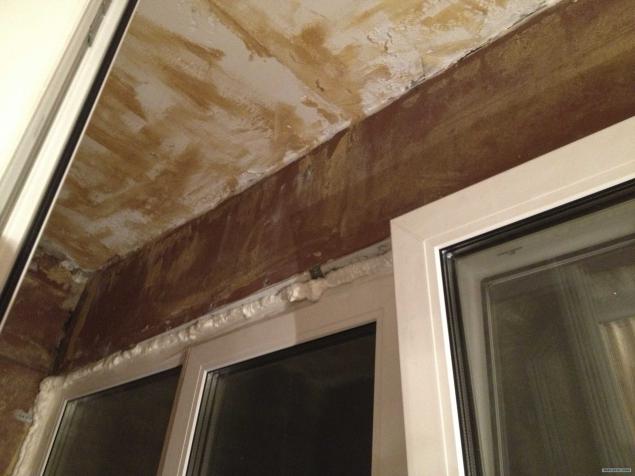
Cut off the residue foam construction knife.
5.
6.
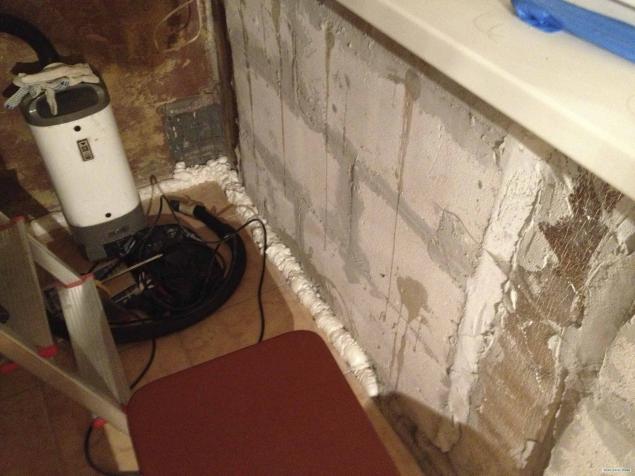
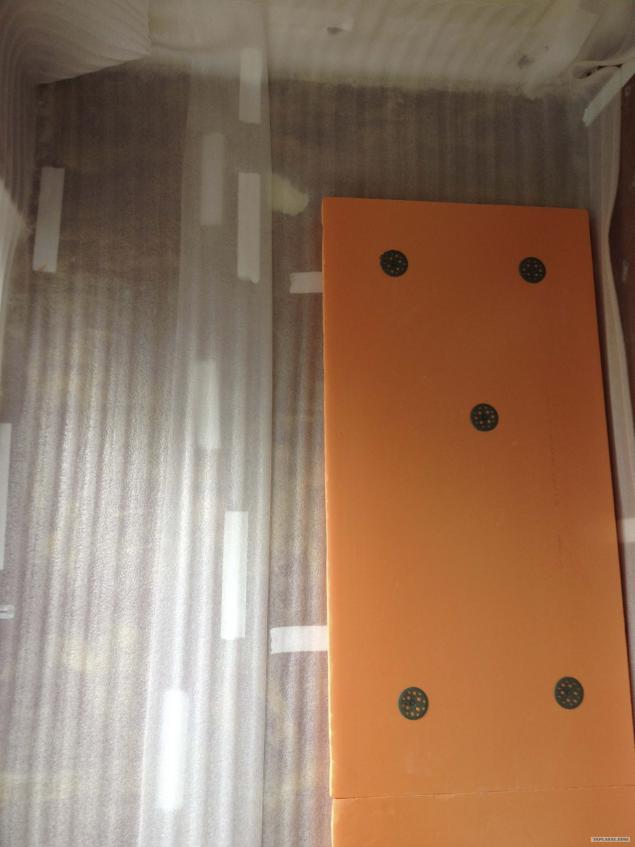
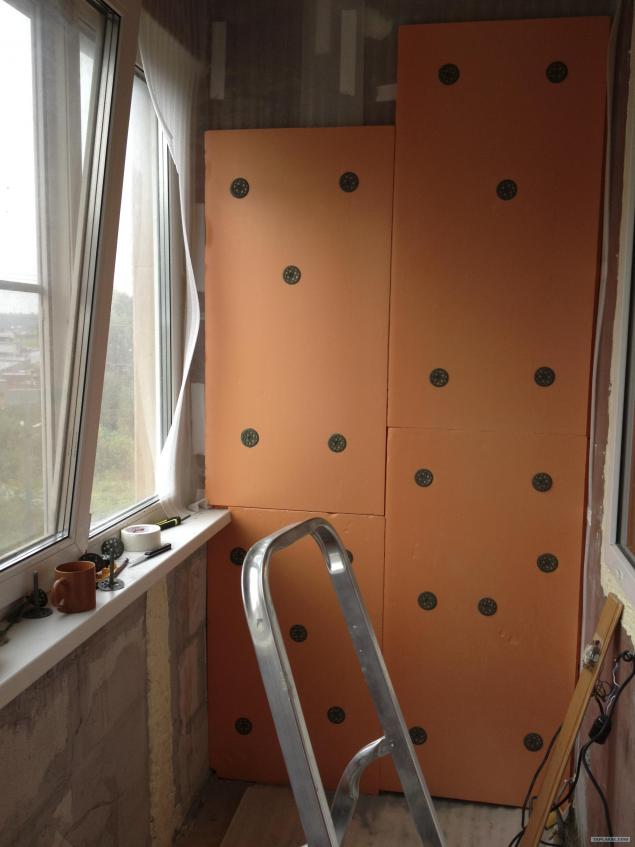
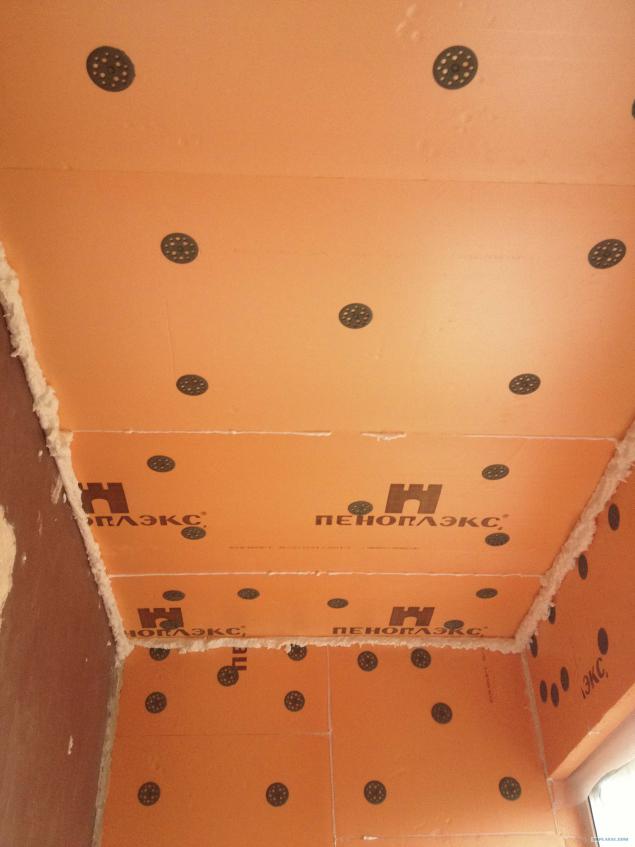
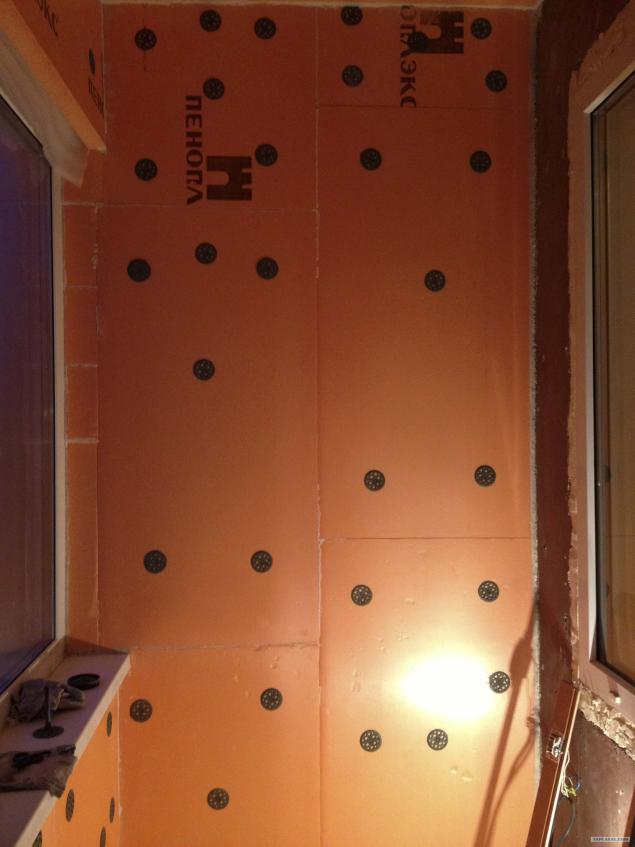
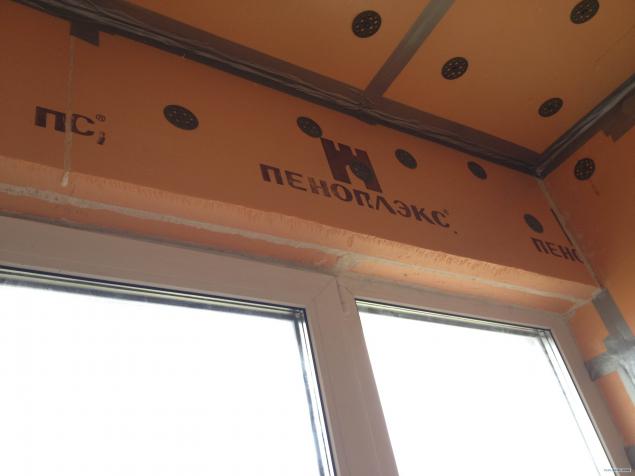
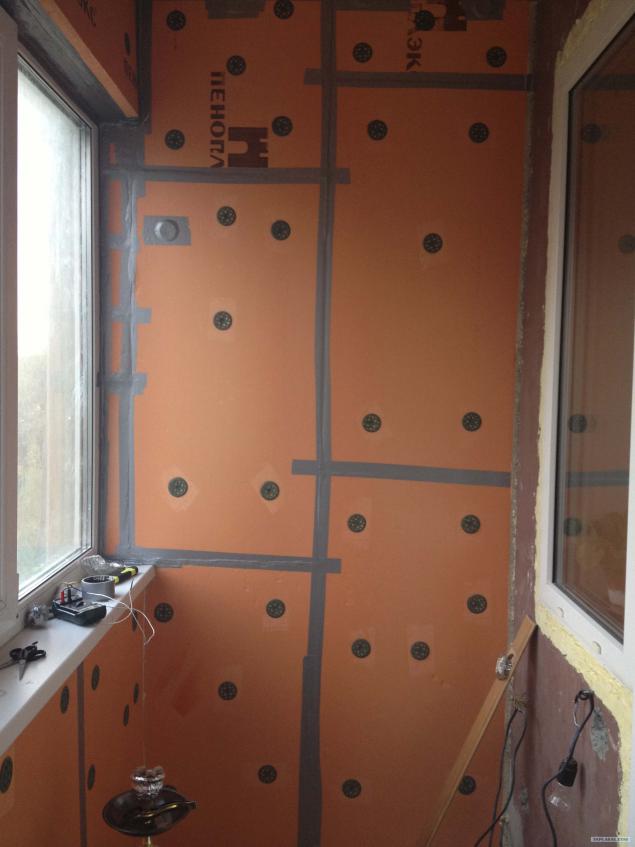
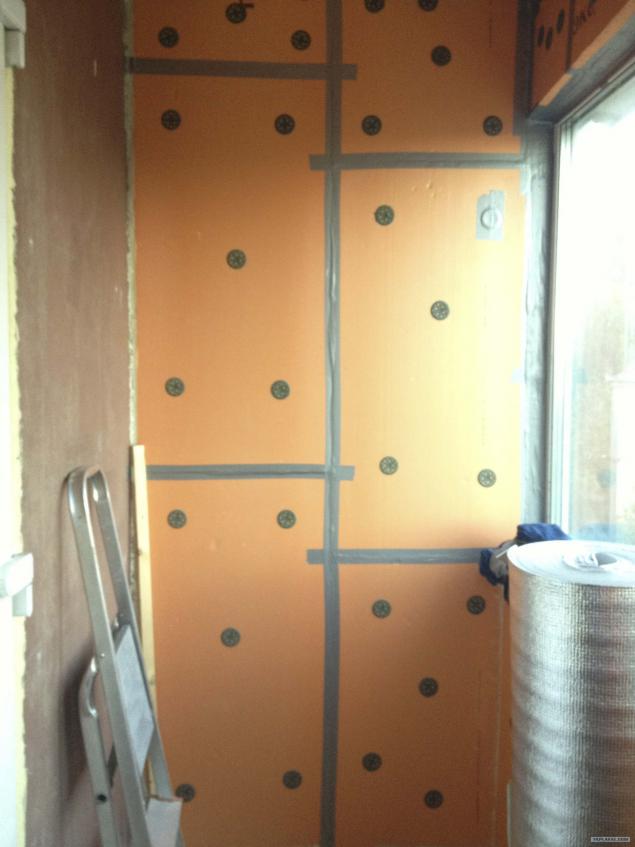
Next, I go to the market and buy - Penoplex, 5 cm thick, the substrate 3 mm penofol foil - 3 mm. Just buy mushrooms for fixing Penoplex. Mushrooms special plastic to avoid cold bridges.
By the way, I want to see that kind of Penoplex can be glued on the foam and glue. I did not try, but if I'm doing now repairs had to experiment - as the perforate wall under mushrooms is very dreary, noisy and dusty job.
I certainly still do not know whether the substrate between the wall and Penoplex, I think not, but I still did. In principle, Penoplex does not absorb moisture, and between the wall and the stove is better not likely to leave anything. But I still wanted to support, once purchased.
PS: Please take into account that only the insulated walls that are cold, that is, the border of street, neighbors and so on. Not insulated walls that border the kitchen, because through them the balcony enters the heat.
7.

The substrate is pasted to the walls in the double-sided tape. Then attached a plate mushrooms. Plates are fixed slot in the groove when the groove did not coincide, that is, it turns out that the connected part 2 without the groove, I cut with a knife groove - so you zapenit joint.
8.
I make the first wall - I have to say, I cut knife plate construction of the railway line on the floor. In principle, you could, but sometimes get really broken sections. In short, as I understood - the less bent blade - the better slice. Ideally, it is necessary to take a slim and rigid blade. I get exhausted to cut the plate relatively thin and flexible.
9.
10.
11.
12.
I am a private person. The crossbow. )))
When the drill ceiling dohrena garbage flies all over her face. It was only later I thought up to use a vacuum cleaner. When the first hole drilled in the ceiling - ate plenty of dust.
13.
That, by the way, and my fighting friend. Neubivaemy comrade fell on the tile 2 times - very much alive.
14.
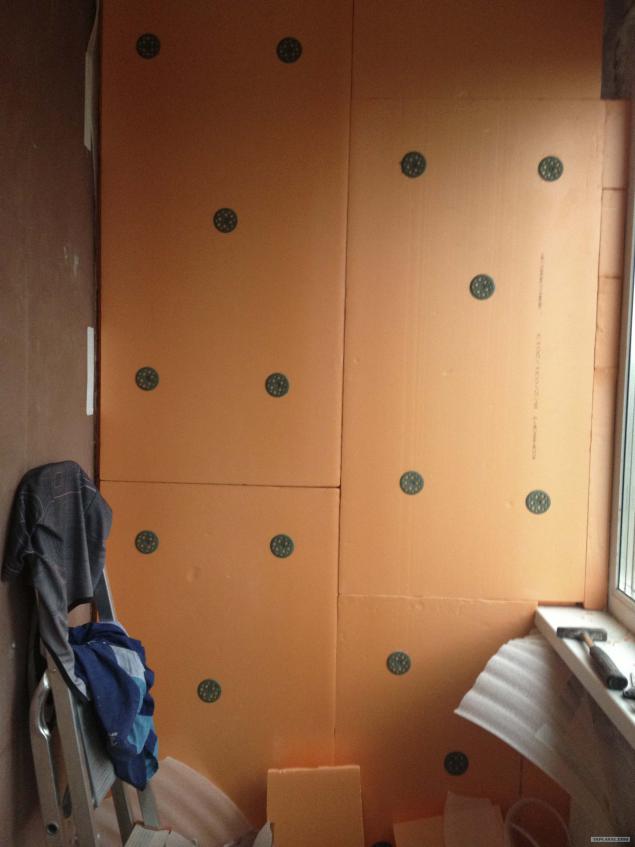
All joints between slabs I thoroughly propenivayu.
By the way, I read that before you put the plate - propenivayut groove. Perhaps it would be better, I did not check.
15.
16.
17.
18.
19.
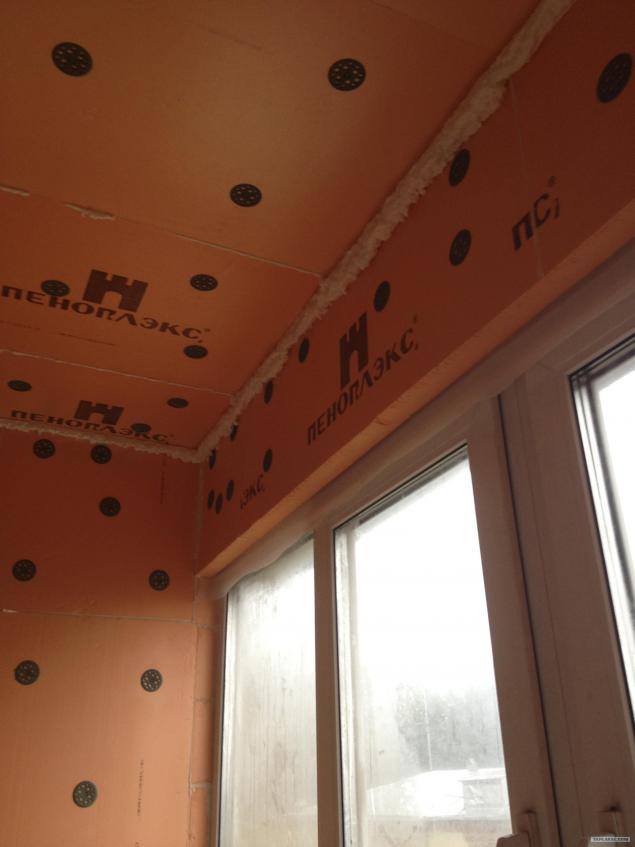
By the way, it is possible, I think, this step does not do - but I thought it will not be superfluous - I taped all joints between the slabs reinforced with tape.
20.
21.
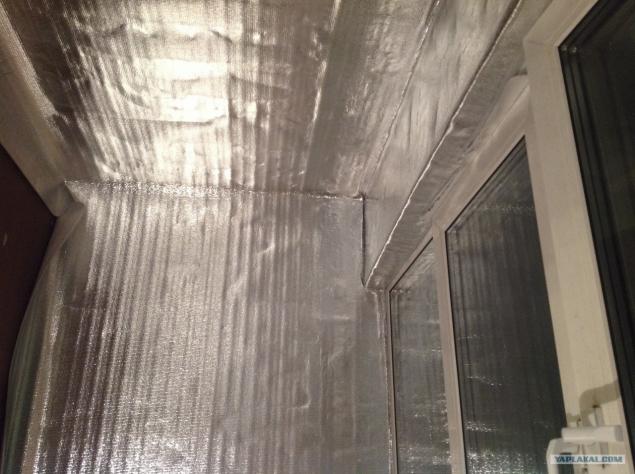
Once he finished with plates - my wife and I began to glue the foil penofol. Hell lesson, I tell you. We tried to glue it without tears (Ural Hello Anton!), That is, the letter P 2 walls and ceiling. In fact, one could go in several ways:
The first way - glue on double-sided tape. I lasted one night this design.
Then everything fell off and sagged. Cons - not convenient to adjust, if pokleit uneven.
The second way - at the time of glue - glue is water-based. I tried, and then read that winter will Achtung all fall off. 3 And he went through.
Third Way - glue on spec. glue. Damn, among the variety of adhesives, I found only one that glues polyethylene (penofol) to the expanded polystyrene (Penoplex) not corroding last.
Be careful - many adhesives corrode polystyrene, yes yes. I found only one glue that sticks together the case - called Titibond red. Do not think for advertising, but I only found it. It is red - yellow corrode polystyrene with a bang.
Way fourth, less zadrotskie. Gluing is not necessarily straight continuously, can be glued in large chunks. At the same time, then will keep penofol crate lining, so even if the crappy pasted, it will not fall off.
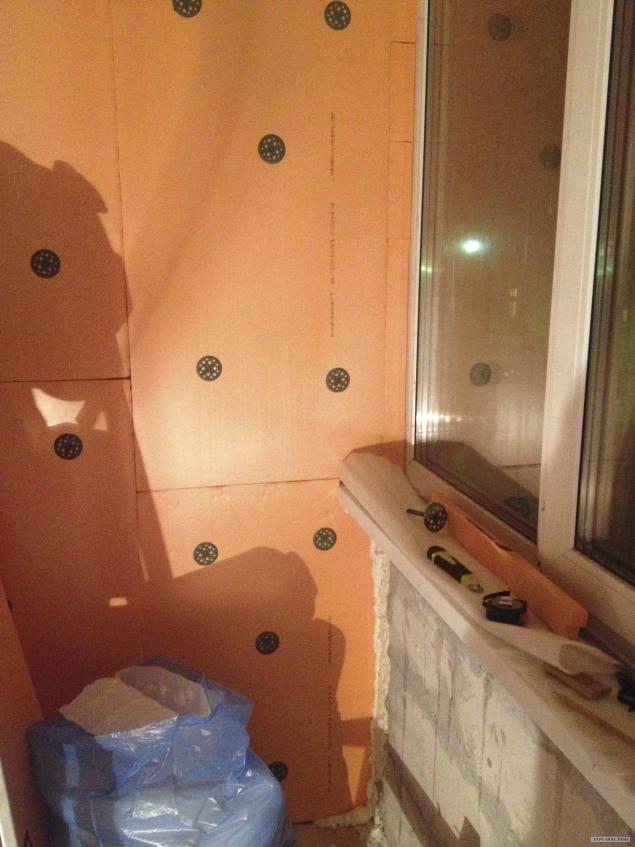
PS: it is necessary to glue penofol foil inside the premises, joint to joint, joints prokleivat foiled tape. To create the room thermos effect.
22.
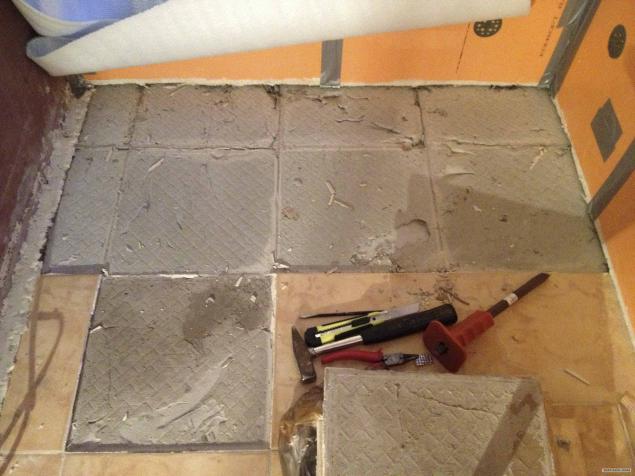
When I almost started to install the lining, I, sit down, smoke hookah and think about it, come to the conclusion that the tiles on the balcony on the floor - a source of heat. Warm floor, which is under it, his task is not mastered even quite warm weather, warming balcony downstairs neighbor. So I decided to - we should get rid of the tiles. I took off the tile and tile adhesive missed all the hollows.
23.
24.
All is good, but it was one thing.
My balcony door opens into the balcony and the distance from the floor to the bottom of the door was about 5.6 cm. This did not allow me to make the floor on joists. And I decided to take a desperate step.
Generally polystyrene withstand very high loads, if the pressure on him within a large plane. In short, if you press your finger on it, it will remain promnetsya trail. But if you put a book on it and stand on it - is on foamed polystyrene will be over.
Predestined comments, I know that because you can not do floors. But in the end everything turned out fine. Apparently, because the balcony floor area of 3 square.
I went to the market and bought a pack of Penoplex 3 cm thick, notched trowel (or whatever his name is), and glue for polystyrene. I made solution and began to glue polystyrene to the floor.
Once all is well propenyl. Other choice I had.
25.
26.

27.
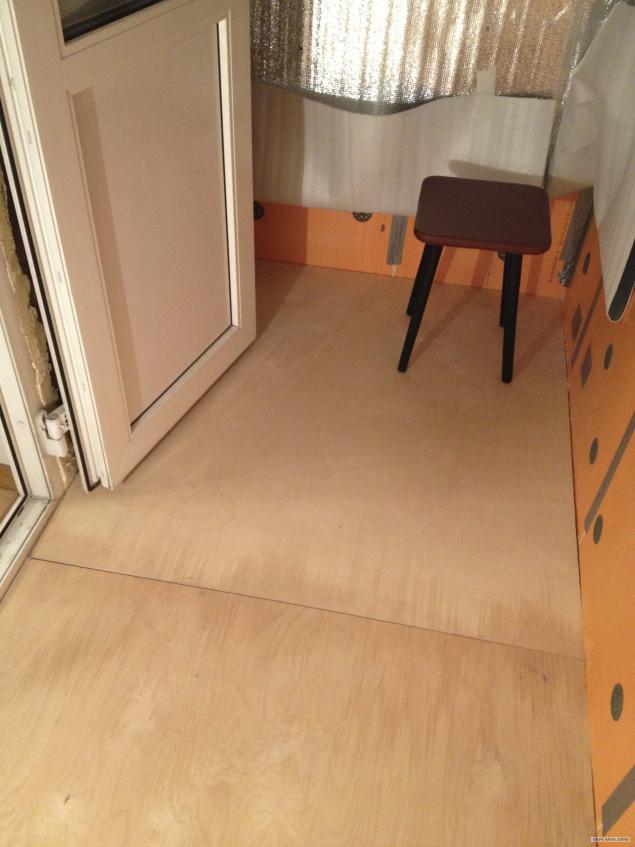
Then I bought a polished plywood 1.2 cm, handled its funds from the mold and placed directly on the polystyrene. Then, prishurupil plywood to concrete through the styrofoam. The joints between plywood treated with a special sealant for wood.
You know, it came out great - no creaks, no wobbles, no flex. In short, the class.
I celebrated my birthday with friends on the balcony smoking a hookah. Paul did not respond to it at the same time the presence of 5 people.
29.
30.
31.

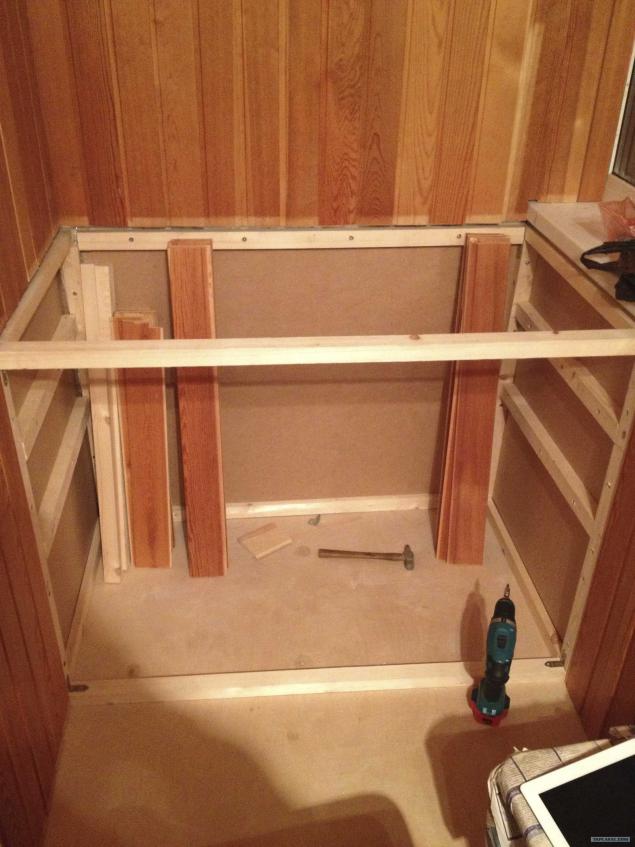
Then I started to collect cubicle and do lathing for lining. Carpenter from me worthless, no experience, so perhaps piled too much.
By the way, you take photographs of the walls, where the mushrooms are located, and then mark them with a marker. It is to them not accidentally vsverlitsya or not to put the guide battens.
32.
33.
Disassembled chaos with wires, all the wires laid in the corrugation. 2 sockets, 1 switch and 1 light.
34.

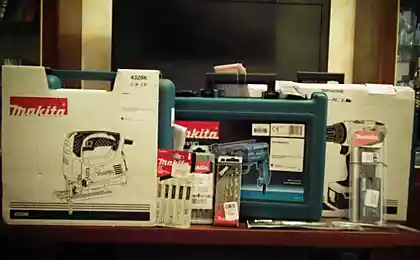
I made under the framework of the closet and began to sheathe the balcony clapboard. I have to say - purchase electric jigsaw - in our case irreplaceable thing. Wall paneling, it seemed to me, the best thing to fix klyamerami and small screws using a screwdriver. Small hammer nails are not comfortable, and the screwdriver to tighten shurupchiki convenient, reliable and fast.
Since I had a lining, sheathing has become to her. But prokosyachil - began to cut long boards, subject to cabinet. In fact, it was necessary to start with the walls, where the boards lining the longest - since that is not circumcised so, somewhere a couple of centimeters promazhesh - well - spoil a long board, and has nothing to replace.
35.

36.
37.
38.
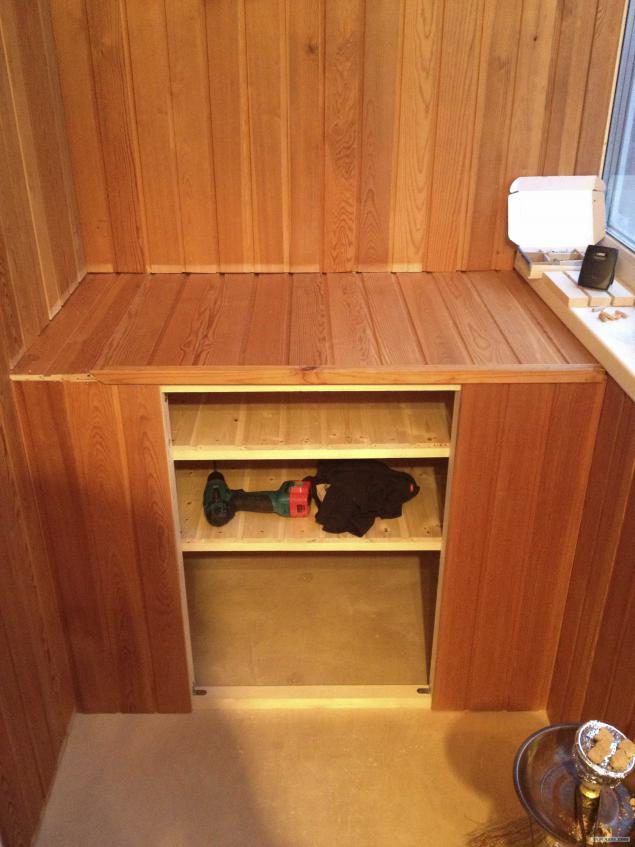
In the end, I ran out of long boards on the most prominent wall. Some were spoiled for dismantling, some with holes under the dryer. Most bummer is that the lining I had varnished and, in a few years, faded, so if you buy a new, white, color is very difficult to get there. It was decided to buy a pack of lining, and treat it with varnish, placed in the middle of the wall that not much was evident.
39.
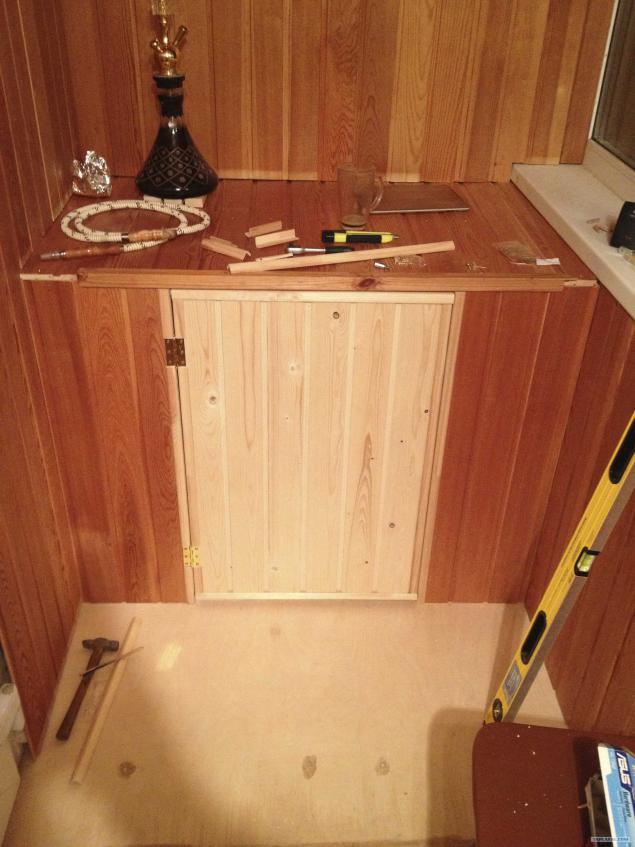
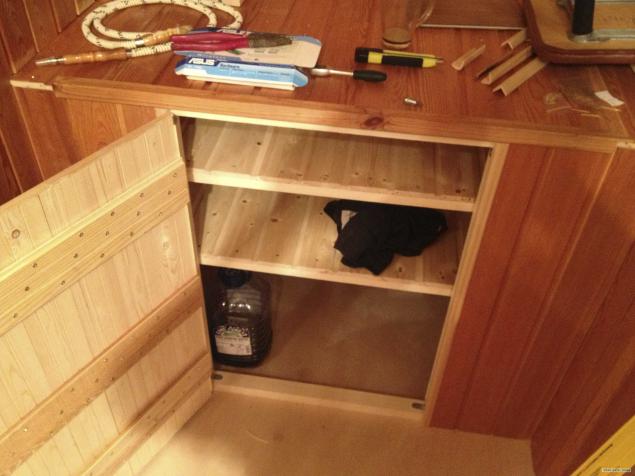
The door to the cabinet made from the remains of a white lining. That is, it turned out that the white door and the wall, as it were complementary to each other.
By the way, little corners on the door is attached finishing nails, and that the tree does not crack, cut one nail hat put in screwdriver and drill holes first, and only then hammered to a new nail. Maybe someone, this method is useful.
40.
41.
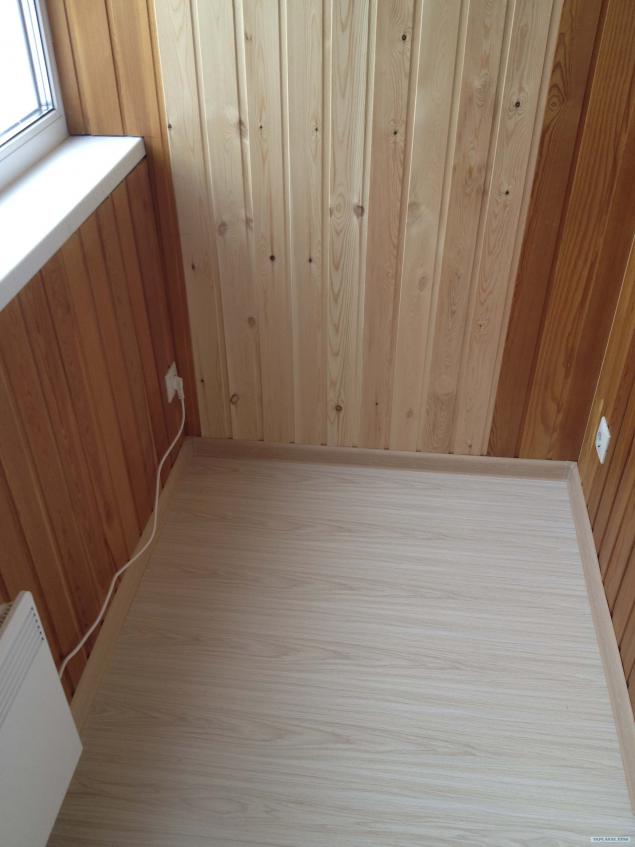
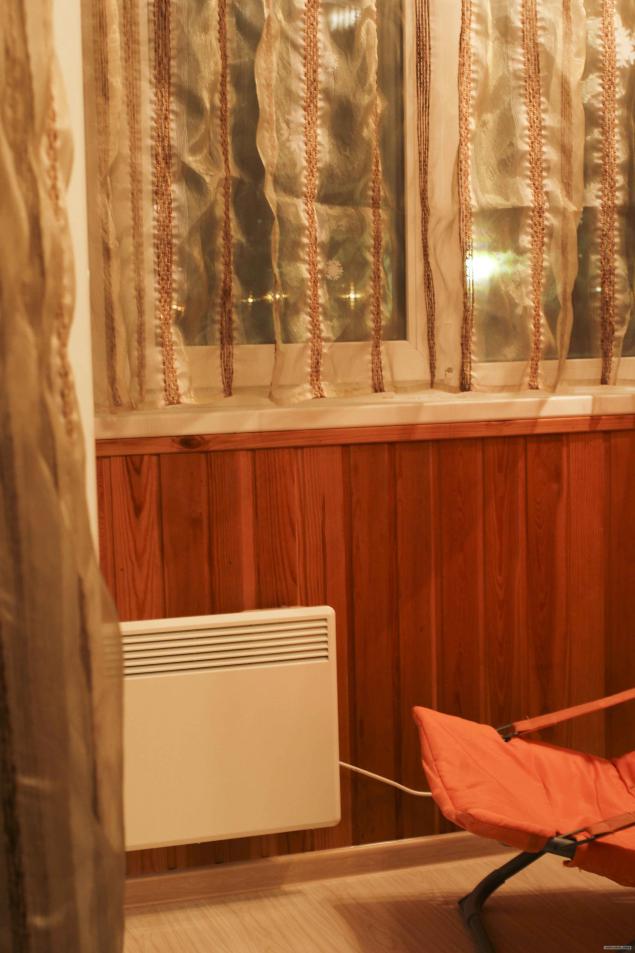
White bed on the floor laminate flooring and skirting screwed. Just bought a heater at 750 Watts.
42.
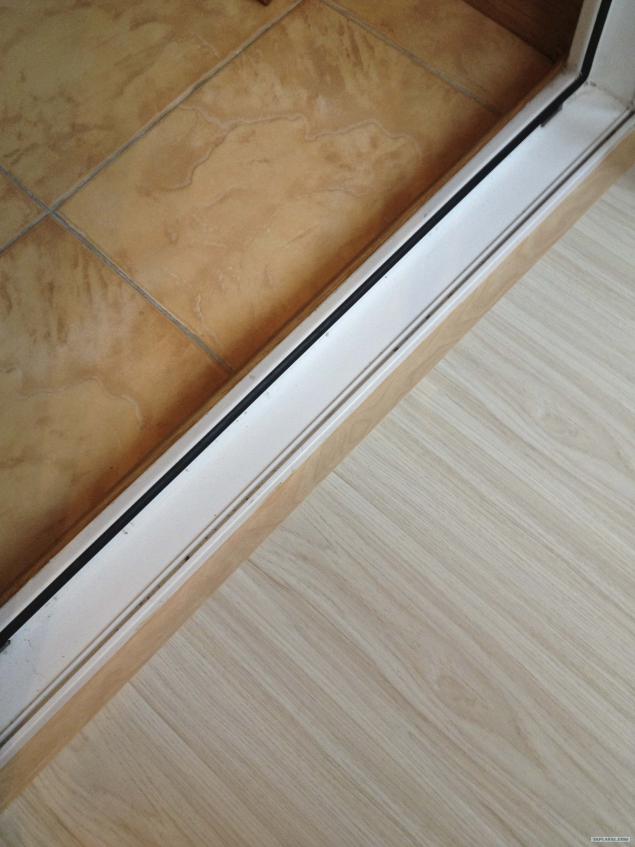
The gap between the laminate and a balcony box, I closed up with a piece of skirting caps kabelkanala, breaking off bracket 1 side. I glued cap double-sided tape.
43.
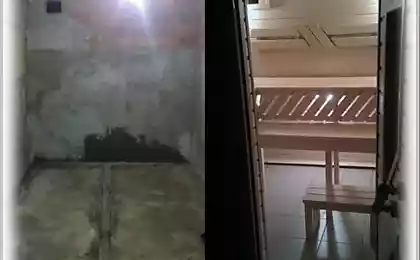
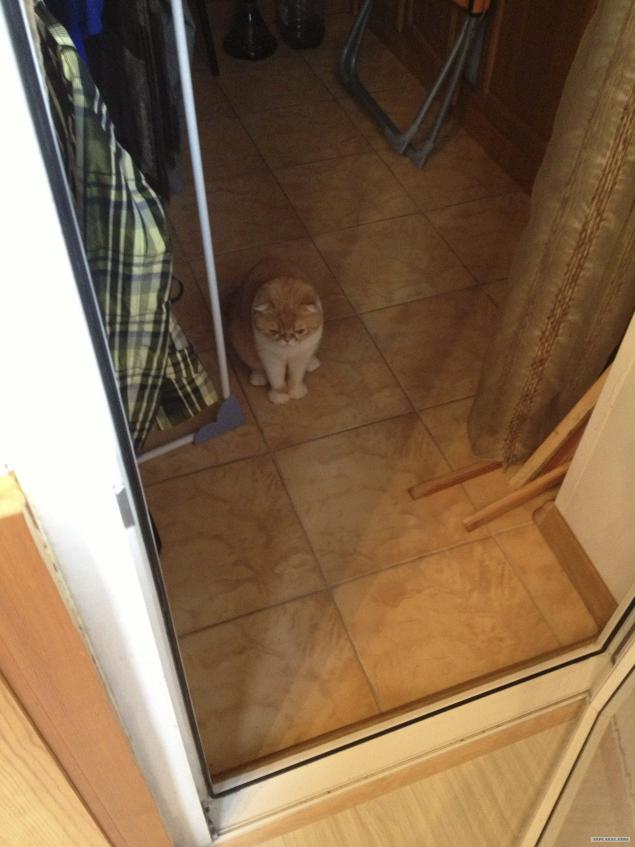
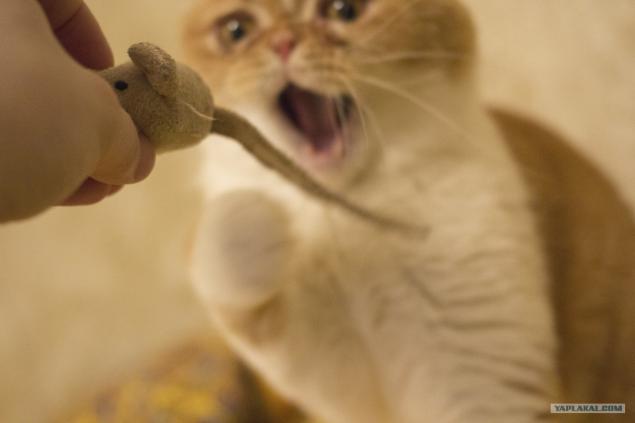
Comrade cat come to check work.
In connection with the repair of his for a long time it was not allowed on the balcony, and he was very upset about it :)
44.
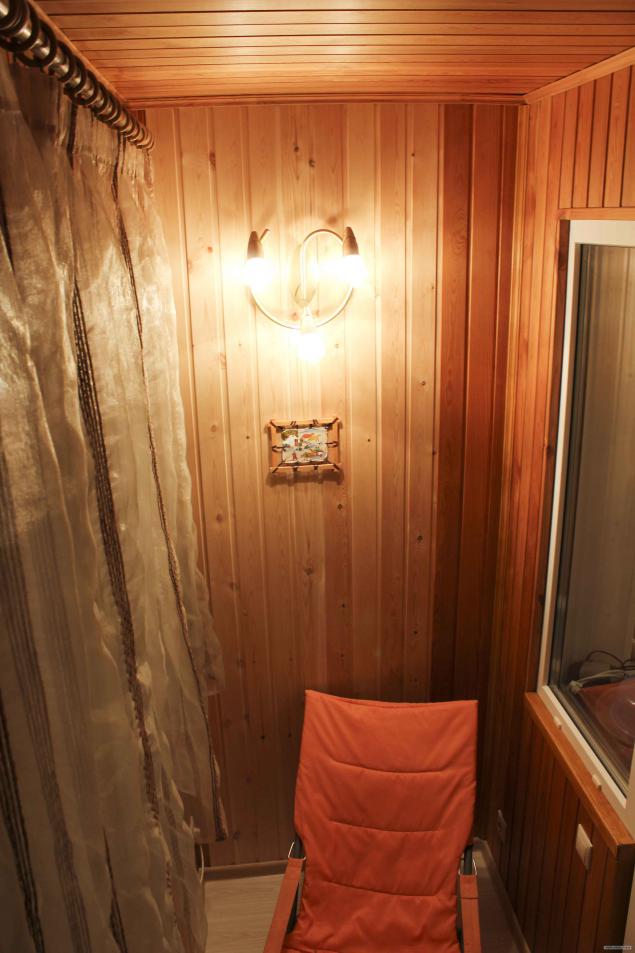
Hung curtains, I attached a corner - that's happened since:
45.
46.
This retractable clothes dryer when it :)
47.
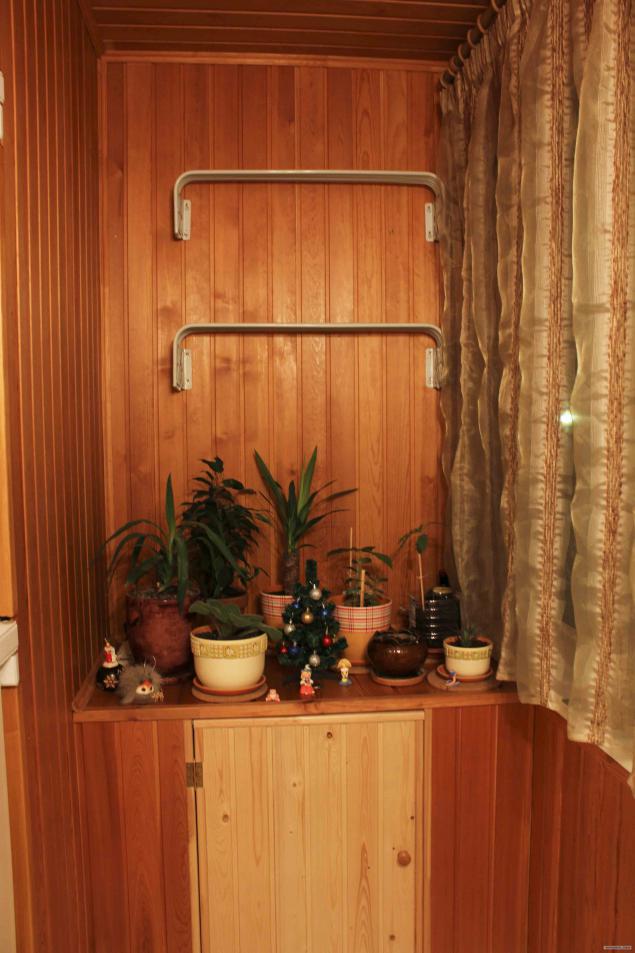
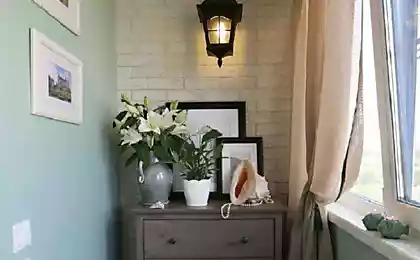
And in my closet now stand flowers and toys that the wife makes plasticine :)
48.
![]()
That's all, as a result, the temperature of -20 on the street, 17 on the balcony, and it is turned off the heater.
The temperature in the cabinet to 3 degrees lower than on the balcony, it's good for storage of vegetables and pickles.
At home we have very stoked, and now, with the door open from the balcony is a little cool air, making homes more comfortable temperature!
There will be questions - ask!
All good!
On the Rights of kotovtornika))))
49.
Source:
In my apartment I have a favorite place - loggia, where after work, I sit with a coffee and smoke a hookah, reading news and PL on the Internet.
Initially, when the apartment repairs done by the hired Tajiks were asked to warm a loggia. To this end, the foreman offered to make on the balcony floor heating and glue wall penofolom that, according to him was to ensure a comfortable temperature on the balcony at any time of the year. Also, the balcony we put good windows. While repairs to the apartment was made from scratch, it was a lot of work, technologies for repair I do not own and control all could not. That is why, with the onset of the first frost, I found that sucks warmed balcony and sit on it in the cold, it was very uncomfortable. Moreover, floor heating can not properly heat the tiles and just spent electricity. Of all the gaps in the balcony very cool barrel.
On the balcony began to form things that are simply dumped in the corner and spoils the appearance that led to the idea that there just needs a wardrobe, as a small apartment, and a lot of things do not fit in the closet.
As a result, a little reflection, I have decided to slightly increase the useful area of the apartment and balcony insulated do.
I have to say - I work in the IT and tools to this in the hands of almost held. Maybe in the process of warming have been mistakes.
Will be 49 photos.

Loggia is a rectangular area. Two walls on each side - one to the neighbors, the other - in the room, the capital.
For a start I began to dismantle the old boards, which was in good condition. The only thing that the builders ended klyamery (not buy fate was probably at a cost of 50 rubles. Over 100 pieces), they began to beat battens to the guides in the slot. Unstick it, while taking care not to damage, it was very difficult. Here are some warming appeared before my eyes - super quality!
1.

Loggia is a rectangular area. Two walls on each side - one to the neighbors, the other - in the room, the capital.
For a start I began to dismantle the old boards, which was in good condition. The only thing that the builders ended klyamery (not buy fate was probably at a cost of 50 rubles. Over 100 pieces), they began to beat battens to the guides in the slot. Unstick it, while taking care not to damage, it was very difficult.
Next, I tore all the bunk and began to froth seams. Just want to give some advice - buy a gun for foam - is worth a penny, and the benefits and savings of nerves - in a million.
PS: By the end of the repair learned fine froth, so as not to cut the foam and then 80%.
ZZY: Foam is never too much))
ZZZY: They say there are winter foam with toluene, which erodes Penoplex. It is not necessary to use, but I have not seen such.

3.

4.

Cut off the residue foam construction knife.
5.

6.

Next, I go to the market and buy - Penoplex, 5 cm thick, the substrate 3 mm penofol foil - 3 mm. Just buy mushrooms for fixing Penoplex. Mushrooms special plastic to avoid cold bridges.
By the way, I want to see that kind of Penoplex can be glued on the foam and glue. I did not try, but if I'm doing now repairs had to experiment - as the perforate wall under mushrooms is very dreary, noisy and dusty job.
I certainly still do not know whether the substrate between the wall and Penoplex, I think not, but I still did. In principle, Penoplex does not absorb moisture, and between the wall and the stove is better not likely to leave anything. But I still wanted to support, once purchased.
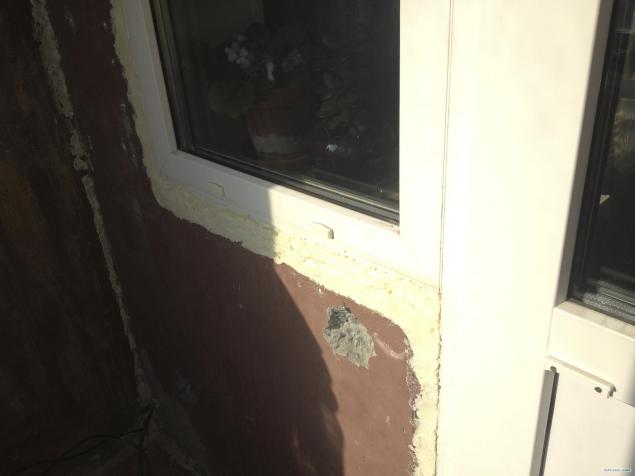
PS: Please take into account that only the insulated walls that are cold, that is, the border of street, neighbors and so on. Not insulated walls that border the kitchen, because through them the balcony enters the heat.
7.

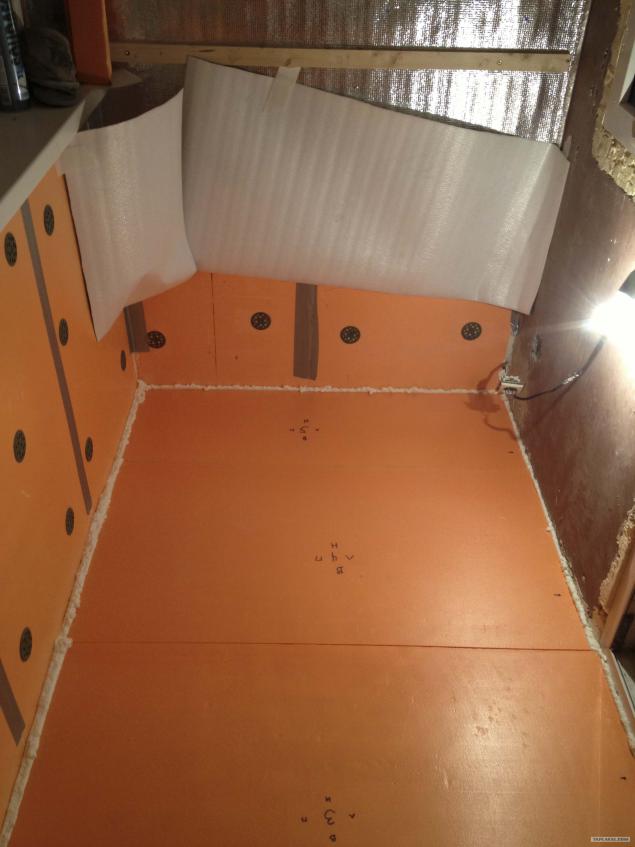
The substrate is pasted to the walls in the double-sided tape. Then attached a plate mushrooms. Plates are fixed slot in the groove when the groove did not coincide, that is, it turns out that the connected part 2 without the groove, I cut with a knife groove - so you zapenit joint.
8.

I make the first wall - I have to say, I cut knife plate construction of the railway line on the floor. In principle, you could, but sometimes get really broken sections. In short, as I understood - the less bent blade - the better slice. Ideally, it is necessary to take a slim and rigid blade. I get exhausted to cut the plate relatively thin and flexible.
9.

10.

11.

12.

I am a private person. The crossbow. )))
When the drill ceiling dohrena garbage flies all over her face. It was only later I thought up to use a vacuum cleaner. When the first hole drilled in the ceiling - ate plenty of dust.
13.

That, by the way, and my fighting friend. Neubivaemy comrade fell on the tile 2 times - very much alive.
14.

All joints between slabs I thoroughly propenivayu.
By the way, I read that before you put the plate - propenivayut groove. Perhaps it would be better, I did not check.
15.

16.

17.

18.

19.

By the way, it is possible, I think, this step does not do - but I thought it will not be superfluous - I taped all joints between the slabs reinforced with tape.
20.

21.

Once he finished with plates - my wife and I began to glue the foil penofol. Hell lesson, I tell you. We tried to glue it without tears (Ural Hello Anton!), That is, the letter P 2 walls and ceiling. In fact, one could go in several ways:
The first way - glue on double-sided tape. I lasted one night this design.
Then everything fell off and sagged. Cons - not convenient to adjust, if pokleit uneven.
The second way - at the time of glue - glue is water-based. I tried, and then read that winter will Achtung all fall off. 3 And he went through.
Third Way - glue on spec. glue. Damn, among the variety of adhesives, I found only one that glues polyethylene (penofol) to the expanded polystyrene (Penoplex) not corroding last.
Be careful - many adhesives corrode polystyrene, yes yes. I found only one glue that sticks together the case - called Titibond red. Do not think for advertising, but I only found it. It is red - yellow corrode polystyrene with a bang.
Way fourth, less zadrotskie. Gluing is not necessarily straight continuously, can be glued in large chunks. At the same time, then will keep penofol crate lining, so even if the crappy pasted, it will not fall off.
PS: it is necessary to glue penofol foil inside the premises, joint to joint, joints prokleivat foiled tape. To create the room thermos effect.
22.

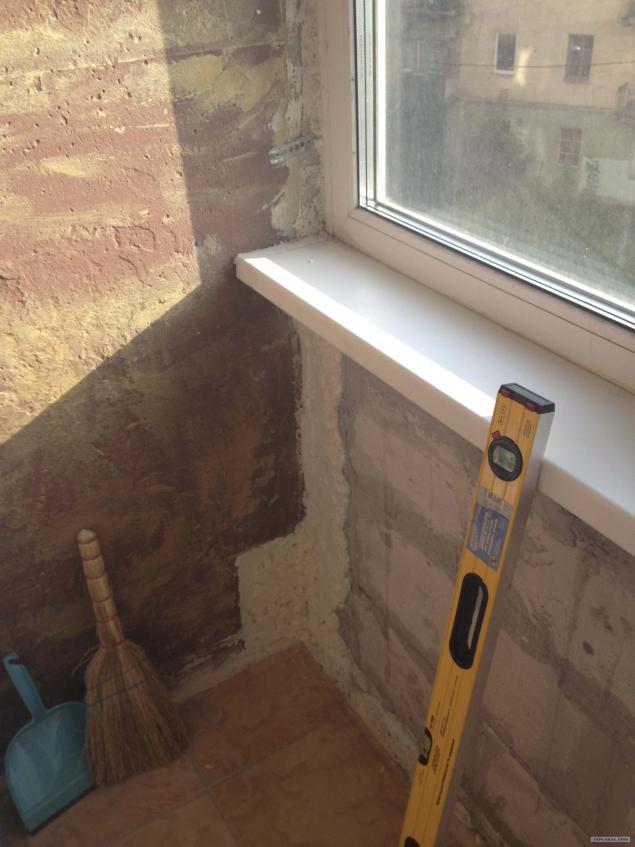
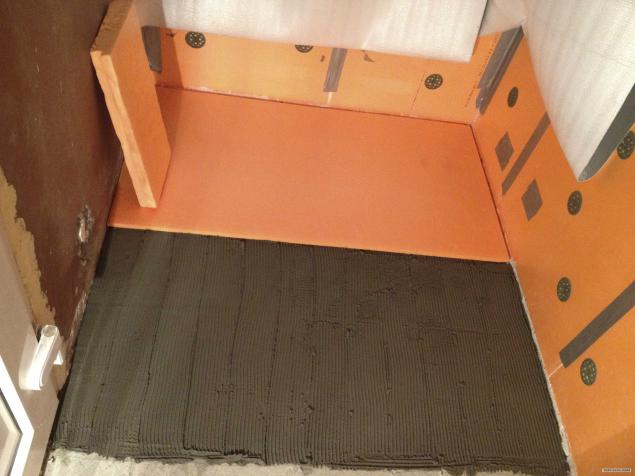
When I almost started to install the lining, I, sit down, smoke hookah and think about it, come to the conclusion that the tiles on the balcony on the floor - a source of heat. Warm floor, which is under it, his task is not mastered even quite warm weather, warming balcony downstairs neighbor. So I decided to - we should get rid of the tiles. I took off the tile and tile adhesive missed all the hollows.
23.

24.

All is good, but it was one thing.
My balcony door opens into the balcony and the distance from the floor to the bottom of the door was about 5.6 cm. This did not allow me to make the floor on joists. And I decided to take a desperate step.
Generally polystyrene withstand very high loads, if the pressure on him within a large plane. In short, if you press your finger on it, it will remain promnetsya trail. But if you put a book on it and stand on it - is on foamed polystyrene will be over.
Predestined comments, I know that because you can not do floors. But in the end everything turned out fine. Apparently, because the balcony floor area of 3 square.
I went to the market and bought a pack of Penoplex 3 cm thick, notched trowel (or whatever his name is), and glue for polystyrene. I made solution and began to glue polystyrene to the floor.
Once all is well propenyl. Other choice I had.
25.

26.

27.

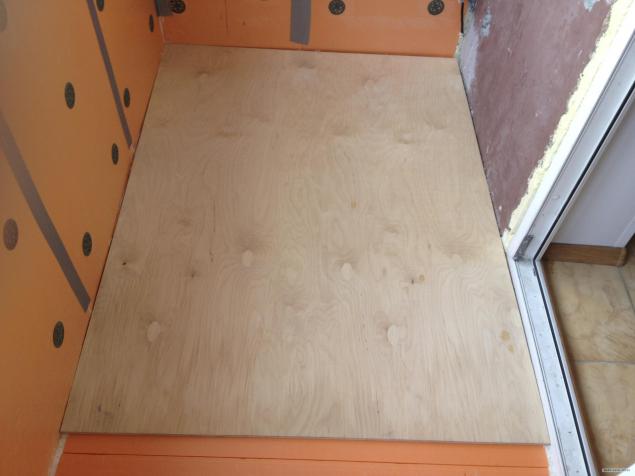
Then I bought a polished plywood 1.2 cm, handled its funds from the mold and placed directly on the polystyrene. Then, prishurupil plywood to concrete through the styrofoam. The joints between plywood treated with a special sealant for wood.
You know, it came out great - no creaks, no wobbles, no flex. In short, the class.
I celebrated my birthday with friends on the balcony smoking a hookah. Paul did not respond to it at the same time the presence of 5 people.
29.

30.

31.

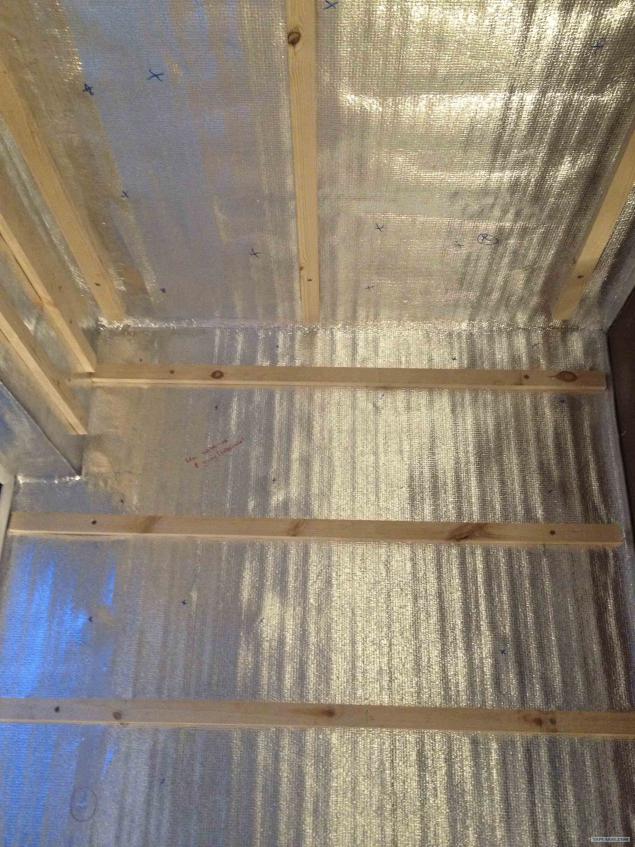
Then I started to collect cubicle and do lathing for lining. Carpenter from me worthless, no experience, so perhaps piled too much.
By the way, you take photographs of the walls, where the mushrooms are located, and then mark them with a marker. It is to them not accidentally vsverlitsya or not to put the guide battens.
32.

33.

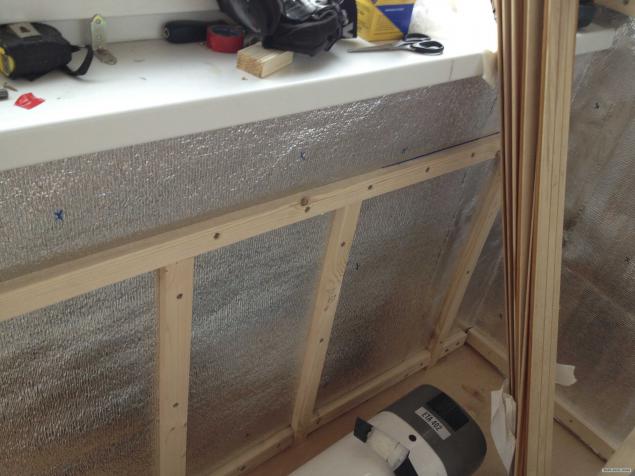
Disassembled chaos with wires, all the wires laid in the corrugation. 2 sockets, 1 switch and 1 light.
34.

I made under the framework of the closet and began to sheathe the balcony clapboard. I have to say - purchase electric jigsaw - in our case irreplaceable thing. Wall paneling, it seemed to me, the best thing to fix klyamerami and small screws using a screwdriver. Small hammer nails are not comfortable, and the screwdriver to tighten shurupchiki convenient, reliable and fast.
Since I had a lining, sheathing has become to her. But prokosyachil - began to cut long boards, subject to cabinet. In fact, it was necessary to start with the walls, where the boards lining the longest - since that is not circumcised so, somewhere a couple of centimeters promazhesh - well - spoil a long board, and has nothing to replace.
35.

36.

37.

38.

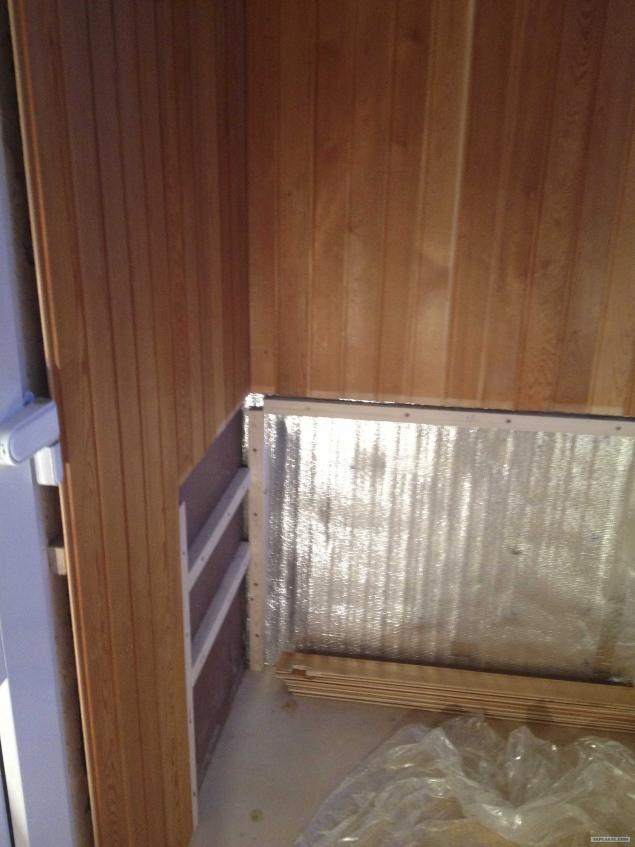
In the end, I ran out of long boards on the most prominent wall. Some were spoiled for dismantling, some with holes under the dryer. Most bummer is that the lining I had varnished and, in a few years, faded, so if you buy a new, white, color is very difficult to get there. It was decided to buy a pack of lining, and treat it with varnish, placed in the middle of the wall that not much was evident.
39.

The door to the cabinet made from the remains of a white lining. That is, it turned out that the white door and the wall, as it were complementary to each other.
By the way, little corners on the door is attached finishing nails, and that the tree does not crack, cut one nail hat put in screwdriver and drill holes first, and only then hammered to a new nail. Maybe someone, this method is useful.
40.

41.

White bed on the floor laminate flooring and skirting screwed. Just bought a heater at 750 Watts.
42.

The gap between the laminate and a balcony box, I closed up with a piece of skirting caps kabelkanala, breaking off bracket 1 side. I glued cap double-sided tape.
43.

Comrade cat come to check work.
In connection with the repair of his for a long time it was not allowed on the balcony, and he was very upset about it :)
44.

Hung curtains, I attached a corner - that's happened since:
45.

46.

This retractable clothes dryer when it :)
47.

And in my closet now stand flowers and toys that the wife makes plasticine :)
48.
That's all, as a result, the temperature of -20 on the street, 17 on the balcony, and it is turned off the heater.
The temperature in the cabinet to 3 degrees lower than on the balcony, it's good for storage of vegetables and pickles.
At home we have very stoked, and now, with the door open from the balcony is a little cool air, making homes more comfortable temperature!
There will be questions - ask!
All good!
On the Rights of kotovtornika))))
49.

Source: