286
Lights on solar batteries with their own hands
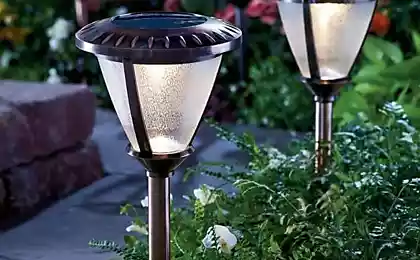
Many summer residents dream of decorating the view of the night garden plot with portable solar-powered flashlights, but many people simply cannot afford such a luxury. There is a way out: collecting lamps with your own hands from inexpensive radio parts, you easily organize a real scattering of lights in the garden.
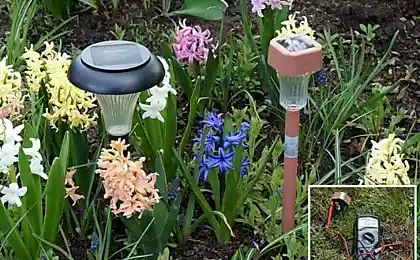
Purchased lamps often disappoint than please. They shine dimly, work only a few hours and serve almost no longer than two years. By collecting a lamp for the garden with your own hands, you determine the necessary parameters and can count on a guaranteed result.
The principle of operation of such a lamp is very simple. In the daytime, the sun hits a solar cell that generates electricity and charges a small battery. When the solar panel voltage drops, the transistor key blocks the current from the solar panel to the battery and supplies power to one or more bright LEDs. When a voltage appears on the contacts of the photocell, reverse switching occurs.
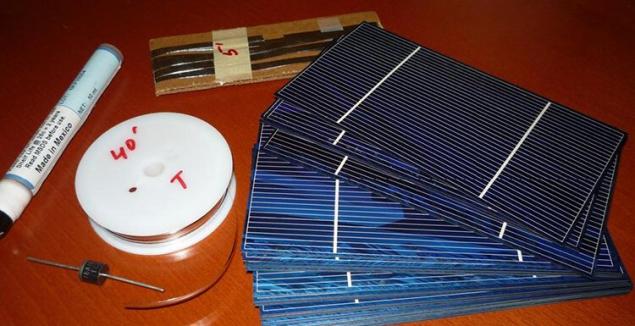
What details and where it is better to orderThe most difficult to get used to solar cells. Substandard elements are suitable, they are easiest to buy at various online auctions. Choose a module with a voltage at the output not lower than 5 volts, the power should correspond to the number of LEDs. It is very important that the module has conductor braces, otherwise buy those that come complete with flat conductors and a flux pencil.
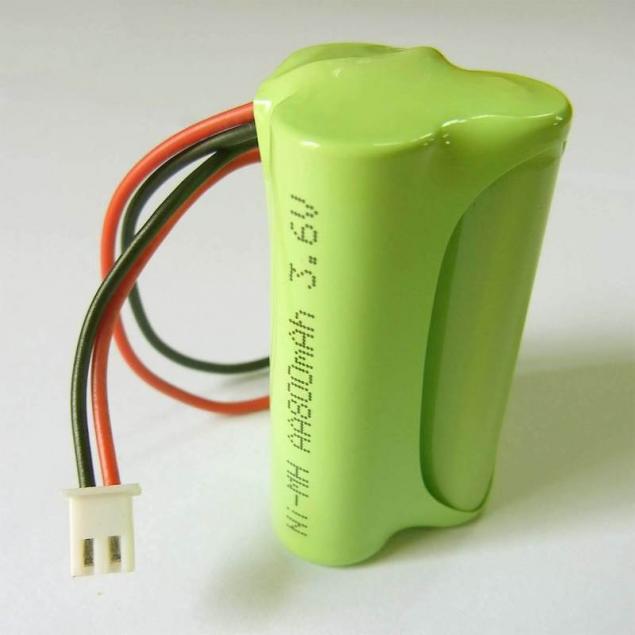
The most expensive element of the lamp is a nickel-metal-hydride or lithium-ion battery. You need 3.6V batteries, they look like three finger batteries tightened in film. The capacity should also correspond to the total power of LEDs multiplied by the number of battery life hours + 30%. You can buy it with modules.
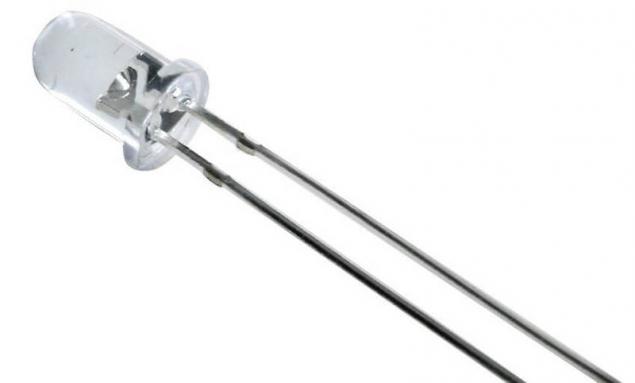
The light sources are LEDs. Based only on the characteristics, you most likely will not be able to find the right level of illumination, so you will have to choose experimentally. It is recommended to use bright white LEDs BL-L513. They are easy to find in electronic components stores, for example, in Chip and Deep they cost 10 rubles. Each LED requires a 33 ohm current limiting resistor.
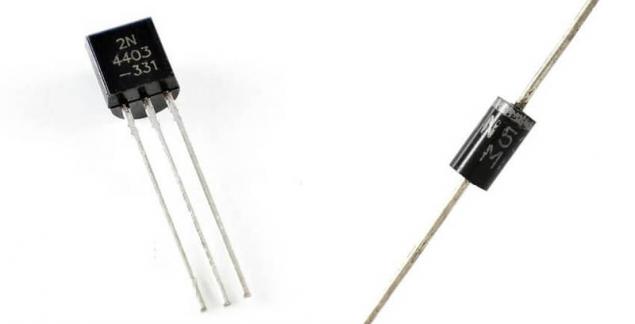
Also, for each luminaire, a transistor 2N4403, a rectifying diode 1N5391 or KD103A, as well as a resistor, the nominal value of which is calculated by the formula R = Ubat x 100/N x 0.02, where N is the number of LEDs in the circuit, and Ubat is the operating voltage of the battery.
How much will the details cost?In cheap Chinese lamps costing about 500 rubles, only one LED is used, which is clearly not enough. Moreover, the battery voltage is 1.5 V, which is why the light is very dim.
In order not to waste time, it is recommended to collect lamps with the optimal configuration, which includes:
Total cost Solar modules Eco-Source 52x19 mm 675 rubles. for 40 pcs. (for 4 lamps) 1 comp. 675.00 rubles. Battery SONY HR03 (1.2 In 4300 mAh) 885 rubles. for 12 pcs. (for 4 lamps) 1 comp. 885.00 rubles. LEDs BL-L513UWC 10 rub. / pc 12 pc 120.00 rub. The resistor CF-100 (1 W 33 ohms) 1.8 rubles / pc. 12 pcs. 21.60 rubles. Transistor 2N4403 6 rubles / pc. 4 pcs. 24.00 rubles. Diode 1N5391 2.5 rubles / pc 4 pcs 10.00 rubles. Resistor CF-100 (1 W 3.6 kΩ) 1.9 rubles / pc 4 pcs 7.60 rubles. Total: 1743.20 rubles. It turns out that for the assembly of one high-quality lamp you need components for about 435 rubles. But from the same details, buying the last 3 positions, you can make 12 analogues of cheap Chinese lamps.
We sell a simple scheme and assemble the detailsTo assemble such a scheme, it is not necessary to have a textolite base and etch the tracks. The cathodes (short leg) of all LEDs are assembled in one node, resistors of 33 ohms are soldered to the anodes (long leg). Resistor tails are also soldered together and soldered to the transistor collector. A resistor of 3.6 kΩ is connected to the transistor base, and a rectifying diode cathode is connected to the emitter. The diode anode is connected to the base resistor, the positive pole of the solar modules is supplied to the same node. The minus from the modules and the battery is connected by wires with the combined cathodes of LEDs. The positive pole of the battery is connected to the emitter of the transistor.
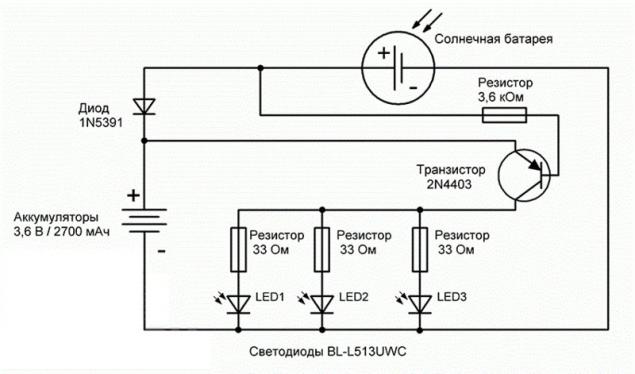
Electrical circuit of lamp
Individual solar modules have a voltage of 0.5 V, and to charge batteries you need 4.5-5 V. Therefore, individual modules need to be chained. First, weld the conductors to the modules if there are none. To do this, cut the flat conductor into strips that are slightly longer than the width of the module. If the module is 19 mm, cut at 25 mm.
The positive contact of the module is located on the back side, and the negative - this is the same central strip on the front. On this strip you need to run flux - this is such a colorless marker from the set. Then a section of the conductor is laid over the contact. It remains only to hold slowly from above with a soldering iron: a thin layer of tin is already on the conductor. The remaining tail is soldered to the contact on the back of the next module and so on along the chain until 10 modules are assembled in two rows.
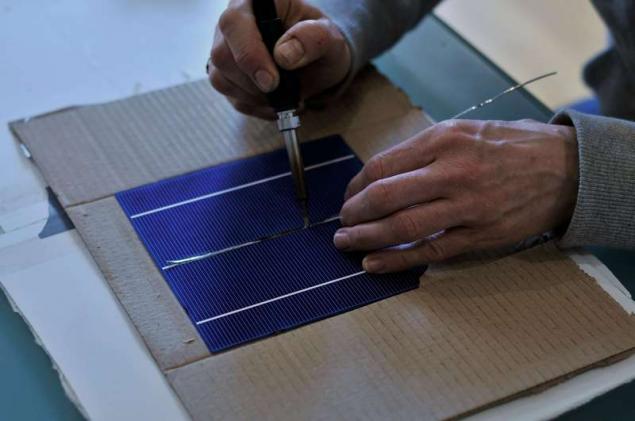
Between the rows you need to make a jumper from a flat conductor, and to the remaining two ends solder thin copper wiring. Be careful when working with modules, they are very fragile. They are also not desirable to overheat, so do not keep the soldering iron in one place for too long.
Design and assembly of the lampFor a lamp you need a body, preferably waterproof. It is very convenient to use an empty can from preservation with a swirling lid.
To assemble such a lamp, you need a piece of plywood to paste two rows of modules on it. The proposed solar cells have a size of 52x19 mm, folding them in two rows, you get a rectangle with dimensions of about 110x110. Glue modules can be on double-sided tape for mirrors, but do not need to press too hard.
Before sticking the modules, cut a hole in the center of the tablet under the lid of the jar and fix it inside with a couple of drops of thermal glue. In the lid, you need to puncture two holes for entering wiring from the modules, do not forget to restore tightness later.
To conveniently place the electronics inside, glue a small foam washer to the inside of the lid. If you, soldering the scheme, will not bite the legs, you can stick the elements into the foam and so fix them. And if you make rectangular incisions in foam, you can easily insert batteries into them. For contact, use a pair of flattened aluminum foil balls with wiring soldered to them.

Before you close the lid, warm the jar from the inside with a hair dryer. So the parts will be less oxidized, and there will be no condensation on the walls of the bank.
Some secrets of operationLamps very poorly tolerate cold, so in the winter they are desirable to bring in a warm room. Batteries should be completely discharged, covering the solar panel with something opaque. Wrap batteries in paper separately, so they will last longer. Also consider covering the modules with a transparent protective coating or using film solar cells. In general, such lamps are enough for 6-7 years of active use. published
P.S. And remember, just changing our consumption – together we change the world!
Source: //www.rmnt.ru/story/electrical/986889.htm

Purchased lamps often disappoint than please. They shine dimly, work only a few hours and serve almost no longer than two years. By collecting a lamp for the garden with your own hands, you determine the necessary parameters and can count on a guaranteed result.
The principle of operation of such a lamp is very simple. In the daytime, the sun hits a solar cell that generates electricity and charges a small battery. When the solar panel voltage drops, the transistor key blocks the current from the solar panel to the battery and supplies power to one or more bright LEDs. When a voltage appears on the contacts of the photocell, reverse switching occurs.
What details and where it is better to orderThe most difficult to get used to solar cells. Substandard elements are suitable, they are easiest to buy at various online auctions. Choose a module with a voltage at the output not lower than 5 volts, the power should correspond to the number of LEDs. It is very important that the module has conductor braces, otherwise buy those that come complete with flat conductors and a flux pencil.
The most expensive element of the lamp is a nickel-metal-hydride or lithium-ion battery. You need 3.6V batteries, they look like three finger batteries tightened in film. The capacity should also correspond to the total power of LEDs multiplied by the number of battery life hours + 30%. You can buy it with modules.

The light sources are LEDs. Based only on the characteristics, you most likely will not be able to find the right level of illumination, so you will have to choose experimentally. It is recommended to use bright white LEDs BL-L513. They are easy to find in electronic components stores, for example, in Chip and Deep they cost 10 rubles. Each LED requires a 33 ohm current limiting resistor.

Also, for each luminaire, a transistor 2N4403, a rectifying diode 1N5391 or KD103A, as well as a resistor, the nominal value of which is calculated by the formula R = Ubat x 100/N x 0.02, where N is the number of LEDs in the circuit, and Ubat is the operating voltage of the battery.

How much will the details cost?In cheap Chinese lamps costing about 500 rubles, only one LED is used, which is clearly not enough. Moreover, the battery voltage is 1.5 V, which is why the light is very dim.
In order not to waste time, it is recommended to collect lamps with the optimal configuration, which includes:
Total cost Solar modules Eco-Source 52x19 mm 675 rubles. for 40 pcs. (for 4 lamps) 1 comp. 675.00 rubles. Battery SONY HR03 (1.2 In 4300 mAh) 885 rubles. for 12 pcs. (for 4 lamps) 1 comp. 885.00 rubles. LEDs BL-L513UWC 10 rub. / pc 12 pc 120.00 rub. The resistor CF-100 (1 W 33 ohms) 1.8 rubles / pc. 12 pcs. 21.60 rubles. Transistor 2N4403 6 rubles / pc. 4 pcs. 24.00 rubles. Diode 1N5391 2.5 rubles / pc 4 pcs 10.00 rubles. Resistor CF-100 (1 W 3.6 kΩ) 1.9 rubles / pc 4 pcs 7.60 rubles. Total: 1743.20 rubles. It turns out that for the assembly of one high-quality lamp you need components for about 435 rubles. But from the same details, buying the last 3 positions, you can make 12 analogues of cheap Chinese lamps.
We sell a simple scheme and assemble the detailsTo assemble such a scheme, it is not necessary to have a textolite base and etch the tracks. The cathodes (short leg) of all LEDs are assembled in one node, resistors of 33 ohms are soldered to the anodes (long leg). Resistor tails are also soldered together and soldered to the transistor collector. A resistor of 3.6 kΩ is connected to the transistor base, and a rectifying diode cathode is connected to the emitter. The diode anode is connected to the base resistor, the positive pole of the solar modules is supplied to the same node. The minus from the modules and the battery is connected by wires with the combined cathodes of LEDs. The positive pole of the battery is connected to the emitter of the transistor.

Electrical circuit of lamp
Individual solar modules have a voltage of 0.5 V, and to charge batteries you need 4.5-5 V. Therefore, individual modules need to be chained. First, weld the conductors to the modules if there are none. To do this, cut the flat conductor into strips that are slightly longer than the width of the module. If the module is 19 mm, cut at 25 mm.
The positive contact of the module is located on the back side, and the negative - this is the same central strip on the front. On this strip you need to run flux - this is such a colorless marker from the set. Then a section of the conductor is laid over the contact. It remains only to hold slowly from above with a soldering iron: a thin layer of tin is already on the conductor. The remaining tail is soldered to the contact on the back of the next module and so on along the chain until 10 modules are assembled in two rows.

Between the rows you need to make a jumper from a flat conductor, and to the remaining two ends solder thin copper wiring. Be careful when working with modules, they are very fragile. They are also not desirable to overheat, so do not keep the soldering iron in one place for too long.
Design and assembly of the lampFor a lamp you need a body, preferably waterproof. It is very convenient to use an empty can from preservation with a swirling lid.
To assemble such a lamp, you need a piece of plywood to paste two rows of modules on it. The proposed solar cells have a size of 52x19 mm, folding them in two rows, you get a rectangle with dimensions of about 110x110. Glue modules can be on double-sided tape for mirrors, but do not need to press too hard.
Before sticking the modules, cut a hole in the center of the tablet under the lid of the jar and fix it inside with a couple of drops of thermal glue. In the lid, you need to puncture two holes for entering wiring from the modules, do not forget to restore tightness later.
To conveniently place the electronics inside, glue a small foam washer to the inside of the lid. If you, soldering the scheme, will not bite the legs, you can stick the elements into the foam and so fix them. And if you make rectangular incisions in foam, you can easily insert batteries into them. For contact, use a pair of flattened aluminum foil balls with wiring soldered to them.

Before you close the lid, warm the jar from the inside with a hair dryer. So the parts will be less oxidized, and there will be no condensation on the walls of the bank.
Some secrets of operationLamps very poorly tolerate cold, so in the winter they are desirable to bring in a warm room. Batteries should be completely discharged, covering the solar panel with something opaque. Wrap batteries in paper separately, so they will last longer. Also consider covering the modules with a transparent protective coating or using film solar cells. In general, such lamps are enough for 6-7 years of active use. published
P.S. And remember, just changing our consumption – together we change the world!
Source: //www.rmnt.ru/story/electrical/986889.htm

