712
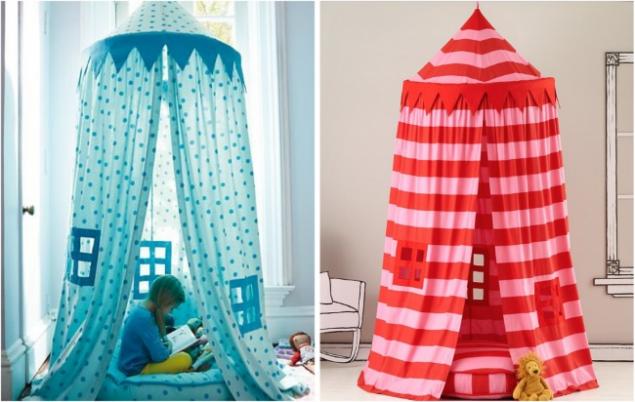
It is easy to make a child a fairytale tent with their hands

Each of us remembers as a child built huts. In the course were blankets, stools, ottomans, pillows - all that can be dragged from one room to another, and in turn its own fort or castle - as you like. But the apartment at that time was more like a haven of nomads.
Website has found great idea exquisite homemade tent, which will please your child and will decorate any home. The beauty of ideas that you can use any materials that are like your kid.
We'll need:
fabric for a toothed crown (about 50-60 cm, the circumference of the hoop, a few rags sewn together can be used) cloth for tent (5, 5 m for large hulahupa, 3, 5 meters for a small) fabric for the top of the dome (calculation depends on the hoop size, see para. 6) wrap-hulahup tape-loop fastener for clothes pin hook for fastening the tent to the ceiling scissors pencil for fabrics, paper patterns sewing machine How to:
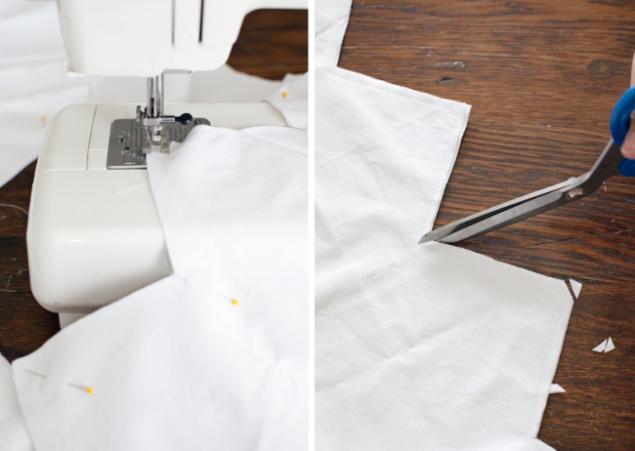
1. The canopy fabric must be cut into pieces height 1, 7-1, 8 m, and the width will depend on the size of the tissue roll. If you choose a small hoop, then cut, sewn together two pieces of curtain, and if more - then three. Make sure that the seam pattern is the same (if the pattern is bright, keep this in mind when buying). The lower edge of the side and you can pull up (gently bend and stitch), and the tip is left alone.

2. Take two strips of cloth for the top-of the crown. The width of each should be between 20 cm and a length equal to the circumference of the hoop, plus a few centimeters at the seams. Draw on paper a template of the tooth, calculating the width so that the first and last tooth agreed hoop whole.

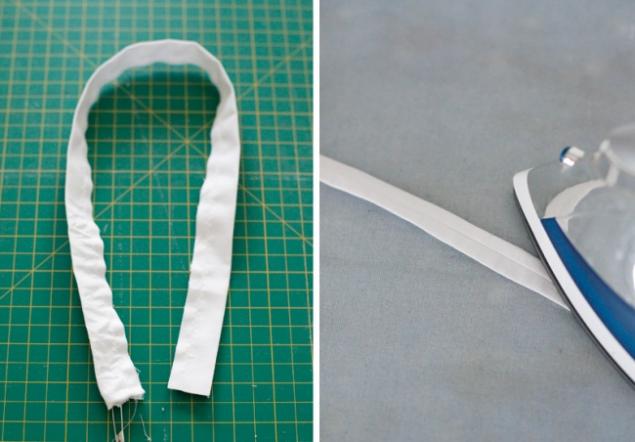
3. Each strip is folded in half with the teeth (inside out), the fastening teeth pins and the side zastrachivaem. Then indented 0, 5-0, 6 cm from the edge sew scalloped edge. After carefully cut away corners and makes an incision in the valleys, so that inside-out border-crown turned out pretty sharp corners.
4. Properly otglazhivaem crown, and the free edge of the basting stitches wide, so that it was easier stitched to the shed.

5. Make a loop for hanging the tent. workpiece length depends on the height of the ceiling in your room. The length of our loop - 110-120 cm, width - 5 cm. Sew it as a normal handset, and then turn otglazhivaem to make it perfectly flat.
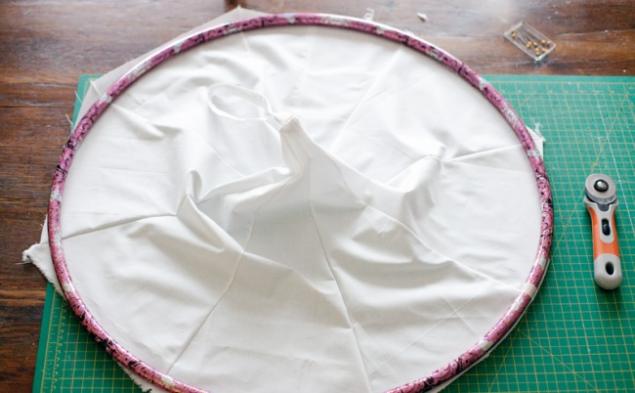
6. Cut out 8 triangles for dome-tops. Remember that the size-triangle patterns depends on the circumference of your hoop, you need to use to calculate the formula: width of the triangle (the short side) is equal to 1/8 of the circumference of + 4 cm hem, triangle length (the distance from the top to the short side of the center) is about 3/4 the diameter of the hoop.
7. First, sew the two halves consisting of 4 triangles, making the indentation at the seams no more than 0, 5-0, 6 cm. Sew the top of our loop-suspension and connect the two halves, that is already all 8 triangles together.

8. Now place the hoop on the dome and make a smooth edge, given that
2-3 cm edge should act. This will provide the perfect customized fit circle.
9. We need to connect the seam overhang and crown. Since the canvas canopy wider than the crown, build it fast seam and spread the folds evenly to both sides of the tent perfectly united and secure seam stitching machine.
10. The crown and canopy securely connected, you can now sew them to the tip. Putting their facial parts zastrachivaem on a typewriter.

11. The hoop can be clad with a cloth tape to paste over or leave as is if it is a suitable color. Making of Velcro loops for fixing the hoop and sew them inside to the back seam where converge the tip of the crown and canopy. The more you stitched Velcro, the more reliable will be attached hoop. This is important.

12. Secure the ceiling hook. It can be glued, but may require installation - depending on whether your room ceiling. Now you can fix the loop on the hook with a tent and enjoy the result. Inside place the bean bag, you can sew two pieces of fabric round, dropping between a rectangular length.
This gift will definitely bring happiness to your child.


See also:
Guide to the kitchen and cooking on site
How to make so that the plants watered themselves
via www.landofnod.com/playhouses-and-teepees/toys-and-gifts/1