1464
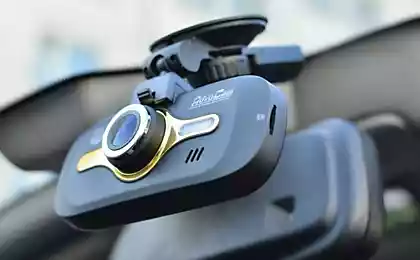
Image Sensor Cleaning DSLR
Dust on the matrices DSLR thing everyday. If you are using your own fotikom periodically change lenses, how would you not carefully carried out this operation, then sooner or later the dust on the sensor will be ... of course, it is better to make it happen later :)
Usually, if the matrix is initially clean (well, I thought it should be), the first signs of dust, with careful handling, become noticeable after about half a year ... and then, if you know of its existence :)
This unpleasant confusion becomes evident when apertures smaller than f / 8, if you do not use the diaphragm is less, then maybe you never pay attention to this "problem", and rightly so!

"His mote" I noticed after dawn shooting in Yalta, when browsing the captured photos in Lightroom. Note the title picture (aperture f / 13), on the left, a little above the horizon, a small gray spot. Yeah Yeah! This is it!
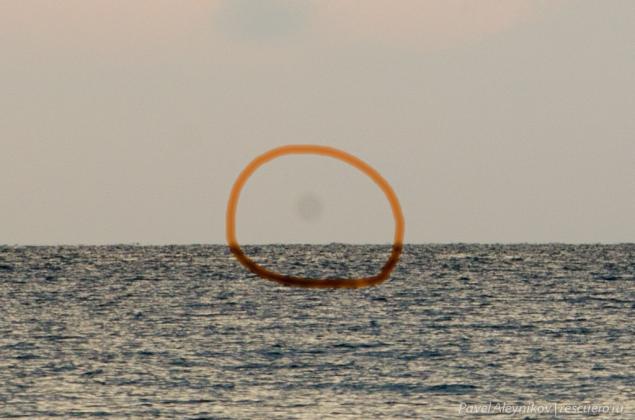
At first I thought that maybe it's some kind of gnat flew past and has been immortalized in a photo. But it was not there, the "gnat" was visible on all images.
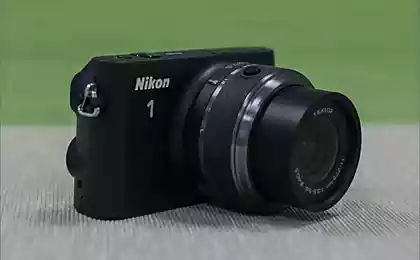
Closing the aperture to f / 36 (minimum aperture for Nikon AF-S 40mm DX micro), turn off the auto-focus, sets the minimum focusing distance and fotkayu ceiling.

This dust! This dust on the new camera ... What a shame :(
Until that moment I knew that cleaning of the matrix can be made in the service center, in case the presence of dust on the sensor and is not a warranty for the cleaning procedure will have to pay. You can also clean the sensor yourself.
Googling a bit further found that in Donetsk (the nearest service center to me) do not perform the procedure itself, and send the camera in Kiev. Information about this procedure was not quite fresh record on the forum was of 2007. Perhaps by now that something has changed for the better?
Prospects remain without fotika indefinitely absolutely not happy, and to pay for the cleaning did not want to.
Filtered set of information found on the Internet, defined 3 ways to self-cleaning matrix SLR:
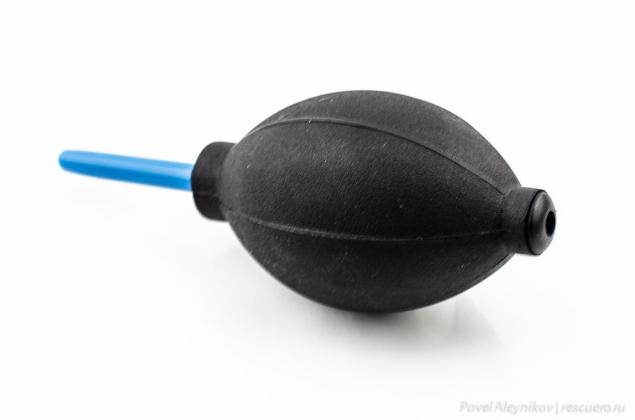
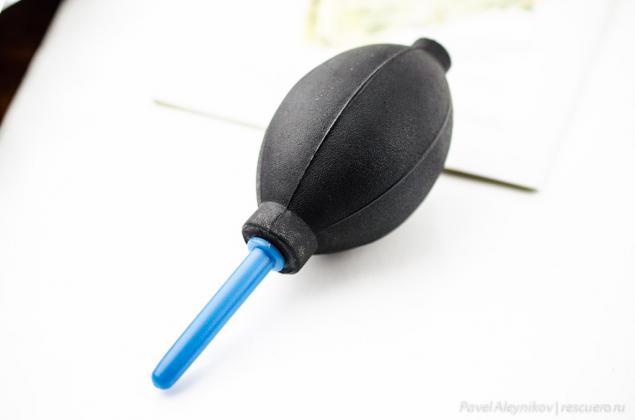
- With a rubber bulb or a can of compressed gas can try to blow a speck of dust from the surface of the sensor;
- Using special "mops" and the cleaning liquid can be made wet cleaning sensor;
- And quite barbaric, according to many members of the forum, the way water purification sensor with a vacuum cleaner.
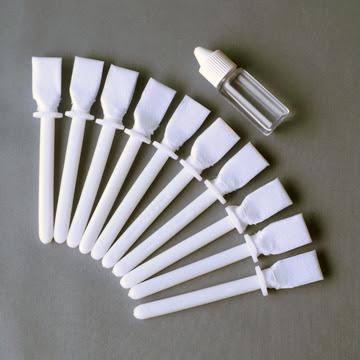
The most effective and safest way - wet cleaning. To accomplish it on ebay was ordered set of cleaning mops and a bottle of cleaning fluid, the cost of such a kit delivery resulted in a 33 $.
By the way, the ordered set has not yet come, but what I want from ebay? It took only 10 days from the date of order.
Since I took a rubber bulb ...
In the holiday did not want to start this delicate procedure, it was decided to wait before returning home.
And here we are at home. At first, after the return, the day was not cleaning up, but on the second day ...
On Saturday night I remember about a speck of dust on the sensor. Certainly need to blow away her pear!
On closer inspection turned out to be a speck of dust is not one but four.

Everything that is written below, NEVER hear NEVER do with your SLR!
Shoot the subject, find the menu item "Lock mirror up for cleaning matrix", choose it and press the shutter button. Here it is, the sensor. Sensor DSLR "live" I saw the first time. Needless excitement was suddenly do something wrong, the inner voice said - "Do not do it, wait the arrival of magic mops!» ...
What is there! Take a pear and blow into alleged location of the dust. Turn off the camera, connect the lens, do a test shot.
About a miracle! Instead of four motes there was only one !!! Super, the first method is really good! And I still doubted.
- The Inner Voice, shut up! Continue the procedure to get rid of annoying dust particles.

Repeat the procedure again!

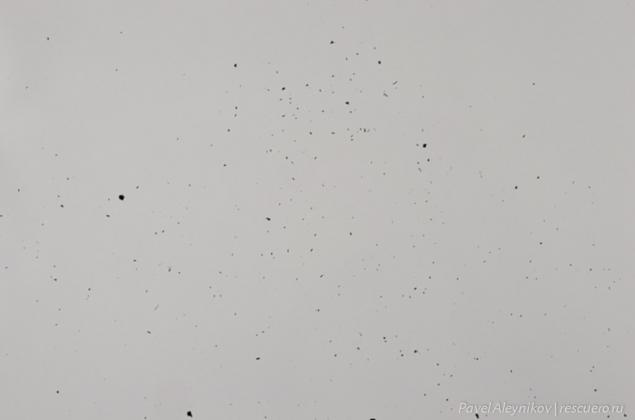
Speck of dust left in place, but ... next came a dozen!
It would seem that common sense should have suggested, we should not try to continue to use the first method, but no! The first time it was all excellent.
- SchA will blow!
- Oops ... Come on, one more time!
- Aaaaaaa! What am I doing?
This dust has already become visible and at f / 8. Goodbye pictures!

Take a picture of pears at f / 3. The dust is not visible.
But you will not always make pictures with a diaphragm.
Analyzed the situation calmed down a bit. "Why did the first time worked, and then getting worse and worse?". The answer came from school physics course.
Remember ebonite stick which is rubbed on wool coat, and then she drew small pieces of paper, hair and stuff ...
- STATIC ELECTRICITY! Ta-dum!
The air escaping from pears blasted matrix, which was neutral. It was deflated 3 motes, one remained. Blowing air "third" of the surface of the sensor, thereby charging it. Charged sensor began to attract any caught in its electrostatic field, dust, as if the very ebony wand ...
Damn ... It is better to wait for the "magic" mop! They definitely help.
Option with a vacuum cleaner was immediately discarded, as with the air and dust, sometimes in a garbage bag and got the shutter curtain ... Tin!
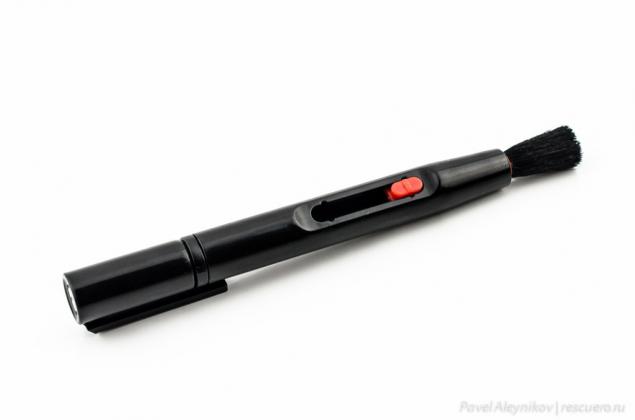
It would seem worth it to stop ... Damn, fucking warehouse engineering brains! I remembered that I have a cleaning kit lenses. This kit includes a special pencil with a brush, which has repeatedly rescued me when cleaning the external surface of the lens, and cleaning with it is going very well!
Small technical refinement: dust sits not on the sensor itself SLRs, and low-pass filter, located directly in front of the matrix and protects photos from the appearance of moire. The filter is made of glass with a special coating, so the chance of damage to the sensor for cleaning almost negligible.
If the lens of "pencil" brushing once or twice, then a glass filter should be cleaned in a jiffy! How wrong I was ...
The tip of a pencil is made of a porous material coated with (I think) something like soot. In the old days, the lenses polished, with the help of soot.
As recently wrote a negligent chairman of the district administration - "Damn ashes sprinkled» ...
I soot matrix ...
Perhaps pencil I rubbed the oil on the surface of the matrix and is not black.
- Maybe even a hammer to knock the camera down?
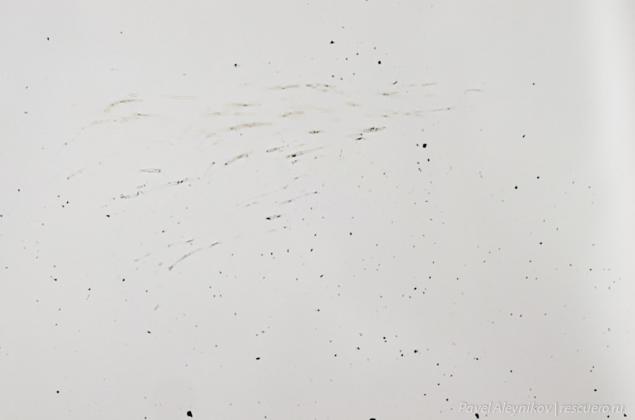
Soot leaves such a "wonderful" mark on the photos ...

For three days, was adjourned. On the third day, or rather night, on the Internet recipe was found, and not without the use of a vacuum cleaner ...
A method of cleaning matrix reflex camera at home.
If you use this method, then you do so at your own risk.
Relax to your actions led to the fatal crash, need to have a very well curved hands :)
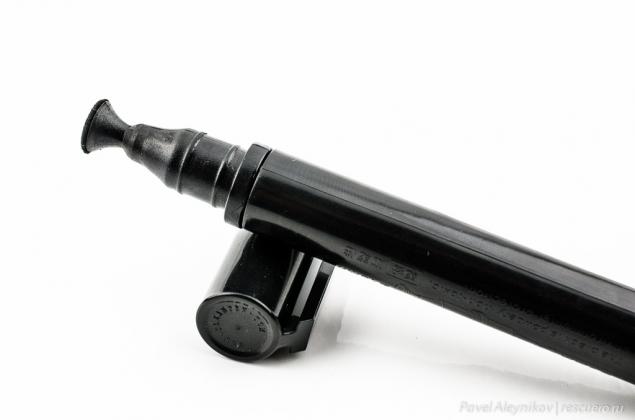
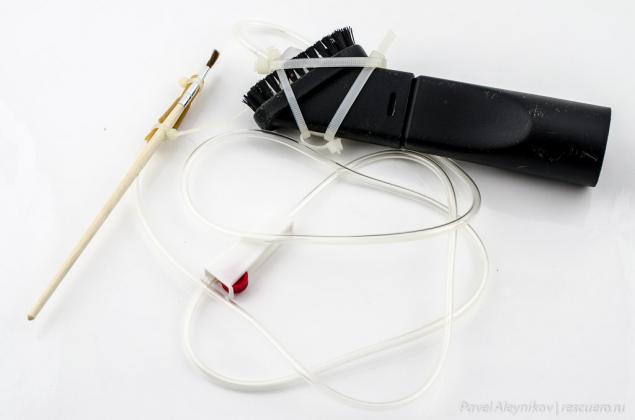
To assemble the unit, we will need:
- A vacuum cleaner with a narrow nozzle;
- Medical dropper (buy at any pharmacy);
- A small brush with bristles made of squirrel fur (buy in the store office supplies);
- Adhesive tape (in the original recipe) or plastic cable ties (used by me) for cables (buy in household goods).
We gather here this design.
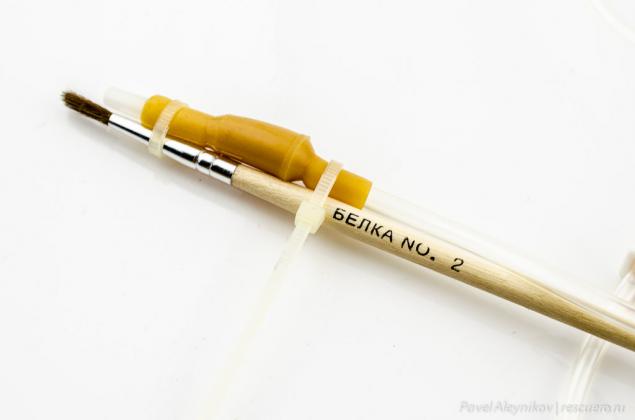
On the cannula (the place where drip attached to the injection needle) secured by tape or cable ties squirrel brush, as shown in the photo below.
Filter drip cut and attach one side to the nozzle of a vacuum cleaner.
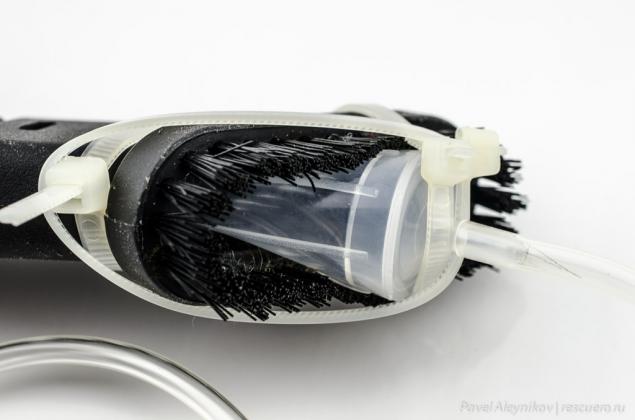
The nozzle is connected to a vacuum cleaner. Done!
Now a bit of room for cleaning. It is best to clean the produce in the bathroom, there is less of all the dust in the suspended state. To dust was even less need to enable cleaning for a few minutes a hot shower to a bath formed mist. Even better to take a shower, the hot water was pouring knowingly and at the same time to prepare for a clean, well-head is also desirable to wash - dandruff, if any, best friend dust :)
After a shower, you need to wait about an hour to excess moisture from the air could settle.
The second condition - put on a good lighting, desk lamp is quite suitable for this purpose, do not forget a damp cloth to remove the dust. You should also remove dust from the surface, which will be a camera (I have it was a kitchen stool).
Next, vacuum cleaner left outside the bathroom, inside the suction hose stretch only with attached design!
Turn on the light and vacuum cleaner, disconnect the lens translate the camera sensor cleaning mode.
Gently brush drawing (it should be clean and lean!) To remove the dust filter matrix.
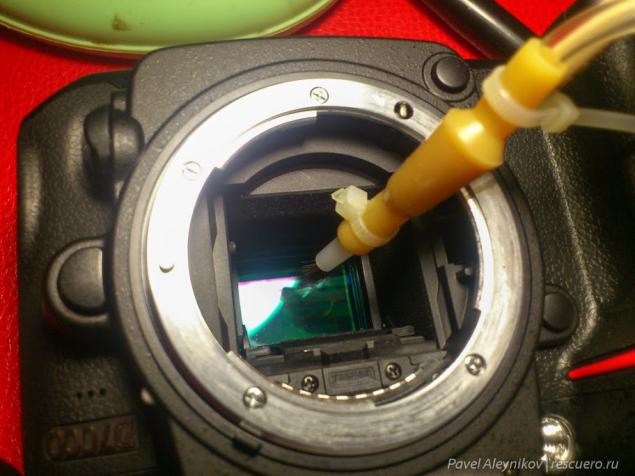
Experience that can scratch the filter is not necessary. Do it with a brush or a plastic dropper tip is almost impossible, the glass is much harder. Still, caution must be observed, metal rim brush, which is fixed pile, it can inflict scratches, so its edge should be fixed above the plastic tip of the system, while its contact with the surface of the filter will be removed.
In my case, had to work hard, black first evenly distributed over the surface of the die and did not want to be removed completely.
In total, had to perform 5 purges, approximately 2-3 minutes each.
1st cleaning.

2nd cleaning.
3rd cleaning
4th cleaning

5th cleaning

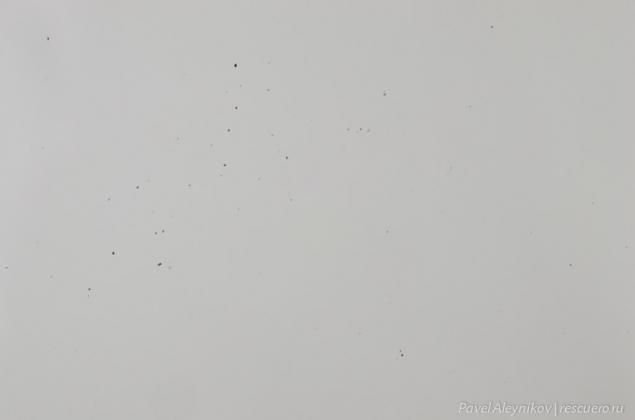
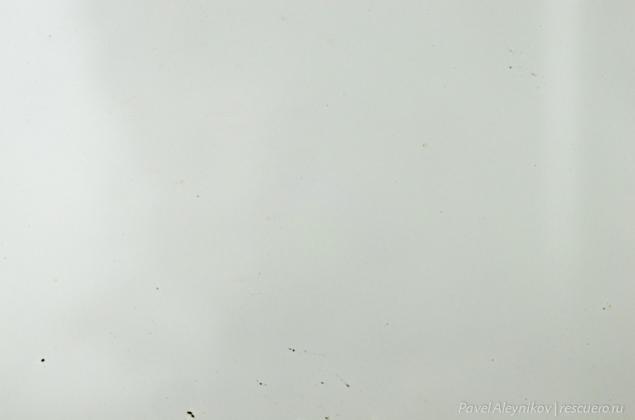
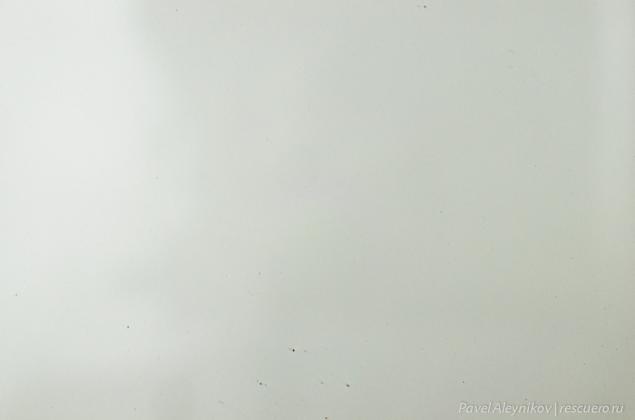
After five procedures on the sensor is a few tiny dust particles. Below is a picture taken at f / 13.

Yay !!! Pure)))))))))))))))))))))))))
Here's a cautionary tale. Describe the entire process, with all admitted lyapami and errors, I decided to keep other inexperienced amateurs from committing my mistakes, and information on cleaning the CCD, had to collect the crumbs from various resources. In this post I will try to organize.
Method of dry cleaning using a brush and vacuum squirrel very safe and effective. Perhaps when it's my cleaning liquid with a mop, I will try to wet cleaning process, which respond very well, but, in all honesty, I see no objective reasons for this procedure.
--img27--
Usually, if the matrix is initially clean (well, I thought it should be), the first signs of dust, with careful handling, become noticeable after about half a year ... and then, if you know of its existence :)
This unpleasant confusion becomes evident when apertures smaller than f / 8, if you do not use the diaphragm is less, then maybe you never pay attention to this "problem", and rightly so!

"His mote" I noticed after dawn shooting in Yalta, when browsing the captured photos in Lightroom. Note the title picture (aperture f / 13), on the left, a little above the horizon, a small gray spot. Yeah Yeah! This is it!

At first I thought that maybe it's some kind of gnat flew past and has been immortalized in a photo. But it was not there, the "gnat" was visible on all images.
Closing the aperture to f / 36 (minimum aperture for Nikon AF-S 40mm DX micro), turn off the auto-focus, sets the minimum focusing distance and fotkayu ceiling.

This dust! This dust on the new camera ... What a shame :(
Until that moment I knew that cleaning of the matrix can be made in the service center, in case the presence of dust on the sensor and is not a warranty for the cleaning procedure will have to pay. You can also clean the sensor yourself.
Googling a bit further found that in Donetsk (the nearest service center to me) do not perform the procedure itself, and send the camera in Kiev. Information about this procedure was not quite fresh record on the forum was of 2007. Perhaps by now that something has changed for the better?
Prospects remain without fotika indefinitely absolutely not happy, and to pay for the cleaning did not want to.
Filtered set of information found on the Internet, defined 3 ways to self-cleaning matrix SLR:
- With a rubber bulb or a can of compressed gas can try to blow a speck of dust from the surface of the sensor;
- Using special "mops" and the cleaning liquid can be made wet cleaning sensor;
- And quite barbaric, according to many members of the forum, the way water purification sensor with a vacuum cleaner.
The most effective and safest way - wet cleaning. To accomplish it on ebay was ordered set of cleaning mops and a bottle of cleaning fluid, the cost of such a kit delivery resulted in a 33 $.

By the way, the ordered set has not yet come, but what I want from ebay? It took only 10 days from the date of order.
Since I took a rubber bulb ...

In the holiday did not want to start this delicate procedure, it was decided to wait before returning home.
And here we are at home. At first, after the return, the day was not cleaning up, but on the second day ...
On Saturday night I remember about a speck of dust on the sensor. Certainly need to blow away her pear!
On closer inspection turned out to be a speck of dust is not one but four.

Everything that is written below, NEVER hear NEVER do with your SLR!
Shoot the subject, find the menu item "Lock mirror up for cleaning matrix", choose it and press the shutter button. Here it is, the sensor. Sensor DSLR "live" I saw the first time. Needless excitement was suddenly do something wrong, the inner voice said - "Do not do it, wait the arrival of magic mops!» ...
What is there! Take a pear and blow into alleged location of the dust. Turn off the camera, connect the lens, do a test shot.
About a miracle! Instead of four motes there was only one !!! Super, the first method is really good! And I still doubted.
- The Inner Voice, shut up! Continue the procedure to get rid of annoying dust particles.

Repeat the procedure again!

Speck of dust left in place, but ... next came a dozen!
It would seem that common sense should have suggested, we should not try to continue to use the first method, but no! The first time it was all excellent.
- SchA will blow!

- Oops ... Come on, one more time!

- Aaaaaaa! What am I doing?
This dust has already become visible and at f / 8. Goodbye pictures!

Take a picture of pears at f / 3. The dust is not visible.

But you will not always make pictures with a diaphragm.
Analyzed the situation calmed down a bit. "Why did the first time worked, and then getting worse and worse?". The answer came from school physics course.
Remember ebonite stick which is rubbed on wool coat, and then she drew small pieces of paper, hair and stuff ...
- STATIC ELECTRICITY! Ta-dum!
The air escaping from pears blasted matrix, which was neutral. It was deflated 3 motes, one remained. Blowing air "third" of the surface of the sensor, thereby charging it. Charged sensor began to attract any caught in its electrostatic field, dust, as if the very ebony wand ...
Damn ... It is better to wait for the "magic" mop! They definitely help.
Option with a vacuum cleaner was immediately discarded, as with the air and dust, sometimes in a garbage bag and got the shutter curtain ... Tin!
It would seem worth it to stop ... Damn, fucking warehouse engineering brains! I remembered that I have a cleaning kit lenses. This kit includes a special pencil with a brush, which has repeatedly rescued me when cleaning the external surface of the lens, and cleaning with it is going very well!

Small technical refinement: dust sits not on the sensor itself SLRs, and low-pass filter, located directly in front of the matrix and protects photos from the appearance of moire. The filter is made of glass with a special coating, so the chance of damage to the sensor for cleaning almost negligible.
If the lens of "pencil" brushing once or twice, then a glass filter should be cleaned in a jiffy! How wrong I was ...
The tip of a pencil is made of a porous material coated with (I think) something like soot. In the old days, the lenses polished, with the help of soot.

As recently wrote a negligent chairman of the district administration - "Damn ashes sprinkled» ...
I soot matrix ...
Perhaps pencil I rubbed the oil on the surface of the matrix and is not black.

- Maybe even a hammer to knock the camera down?
Soot leaves such a "wonderful" mark on the photos ...

For three days, was adjourned. On the third day, or rather night, on the Internet recipe was found, and not without the use of a vacuum cleaner ...
A method of cleaning matrix reflex camera at home.
If you use this method, then you do so at your own risk.
Relax to your actions led to the fatal crash, need to have a very well curved hands :)
To assemble the unit, we will need:
- A vacuum cleaner with a narrow nozzle;
- Medical dropper (buy at any pharmacy);
- A small brush with bristles made of squirrel fur (buy in the store office supplies);
- Adhesive tape (in the original recipe) or plastic cable ties (used by me) for cables (buy in household goods).
We gather here this design.

On the cannula (the place where drip attached to the injection needle) secured by tape or cable ties squirrel brush, as shown in the photo below.

Filter drip cut and attach one side to the nozzle of a vacuum cleaner.

The nozzle is connected to a vacuum cleaner. Done!
Now a bit of room for cleaning. It is best to clean the produce in the bathroom, there is less of all the dust in the suspended state. To dust was even less need to enable cleaning for a few minutes a hot shower to a bath formed mist. Even better to take a shower, the hot water was pouring knowingly and at the same time to prepare for a clean, well-head is also desirable to wash - dandruff, if any, best friend dust :)
After a shower, you need to wait about an hour to excess moisture from the air could settle.
The second condition - put on a good lighting, desk lamp is quite suitable for this purpose, do not forget a damp cloth to remove the dust. You should also remove dust from the surface, which will be a camera (I have it was a kitchen stool).
Next, vacuum cleaner left outside the bathroom, inside the suction hose stretch only with attached design!
Turn on the light and vacuum cleaner, disconnect the lens translate the camera sensor cleaning mode.
Gently brush drawing (it should be clean and lean!) To remove the dust filter matrix.

Experience that can scratch the filter is not necessary. Do it with a brush or a plastic dropper tip is almost impossible, the glass is much harder. Still, caution must be observed, metal rim brush, which is fixed pile, it can inflict scratches, so its edge should be fixed above the plastic tip of the system, while its contact with the surface of the filter will be removed.
In my case, had to work hard, black first evenly distributed over the surface of the die and did not want to be removed completely.
In total, had to perform 5 purges, approximately 2-3 minutes each.
1st cleaning.

2nd cleaning.

3rd cleaning

4th cleaning

5th cleaning

After five procedures on the sensor is a few tiny dust particles. Below is a picture taken at f / 13.

Yay !!! Pure)))))))))))))))))))))))))
Here's a cautionary tale. Describe the entire process, with all admitted lyapami and errors, I decided to keep other inexperienced amateurs from committing my mistakes, and information on cleaning the CCD, had to collect the crumbs from various resources. In this post I will try to organize.
Method of dry cleaning using a brush and vacuum squirrel very safe and effective. Perhaps when it's my cleaning liquid with a mop, I will try to wet cleaning process, which respond very well, but, in all honesty, I see no objective reasons for this procedure.
--img27--