736
Children's bunk bed
Will be 68 photos
Author © fiva13 forum.woodtools.ru/index.php?topic=51380.0
I came to the finish line first phase of the project, which gave reason to do what he likes, which has long been lying soul, but did not reach his hands.
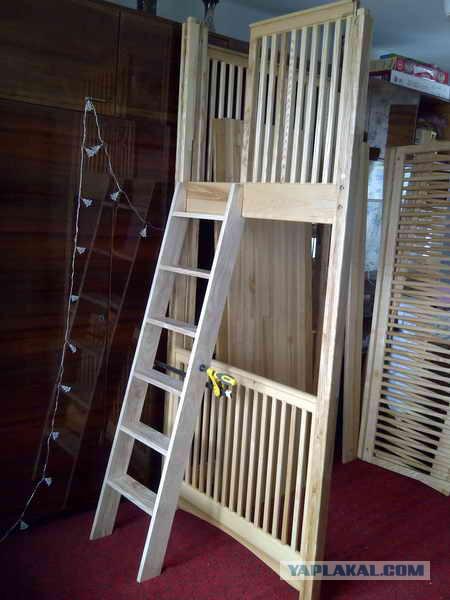
Restricted square meters of living space and set for completion of the family need to use cubic meters room with ceiling height of 3 meters. Bed decided to mainly ash. After a long walk on the sites (mostly foreign) in search of a suitable option and view more than 50 variants of beds from solid chose this bed:

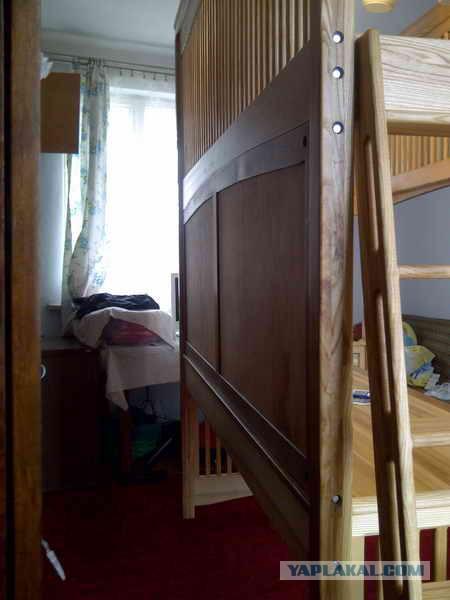
Only the ladder with time plan to replace the design with built-in steps drawers.
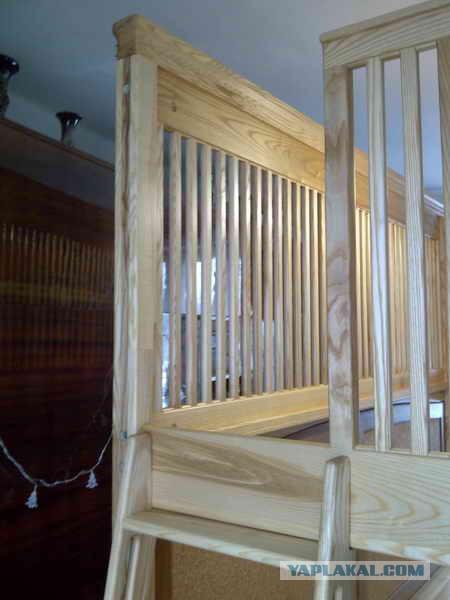
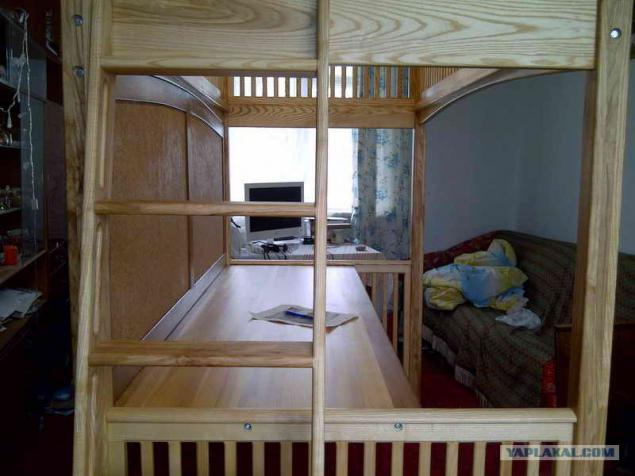
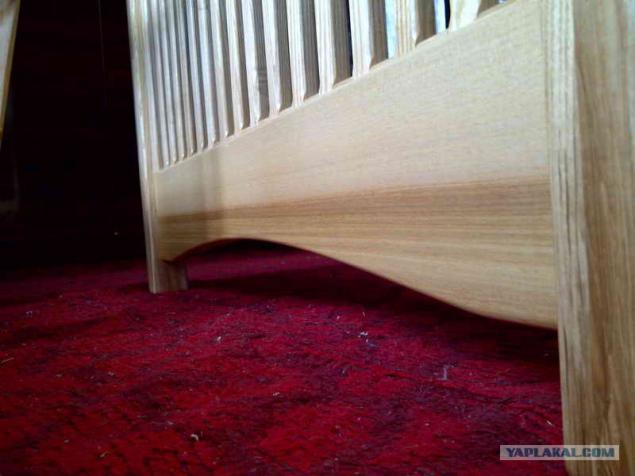
In pictures I tried to figure all sizes under the mattress 200h900h1900 (for growth) Height of the upper railing turned 2300.
He began work on the principle of "say - done", but since I had to reckon with the limited time, tools and, most importantly, lack of experience, has continued to work on the principle of "If you suffer for a long time something happens." Although for me to work with a tree does not torture, but quite the contrary. I stretched out the 1st stage for almost a year, according to the acquired skills are worth.
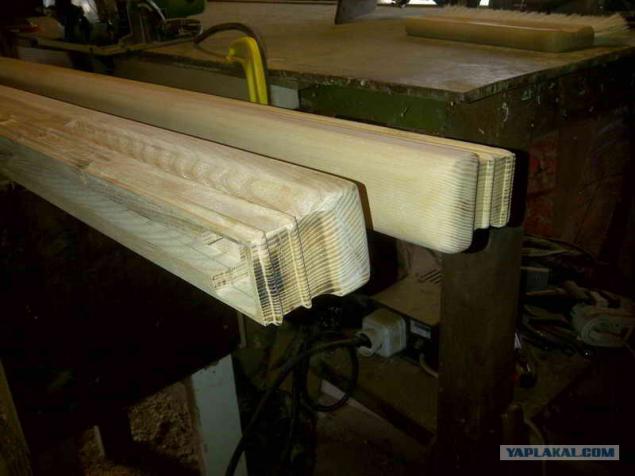
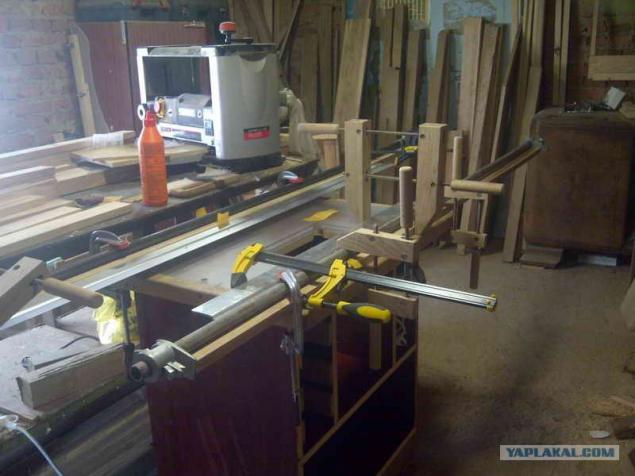
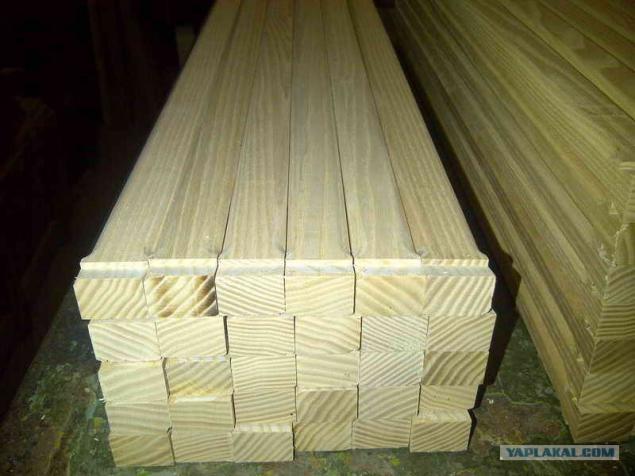
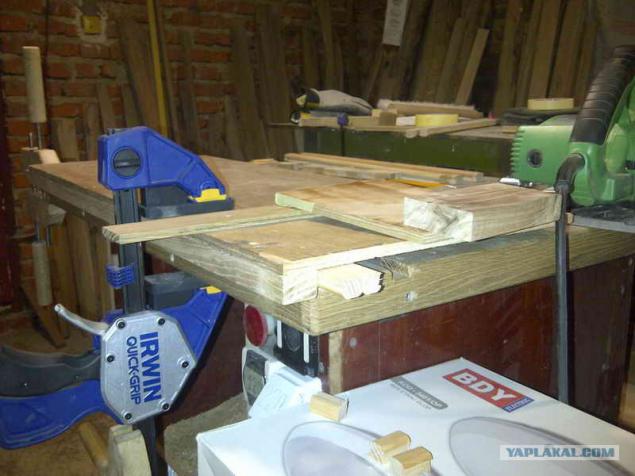
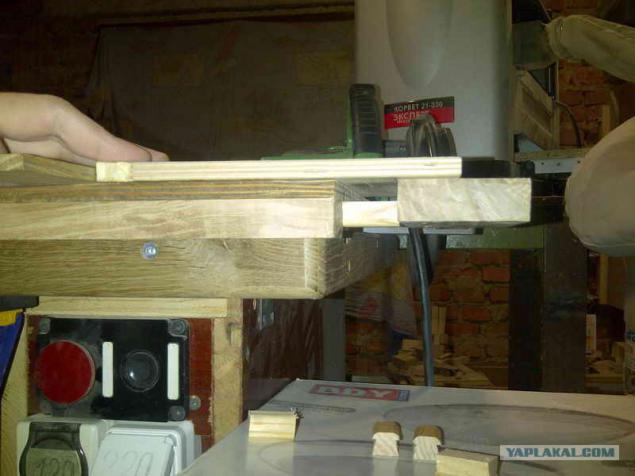
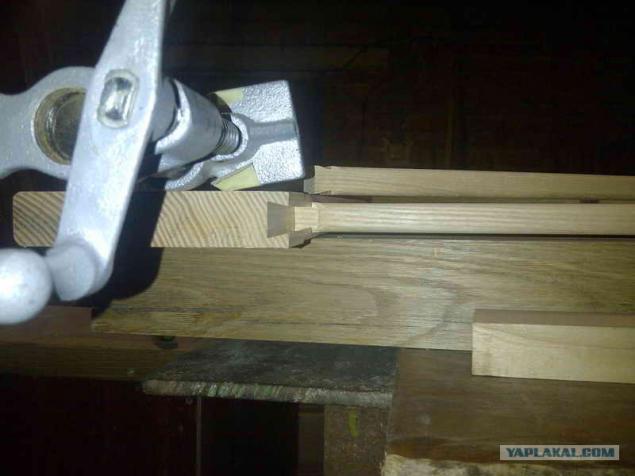
At the initial stage of the e-mail. The instrument was only manual mill, hand circular saw, jigsaw and ESHM. Therefore reysmusovannye had to order blank. These blanks with straight corners, to put it mildly not friends - solid parallelograms. Realizing that without the direct catch anything good will come out, I corrected all this mess, missing parts on the table between the milling cutter and the anvil slot.
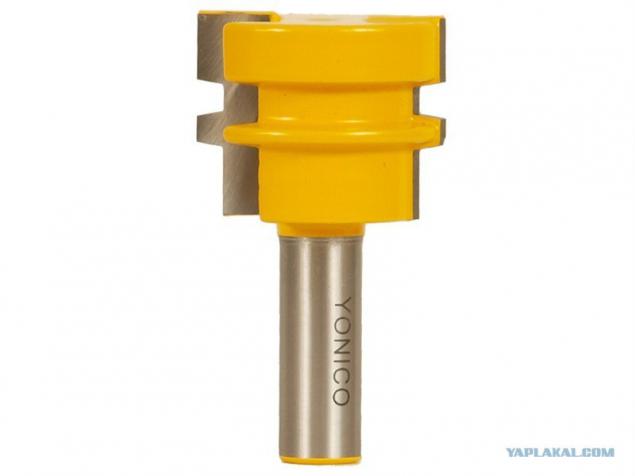
Mills for handrails and grooving cutters produced longitudinal railing:
03
Billets uprights pokruchennye was, therefore, necessary to make the rack of dry material at hand. Dry in the workshop were just edging boards ash, but the humpback. Cut them to the length of 2-3 each, dissolved in the slats and leveled in Thicknessing machine-synthesized. Further, these slats cutter for bonding spliced to length:
05
Missed the slats through the marking gauge, on a smooth fugue glued three-layer racks and aligning in the gauge, was Euro beam:
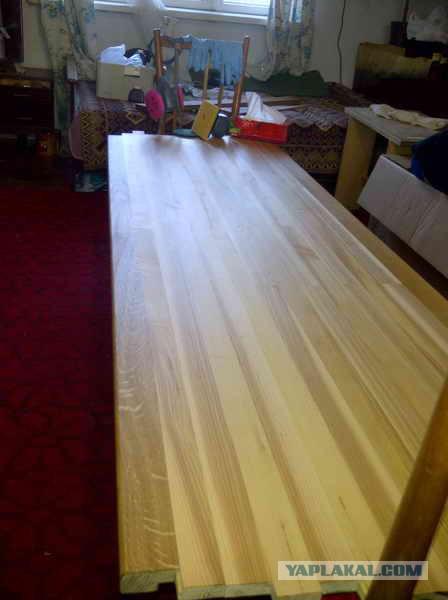
To brought back from the dry, but the curves, make the most resistant, and due to the lack of material on the table, and cut each segment 2-3, sawed in half lengthwise, leveled in the gauge, glued in length, pass through a marking gauge and glue are 3 plots width of 200-230 mm for countertops:
From these plots and reysmusovannyh glued top and ESHM lined the steps between them:
09
Tabletop covered with 3 layers of oil Festool Heavy Duty intermediate light sanding with Scotch-Brite (red and gray):
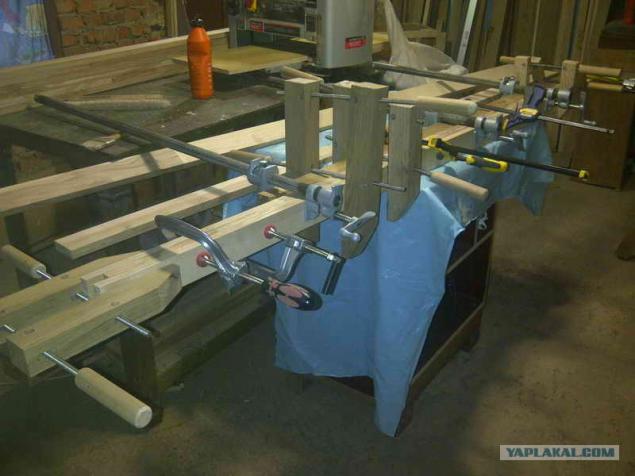
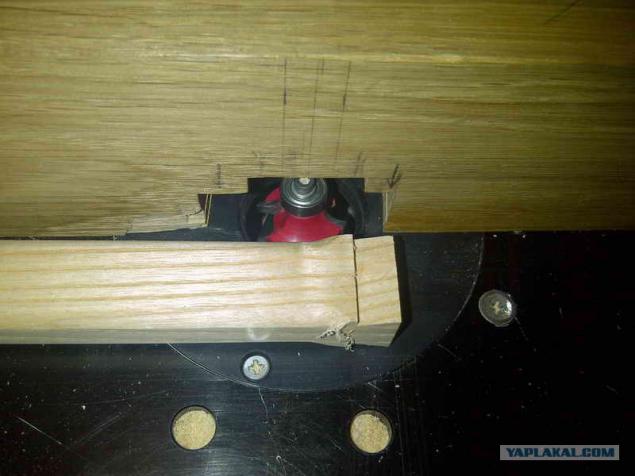
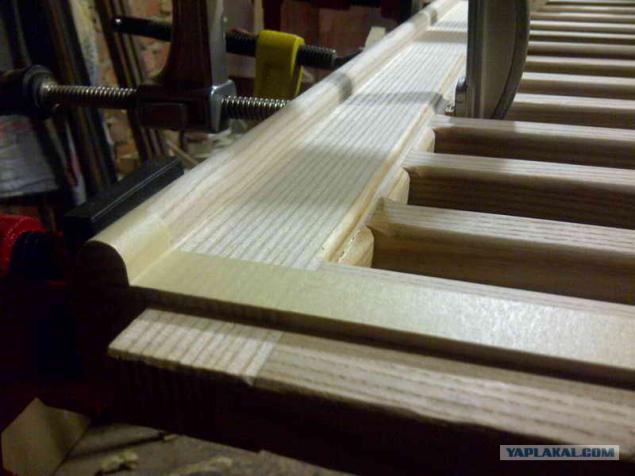
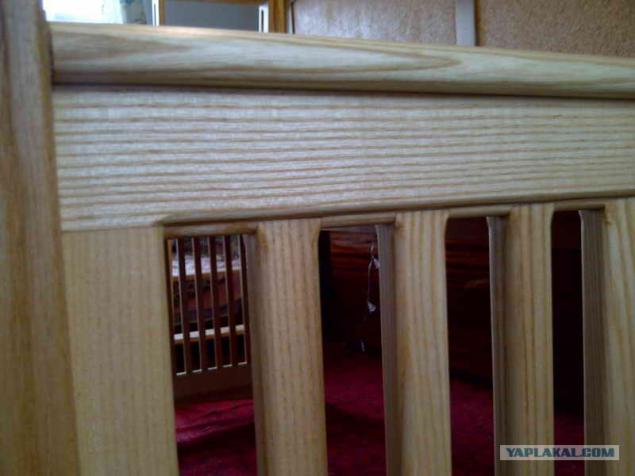
Freesia "dovetail" (after the slot) made grooves for arrays and rack frames sections:

Using homemade wooden clamp both stops, radius cutter rounded edges grids:
13
14
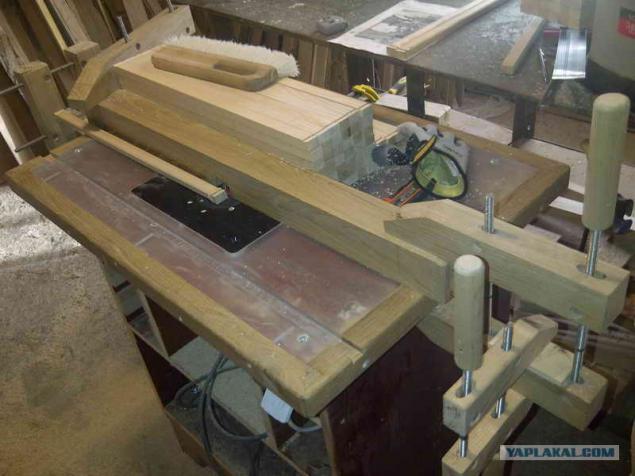
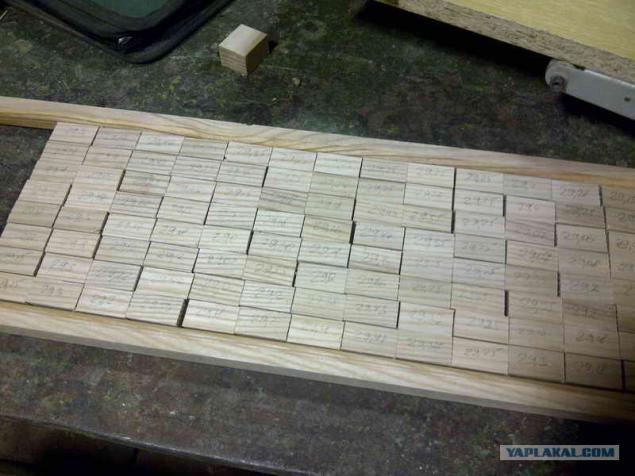
Since Length inserts between bars must have an accuracy of up to 0, 1 mm, the couple built to adapt plywood for cutting inserts manual circular saw:
16
17
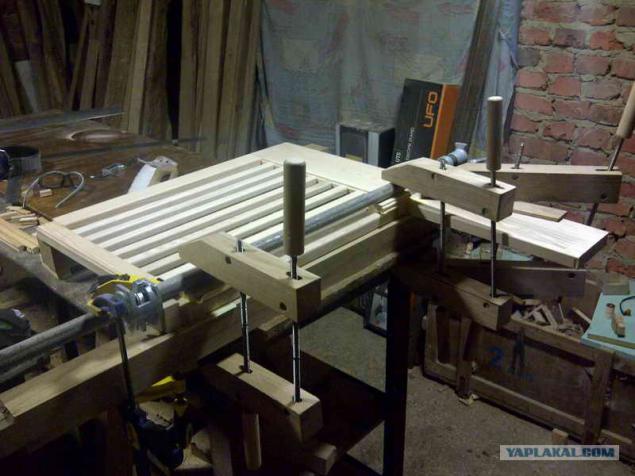
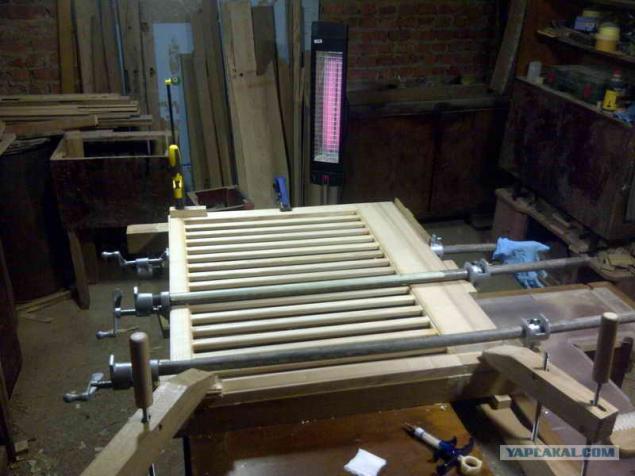
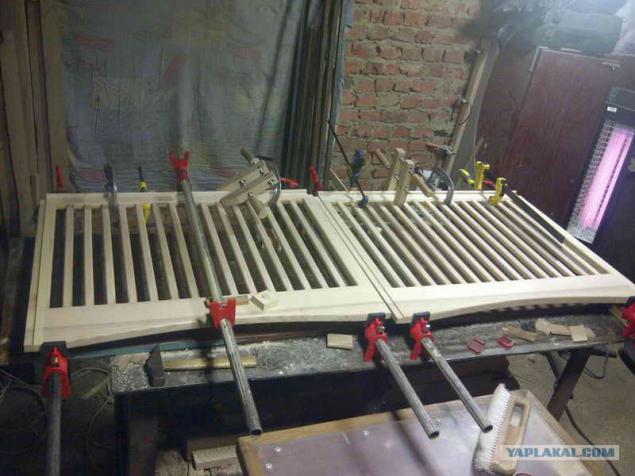
Due to the small bend "guide" grates sections for dry assembly using two clamps, alternately sticking in the grooves of a grid / bar with inserts:
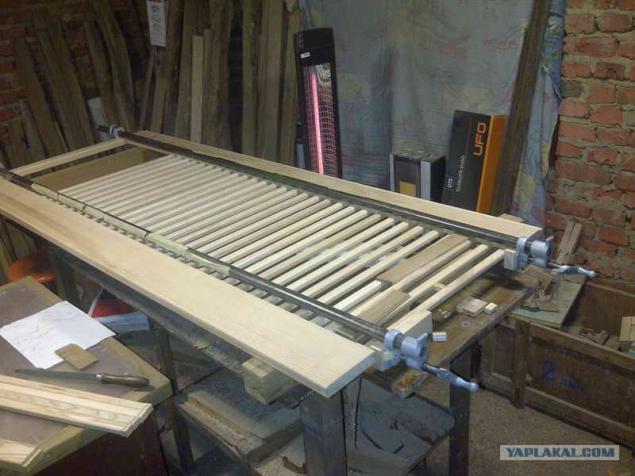
19
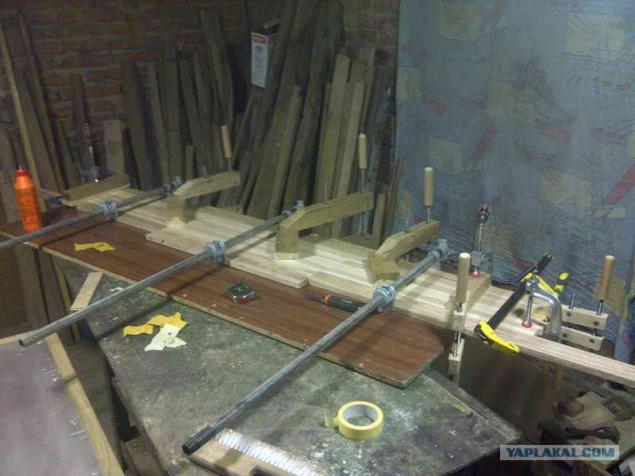
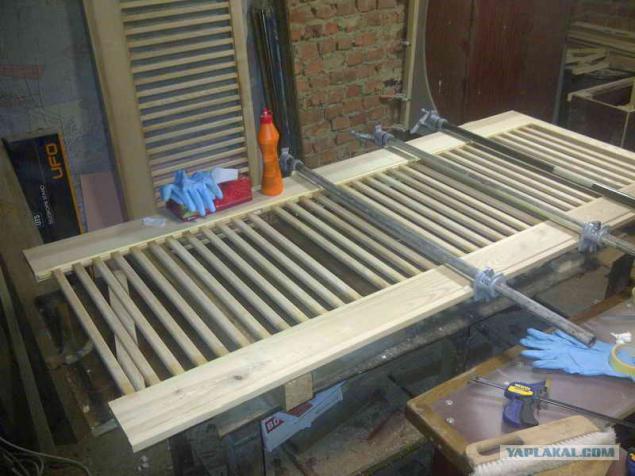
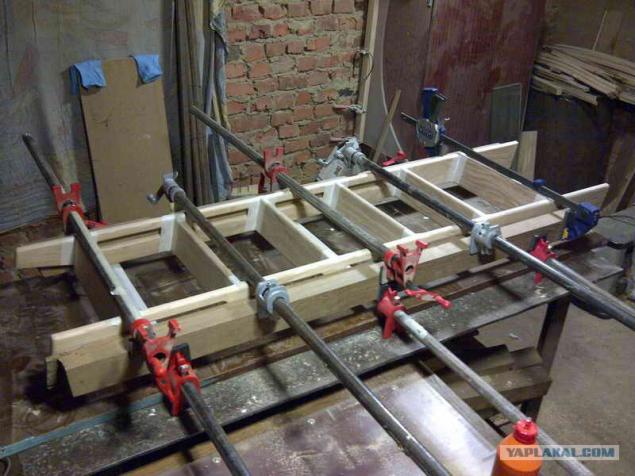
Then insert grids in the section. For example the left starting from the rack frame to apply the adhesive and promote one lattice inserts. 25-30 cm missed the glue - set clamp, and so on:
21
22
23
24
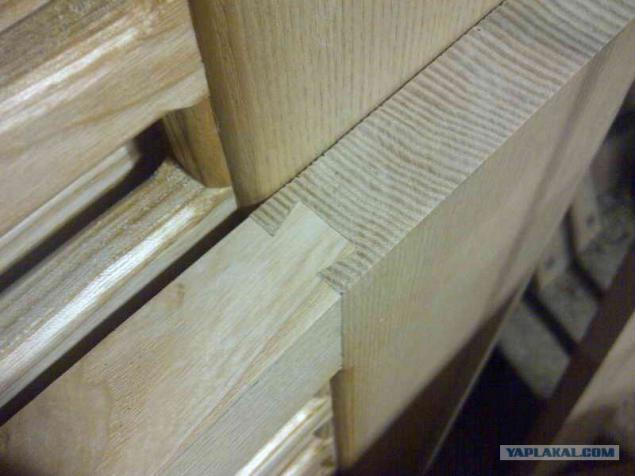
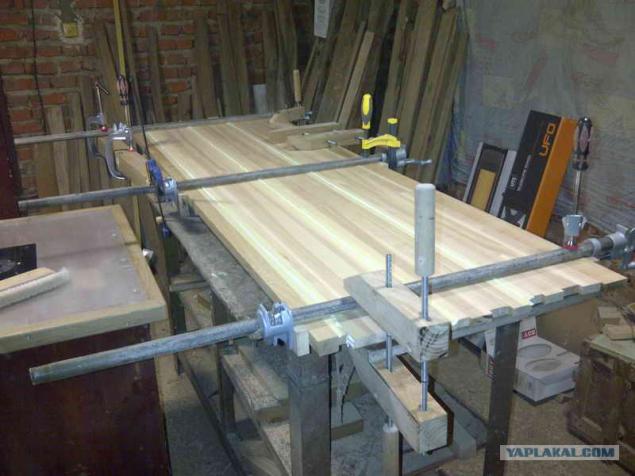
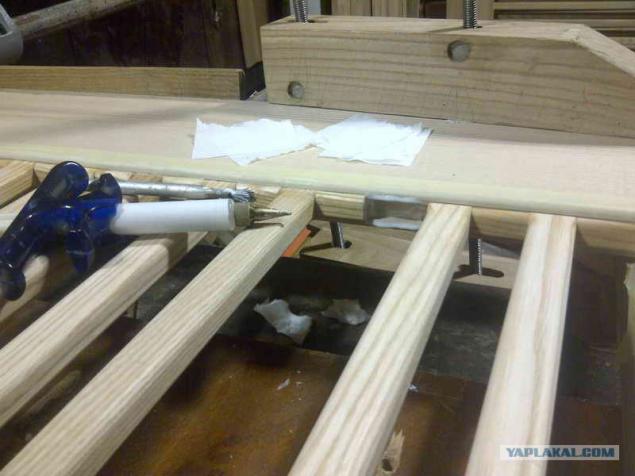
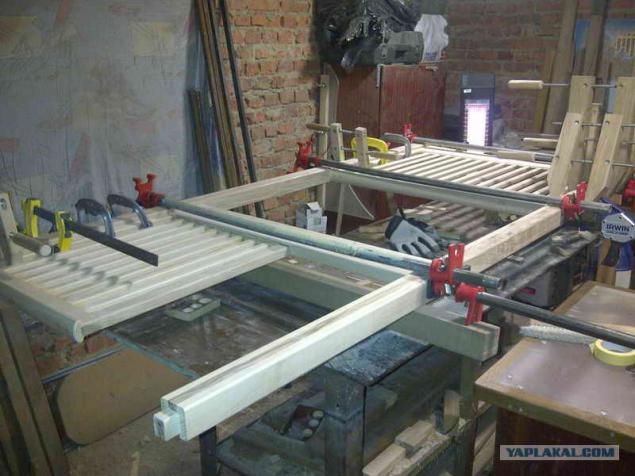
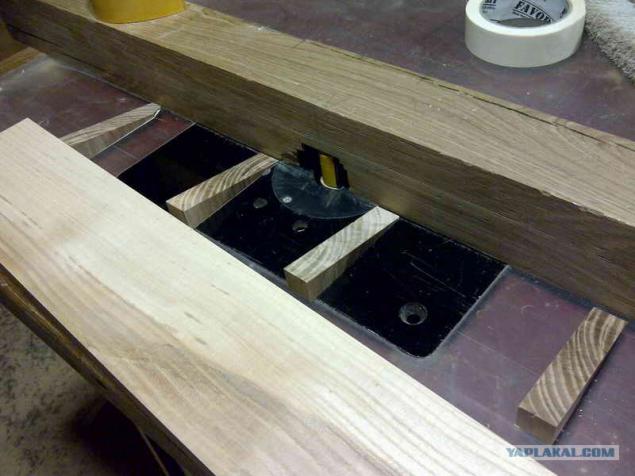
Grooving cutters and chisel at the corners of the grooves produced in the stands and on the sections milled grooves and checked assembly:
26

27
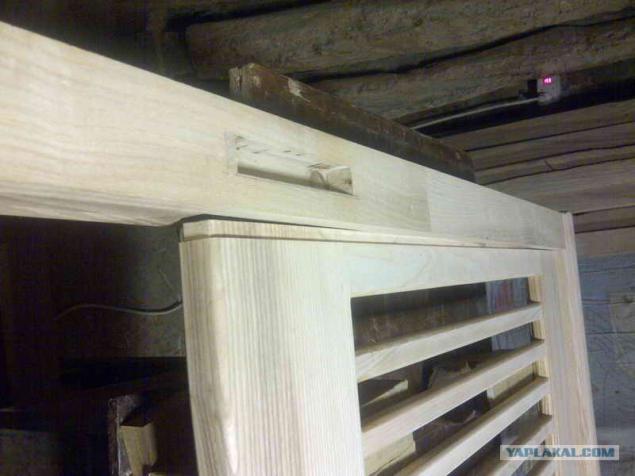
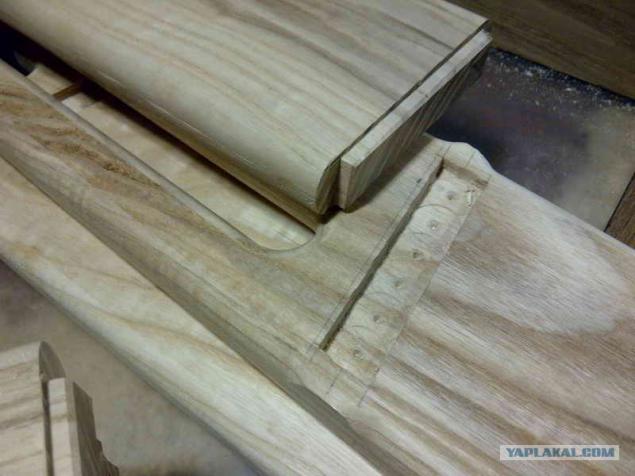
I did cross the railing groove fillet (upper cutter style of the set, the lower cutter radius) and pasted into sections:
29
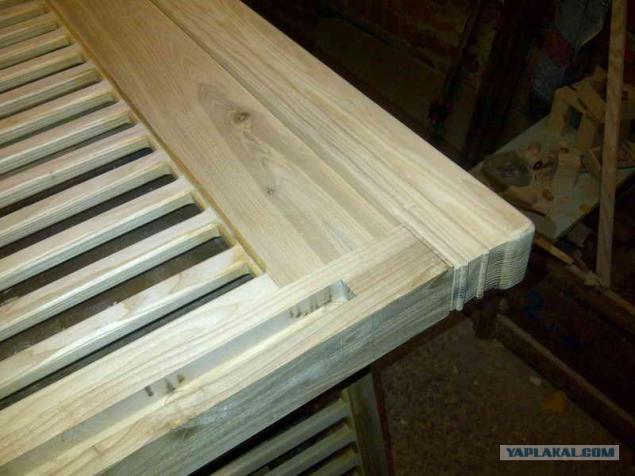
Glued side sections:
31
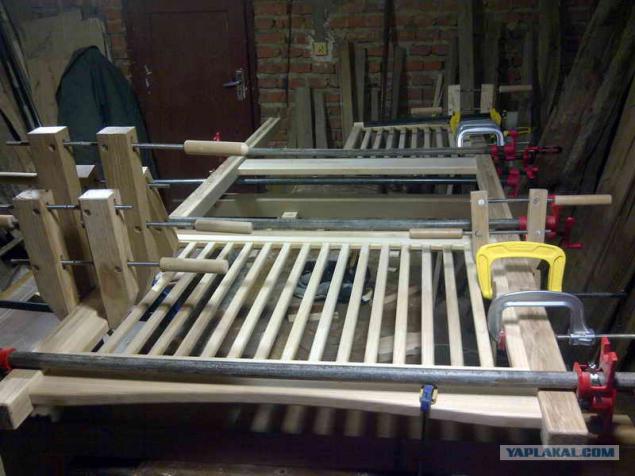
Glued lengthwise railings:
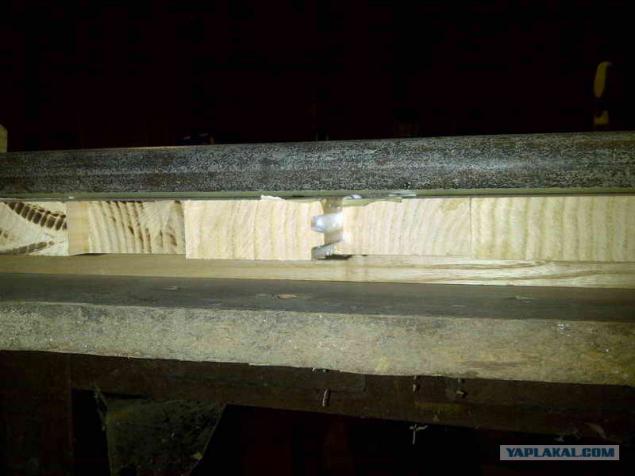
Since the main countertop thickness of 18 mm left, then its dimensions (640h1900) welded support frame from square profile 25x25 and 25x25 corner. Half a corner cut edges and weld perpendicular to another edge to form a spike that will go into the groove under the handrail cross-section and keep the sides of the tabletop. Painted. Drill holes in the corners and threaded bolt.
34
35
The table top assembly with frame:
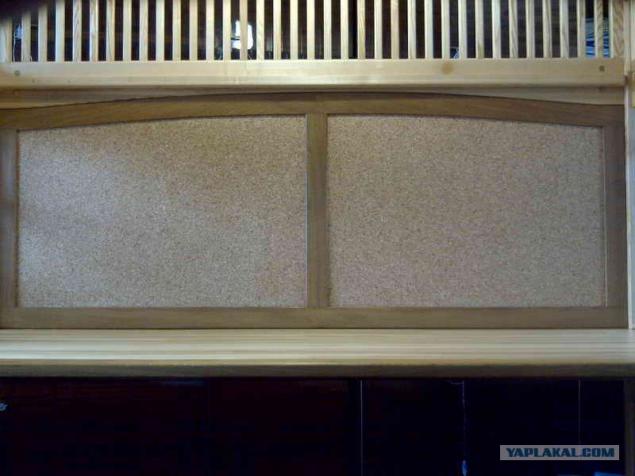
Manufacture oak strapping 10 mm plywood sheets with glued-five millimeter plug. Between sheets of cork in the middle, left for a period of oak planks. For the radius of the top rung as a copier using the lower bound of the top section. The binding groove from the front quarter chose to approach the edges of sheets of cork. Paste the plug on plywood, glued to the frame and stick the two sides oak planks. Sanded.
38
Dry assembly and pilot drilling holes for fasteners:
40
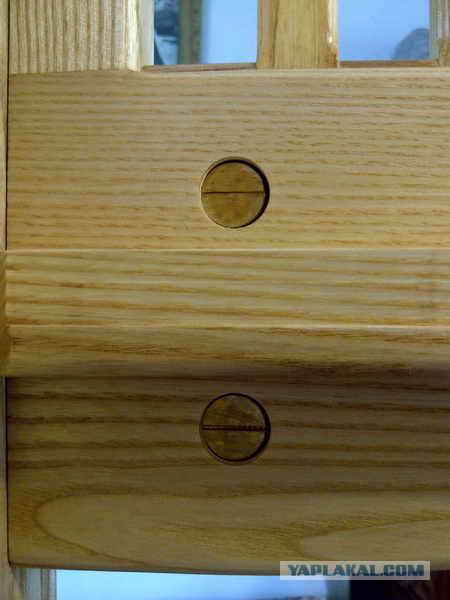
Defining the center blind holes under the "barrels" (nuts) with two drill holes in the parallel bar:
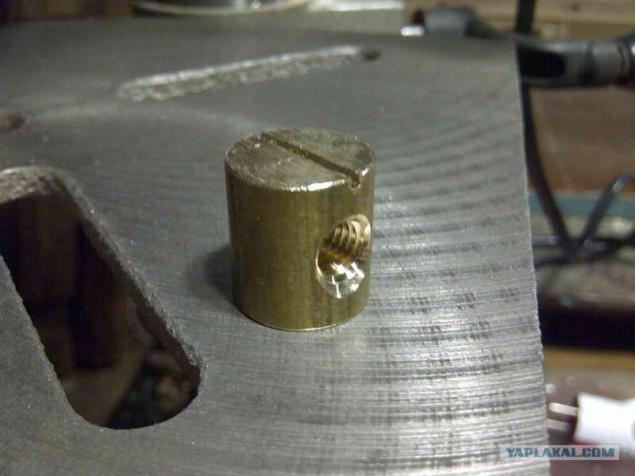
Since we have for sale "barrels" on the M8, we had to make them from brass bar F18:
43
44
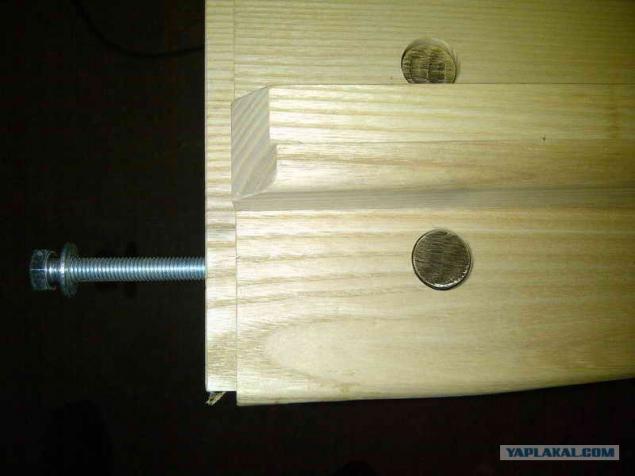
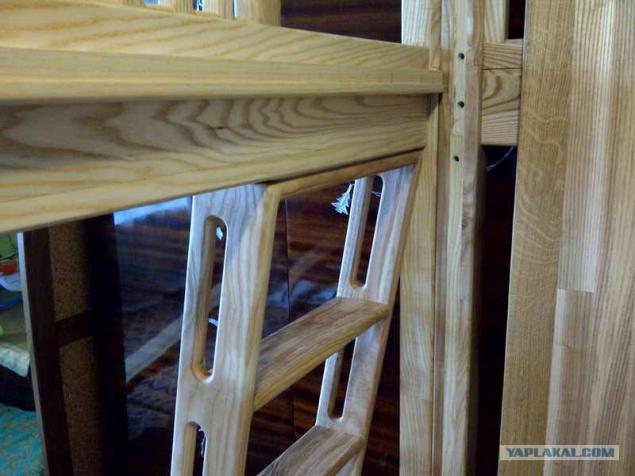
The principle of mounting prefabricated sections. Bolt 125hM8:
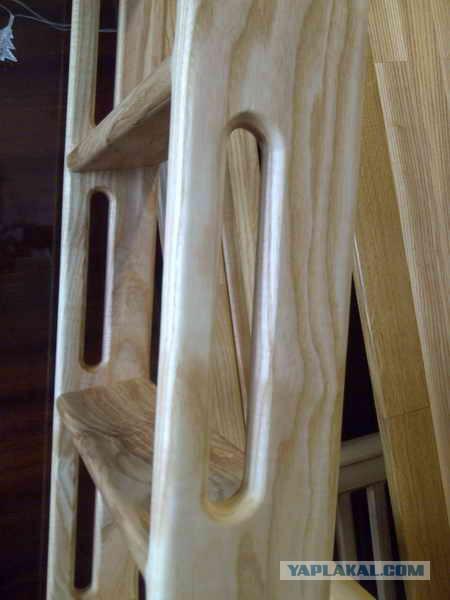
Milling angle steps spikes Grooves ladder:
47
Dry assembly ladder:
Gluing ladder:
After finishing oil:
51
52

53
54
55
56
57
58
59
60

61
62
63
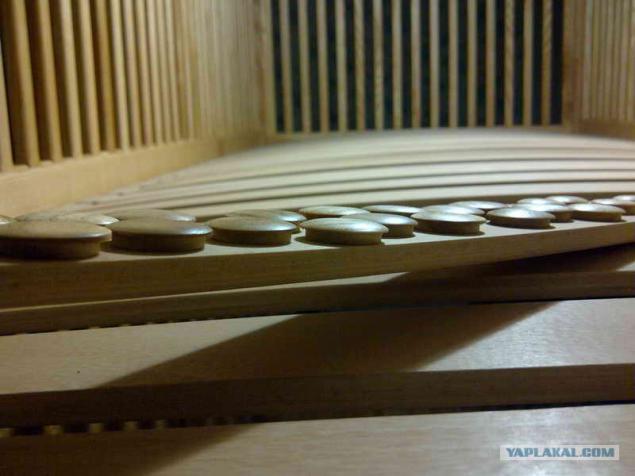
Setting slats:
65
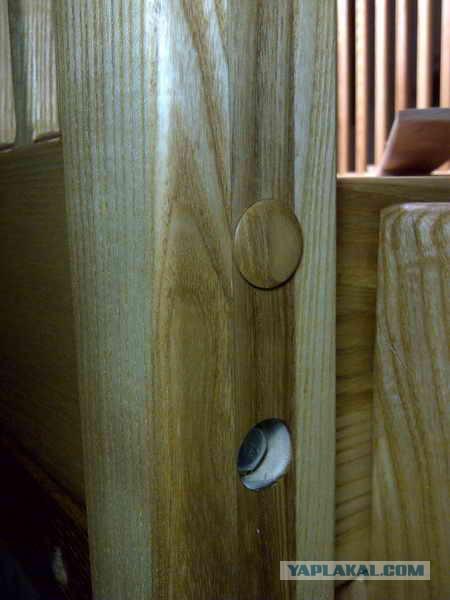
Removable plug / plug holes with bolts. "The core cutter" in the strip thickness of 5 mm drill Sec. 3 mm, since the entire second thickness "k. drill "large diameter. In the double-sided tape to glue the cork wooden cylinder clamped in the drill chuck and forming shlifbumagoy range:
67
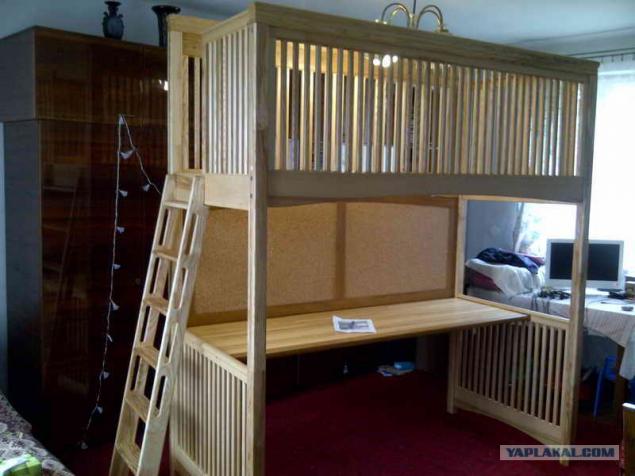
The first stage, it seems, passed:
Posted in [mergetime] 1366205773 [/ mergetime]
While all.
It is interesting to hear your feedback, advice and constructive criticism.
something like ...
Source:
Author © fiva13 forum.woodtools.ru/index.php?topic=51380.0
I came to the finish line first phase of the project, which gave reason to do what he likes, which has long been lying soul, but did not reach his hands.
Restricted square meters of living space and set for completion of the family need to use cubic meters room with ceiling height of 3 meters. Bed decided to mainly ash. After a long walk on the sites (mostly foreign) in search of a suitable option and view more than 50 variants of beds from solid chose this bed:

Only the ladder with time plan to replace the design with built-in steps drawers.
In pictures I tried to figure all sizes under the mattress 200h900h1900 (for growth) Height of the upper railing turned 2300.
He began work on the principle of "say - done", but since I had to reckon with the limited time, tools and, most importantly, lack of experience, has continued to work on the principle of "If you suffer for a long time something happens." Although for me to work with a tree does not torture, but quite the contrary. I stretched out the 1st stage for almost a year, according to the acquired skills are worth.
At the initial stage of the e-mail. The instrument was only manual mill, hand circular saw, jigsaw and ESHM. Therefore reysmusovannye had to order blank. These blanks with straight corners, to put it mildly not friends - solid parallelograms. Realizing that without the direct catch anything good will come out, I corrected all this mess, missing parts on the table between the milling cutter and the anvil slot.
Mills for handrails and grooving cutters produced longitudinal railing:

03

Billets uprights pokruchennye was, therefore, necessary to make the rack of dry material at hand. Dry in the workshop were just edging boards ash, but the humpback. Cut them to the length of 2-3 each, dissolved in the slats and leveled in Thicknessing machine-synthesized. Further, these slats cutter for bonding spliced to length:

05

Missed the slats through the marking gauge, on a smooth fugue glued three-layer racks and aligning in the gauge, was Euro beam:

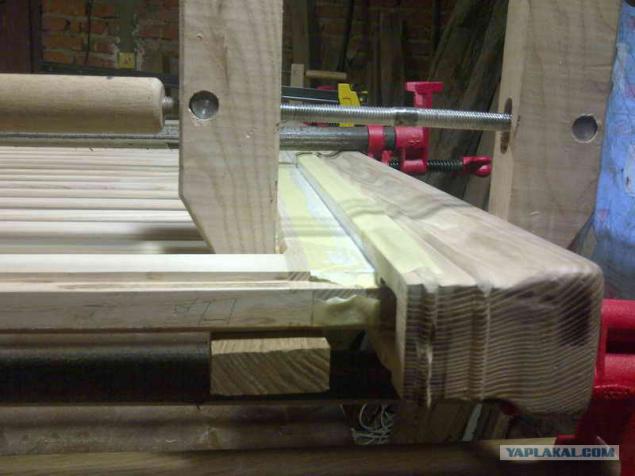
To brought back from the dry, but the curves, make the most resistant, and due to the lack of material on the table, and cut each segment 2-3, sawed in half lengthwise, leveled in the gauge, glued in length, pass through a marking gauge and glue are 3 plots width of 200-230 mm for countertops:

From these plots and reysmusovannyh glued top and ESHM lined the steps between them:

09

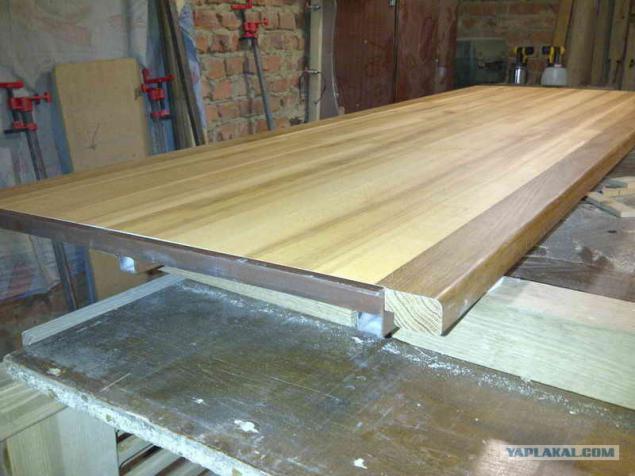
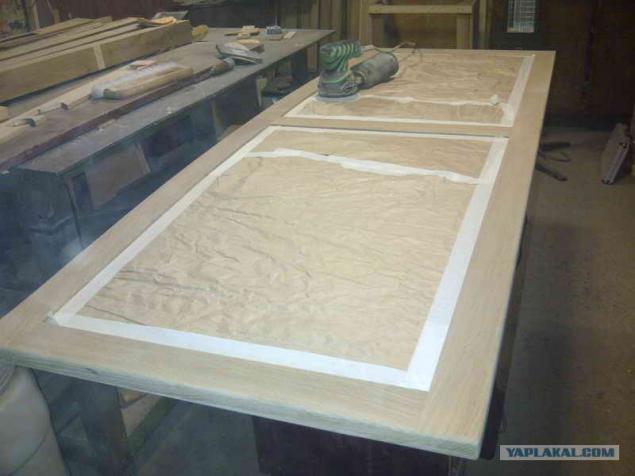
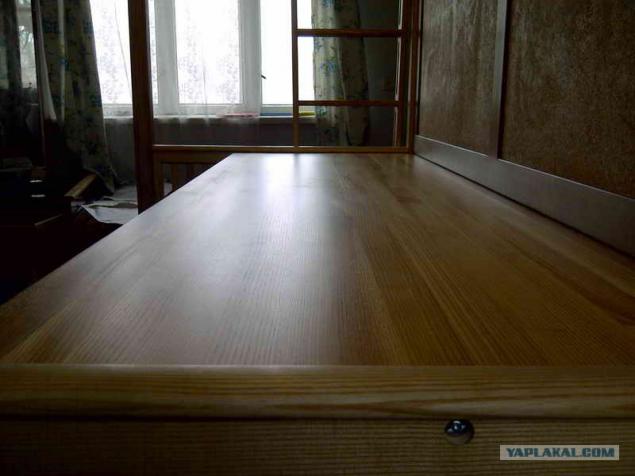
Tabletop covered with 3 layers of oil Festool Heavy Duty intermediate light sanding with Scotch-Brite (red and gray):

Freesia "dovetail" (after the slot) made grooves for arrays and rack frames sections:

Using homemade wooden clamp both stops, radius cutter rounded edges grids:

13

14

Since Length inserts between bars must have an accuracy of up to 0, 1 mm, the couple built to adapt plywood for cutting inserts manual circular saw:

16

17

Due to the small bend "guide" grates sections for dry assembly using two clamps, alternately sticking in the grooves of a grid / bar with inserts:

19

Then insert grids in the section. For example the left starting from the rack frame to apply the adhesive and promote one lattice inserts. 25-30 cm missed the glue - set clamp, and so on:

21

22

23

24

Grooving cutters and chisel at the corners of the grooves produced in the stands and on the sections milled grooves and checked assembly:

26

27

I did cross the railing groove fillet (upper cutter style of the set, the lower cutter radius) and pasted into sections:

29

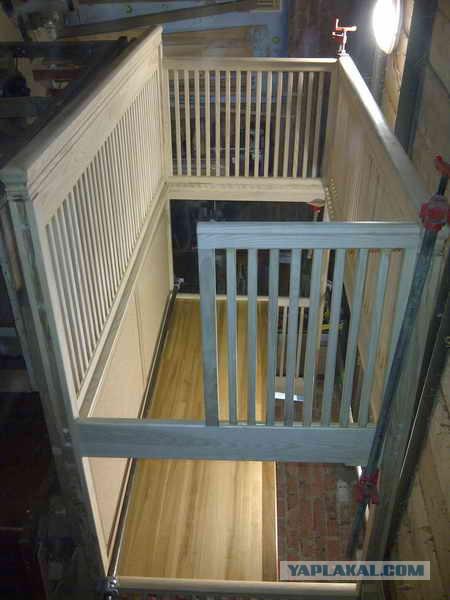
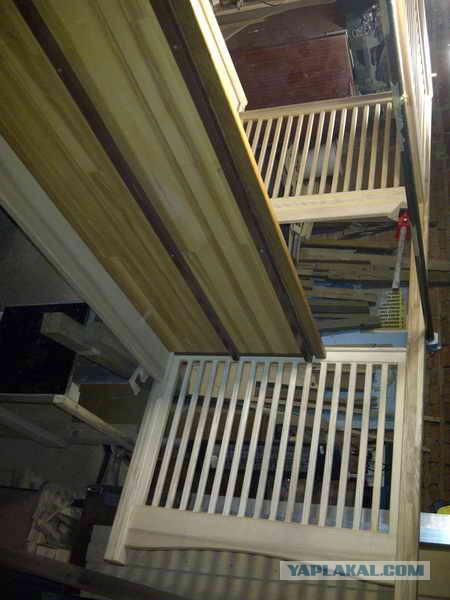
Glued side sections:

31

Glued lengthwise railings:

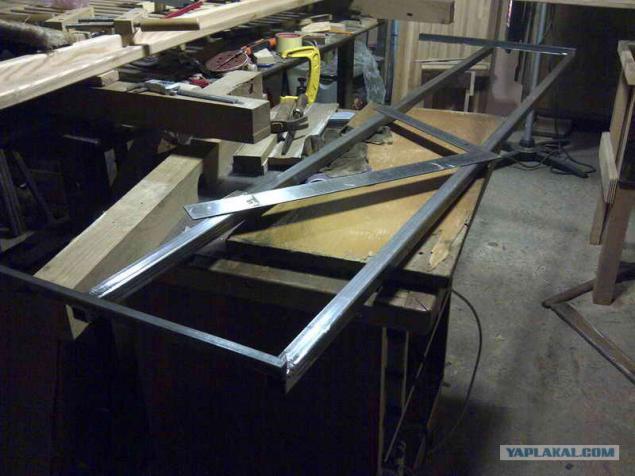
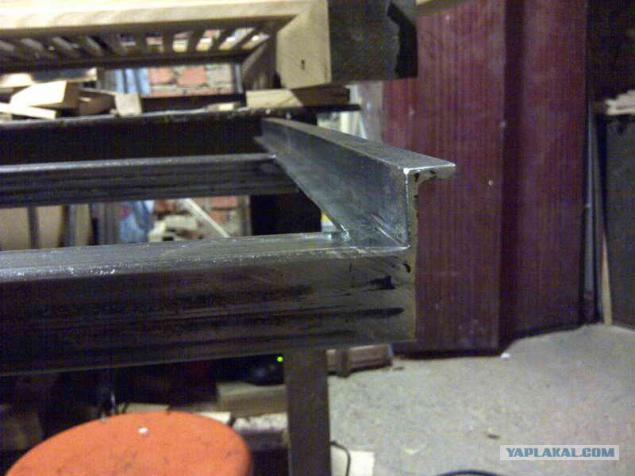
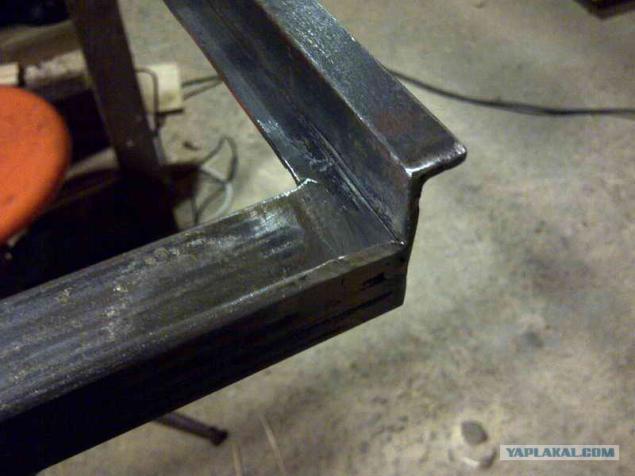
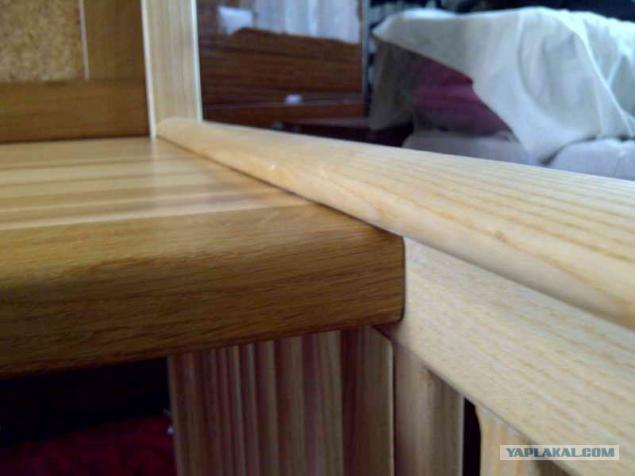
Since the main countertop thickness of 18 mm left, then its dimensions (640h1900) welded support frame from square profile 25x25 and 25x25 corner. Half a corner cut edges and weld perpendicular to another edge to form a spike that will go into the groove under the handrail cross-section and keep the sides of the tabletop. Painted. Drill holes in the corners and threaded bolt.

34

35

The table top assembly with frame:

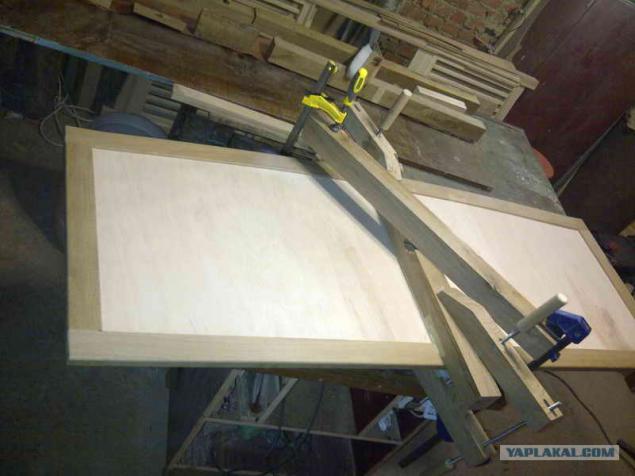
Manufacture oak strapping 10 mm plywood sheets with glued-five millimeter plug. Between sheets of cork in the middle, left for a period of oak planks. For the radius of the top rung as a copier using the lower bound of the top section. The binding groove from the front quarter chose to approach the edges of sheets of cork. Paste the plug on plywood, glued to the frame and stick the two sides oak planks. Sanded.

38

Dry assembly and pilot drilling holes for fasteners:

40

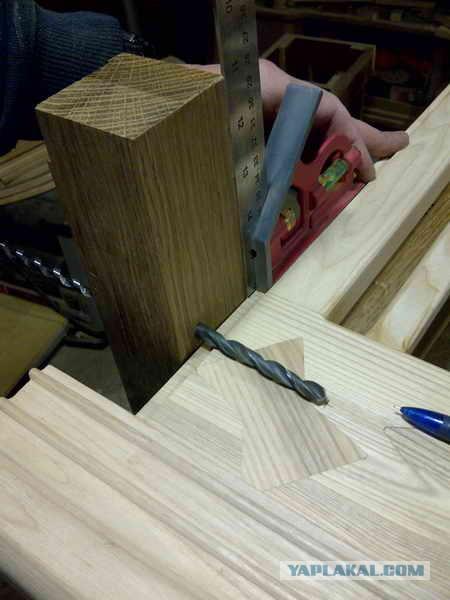
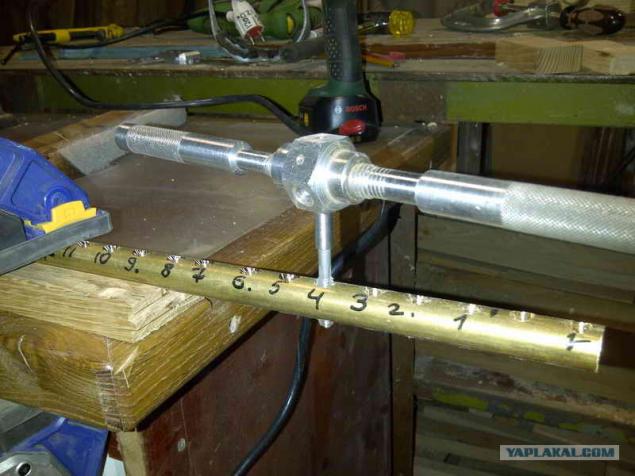
Defining the center blind holes under the "barrels" (nuts) with two drill holes in the parallel bar:

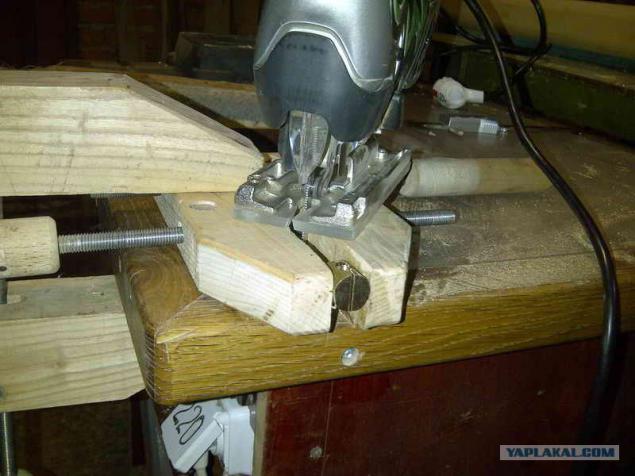
Since we have for sale "barrels" on the M8, we had to make them from brass bar F18:

43

44

The principle of mounting prefabricated sections. Bolt 125hM8:

Milling angle steps spikes Grooves ladder:

47

Dry assembly ladder:

Gluing ladder:

After finishing oil:

51

52

53

54

55

56

57

58

59

60

61

62

63

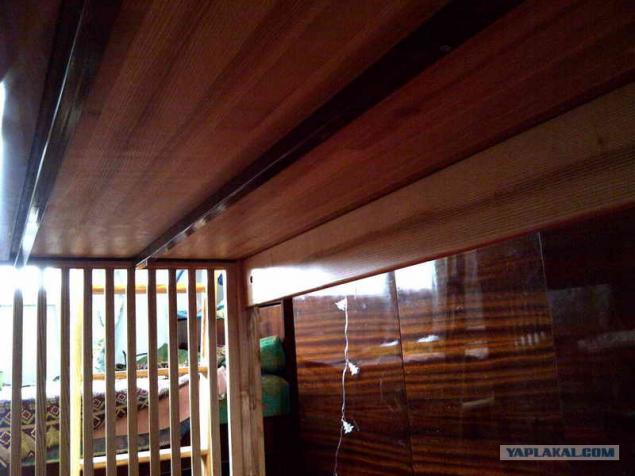
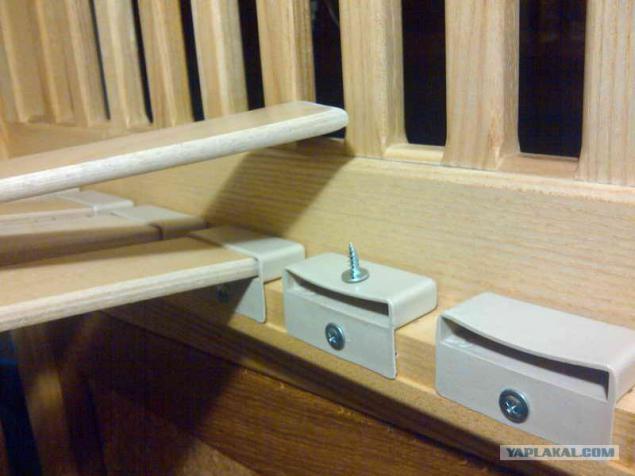
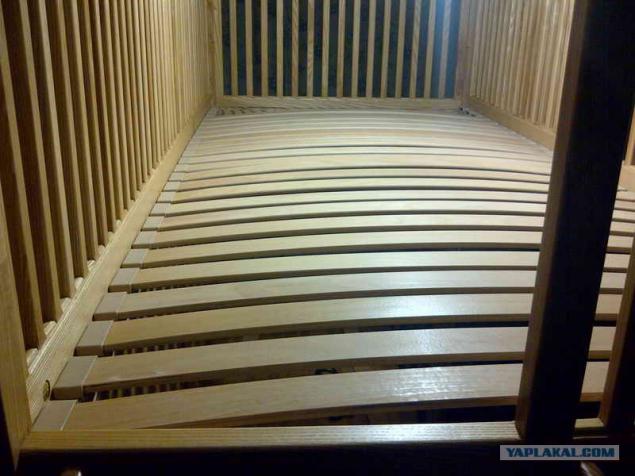
Setting slats:

65

Removable plug / plug holes with bolts. "The core cutter" in the strip thickness of 5 mm drill Sec. 3 mm, since the entire second thickness "k. drill "large diameter. In the double-sided tape to glue the cork wooden cylinder clamped in the drill chuck and forming shlifbumagoy range:

67

The first stage, it seems, passed:
Posted in [mergetime] 1366205773 [/ mergetime]
While all.
It is interesting to hear your feedback, advice and constructive criticism.

something like ...

Source: