242
Installation of the infrared floor in the bathroom
Infrared floor has replaced the aging water and electric, which are an order of magnitude time-consuming in installation and endowed with a number of significant shortcomings. The technology of installation of the infrared floor is simple and even a novice master will cope with it, who will only have to clearly act on the instructions. Let’s try to understand the stages of installation and possible “pitfalls” at the same time.
We plan to repair the bathroom - choose an infrared warm floor
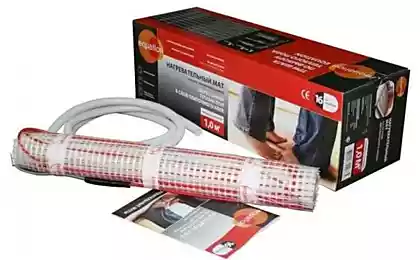
This type of warm floor is heated copper conductor film https://enita.com.ua/category/plenochnyj-pol/, which contains carbon paste, thermostat and temperature sensor. Film laying is done quickly due to the lack of related work and is especially effective for building materials that accumulate heat, for example, floor tiles. It or porcelain porcelain is often used in rooms with high requirements of sanitary and hygienic or operational standards - in the kitchen, corridor or bathroom.

Installation stages
The preliminary stage of work should be measurements of the room and determination of the capacity of the film floor. If floor heating of 20 m2 is required, the system power is selected at least 220 W/m2. From the total area of the bathroom, it is necessary to exclude the one that is occupied by large objects (shower cabin, bulky bath, washing machine, linen cabinet, etc.). The base is prepared - the vacuum cleaner removes the smallest garbage, grains of sand.
Next:
A temperature sensor is connected and laid, the control wires are fixed with tape. And at this stage it is more expedient to install the thermostat - since the location of the subsequent elements is determined by its location. Installation of infrared floor sheets begins on the longest side of the bathroom. Such preparations are made in order to reduce the length of the feed wires. The gap between the sheets is determined by 1-1.5 cm, indentation from the walls - at least 10-15 cm. The structure is fixed using scotch. Wires are connected according to the parallel connection scheme.
This should include:
Verification phase
All - the main points of laying the warm infrared floor are implemented. Electrical connections must be checked according to the manufacturer's scheme. Check the design - turn on the floor heating. Test time is 10-15 minutes. This shall not include:
Upon completion of successful tests, we coat the structure with PVC film for additional protection. Then a reinforcement net is layered under the laying of tiles. We make fixation with dowels in the intervals between the sheets of the film floor. The thickness of tile glue should be in the range of 1-1.5 cm.
Having elementary skills in working with electrical wiring, general ideas about the installation of infrared coating - it is possible to get a spectacular result on heating the floor in the bathroom. It does not require expensive professional tools.
We plan to repair the bathroom - choose an infrared warm floor
This type of warm floor is heated copper conductor film https://enita.com.ua/category/plenochnyj-pol/, which contains carbon paste, thermostat and temperature sensor. Film laying is done quickly due to the lack of related work and is especially effective for building materials that accumulate heat, for example, floor tiles. It or porcelain porcelain is often used in rooms with high requirements of sanitary and hygienic or operational standards - in the kitchen, corridor or bathroom.

Installation stages
The preliminary stage of work should be measurements of the room and determination of the capacity of the film floor. If floor heating of 20 m2 is required, the system power is selected at least 220 W/m2. From the total area of the bathroom, it is necessary to exclude the one that is occupied by large objects (shower cabin, bulky bath, washing machine, linen cabinet, etc.). The base is prepared - the vacuum cleaner removes the smallest garbage, grains of sand.
Next:
- lay a roll foil reflector on one side, carefully glue all joints with self-adhesive aluminum tape;
- in the central area of the room, a cutout is made in the form of a rectangle for installing a thermal sensor;
- produce a cut of thermal insulation material for laying the wires of the thermal sensor.
A temperature sensor is connected and laid, the control wires are fixed with tape. And at this stage it is more expedient to install the thermostat - since the location of the subsequent elements is determined by its location. Installation of infrared floor sheets begins on the longest side of the bathroom. Such preparations are made in order to reduce the length of the feed wires. The gap between the sheets is determined by 1-1.5 cm, indentation from the walls - at least 10-15 cm. The structure is fixed using scotch. Wires are connected according to the parallel connection scheme.
This should include:
- make a thorough crimping of the feed wires in the contact clip,
- isolate the contacts with bitumen tape,
- Insulation is carried out on the back of the film.
Verification phase
All - the main points of laying the warm infrared floor are implemented. Electrical connections must be checked according to the manufacturer's scheme. Check the design - turn on the floor heating. Test time is 10-15 minutes. This shall not include:
- crackling,
- The smell of melted plastic,
- sparkle.
Upon completion of successful tests, we coat the structure with PVC film for additional protection. Then a reinforcement net is layered under the laying of tiles. We make fixation with dowels in the intervals between the sheets of the film floor. The thickness of tile glue should be in the range of 1-1.5 cm.
Having elementary skills in working with electrical wiring, general ideas about the installation of infrared coating - it is possible to get a spectacular result on heating the floor in the bathroom. It does not require expensive professional tools.
Overview of the possibilities of Forex broker Arotrade
How to choose a gift for your birthday and not only


