173
What to do for a house from a plastic bucket and rope
Creating something new out of trash is a great hobby. It develops imagination and fine motor skills. Crafts at home They can not only give you an interesting experience and useful products, but also calm your nerves and lift your mood.
The main thing in this case is to understand that no one is chasing you and take each step gradually, slowly. Thus, the person relaxes and is fully involved in the process. It is not surprising that some masters get great things from the first time, although they have not even done anything so creative in their entire lives.
Crafts at home Laundry basket What you need
Manufacture
But we have two more crafts to give that you will definitely like!
What you'll need
Manufacture
Lights you'll need
Manufacture
As you can see, there is nothing difficult in this case: paint there, glue there. But the thing made with his own hands, will long please the owner. And most interestingly, no one else has one. Indeed, even the paint and materials of all will be different, piece things!
https://www.youtube.com/watch? v=im3YxzHVfXI
In this video you can see with your own eyes how easy and simple you can make a craft that will make life much easier during the renovation of a house or apartment. Use it!

The main thing in this case is to understand that no one is chasing you and take each step gradually, slowly. Thus, the person relaxes and is fully involved in the process. It is not surprising that some masters get great things from the first time, although they have not even done anything so creative in their entire lives.
Crafts at home Laundry basket What you need
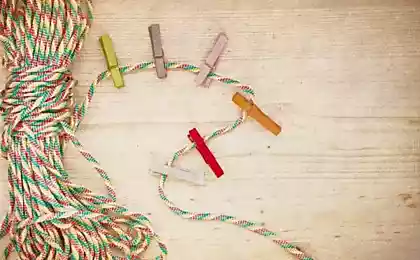
- thick rope (stump)
- glue
- bucket
- handbag
- painter
- painter
Manufacture
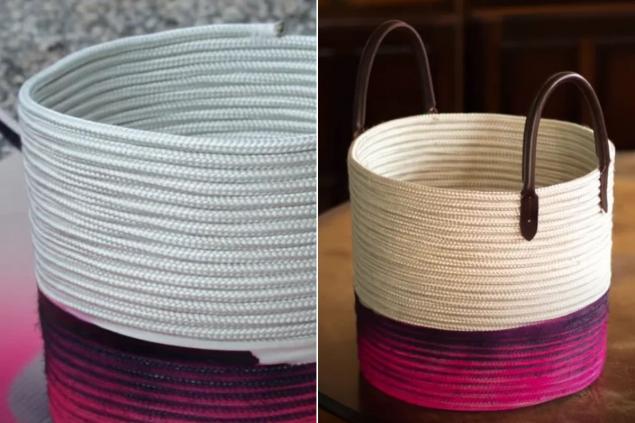
- First, put a little glue on the end of the rope and start twisting it into a spiral, simultaneously fixing this case with glue. It is necessary that the size of the "snail" coincides with the size of the bottom of your bucket. Put it on the bottom of the bucket and continue to do the spiral, creating the walls of the future basket.
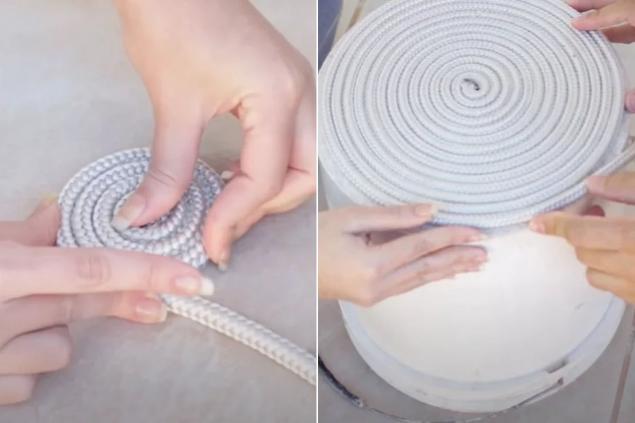
- Keep the spiral up, but don't stick the rope to the bucket, we don't need it. When the walls are fully formed, pull out the bucket. Basically, you already have a basket ready. But let's finish the job completely.
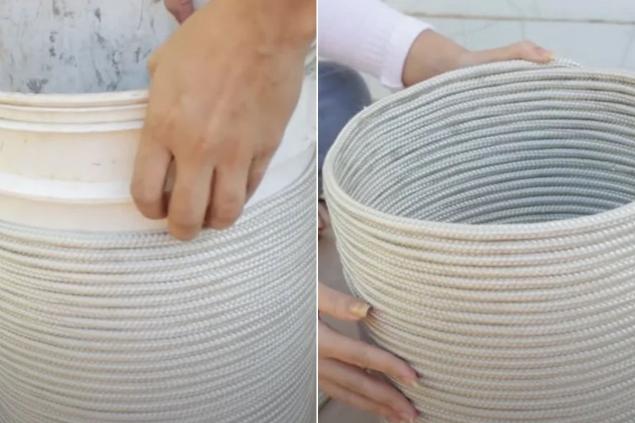
- The edge of the rope is well glued and threaded with threads of a similar color. This part of the product is responsible for the entire structure, so it needs to be well strengthened. Now you have to choose whether to use some more rope for the handles or take the handles from the old bag. We chose the second option.
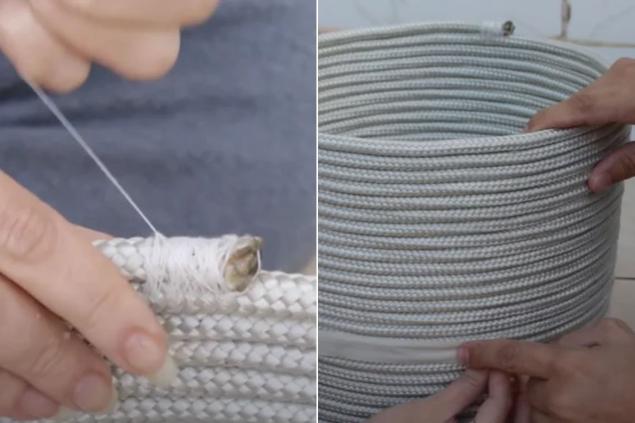
- With the same glue and thread, attach the handles to the basket. And now, if you want, with the help of paint tape, mark the part of the basket that you will paint, and stain it with spray paint. Let the craft dry and use as intended, knowing that you made it yourself from beginning to end.


But we have two more crafts to give that you will definitely like!
What you'll need
- iron-bucket
- paint
- wood-beam
- screws
- soft padding (syntepone)
- finisher
- sand
Manufacture
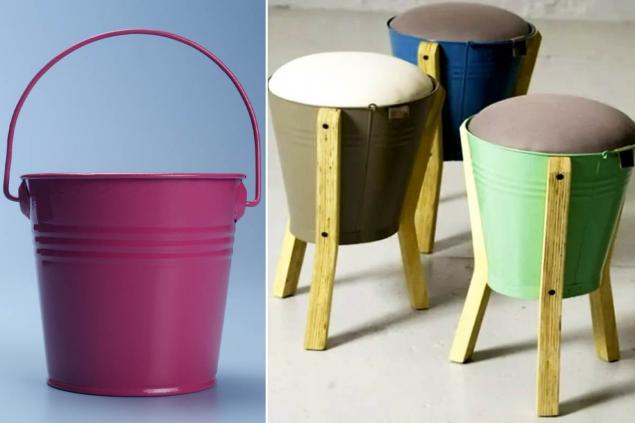
- First, paint the bucket in your favorite color and leave it to dry. After it dries, attach the curved wooden beams to it. This should be done carefully: the legs should be stable.
- There's about half a mound of sand in the bucket. That's how we weight it. And on top of the bed is a fabric filled with syntepon. Secure it so that the knot is inside the bucket. Done. Your veranda will be the decoration of your veranda. You can make a few of them to be enough for everyone.


Lights you'll need
- bucket
- drill
- cartridge
- lamp cord
Manufacture
- Another craft that is suitable either for a cottage or for a loft-style apartment. First, remove the pen from the bucket, it will not be necessary. Now make a small hole in it exactly in the middle of the lower part. Put the bullet in, fix it. Stretching the cord to the ceiling, hanging a bucket on it, which will play the role of a ceiling, and fix it.
View this post on Instagram
#bucketlamp #creativelamp #bucketlamp
A post shared by VERA GOLYN (@face2faith) on Jan 29, 2016 at 9:05am PST - Basically, the lamp is ready. But this is more a design decision than a real craftsmanship. On the other hand, there are non-standard materials, a bit of manual labor and an unusual but cute result. What else do you need?
As you can see, there is nothing difficult in this case: paint there, glue there. But the thing made with his own hands, will long please the owner. And most interestingly, no one else has one. Indeed, even the paint and materials of all will be different, piece things!
https://www.youtube.com/watch? v=im3YxzHVfXI
In this video you can see with your own eyes how easy and simple you can make a craft that will make life much easier during the renovation of a house or apartment. Use it!