Tremble, Oculus VR
Maybe someone read my post about the sand electrified rocker . In that article, I expressed a desire to cross to get a device with virtual reality goggles. Oddly enough, it's not stopped on the expression of desire. I would certainly prefer popolzovavshis Oculus Rift, but it's too big a blow to the budget of the provincial loader, the more impact, not supplied to Ukraine. In addition, insiders say that in our "megacity" look for this wonderful device useless. Well, get it out of the box classic loaf of black bread, screwdriver and thread, and with a look at the set of photos that you can get out of this.
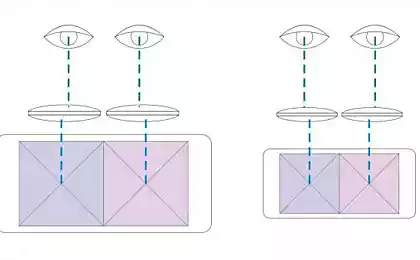
Construction times h4> Prior to the study subjects seemed to me that such a device must have complex, not implemented in the home optics, but Google has dispelled these fears. It turns out to spoil yourself sight, only a couple of lenses from stationery stores. This implementation uses lenticular lens outer diameter of 54mm. Indicated on the packaging howling 10X magnification, the price of about $ 1 apiece.
The first version I literally glued somewhere half a year ago. Just to see if I can see the stereo effect. This freak looked something like this:
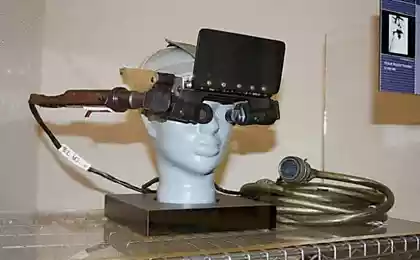
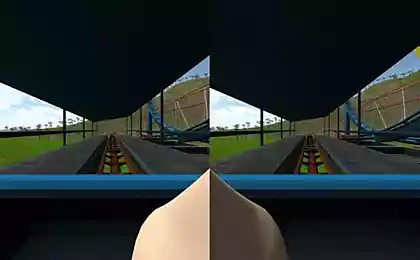
The construction of two h4> The effect was, but just a couple of android demos, others are not allowed to set up mezhduglazie IPD , 7 is important for the 'screen. In addition, in my case is not required to run applications on the tablet, and streaming images from a computer that steers elektrotaburetkoy. In these matters, I did not manage to achieve tangible progress, therefore sverhtehnologichny virtual reality goggles were abandoned gather dust on a closet. But after reading the above materials Habra, I decided a little more kick the corpse. I liked the idea PlazmX used in the device box of tools housing industrial manufacturing. But I decided that it's easier and better to use food container:
- it should be easier;
- range of containers is extensive, it is easier to find the appropriate size.
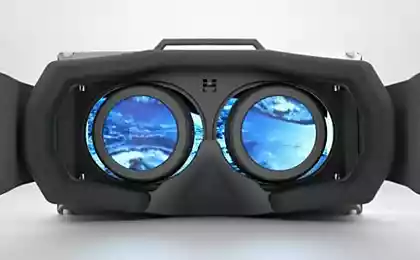
After the experience with the first design has remained a strong belief that the rubbing face of cardboard brick is not very convenient, so I bought at the hardware store here are the goggles for $ 1 (the latter do not know where he got). Less I did not like the green, and subjected them I vivisection.
Drill a hole in the core bit glasses, container and all in all, how could reach. Soplemet uncovered, not sparing the content pasted in place of the lens, and glued together all the elements of design.
Photos process to obtain the following:
Probably I add too many photos, but once the film is still used, not disappear as good
The most attentive readers have probably noticed that the source material for the very first design was the box from the very screwdriver, which I drilled holes for the lenses. I believe that this is a sign. It remains to find out what it means.
Files h4>
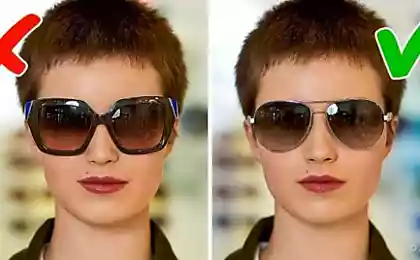
-Devochka, here you are bald, how are you holding a bow on her head?
-How Profit and kept blockquote> It is strange, but the tablet does not work from the birth of the accelerometer. Despite the fact that the Auto-rotate screen works, some (all?) Of the application can not see the accelerometer. I read somewhere that the Auto Rotate eastern friends sometimes put something like a pendulum. I do not know the reason or not, do not hunt to dig. Because of this, and also due to the fact that I have had to deal with FreeTrack , I used it. Also a nice bonus is that this softina natively supported in the driving simulator used by me.
FreeTrack determines the position of the head by three points. A working webcam aimed at three contrasting marker, eg nailed to the head of the LEDs. As a more humane option - to cap. In normal (average) of the head position markers should not be located on the same vertical plane (in the place of this embodiment sfeylil points I). As markers better use LEDs, but can also be applied to the external backlight reflectors. I used infrared LEDs. To provide power to the LEDs had to modify the cable microUSB-OTG. To do this, an additional cable was withdrawn two power wires, which through the current-limiting resistor connected in series with three LEDs. As planned with the functionality of the cable had to be saved.
Also had to modify the camera, remove the IR filter. Thereafter, it is desirable to use a filter chamber of the visible spectrum. This works great as a fully irradiated by color (black and white I have not gone trick) film, if someone still remembers how it looks.
Another version of the bike is assembled, but the wheels were square. It turned out it's not so great, as seen from the mountains. The device is assembled, tested, but proved to be too heavy, too big, uncomfortable opened and I guess a little tradition with a focal length. The main reason for these stocks was a bad choice of container. My plate was a little asymmetric, because of what I had to take larger containers, as the depth of the container was suddenly less necessary, but this issue is partially resolved using additional insertion (a piece of white plastic lining in the design). Also, I incorrectly screwed head tracker, setting all the LEDs on the same vertical plane.
Construction dva.odin h4> to suffer a couple of days, I decided to change the design and buy another container with convenient snaps a little deeper and larger. Bought, and there before me suddenly realized that he decently harder. Fail. Ingloriously protracheno another $ 2. Well at least not in time raskurochit.
You probably thought that since I have already described the production of two and a half points, that's all over, I calm down, and you start to read comments ?! Not so simple.
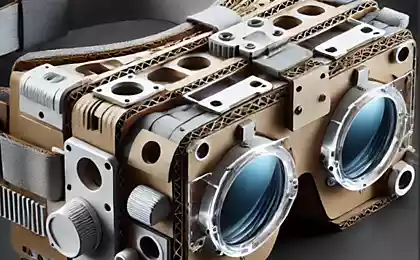
The construction of three h4> In the regular fit design I decided to repeat the first attempt and build makeshift housing made of corrugated cardboard. You could use more tech stuff, but that's at hand was not. The role of the donor agreed to play here this box:
I cut, glue:
Screwed fastening for gum tucked under the arm of a piece of tin:
As you know, having one marker, you can paint everything except the marker. And with two markers can be painted everything. So, basically, I had the opportunity to paint everything in two layers, but I limited myself to only some surface points.
Get:
Replace the crippled container freshly construction of cardboard. Change to the correct location of LEDs tracker.
Last on the current version:
Pro software probably will write a separate article. In principle, it works, but crooked. Even already been removed video , but it is necessary to finished piece of metal sane state.
And if suddenly someone will dare to repeat, quote warning Meklon :
The only thing I want to say to those who will follow - homemade is very different in terms of accuracy of the factory production. The result of the errors will be fierce spasm of accommodation and fatigue during prolonged use. Blockquote>
Source: habrahabr.ru/post/233725/