1046
Playground child - their own hands better!
57 photo.
Little prehistory.
It all started when I got married ... I do not think wrong, I'm happy about that !!! No, probably not ... I'm very happy !!!)
Because from that moment on, my life changed dramatically. From the "eternal student", I began to transform into a head of the family.
By the time of the wedding ceremony, from the whole of the property, I was like Latvians, x * k da soul) played a good wedding "on credit", Gifts she paid off only 60%, and our young family found their lives in the dormitory of 12m2 and a loan of 100 thousand over the next five years. "Beer comrades" slowly began to fall away, and their shift began to come quiet family life.
Three months later, the wife of such a life I cheered the news of the imminent replenishment of our family ...
At first I was scared, and then came the realization and humility in one bottle,
and then I realized it was time to act for the good of her family! Having estimated the pros and cons, the family council it was decided to purchase suburban area in the city, preferably with the structure. Figuring how much we are already paying for the loan, how much it costs a removable housing, it was decided to "okreditovatsya" 300kilorubley another, but that money has to invest wisely). Site search took about 2 months and became opofeozom, or a gift of fate, or the reward for patience, 14 acres of land in a small house in
25 square meters and a garage of 30 squares in the city, for a symbolic 200 thousand. There was a "but", the site had a bias, but at that price it was just a gift, we are not looking for the easy way). On the remaining 100 thousand. Led light and water, and made the first repairs in the house, which is still going on)). And now, after 3 years, we got a little studio apartment with all the conditions and prospects for future expansion. During this time I became a happy father who loves his son.
The son grows very active child and one family evenings with his wife decided to organize it at least a small but personal playground, good plot of land allows.
At all events, it was decided to allocate no more than 10 thousand. Rubles (For further loan is paid, and to deprive the child of the joys of childhood do not want to).
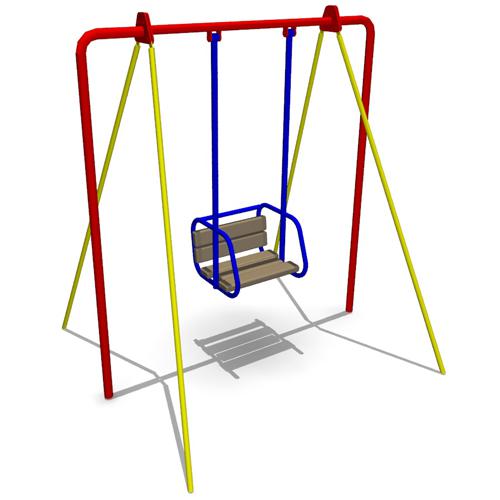
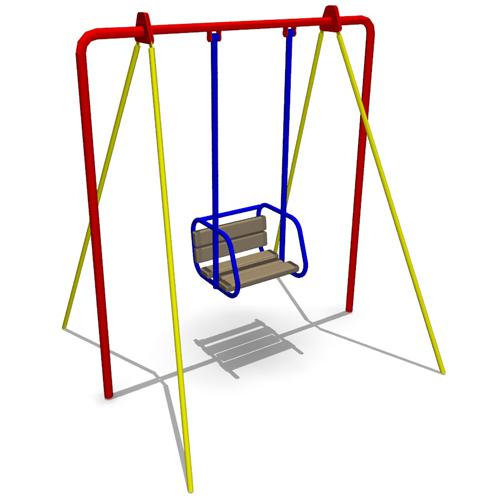
Ride on the markets and shops, it became clear makimum that we can buy from the finished, like this:
Photo 1:
But we're not a finger to do, and "ready" and "overpayment" is not for us !!! Digging in the vast runet, it was found a few good projects playgrounds made of wood.
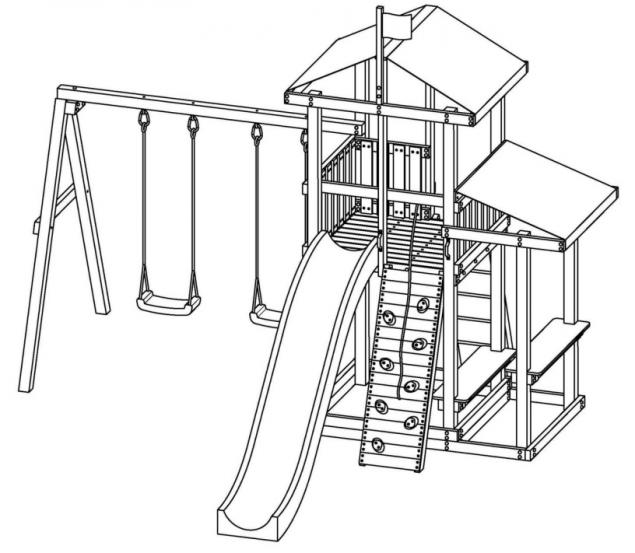
All tchatelno calculate the price of learning material, it became clear that if you do the site itself, I can easily invest in designated above budget, but still spend five times less than the offer of ready-made platform for the project. His choice has stopped on this project:
Photo 2:
And so, in early May, arrived next, long-awaited two-week vacation. Hands have itched with anticipation of creativity, and a children's playground, at least mentally, but already has a pre-designated location! Having vacation, immediately I went and bought all the basic stuff, it's cement, wood and screws.
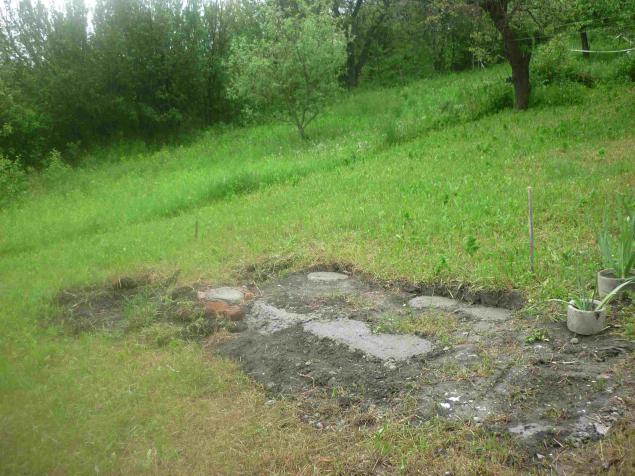
For a start, the selected location for the site, filled six concrete foundations for the support depth of 0.5 meters. Because of the uneven portion on one side of the ground it had to remove a little, but on the other
pour.
Photo 3:
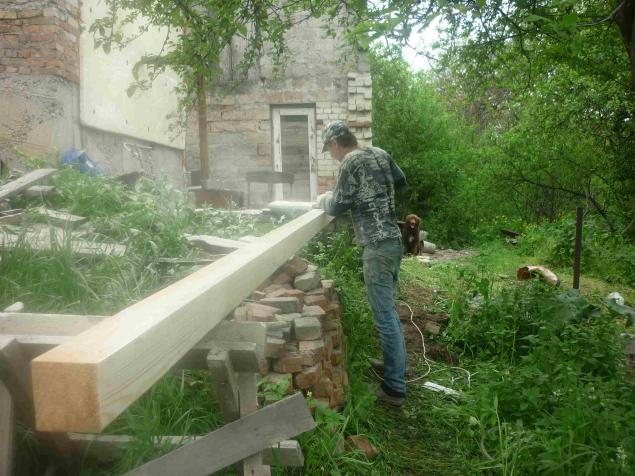
As long as the concrete dries, he took up the processing of wood. Processed grinder with medium grit Abrasive mop. All parties were soundly cleaned boards to avoid splinters in our hands malyuhastikov. The corners have also been ground off, in order to avoid more serious injuries. For one evening, the board handled 4 100 * 100 mm and 8 boards 50 * 100 mm.Pylischa was ... words can not convey! Logs 20 * 100, it was decided during the assembly process design, they just have no strength left ...
Photo 4:
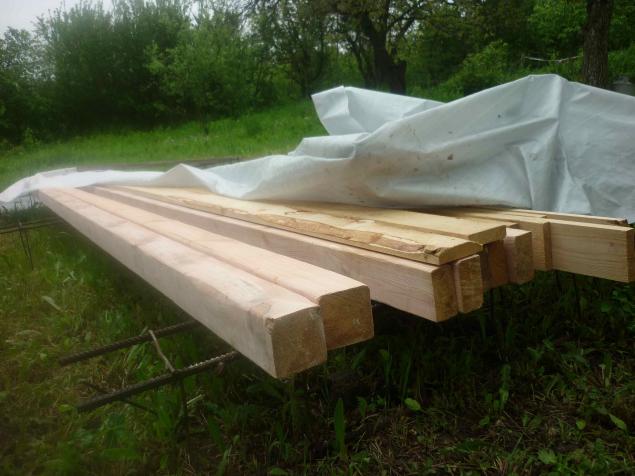
After sanding boards, treated wood impregnated them against corrosion and bugs, making the tree has acquired a pink tint and gave hours to dry. Here it is, almost all the material is ready for further cutting and assembly. 2 board 100 * 100 and 100 * 50 one already cutting)
Photo 5:
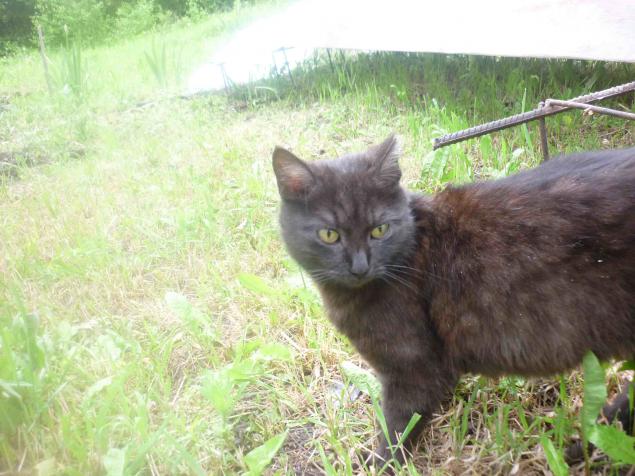
From under the boards to help crept sleepy Mike Farley, covered in sawdust) How to do without it!
Photo 6:
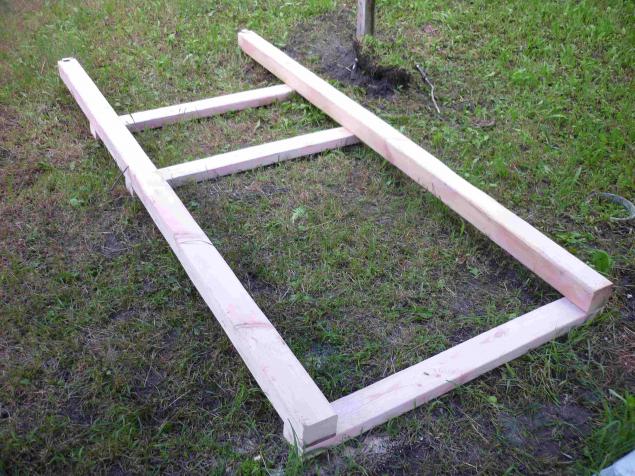
To start collecting the supporting structure. For her, taking 2 board 100 * 100 2 long, 8 meters, and connects them to each other three boards 50 * 100 1 long, 2 meters, carefully maintaining all distances and diagonals.
It turned out that it is.
Photo 7:
By collecting pattern I have the same item). And now they have 2!
Photo 8
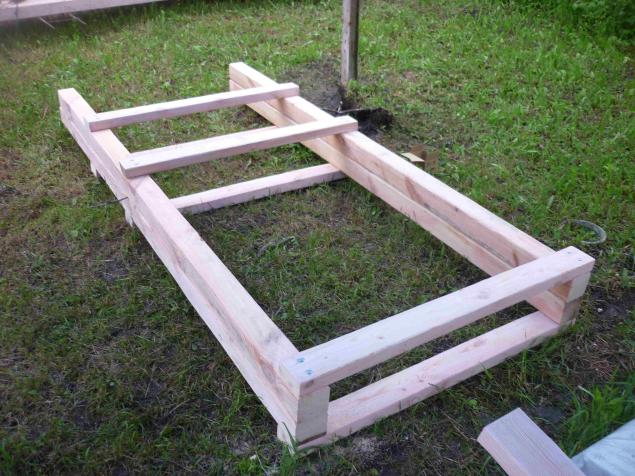
Crepe boards together with screws on a tree-type "Capercaillie" size 8 * 85mm with washer, pre-drilled holes for them 4mm.
Photo 9:
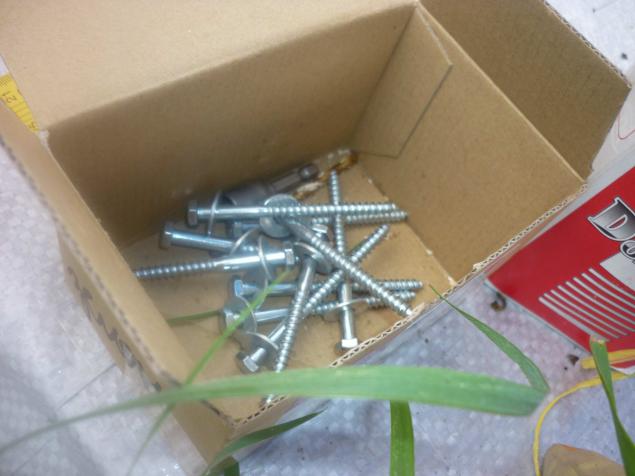
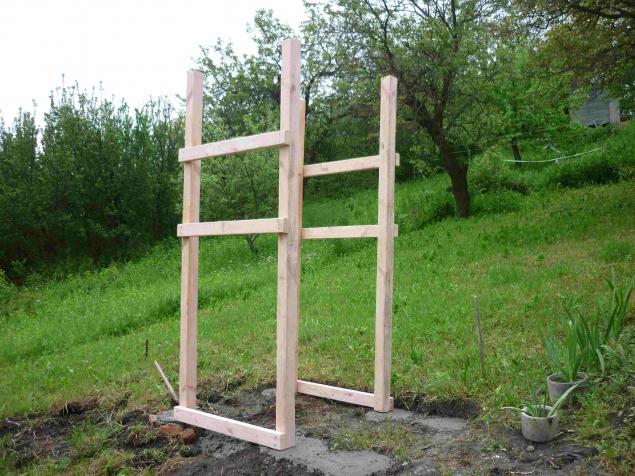
Install a support structure to its rightful place, securing them together "on the nozzle»))
Photo 10:
Came Head! He showed me an error, they say, in the wrong direction pad bet! Who so builds! Quickly convert!
Photo 11:
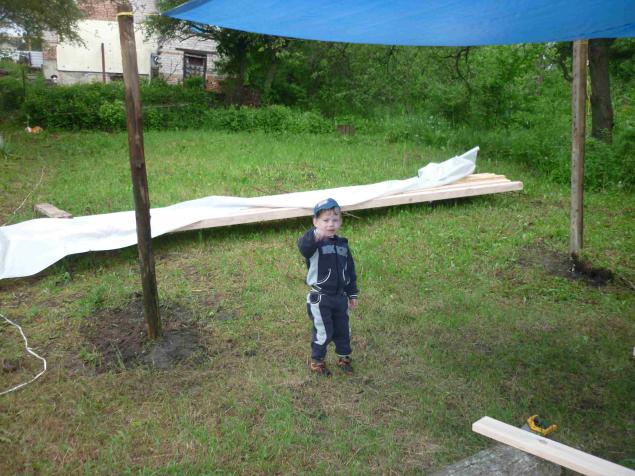
Well naschalnike, Chivo swears fix!
Photo 12:
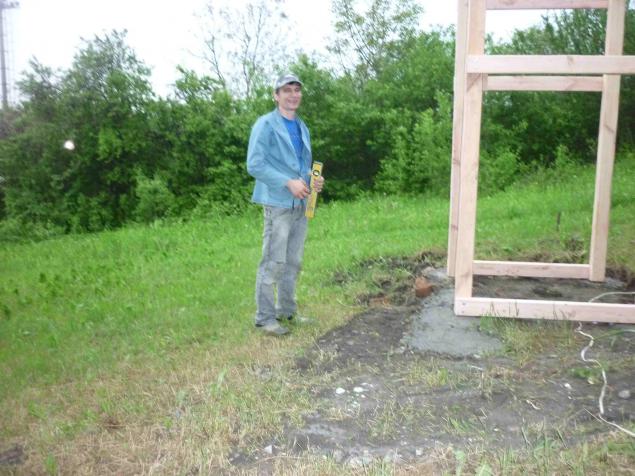
He turned in the right naravlenii design, secure the rack between a board of 20 * 100mm length 1 2m.
Photo 13:
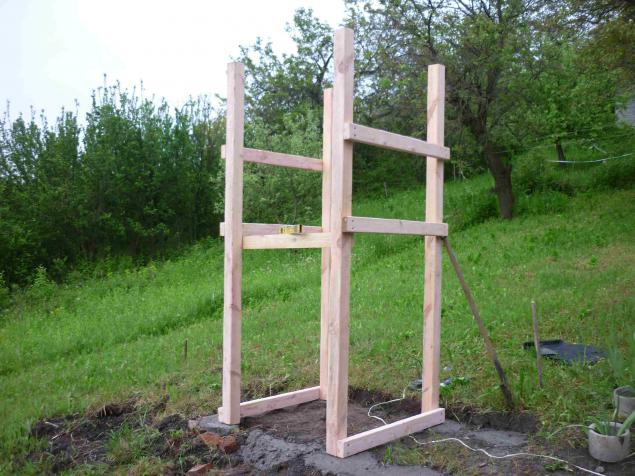
Putting the rack level and vyvev all diagonals, fasten them together more thoroughly. Top board 20 * 100mm,
below 50 * 100mm and a length of 1, 6 meters, with a margin for extensions.
Photo 14:
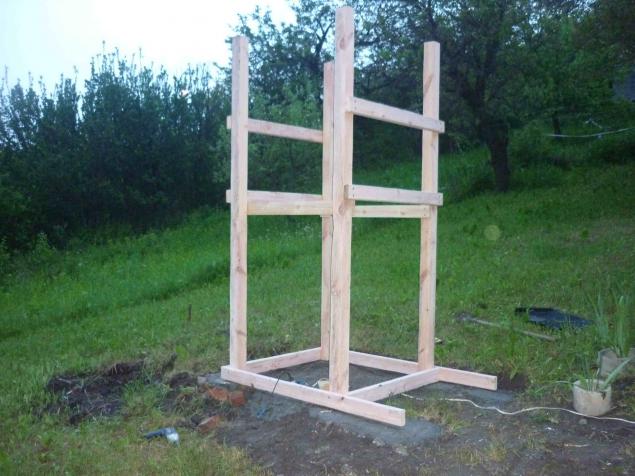
Place mounting board 20 and 100.
Photo 15:
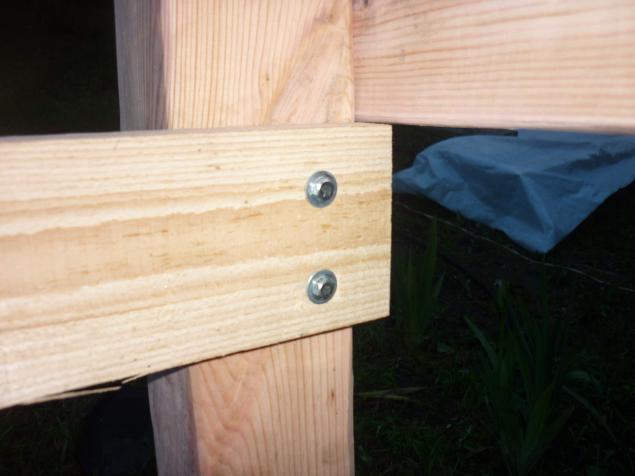
Added board 20 below 50, turned in a circle tying the twenty, her gender will do) but tomorrow, dark ...
Photo 16:
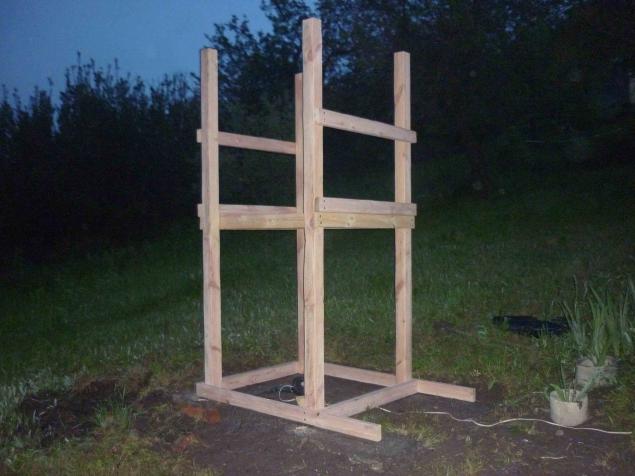
The next morning, continued to work on the floor. Between 20 board, which made the harness, insert the board 50 by screwing it just below 2 cm to the floor does not seem to fit.
Photo 17:
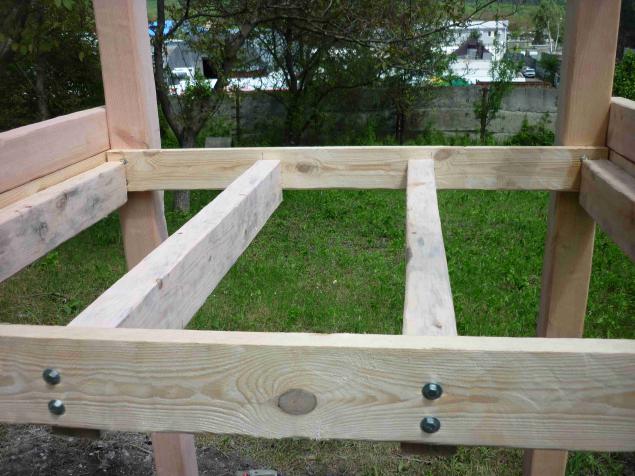
Side strengthened so. In parallel we clean untreated wood grinder and grind off the rough edges. We're worried about malyuhastikov!
Photo 18:
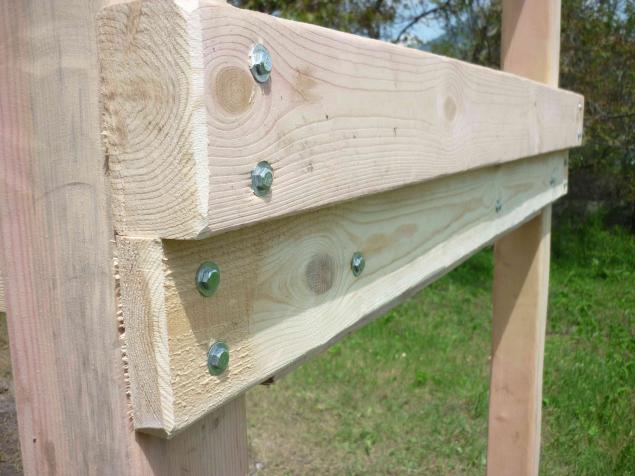
Distribute floor boards 20 * 100.
Photo 19:
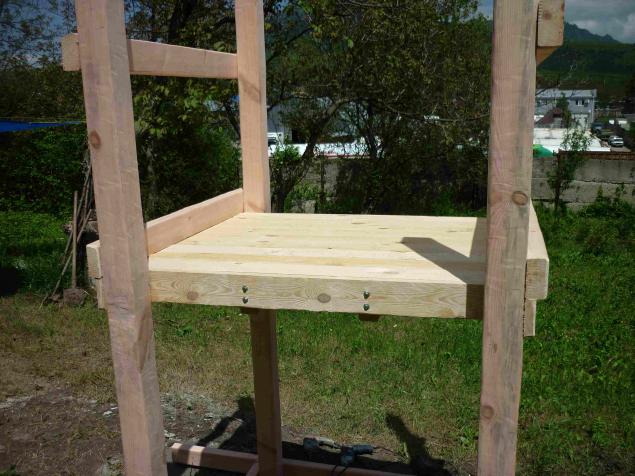
And well paced grinder, removing all differences postachivaya boards and sharp corners.
Photo 20:
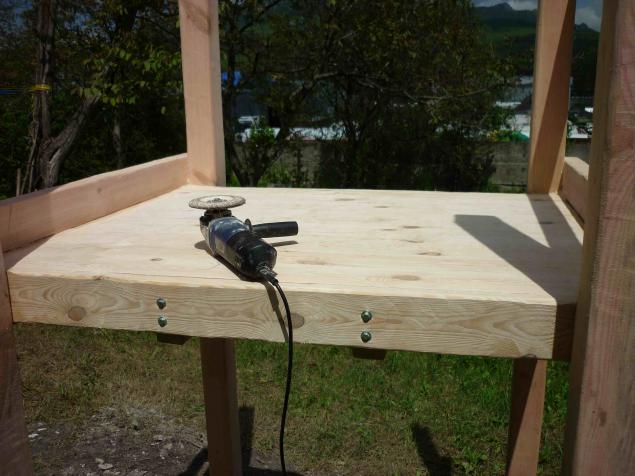
Just grind off all protruding corners under the floor, in order to avoid injuries to the heads of children.
Photo 21:
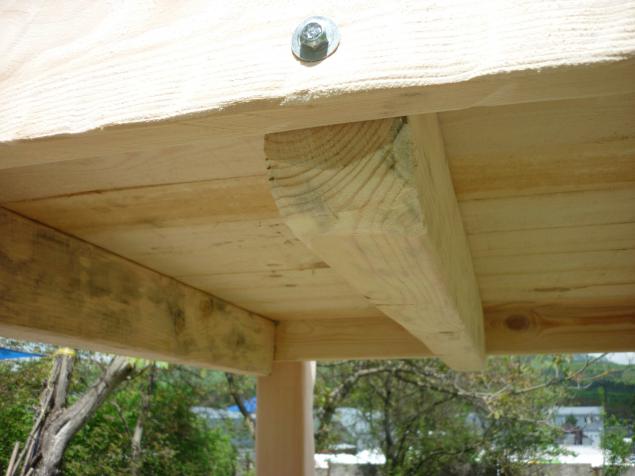
Screwed floor boards with screws.
Photo 22:
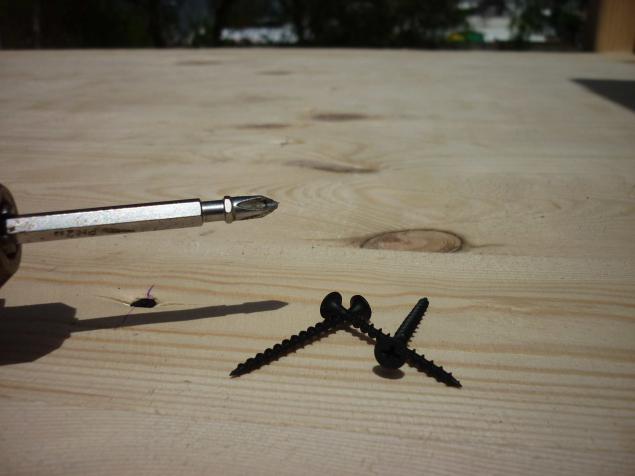
And adds another 50 from the railing of the board. Begins to emerge that the ...
Photo 23:
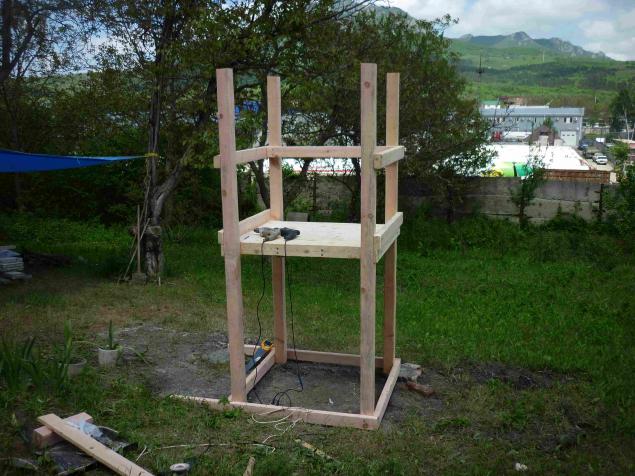
At the bottom is screwed another series of boards 50 * 100. There is a sandbox.
Photo 24:
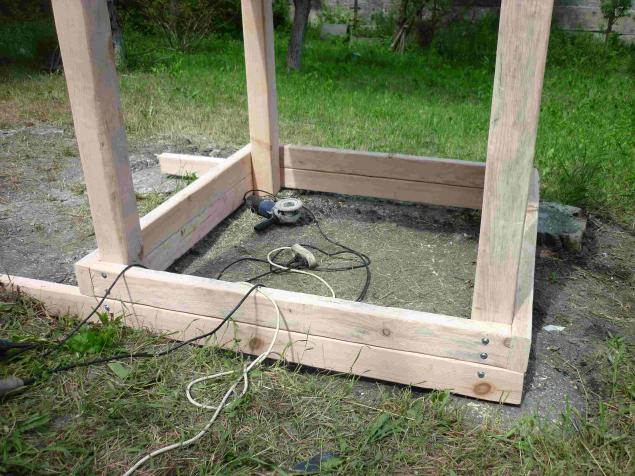
Sandbox 2. Remember who build and grind angles)
Photo 25:
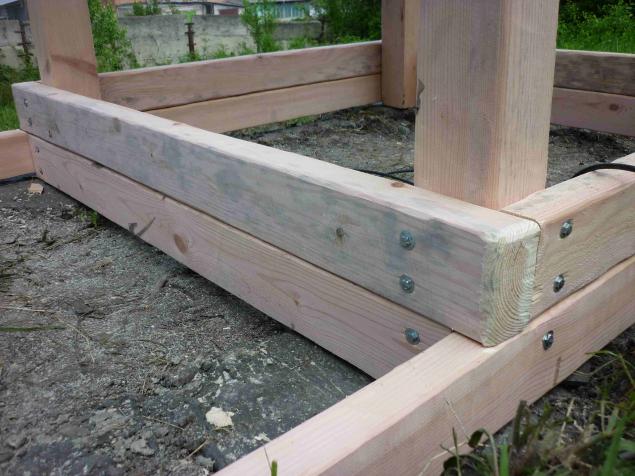
Screw the base to the roof. Board 50tka.
Photo 26:
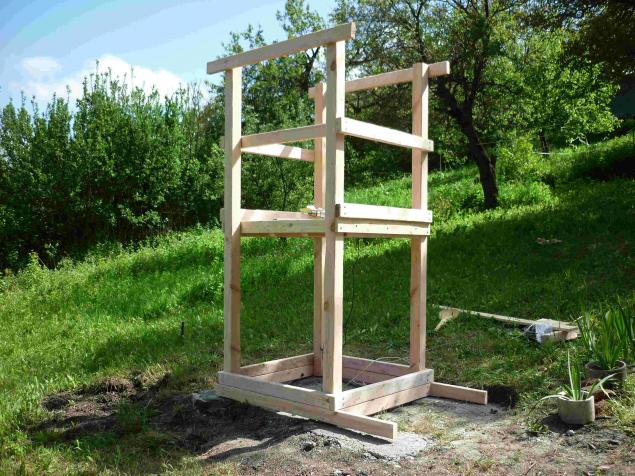
And screw the base under the roof ridge and the stairs up the hill.
Photo 27:
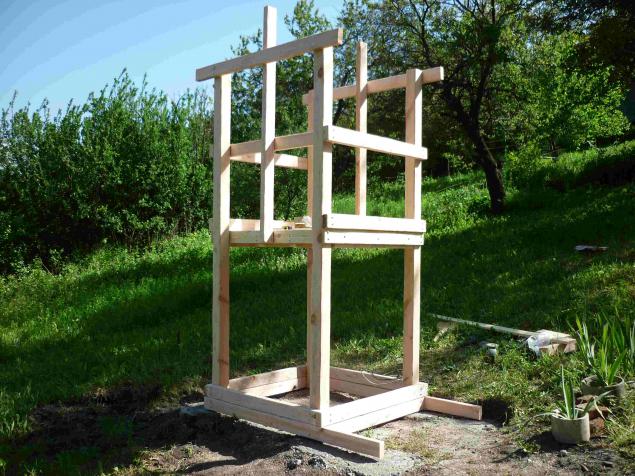
Bottom mount ridge inside.
Photo 28:
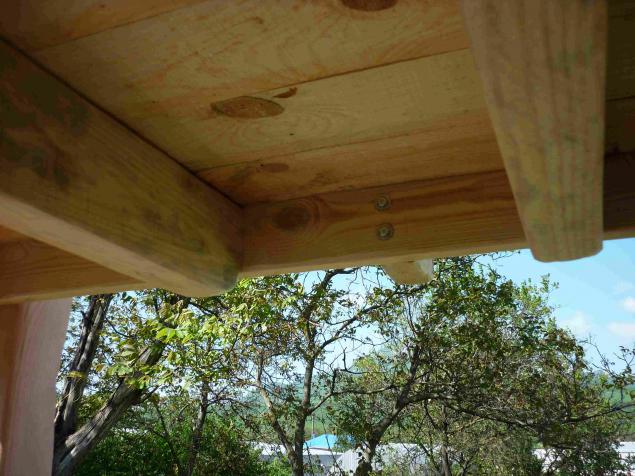
Screw the short perilka.
Photo 29:
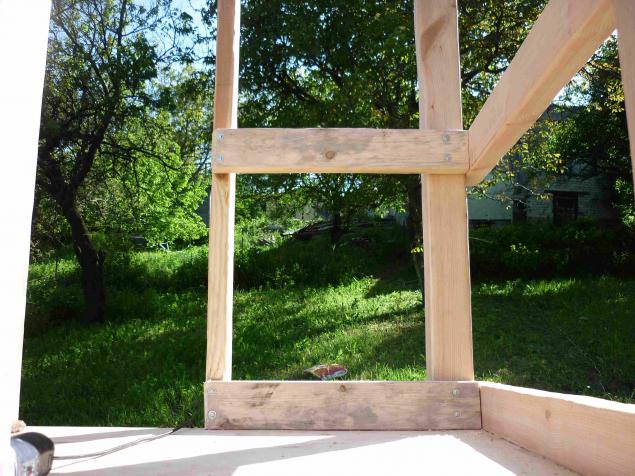
And finished off the roof and harness horse.
Photo 30:
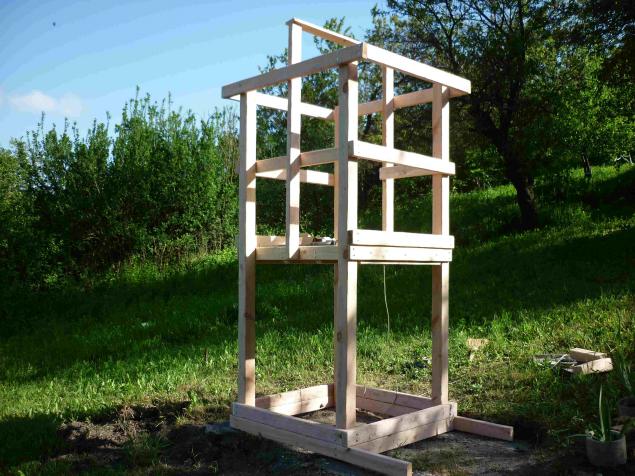
Closer ...
Photo 31:
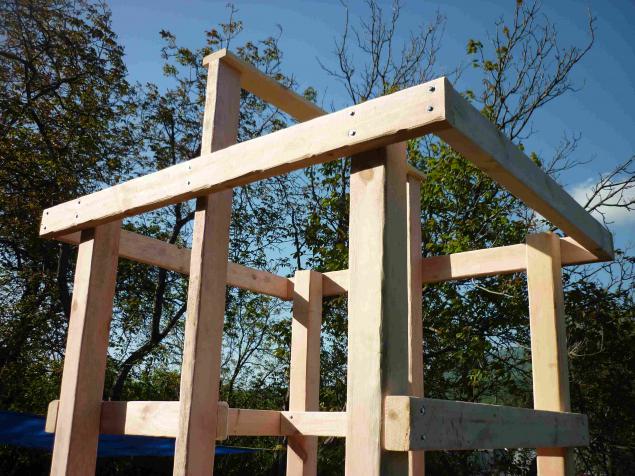
Washed down and fastened to the main structure extension.
Photo 32:
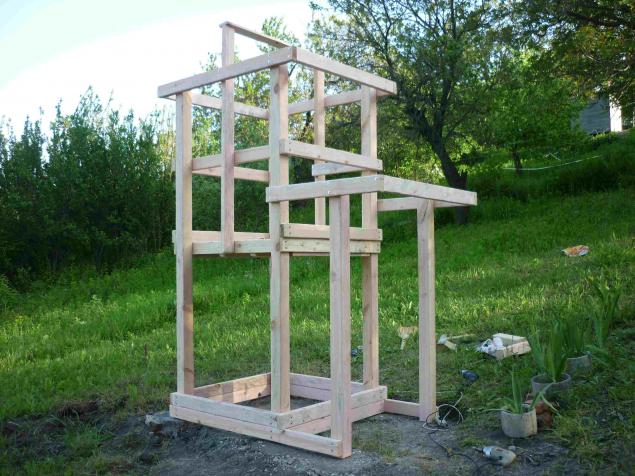
During the broken drill bit, to go for the new was laziness, but experience shows that you need to go ...
Photo 33:
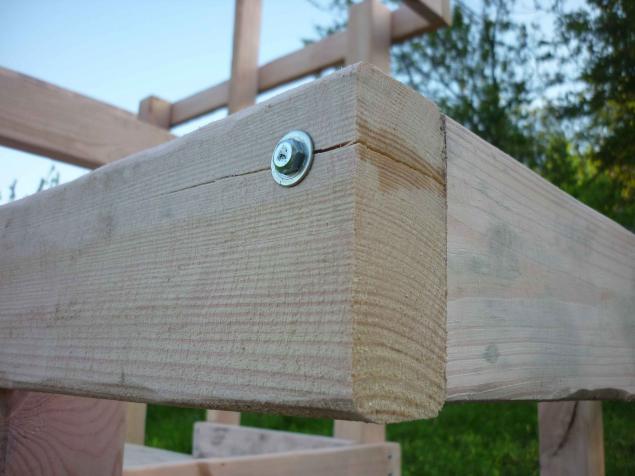
Tied extension on the bottom.
Photo 34:
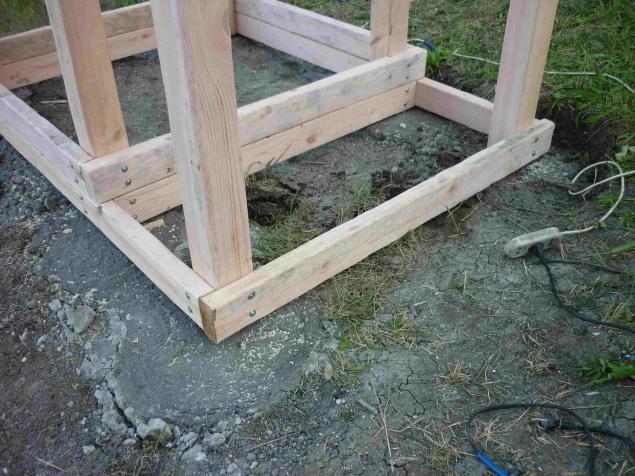
It is increasingly beginning to resemble the desired result :)
Photo 35:
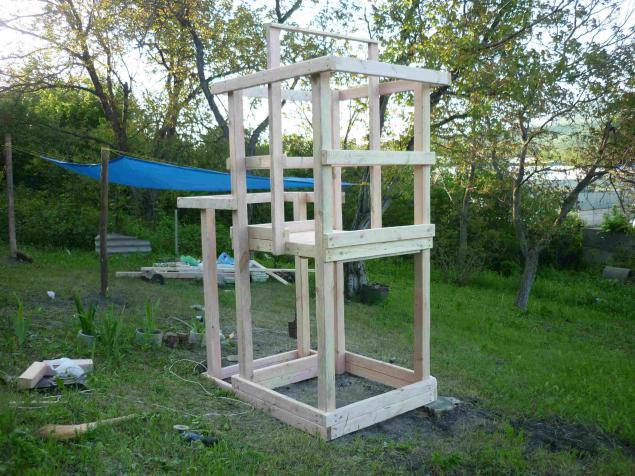
In the sandpit and pergola collect stool. I screwed to the support pieces of the board 50 * 100 ...
Photo 36:
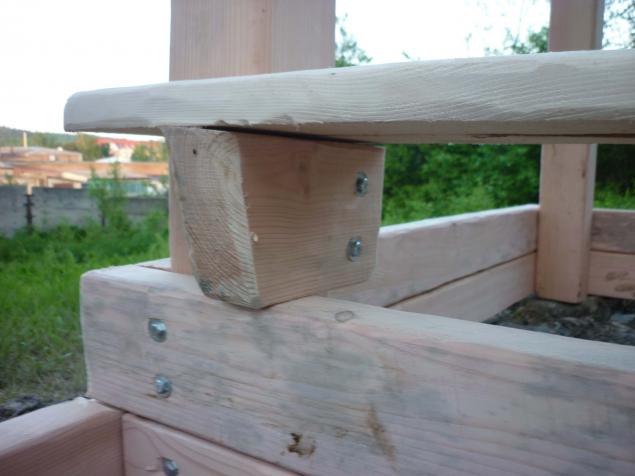
and in the middle add emphasis to the strength of the bench. Only strengthened the top screws. And of course, tchatelno skin and round out all the angles.
Photo 37:
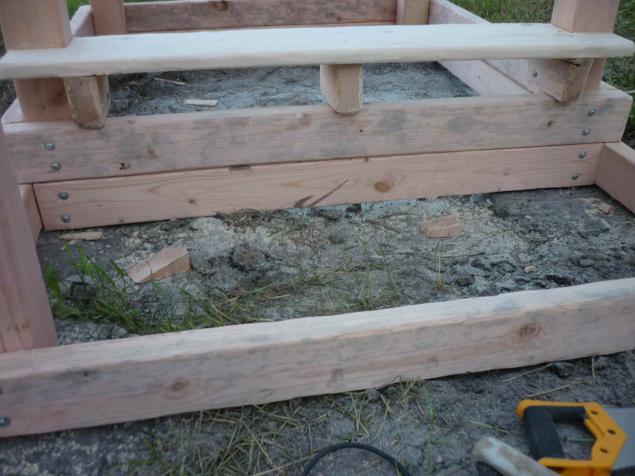
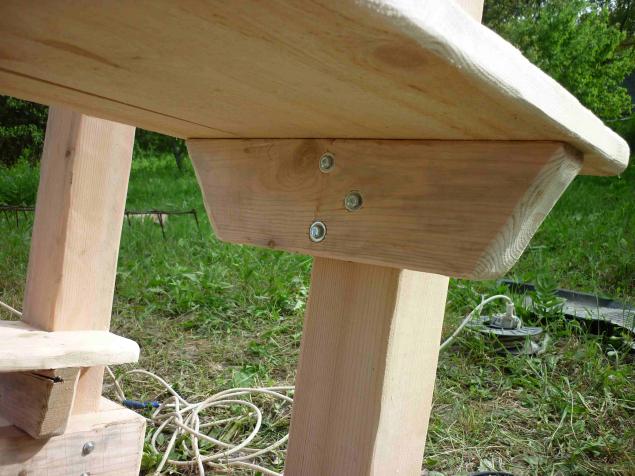
In an annex collecting table. Just trim the board took 50, washed them down at an angle, and 3 bolts screwed to the counter to not cranked.
To intact knees were kids, sanded corners.
Photo 38:
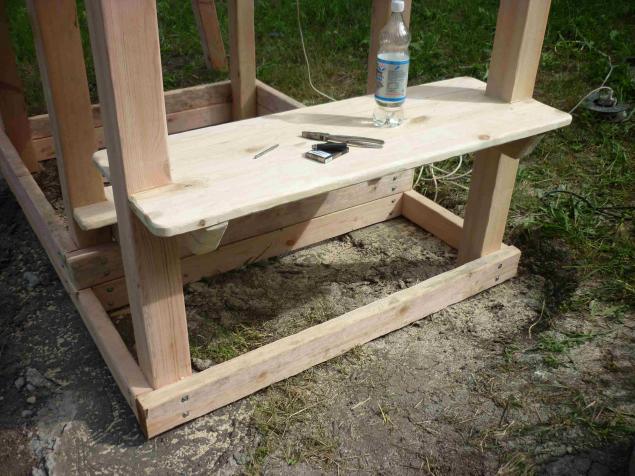
Ready, sanded table.
Photo 39:
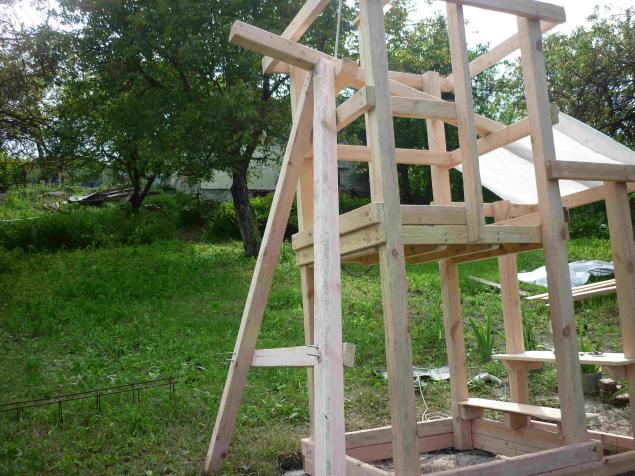
There is already finished, but not installed base for the swing. Earn forgot to capture this process. So he decided to swap
perilka short and long, because the hill was decided to do the other side.
Photo 40:
2 100 * 100 feet connected piece of the same beam bolts 16 * 200. I had to make a groove, or bolts not enough.
And the upper beam is bolted to the bottom, a large bolt, do not know the size, found in the garage, but it really screwed zadolbalsya!
Photo 41.
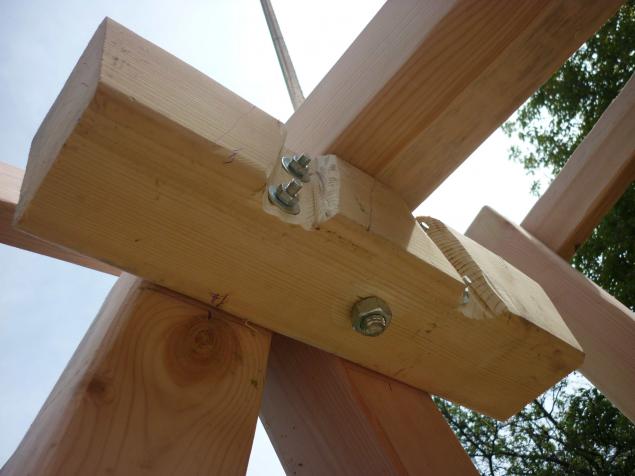
At the bottom of the foot is sealed between board 50 * 100, reliability is also twisted bolts 16 * 200, cut off the excess.
Photo 42:
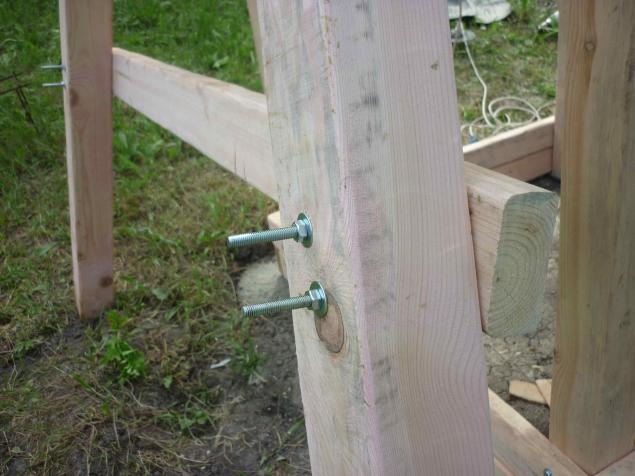
Dug a pit under the feet of the swing, slipped to rubble. I made all on the level. Beam to swing a hill just screwed to the found in the garage of a large bolt)
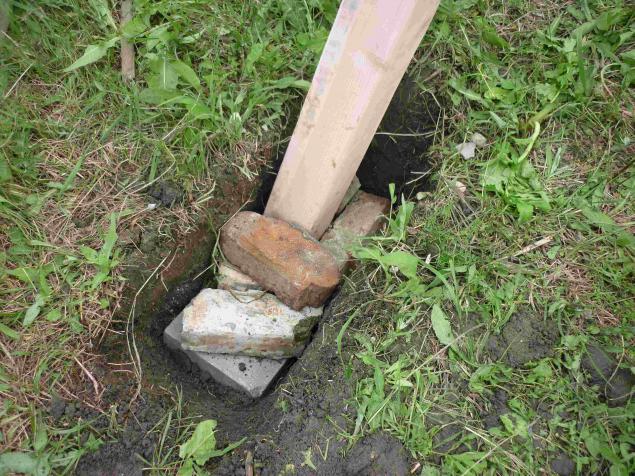
Photo 43:
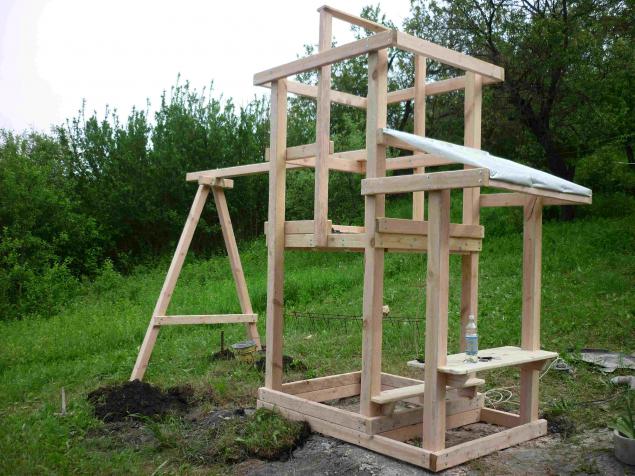
Feet in well pits lined with brick to tightly kept falling asleep on top of rubble and earth. Keep everything just fine.
Photo 44:
Screw the foundation for the steps on the mound.
Photo 45:
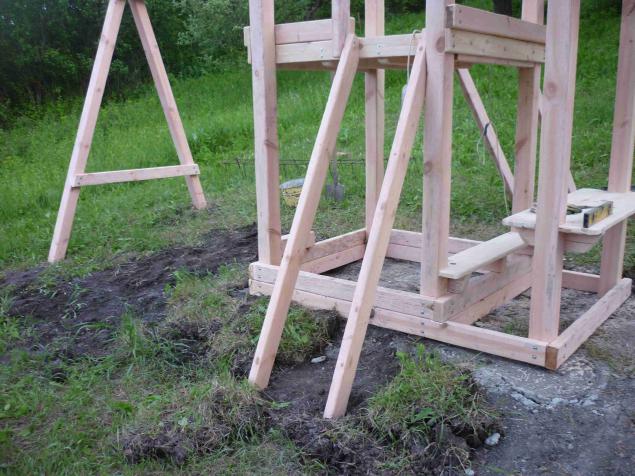
That's the way. One screw is enough.
Photo 46:
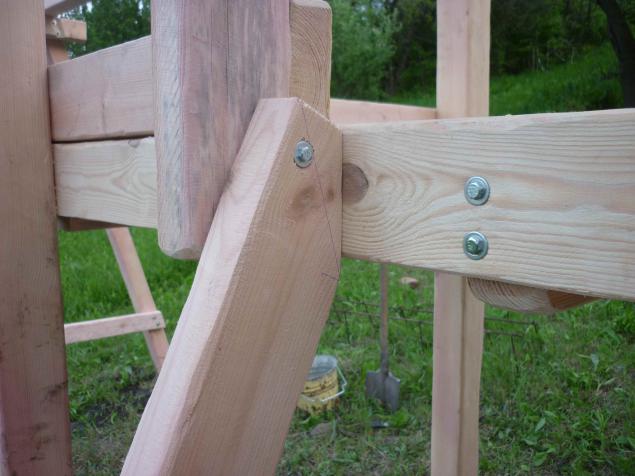
And secure foundation for future climbers on which to "zakarapkatsya" on the ledges to the hill.
Photo 47:
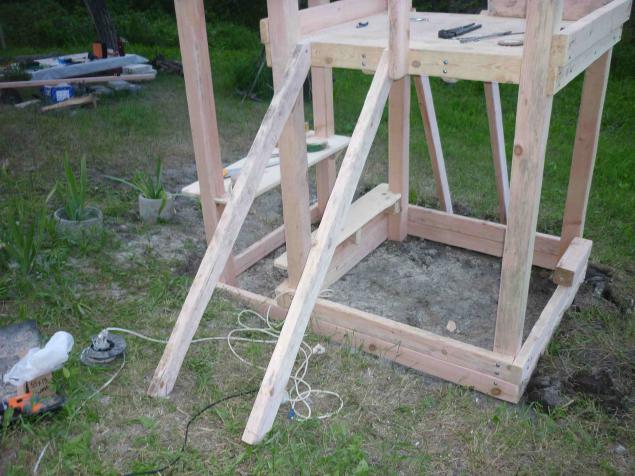
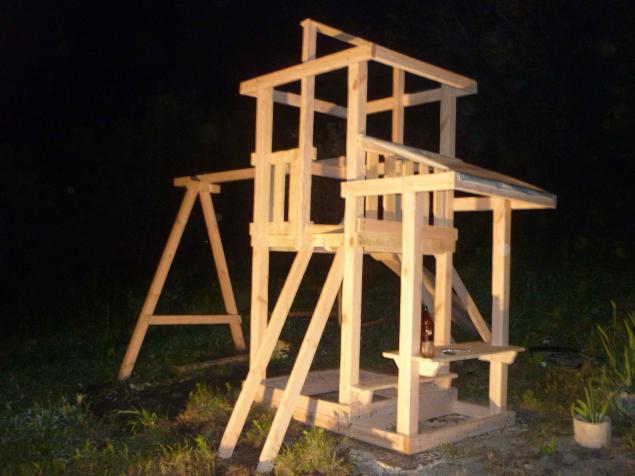
On the nose was my birthday, but ... All 30 dropped out, and, as usual, at the last moment went for groceries. When all was
purchased and partially cooked, it was already dark outside. But that did not stop me! We had to do something though as a platform, which
it would be possible to use, as a son, too, had to come girlfriend and friends :) The last photo of the day is already well into the night, with a beer on the table
and in anticipation of a good day, made hill from what it was to slide, fastened to perilkam "fence" ... and went to bed.
Photo 48:
The next morning, "Customer" hastily fastened the steps up the hill. Apparently he was pleased :)
Photo 49:
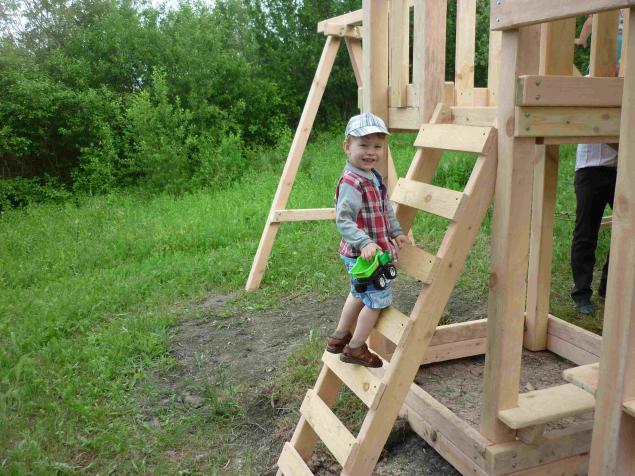
Obbil hill waterproofing and began testing. Damu forward!
Photo 50:
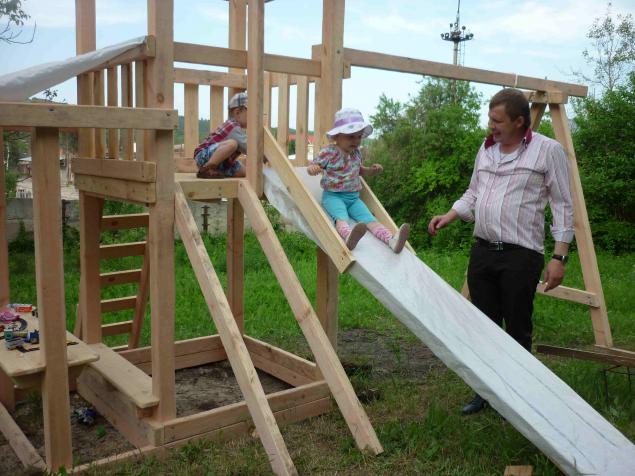
Second went !!!
Photo 51:
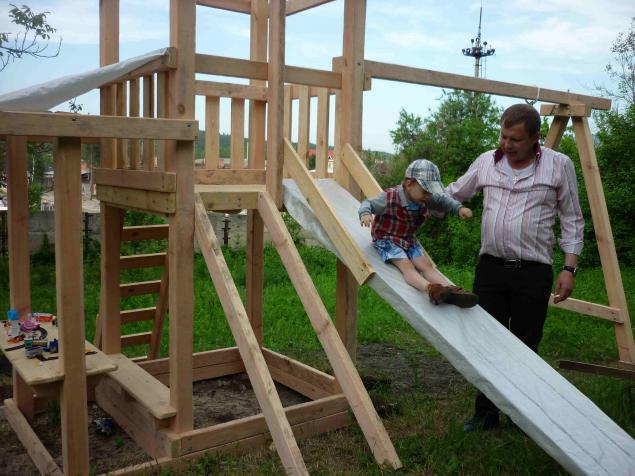
Third went !!!: gigigi:
Photo 52:
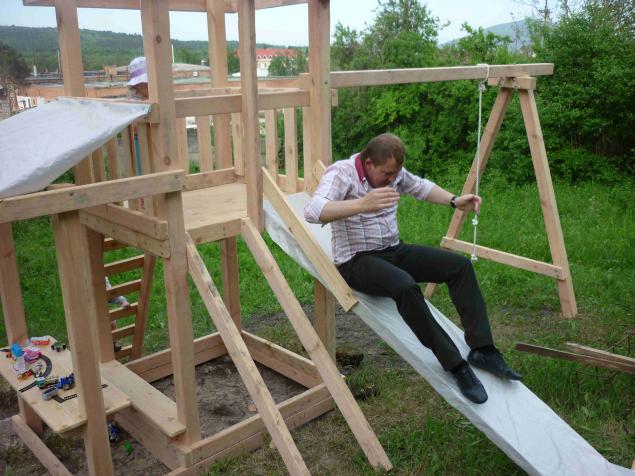
The tests are successful! Plschadka a robust and reliable!
Photo 53:
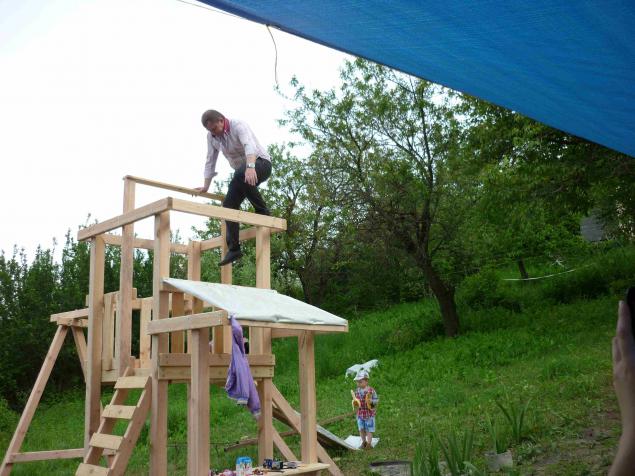
After the holiday, netoropyas completed the ladder "climber».
Photo 54:
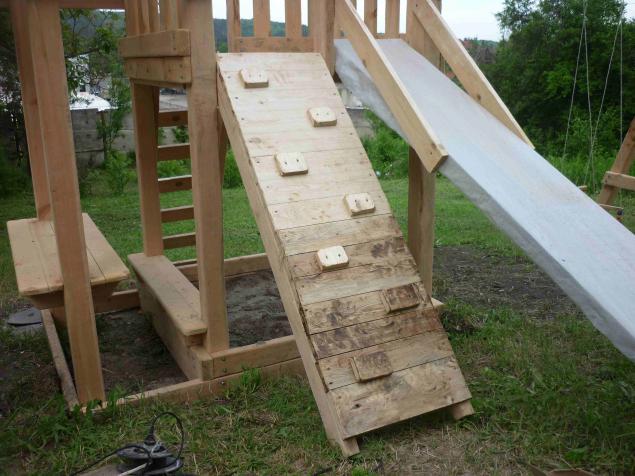
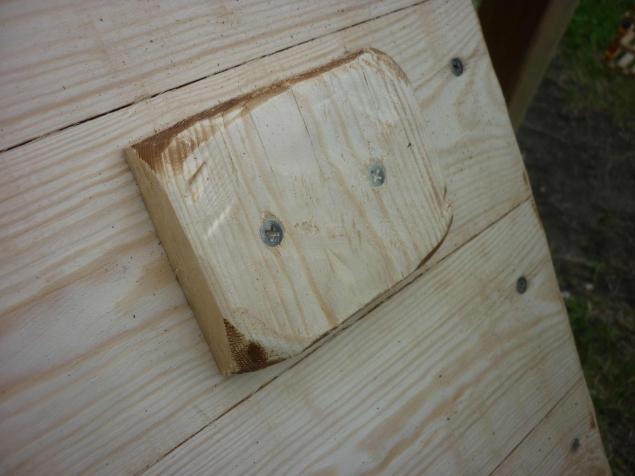
As projections screwed blotch on screws and well crafted grinder.
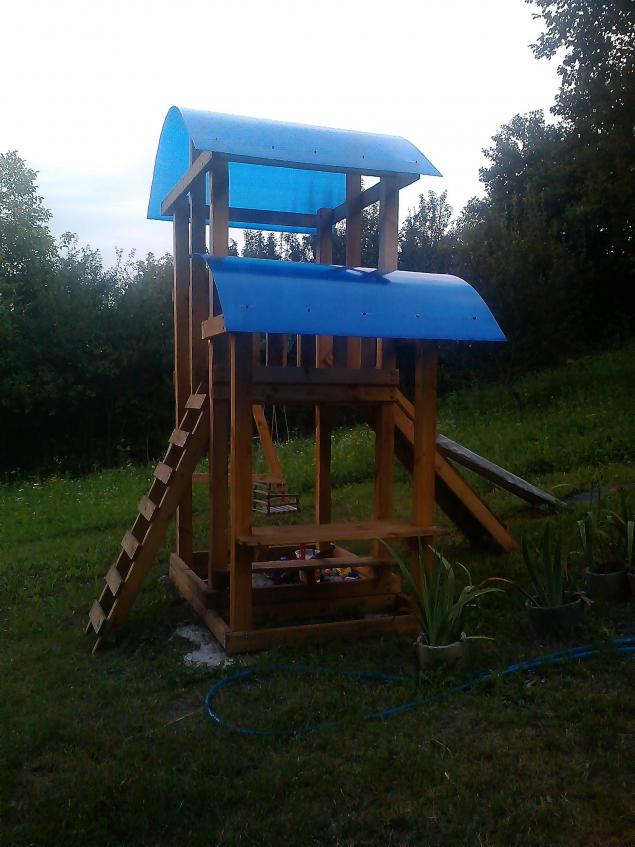
Photo 55:
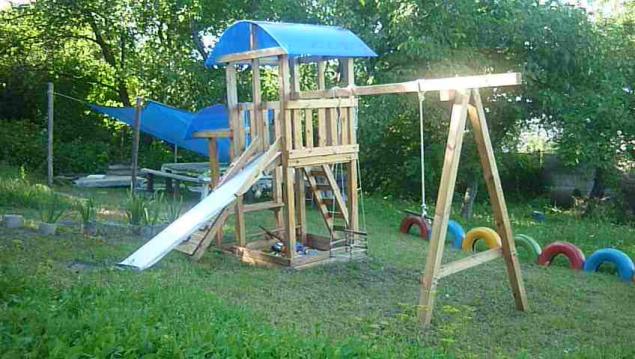
Then he treats the entire structure varnish and screw the roof made of polycarbonate. The plans cover all the varnish. This process is in the photo did not hit, but one photo of the finished result. Another yet)
Photo 56:
the Budget
Forest 0.6 cube-4600 p.
100 * 100mm - 4 pcs. by 6m.
50 * 100 mm - 8 pieces. by 6m.
20 * 100mm - 7pcs. by 6m.
Screws and capercaillie 800r
150pcs - 8 * 85mm
50pcs 8 * 45mm
200pcs 6 * 45mm screw
Hand saw 1pc-250r
grinders range of sanding on 3-piece 150r
Drains 10 liters-350r
Drill 4mm 2 pcs, 50p
bits and screws for gluhorey-100R
Cement 50 kg / bag-250r
linseed oil 10L - gift
polycarbonate 3m * 2.1m -1150r
Photo 57
Posted in [mergetime] 1406547339 [/ mergetime]
Everything. kick. Pervyypost))

Little prehistory.
It all started when I got married ... I do not think wrong, I'm happy about that !!! No, probably not ... I'm very happy !!!)
Because from that moment on, my life changed dramatically. From the "eternal student", I began to transform into a head of the family.
By the time of the wedding ceremony, from the whole of the property, I was like Latvians, x * k da soul) played a good wedding "on credit", Gifts she paid off only 60%, and our young family found their lives in the dormitory of 12m2 and a loan of 100 thousand over the next five years. "Beer comrades" slowly began to fall away, and their shift began to come quiet family life.
Three months later, the wife of such a life I cheered the news of the imminent replenishment of our family ...
At first I was scared, and then came the realization and humility in one bottle,
and then I realized it was time to act for the good of her family! Having estimated the pros and cons, the family council it was decided to purchase suburban area in the city, preferably with the structure. Figuring how much we are already paying for the loan, how much it costs a removable housing, it was decided to "okreditovatsya" 300kilorubley another, but that money has to invest wisely). Site search took about 2 months and became opofeozom, or a gift of fate, or the reward for patience, 14 acres of land in a small house in
25 square meters and a garage of 30 squares in the city, for a symbolic 200 thousand. There was a "but", the site had a bias, but at that price it was just a gift, we are not looking for the easy way). On the remaining 100 thousand. Led light and water, and made the first repairs in the house, which is still going on)). And now, after 3 years, we got a little studio apartment with all the conditions and prospects for future expansion. During this time I became a happy father who loves his son.
The son grows very active child and one family evenings with his wife decided to organize it at least a small but personal playground, good plot of land allows.
At all events, it was decided to allocate no more than 10 thousand. Rubles (For further loan is paid, and to deprive the child of the joys of childhood do not want to).
Ride on the markets and shops, it became clear makimum that we can buy from the finished, like this:
Photo 1:

But we're not a finger to do, and "ready" and "overpayment" is not for us !!! Digging in the vast runet, it was found a few good projects playgrounds made of wood.
All tchatelno calculate the price of learning material, it became clear that if you do the site itself, I can easily invest in designated above budget, but still spend five times less than the offer of ready-made platform for the project. His choice has stopped on this project:
Photo 2:

And so, in early May, arrived next, long-awaited two-week vacation. Hands have itched with anticipation of creativity, and a children's playground, at least mentally, but already has a pre-designated location! Having vacation, immediately I went and bought all the basic stuff, it's cement, wood and screws.
For a start, the selected location for the site, filled six concrete foundations for the support depth of 0.5 meters. Because of the uneven portion on one side of the ground it had to remove a little, but on the other
pour.
Photo 3:

As long as the concrete dries, he took up the processing of wood. Processed grinder with medium grit Abrasive mop. All parties were soundly cleaned boards to avoid splinters in our hands malyuhastikov. The corners have also been ground off, in order to avoid more serious injuries. For one evening, the board handled 4 100 * 100 mm and 8 boards 50 * 100 mm.Pylischa was ... words can not convey! Logs 20 * 100, it was decided during the assembly process design, they just have no strength left ...
Photo 4:

After sanding boards, treated wood impregnated them against corrosion and bugs, making the tree has acquired a pink tint and gave hours to dry. Here it is, almost all the material is ready for further cutting and assembly. 2 board 100 * 100 and 100 * 50 one already cutting)
Photo 5:

From under the boards to help crept sleepy Mike Farley, covered in sawdust) How to do without it!
Photo 6:

To start collecting the supporting structure. For her, taking 2 board 100 * 100 2 long, 8 meters, and connects them to each other three boards 50 * 100 1 long, 2 meters, carefully maintaining all distances and diagonals.
It turned out that it is.
Photo 7:

By collecting pattern I have the same item). And now they have 2!
Photo 8

Crepe boards together with screws on a tree-type "Capercaillie" size 8 * 85mm with washer, pre-drilled holes for them 4mm.
Photo 9:

Install a support structure to its rightful place, securing them together "on the nozzle»))
Photo 10:

Came Head! He showed me an error, they say, in the wrong direction pad bet! Who so builds! Quickly convert!
Photo 11:

Well naschalnike, Chivo swears fix!
Photo 12:

He turned in the right naravlenii design, secure the rack between a board of 20 * 100mm length 1 2m.
Photo 13:

Putting the rack level and vyvev all diagonals, fasten them together more thoroughly. Top board 20 * 100mm,
below 50 * 100mm and a length of 1, 6 meters, with a margin for extensions.
Photo 14:

Place mounting board 20 and 100.
Photo 15:

Added board 20 below 50, turned in a circle tying the twenty, her gender will do) but tomorrow, dark ...
Photo 16:

The next morning, continued to work on the floor. Between 20 board, which made the harness, insert the board 50 by screwing it just below 2 cm to the floor does not seem to fit.
Photo 17:

Side strengthened so. In parallel we clean untreated wood grinder and grind off the rough edges. We're worried about malyuhastikov!
Photo 18:

Distribute floor boards 20 * 100.
Photo 19:

And well paced grinder, removing all differences postachivaya boards and sharp corners.
Photo 20:

Just grind off all protruding corners under the floor, in order to avoid injuries to the heads of children.
Photo 21:

Screwed floor boards with screws.
Photo 22:

And adds another 50 from the railing of the board. Begins to emerge that the ...
Photo 23:

At the bottom is screwed another series of boards 50 * 100. There is a sandbox.
Photo 24:

Sandbox 2. Remember who build and grind angles)
Photo 25:

Screw the base to the roof. Board 50tka.
Photo 26:

And screw the base under the roof ridge and the stairs up the hill.
Photo 27:

Bottom mount ridge inside.
Photo 28:

Screw the short perilka.
Photo 29:

And finished off the roof and harness horse.
Photo 30:

Closer ...
Photo 31:

Washed down and fastened to the main structure extension.
Photo 32:

During the broken drill bit, to go for the new was laziness, but experience shows that you need to go ...
Photo 33:

Tied extension on the bottom.
Photo 34:

It is increasingly beginning to resemble the desired result :)
Photo 35:

In the sandpit and pergola collect stool. I screwed to the support pieces of the board 50 * 100 ...
Photo 36:

and in the middle add emphasis to the strength of the bench. Only strengthened the top screws. And of course, tchatelno skin and round out all the angles.
Photo 37:

In an annex collecting table. Just trim the board took 50, washed them down at an angle, and 3 bolts screwed to the counter to not cranked.
To intact knees were kids, sanded corners.
Photo 38:

Ready, sanded table.
Photo 39:

There is already finished, but not installed base for the swing. Earn forgot to capture this process. So he decided to swap
perilka short and long, because the hill was decided to do the other side.
Photo 40:

2 100 * 100 feet connected piece of the same beam bolts 16 * 200. I had to make a groove, or bolts not enough.
And the upper beam is bolted to the bottom, a large bolt, do not know the size, found in the garage, but it really screwed zadolbalsya!
Photo 41.

At the bottom of the foot is sealed between board 50 * 100, reliability is also twisted bolts 16 * 200, cut off the excess.
Photo 42:

Dug a pit under the feet of the swing, slipped to rubble. I made all on the level. Beam to swing a hill just screwed to the found in the garage of a large bolt)
Photo 43:

Feet in well pits lined with brick to tightly kept falling asleep on top of rubble and earth. Keep everything just fine.
Photo 44:

Screw the foundation for the steps on the mound.
Photo 45:

That's the way. One screw is enough.
Photo 46:

And secure foundation for future climbers on which to "zakarapkatsya" on the ledges to the hill.
Photo 47:

On the nose was my birthday, but ... All 30 dropped out, and, as usual, at the last moment went for groceries. When all was
purchased and partially cooked, it was already dark outside. But that did not stop me! We had to do something though as a platform, which
it would be possible to use, as a son, too, had to come girlfriend and friends :) The last photo of the day is already well into the night, with a beer on the table
and in anticipation of a good day, made hill from what it was to slide, fastened to perilkam "fence" ... and went to bed.
Photo 48:

The next morning, "Customer" hastily fastened the steps up the hill. Apparently he was pleased :)
Photo 49:

Obbil hill waterproofing and began testing. Damu forward!
Photo 50:

Second went !!!
Photo 51:

Third went !!!: gigigi:
Photo 52:

The tests are successful! Plschadka a robust and reliable!
Photo 53:

After the holiday, netoropyas completed the ladder "climber».
Photo 54:

As projections screwed blotch on screws and well crafted grinder.
Photo 55:

Then he treats the entire structure varnish and screw the roof made of polycarbonate. The plans cover all the varnish. This process is in the photo did not hit, but one photo of the finished result. Another yet)
Photo 56:

the Budget
Forest 0.6 cube-4600 p.
100 * 100mm - 4 pcs. by 6m.
50 * 100 mm - 8 pieces. by 6m.
20 * 100mm - 7pcs. by 6m.
Screws and capercaillie 800r
150pcs - 8 * 85mm
50pcs 8 * 45mm
200pcs 6 * 45mm screw
Hand saw 1pc-250r
grinders range of sanding on 3-piece 150r
Drains 10 liters-350r
Drill 4mm 2 pcs, 50p
bits and screws for gluhorey-100R
Cement 50 kg / bag-250r
linseed oil 10L - gift
polycarbonate 3m * 2.1m -1150r
Photo 57
Posted in [mergetime] 1406547339 [/ mergetime]
Everything. kick. Pervyypost))

