1716
Field tests astrotrekera
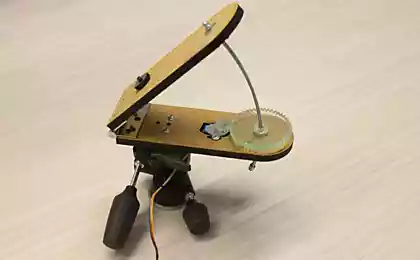
In a previous post I explained how you can make astrotreker two evening. It is time to test it and make the first conclusions.
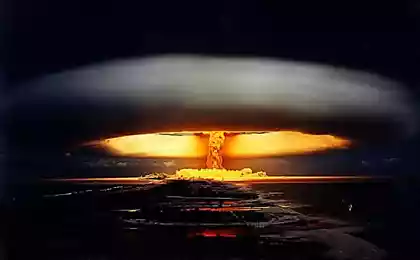
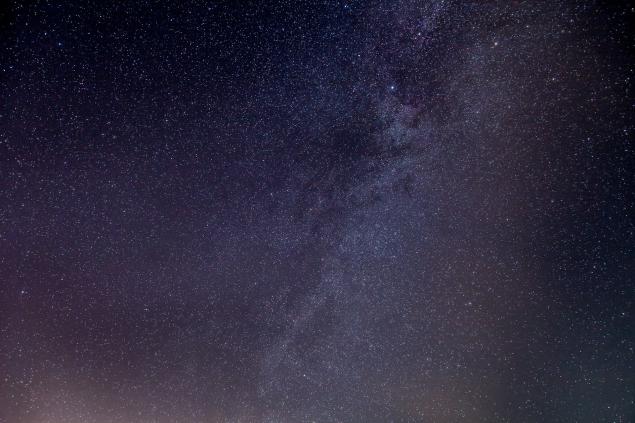
Here is a sample photo taken with it:

Yesterday issued the first successful night with clear skies. I packed up and went to the cottage is 15 km from Dnipropetrovsk. The distance is not sufficient to eliminate glare from the city, but for the first experiments is quite suitable.
After preliminary tests balcony I made two significant changes in the firmware of the controller. First - at power engine immediately starts to rotate. This allows you to simply switch-off the power to start the engine. And second - change the direction of rotation of the motor. I hid all the electronics in a black box and tried to climb it is not in the process of shooting to not lighted eyes once again.
At the place I started with an attempt to orient the axis of rotation of the tracker to North zavezdu. This proved the biggest challenge for the entire evening.
Firstly, I have had no sight. Come watch the door along the canopy using the angle between it and the MDF as sight. But it is very, very uncomfortable, because it is impossible to keep in focus, and it and the North Star.
Secondly, my tripod head is not designed for very precise aiming at the subject. She absolutely no elements to make very precise and small rotation. Those pens that it has a very short, they have a small lever. And when I hung astrotreker second tripod head and camera with the lens, it happened that the main head began to act very big load with a large lever, which made any precise guidance in principle impossible.
It turns out that you need to come up with some mechanism for precise guidance of the tracker on a pole without using a tripod head. You also need to provide sight.
I performed the initial configuration using the gyroscope in the phone. I put the angle of 49.2 degrees and an eye tracker is brought toward the poles.
Next, I used it this way, because Nothing is more precise without changing the design do not work.
Also during the experiments revealed that the stiffness of the structure raises a number of questions. The shutter is released when the focal length of 200mm arise microvibrations (even with pre-mirror up). I bypassed this review covering the lens by hand on a pair of first and last seconds of exposure.
The first test shots I did with the engine off, and then - enabled. The difference was significant:
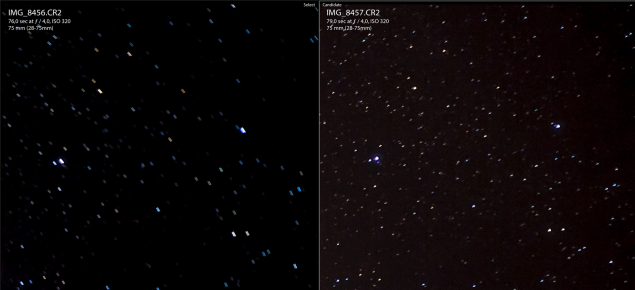
F / 4, ISO 320, 75mm, 79 sec.
It left a static frame, right - with astrotrekerom. This corner of the photo, the scale of 1: 1. Tamron 28-75 / 2.8 draws on the corners as something not very nice.
But this whole frame:
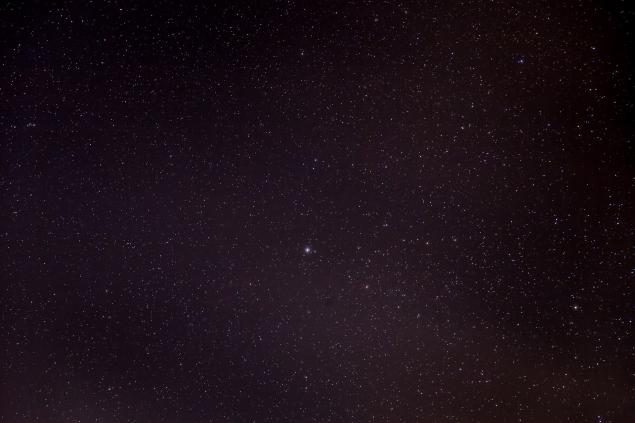
Just below the center of the frame - Polaris.
Further decided to try a slower shutter speed at wide angle and no longer near the poles where the minimum rotation and side. Result impressed me:
28mm, f / 4, ISO 320, 149 sec.
Up the courage and do even slower shutter speed. Do one after the 2 frames (212 and 260 seconds, f / 3.5, ISO 320 28 mm). A little play with them in the editor and glued to reduce noise and increase the brightness. The camera looked almost vertically upwards, so that the lens, fortunately, did not get any glare from neighbors.
Oh yes! This is something for which all was started. Huge deposits of stars, the Milky Way is visible, good attention to detail, no tracks. I'm pleased.
Well, to me this is not enough. I pass to the 70-200 / 2.8. We have to re-adjust to the pole tip of the tracker. At this time, very difficult. The weight of the camera with the lens large. The accuracy of the sight is even smaller than in the previous experiment.
During testing, it is clear that about shutter speeds slower than 60 seconds until it will have to forget - climbs tracks. But exposure to the minute, it looks not so bad. Also have to raise ISO up to 1600, to get a good exposure.
200mm, F / 3.3, ISO 1600, 64sec.
Here is a fragment of a 1: 1 scale
Next, I started to experiment with the setting to the North Star. Also almost completely "closed" half tracker to reduce the hanging rods. During the experiments turned out to make a few pictures of the famous Andromeda galaxy (M31). Find it in the sky was not just a novice. But the program has helped SkEye phone. Samu galaxy eyes I have not seen. Suggests a purely secondary features. But once finding it in the sky then it was too easy.
Receive such a frame:
63 sec, 200mm, f / 3.2, ISO 1600
Here is a fragment of a 1: 1 scale
After trimming, adding three frames, color correction, and droplets of street magic to get the picture from the beginning of Lent:
Well, not bad for the first time.
10 tips for beginners like me 1. Dress is much warmer than in the afternoon. Though now and the summer, but at night the temperature drops to 12 (or even lower). Sitting still for long and very cold. I wore a winter down jacket, hat and gloves and still froze at the end. Went to bed at 3 am at the most because it was cold.
2. Thermos with tea and cookies. Must have.
3. Bring a folding table and a white tablecloth. I was comfortable all spread out on it. In the dark on a white tablecloth visible contours of objects so that it is more convenient to find in it what you want.
4. A comfortable chair. Will have to sit for long. Better to be comfortable. I used a folding beach chair chaise longue.
5. Spare batteries, flash, camera.
6. At night, dew drops. Cover equipment and appliances rags while not in use. Periodically check the optics. Take a microfiber wipe moisture.
7. At night one bit scared. React to any rustling. I think it would be better if someone will be there.
8. Turn on the camera mirror lockup. Use a cable release.
9. Try not to move near the tripod until the delay is. No jumps, bumps, vibrations, loud music.
10. Keep track of your feet. Rests on the tripod. Easy to shoot down the alignment to the North Star.
11. Bonus free advice is only for those who opened the spoiler.
You can use the angle finder. Here's a:
It is the mode of doubling pictures of the viewfinder, which greatly increases the visibility of stars at the sight of an eye.
So, summing up we can say that astrotreker really works. Its accuracy is sufficient for even a 200mm lens and camera 21MPx. However, the design requires significant improvement to improve guidance on the pole without the use of the head with a camera tripod.
With astrotrekera anyone can join astrophotography. It does not require significant capital investment (subject to availability camera shatativa and desires), it's fun and informative.
P.S. Who am I kidding though. While I waited for the duration of each frame in a few minutes, I was overcome with melancholy green. You had to take with you and a telescope.
Source: habrahabr.ru/post/228035/
Here is a sample photo taken with it:

Yesterday issued the first successful night with clear skies. I packed up and went to the cottage is 15 km from Dnipropetrovsk. The distance is not sufficient to eliminate glare from the city, but for the first experiments is quite suitable.
After preliminary tests balcony I made two significant changes in the firmware of the controller. First - at power engine immediately starts to rotate. This allows you to simply switch-off the power to start the engine. And second - change the direction of rotation of the motor. I hid all the electronics in a black box and tried to climb it is not in the process of shooting to not lighted eyes once again.
At the place I started with an attempt to orient the axis of rotation of the tracker to North zavezdu. This proved the biggest challenge for the entire evening.
Firstly, I have had no sight. Come watch the door along the canopy using the angle between it and the MDF as sight. But it is very, very uncomfortable, because it is impossible to keep in focus, and it and the North Star.

Secondly, my tripod head is not designed for very precise aiming at the subject. She absolutely no elements to make very precise and small rotation. Those pens that it has a very short, they have a small lever. And when I hung astrotreker second tripod head and camera with the lens, it happened that the main head began to act very big load with a large lever, which made any precise guidance in principle impossible.
It turns out that you need to come up with some mechanism for precise guidance of the tracker on a pole without using a tripod head. You also need to provide sight.
I performed the initial configuration using the gyroscope in the phone. I put the angle of 49.2 degrees and an eye tracker is brought toward the poles.
Next, I used it this way, because Nothing is more precise without changing the design do not work.
Also during the experiments revealed that the stiffness of the structure raises a number of questions. The shutter is released when the focal length of 200mm arise microvibrations (even with pre-mirror up). I bypassed this review covering the lens by hand on a pair of first and last seconds of exposure.
The first test shots I did with the engine off, and then - enabled. The difference was significant:

F / 4, ISO 320, 75mm, 79 sec.
It left a static frame, right - with astrotrekerom. This corner of the photo, the scale of 1: 1. Tamron 28-75 / 2.8 draws on the corners as something not very nice.
But this whole frame:

Just below the center of the frame - Polaris.
Further decided to try a slower shutter speed at wide angle and no longer near the poles where the minimum rotation and side. Result impressed me:

28mm, f / 4, ISO 320, 149 sec.
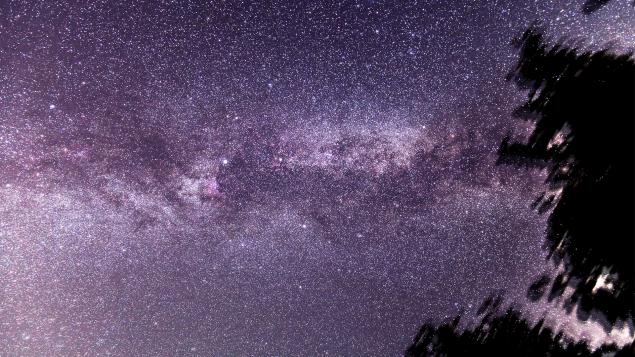
Up the courage and do even slower shutter speed. Do one after the 2 frames (212 and 260 seconds, f / 3.5, ISO 320 28 mm). A little play with them in the editor and glued to reduce noise and increase the brightness. The camera looked almost vertically upwards, so that the lens, fortunately, did not get any glare from neighbors.

Oh yes! This is something for which all was started. Huge deposits of stars, the Milky Way is visible, good attention to detail, no tracks. I'm pleased.
Well, to me this is not enough. I pass to the 70-200 / 2.8. We have to re-adjust to the pole tip of the tracker. At this time, very difficult. The weight of the camera with the lens large. The accuracy of the sight is even smaller than in the previous experiment.
During testing, it is clear that about shutter speeds slower than 60 seconds until it will have to forget - climbs tracks. But exposure to the minute, it looks not so bad. Also have to raise ISO up to 1600, to get a good exposure.

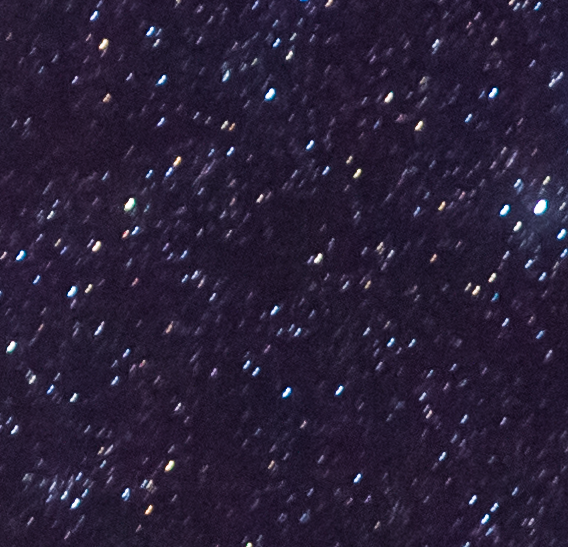
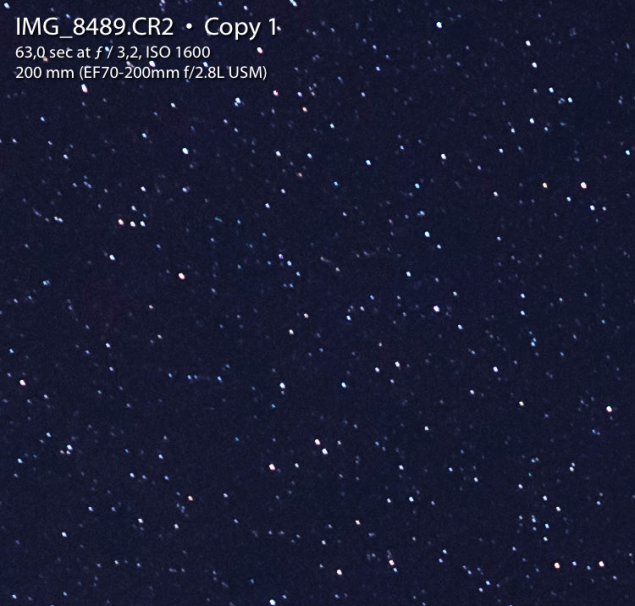
200mm, F / 3.3, ISO 1600, 64sec.
Here is a fragment of a 1: 1 scale

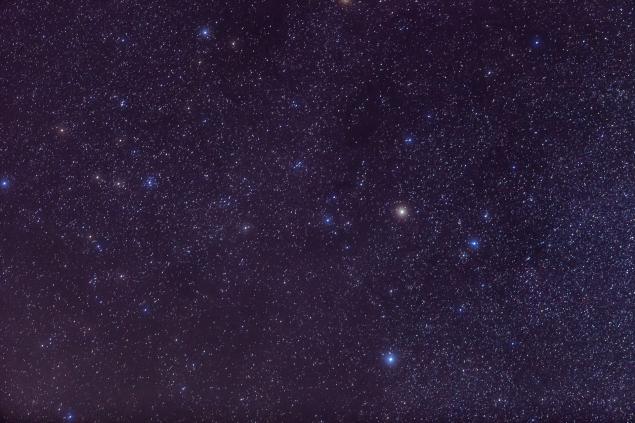
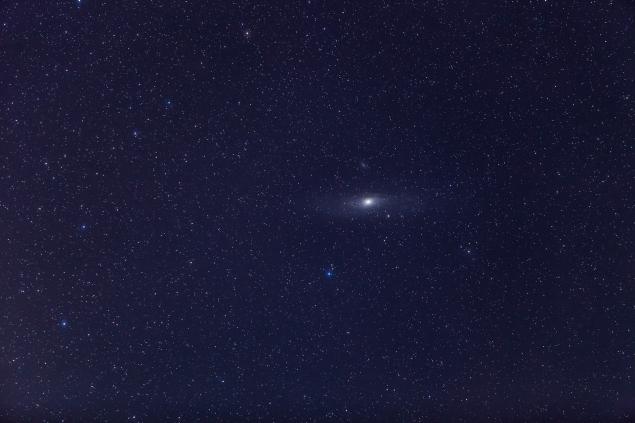
Next, I started to experiment with the setting to the North Star. Also almost completely "closed" half tracker to reduce the hanging rods. During the experiments turned out to make a few pictures of the famous Andromeda galaxy (M31). Find it in the sky was not just a novice. But the program has helped SkEye phone. Samu galaxy eyes I have not seen. Suggests a purely secondary features. But once finding it in the sky then it was too easy.
Receive such a frame:

63 sec, 200mm, f / 3.2, ISO 1600
Here is a fragment of a 1: 1 scale

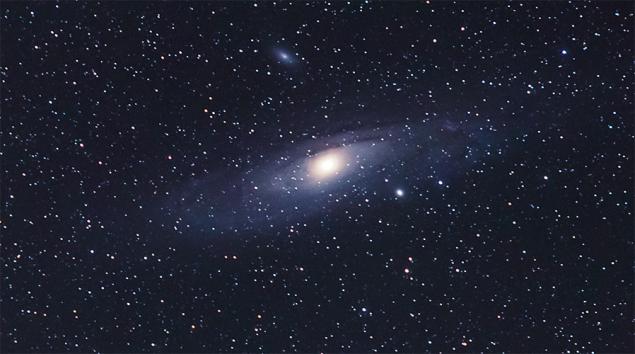
After trimming, adding three frames, color correction, and droplets of street magic to get the picture from the beginning of Lent:

Well, not bad for the first time.
10 tips for beginners like me 1. Dress is much warmer than in the afternoon. Though now and the summer, but at night the temperature drops to 12 (or even lower). Sitting still for long and very cold. I wore a winter down jacket, hat and gloves and still froze at the end. Went to bed at 3 am at the most because it was cold.
2. Thermos with tea and cookies. Must have.
3. Bring a folding table and a white tablecloth. I was comfortable all spread out on it. In the dark on a white tablecloth visible contours of objects so that it is more convenient to find in it what you want.
4. A comfortable chair. Will have to sit for long. Better to be comfortable. I used a folding beach chair chaise longue.
5. Spare batteries, flash, camera.
6. At night, dew drops. Cover equipment and appliances rags while not in use. Periodically check the optics. Take a microfiber wipe moisture.
7. At night one bit scared. React to any rustling. I think it would be better if someone will be there.
8. Turn on the camera mirror lockup. Use a cable release.
9. Try not to move near the tripod until the delay is. No jumps, bumps, vibrations, loud music.
10. Keep track of your feet. Rests on the tripod. Easy to shoot down the alignment to the North Star.
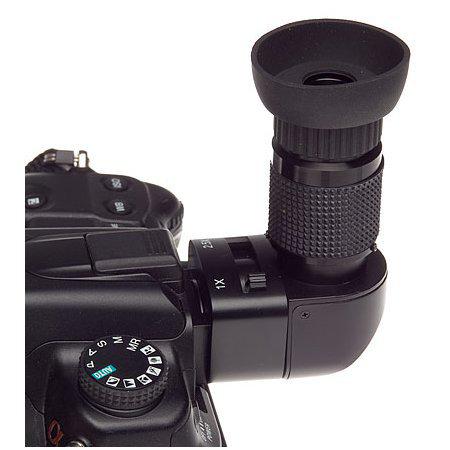
11. Bonus free advice is only for those who opened the spoiler.
You can use the angle finder. Here's a:

It is the mode of doubling pictures of the viewfinder, which greatly increases the visibility of stars at the sight of an eye.
So, summing up we can say that astrotreker really works. Its accuracy is sufficient for even a 200mm lens and camera 21MPx. However, the design requires significant improvement to improve guidance on the pole without the use of the head with a camera tripod.
With astrotrekera anyone can join astrophotography. It does not require significant capital investment (subject to availability camera shatativa and desires), it's fun and informative.
P.S. Who am I kidding though. While I waited for the duration of each frame in a few minutes, I was overcome with melancholy green. You had to take with you and a telescope.
Source: habrahabr.ru/post/228035/