1022
Self Repair Automatic BMW E38
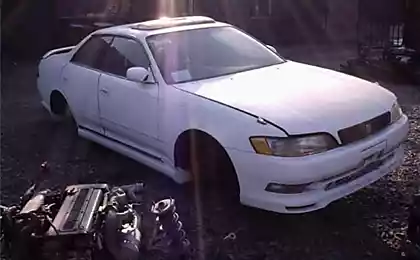
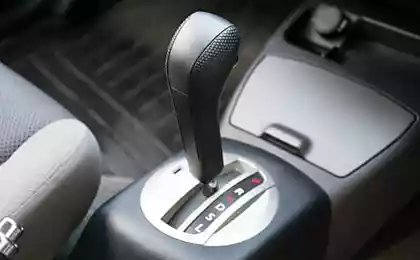
I've got such a wonderful car: BMW e38 730d. Over time, the tremors were light when switching 1-2-3. One day, while there was a strong push traffic, but the car was on. I drove up to the point B, went to the parking lot. When I am going to go into reverse gear. Car went in spurts. I turn on the drive, but it does not go. I give gas, 2 thousand happening and push a box falls into emergency mode, which is the norm. It forces the 4th gear. Experienced citizens stated that disassemble the box in any case, and that this is a problem in mechanics, not hydro management. Market research boxed craftsmen led to a disappointing conclusion: the removal-installation 5t.r. automatic transmission repair, including parts and labor 70-80, with their skill level is so high that they push the cost of defects and chat on the phone ...
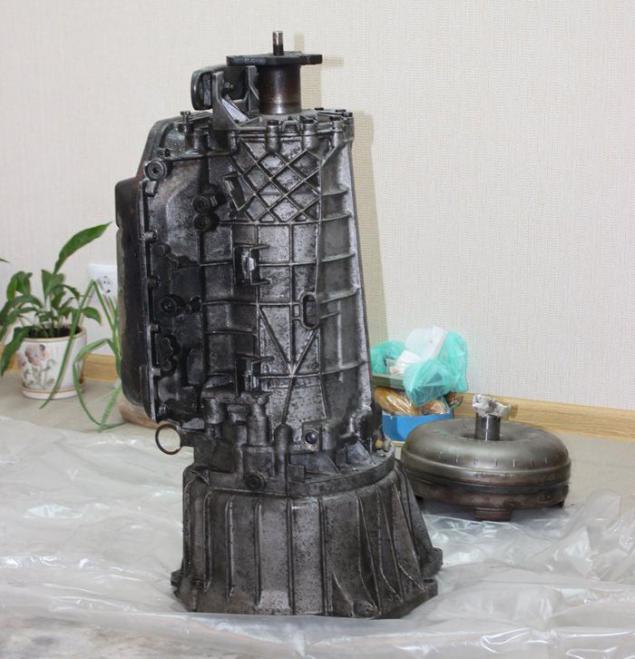
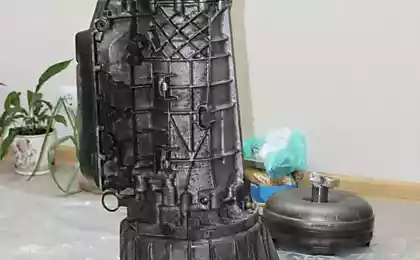
And after much deliberation I decided to do himself. I bought the instrument at 12, took off from a friend on the pit together. Supported by a hydraulic jack to prevent damage to the guides. We revert to 20cm, and I pulled out the torque converter. Already 10 pounds lighter, and it may fall out, with a broken oil pump drive automatic transmission. Removed finally brought in a clean, bright and warm room patient.
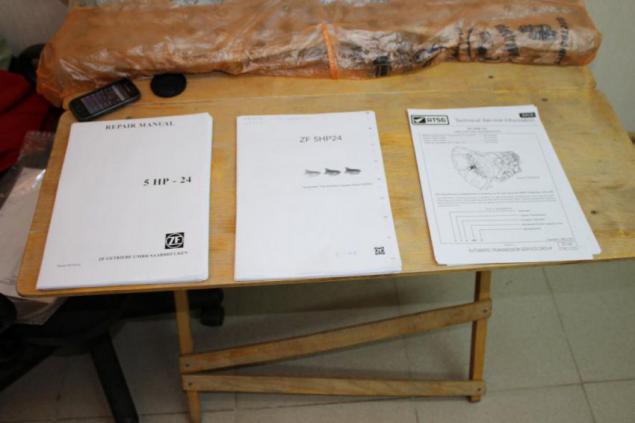
3 Print books: Corporate rerair manual, spare parts catalog and manual for the hydraulic unit ATSG
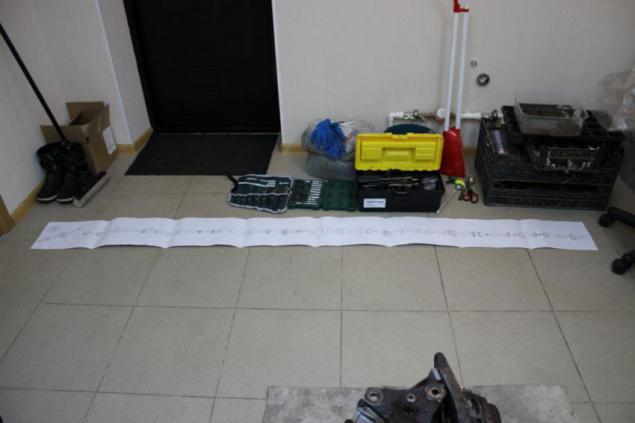
Print and glue full automatic transmission scheme. Well, just I did my dad, for which many thanks to him. Then I laid out right on the fine details of the scheme, which is very simplified assembly
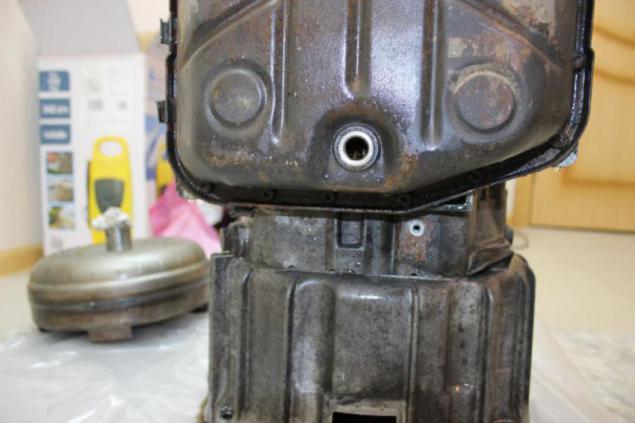
Unscrew the drain bolt and the retaining bar connector position switch
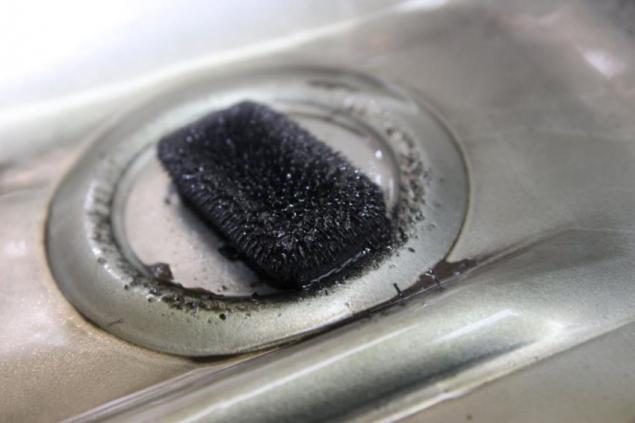
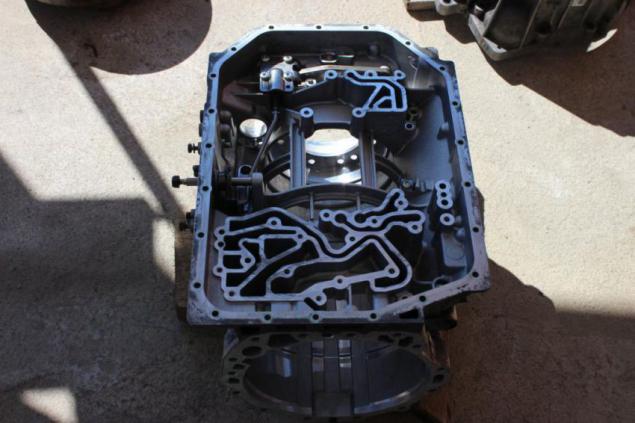
Overturn box. Turn off the pallet. Magnets in a sad state
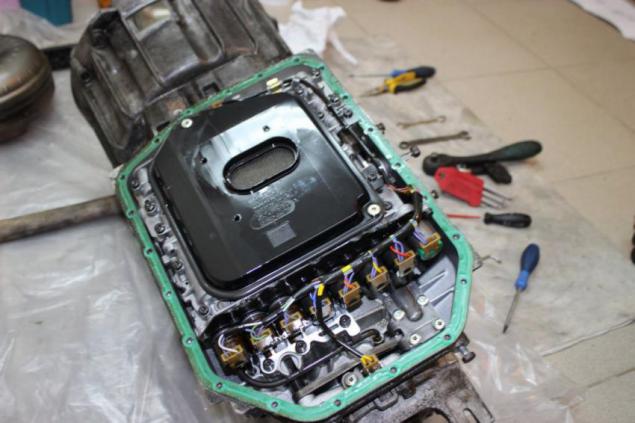
Turn off the filter, remove the clip connector electronic valves and sensors. Turn off the hydraulic unit. Just twist the screws with large heads!
Remove the retaining plate of the output shaft speed sensor and oil pipes. I have these bolts broke. I drill a small hole at the core and tear hammer.
Extract 2 Lock 2 springs under them. Be sure to retrieve the 2 rubber plugs out of the springs. Without this box does not understand. The new hub is in the cushioning package. You can not feel sorry.
So were the oil tube to remember :)

To make it easier to work Turn off the output shaft. No photo, I show an excerpt from the manual
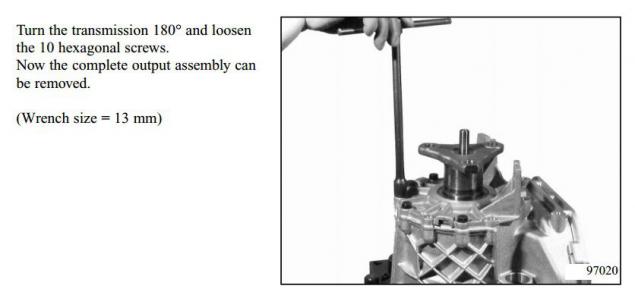
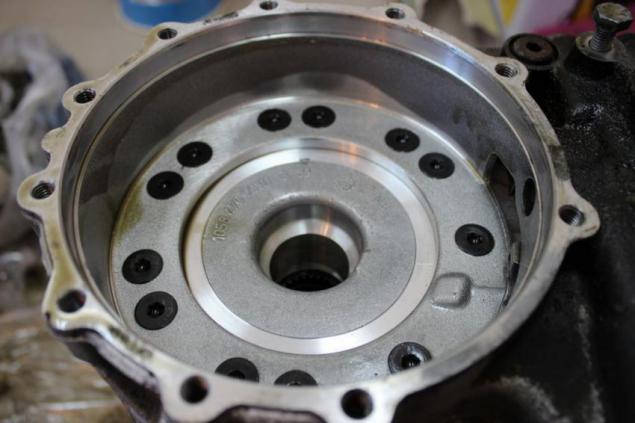
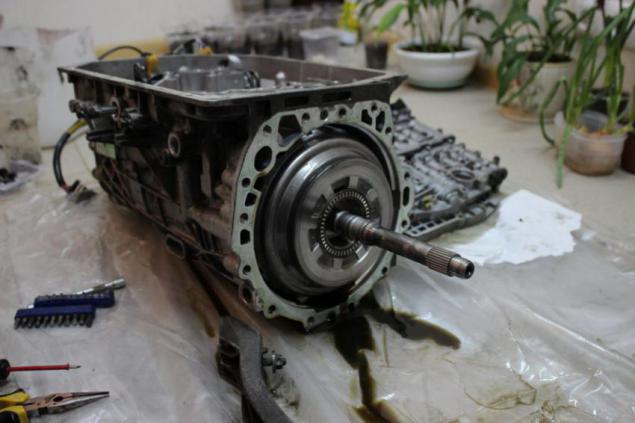
Now you can flip 180 and the box would normally be at the back. Next, unscrew the bell with a pump from the body of the box. To pump remained on the bell reserve the bolas
It turns out so. Lay off the node towards
Put a box in the "back", remove the washer underneath the bearing. When assembling do not forget for the puck! I have it was "unnecessary detail" and had to disassemble to deliver. Well it is not far
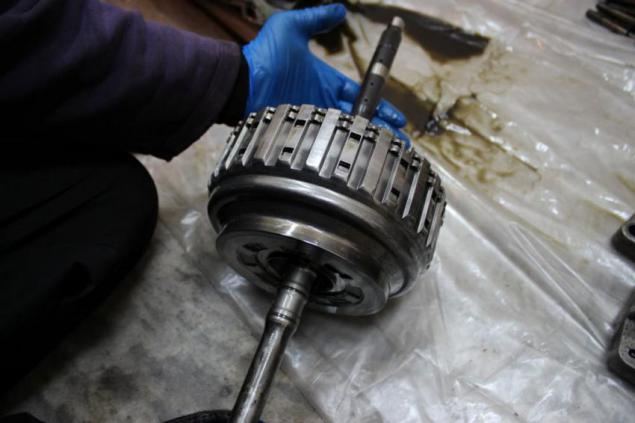
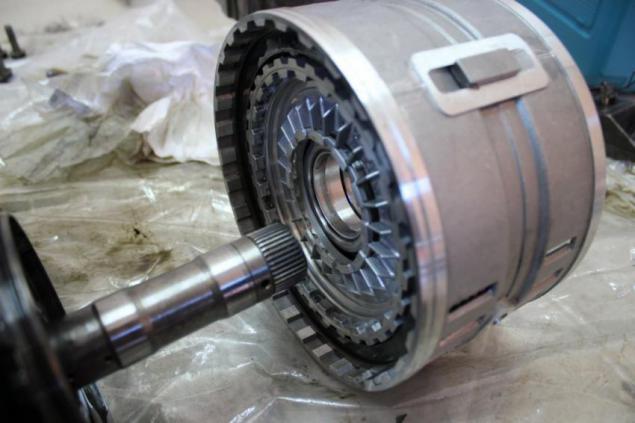
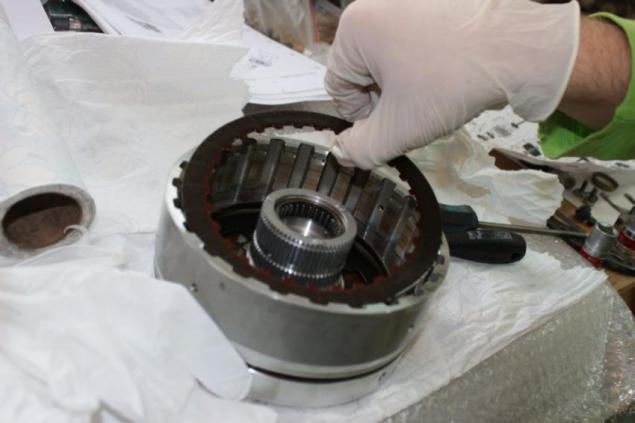
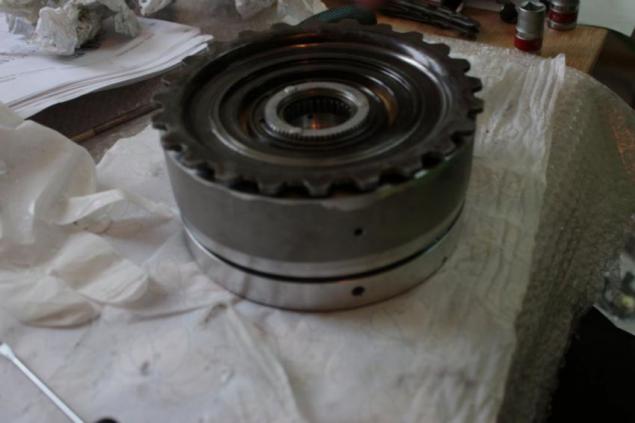
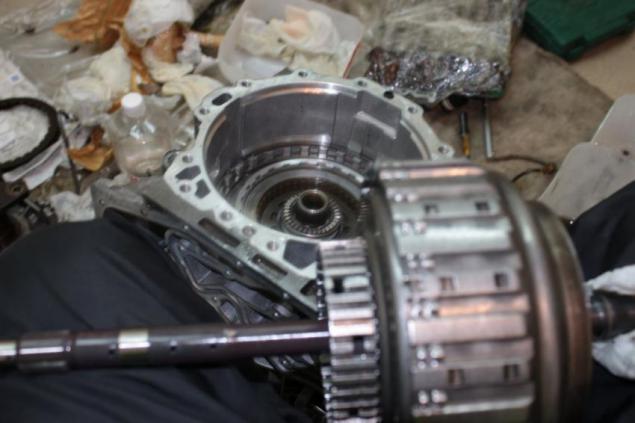
Removing the input shaft
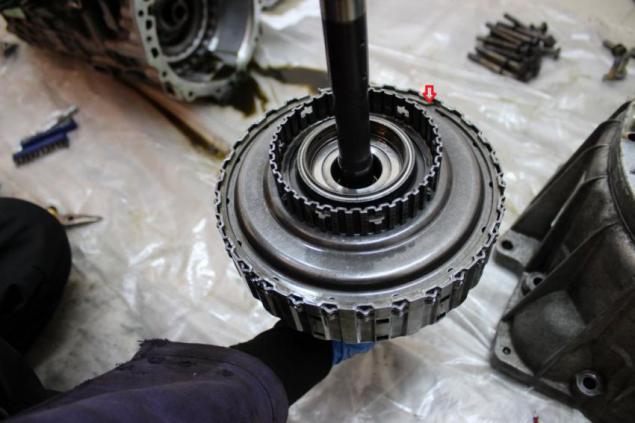
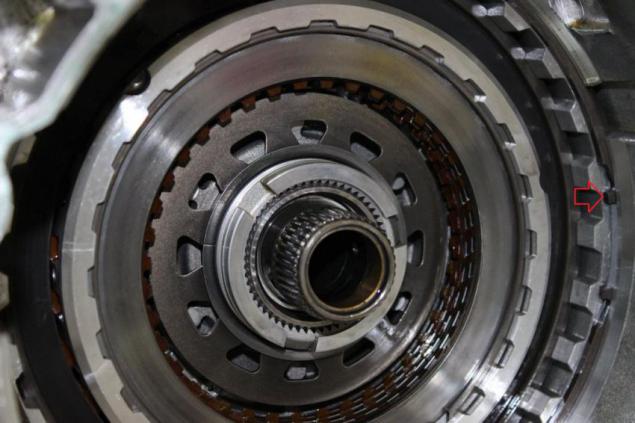
Remove the retaining ring assembly and dismantle
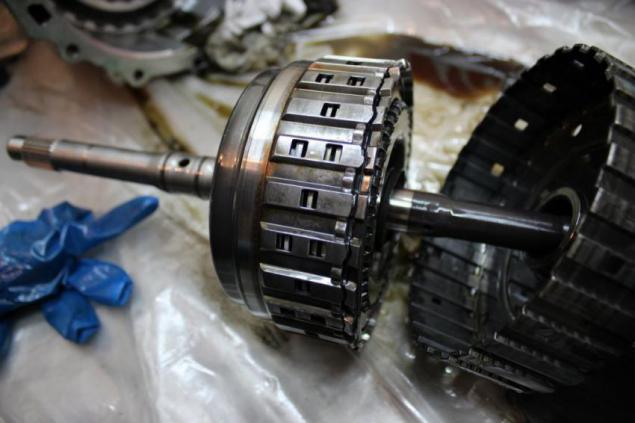
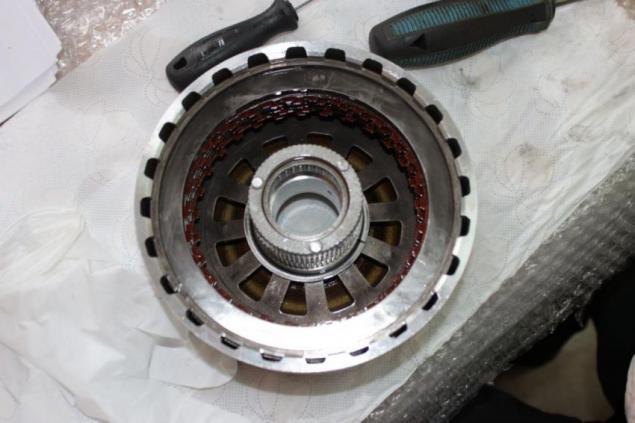
And we see the hero of the festivities! The classic problem of these boxes: crack the input shaft
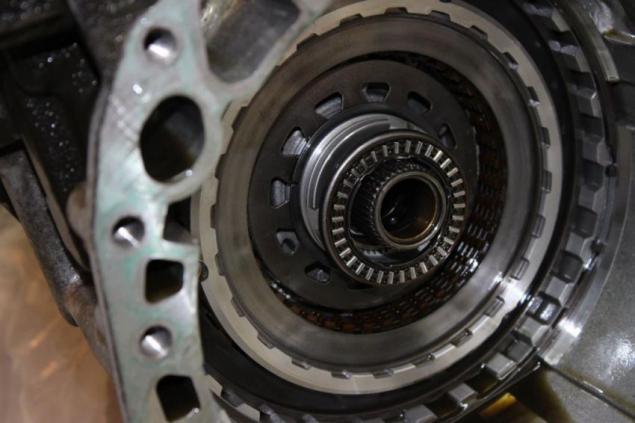
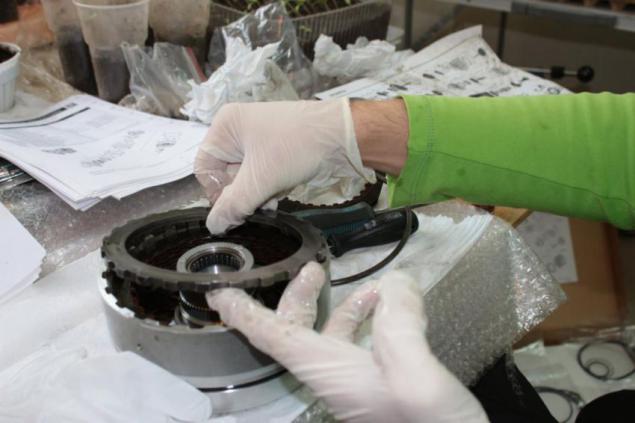
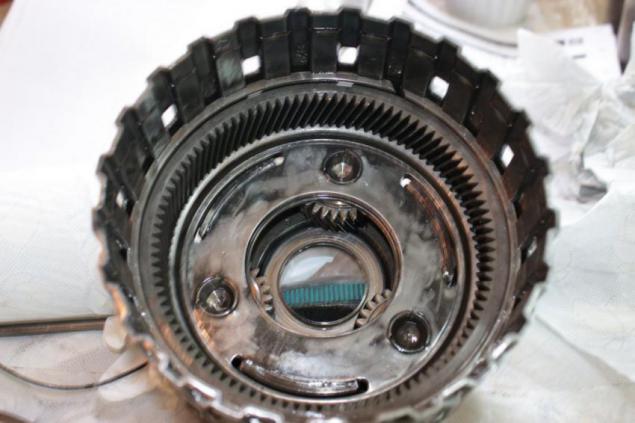
Parse on. Remove bearing
Remove the retaining ring
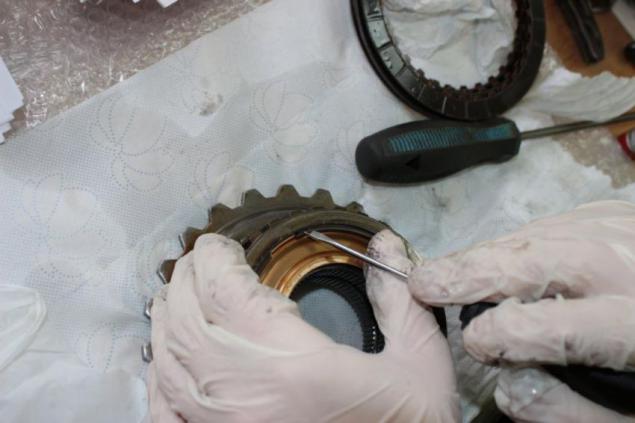
Clings to the wire in the opening of the shaft, remove the brake and clutch C. DE So very tight. Pull slowly, tapping the circle node. It clings to the node rubber bushings, which I wrote above. Do not forget to retrieve.
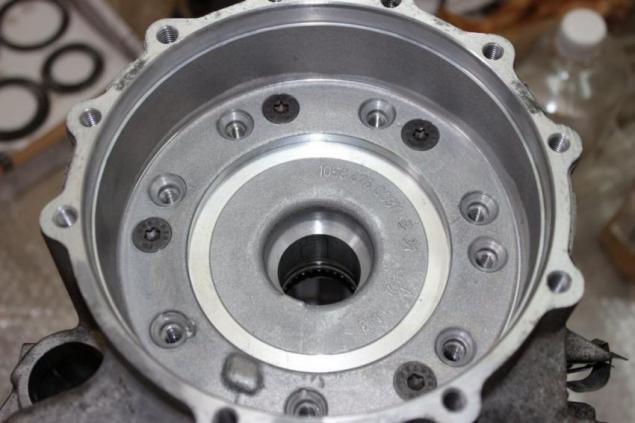
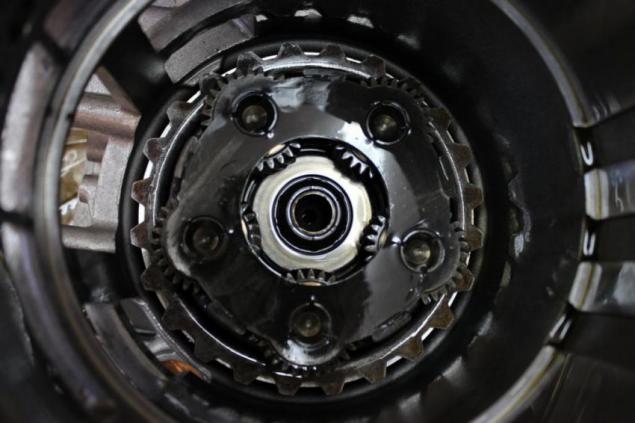
Removing the planetary transmission. Put the box vertically. Turn off the brake F
My body high pressure washer. Dry them.
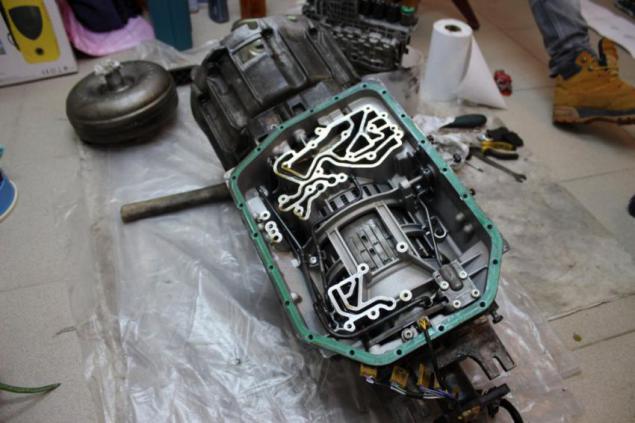
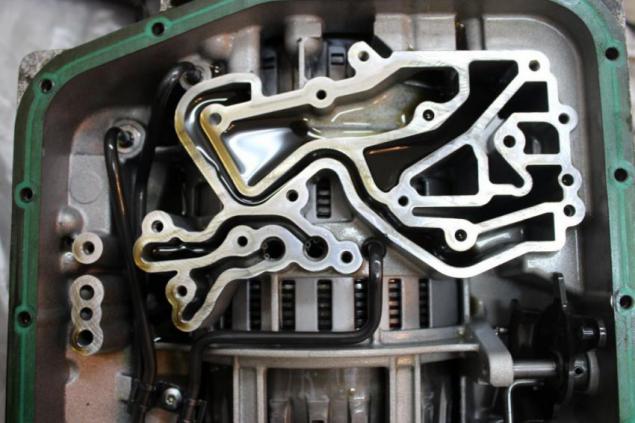
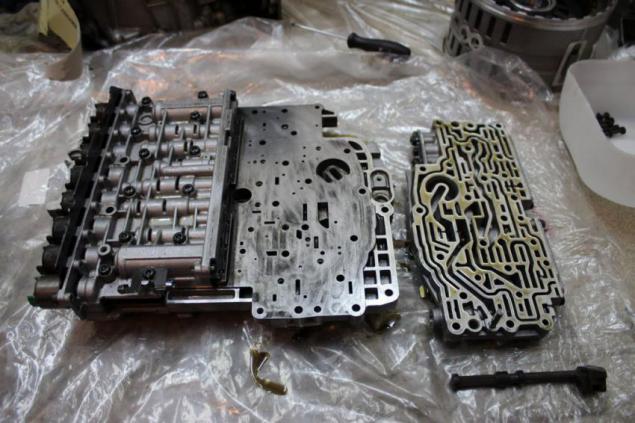
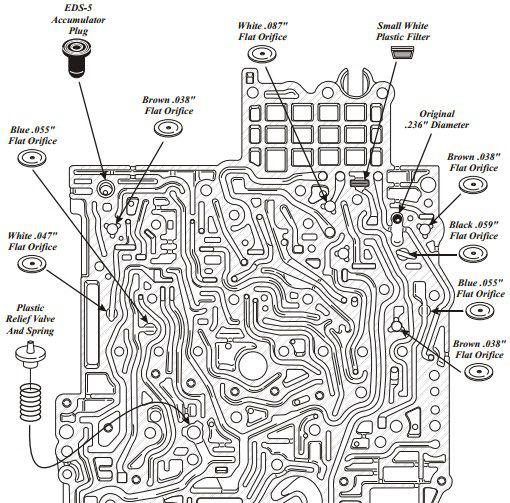
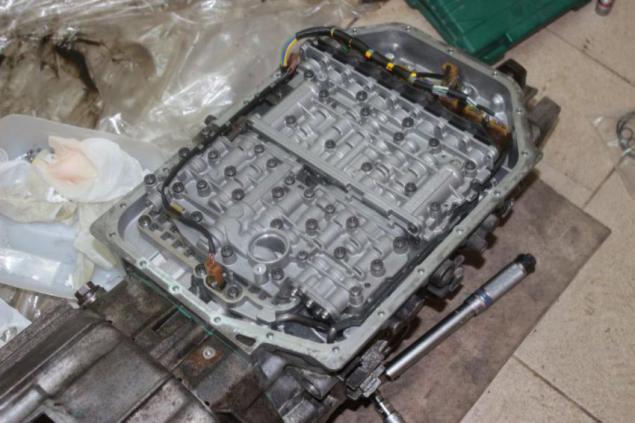
Getting a very responsible job. Disassembly and cleaning the hydraulic unit. This image will then tighten bolts necessary.

Remove the node from the speed switch
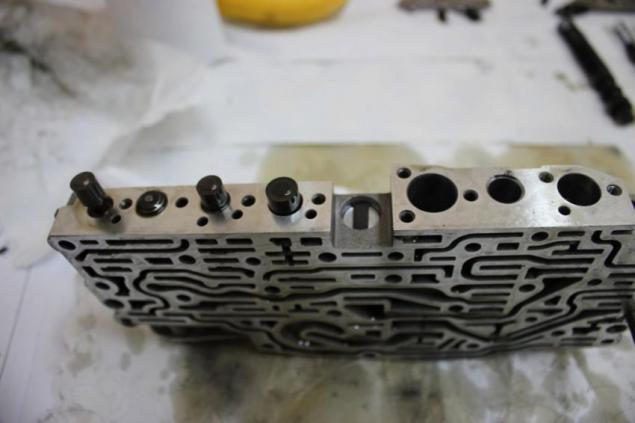
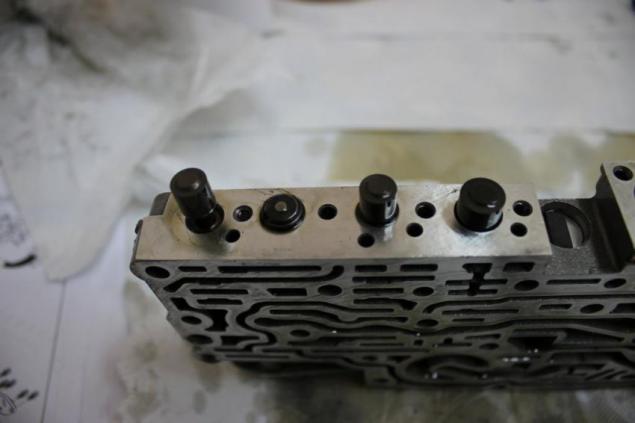
Turn off the retaining straps valves and springs
Removing the retaining plate from the middle of the channel. All items are carefully and consistently decompose. Snack bananchiki :)
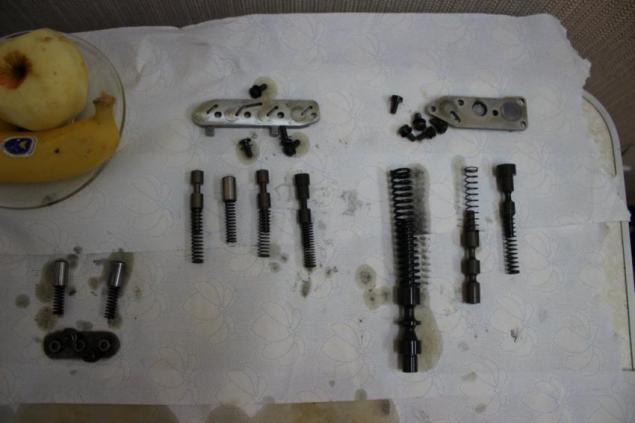
My plate washer, then with diesel fuel. My valves. Check for damage and the integrity of the channels in the plate. ATF lubricates the valves and set back. Trims twirl uniformly to nothing damaging to the point of a manual.
We continue to parse. It begins a responsible part. Under the metal gasket a lot of small elements that it is desirable not to lose. Photo No excerpt from ATSG
All wash, spread a trifle, changing pad (available in the kit), curl up with a point of a manual. Unscrew holder electric valves and pressure regulator. Wash - purged, changing rings. Putting it. Photos not, all the attention was in the unit, so that nothing is forgotten. Lay seal :)

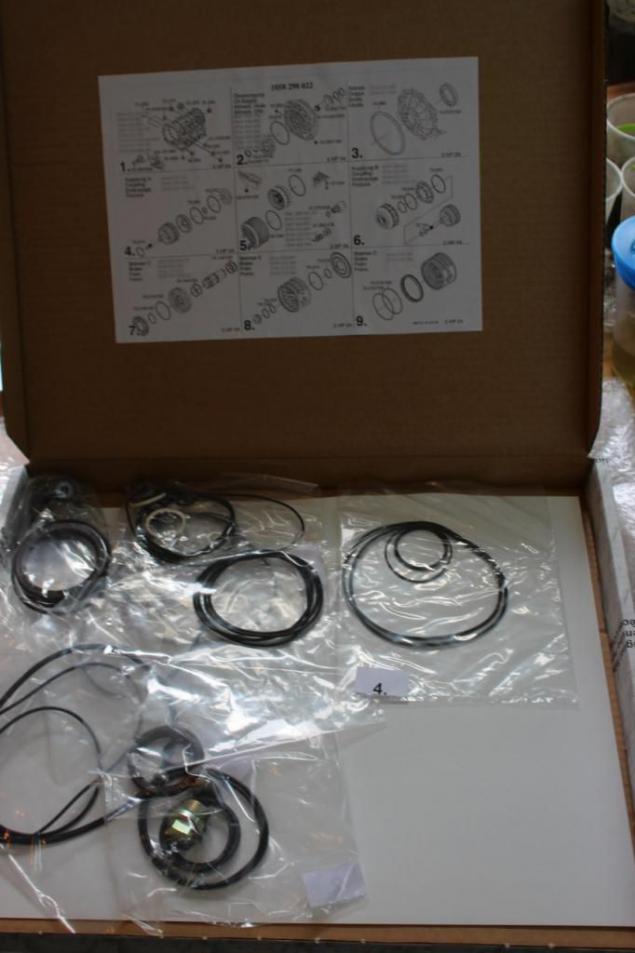
Came parts.
DICHTUNGSSATZ: Overhaul kit 1058 298 022
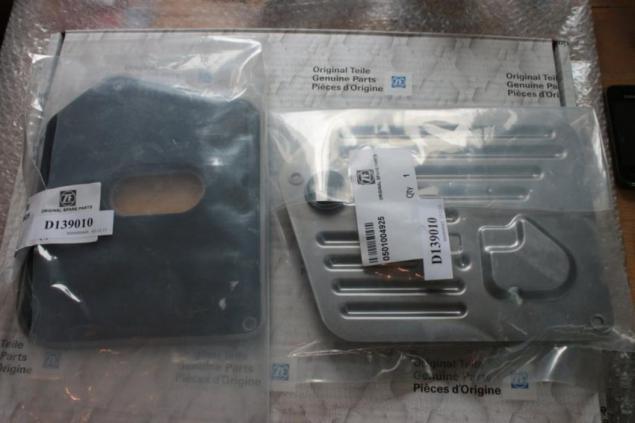
Filters 2 pieces: Hydraulic Filter 0501 004 925
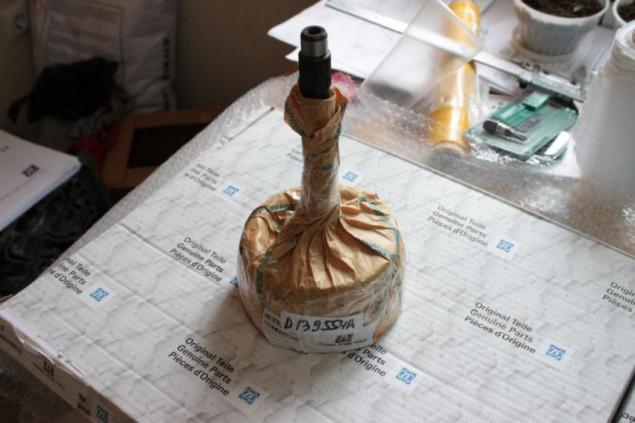
The input shaft: Input shaft 1058 270 040
Complete clutch: Clutch kit 1058 298 015
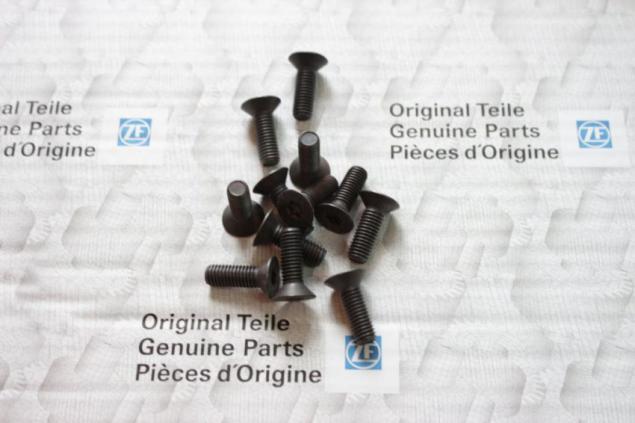
Bolt Kit, brake F: COUNTERSUNK SCREW 0736 401 054 12p.
Begin the assembly. Soak in the ATP clutches.
Putting the brake F. Insert the piston F. Before this view it for consistency of rubber. Depreciation in the future will be the cause of failure reverse gear. With my everything was fine.
Install the spring, insert half rings. I'm compressing the spring with the help of the 3 clamps.
It turns out so. A similar procedure is carried out with the other pistons are changing gum from the kit.
Getting clutch assembly package. The first set of Belleville spring. It has a wave-like profile.
During the spring there is a steel disc
For drive - friction lining
Again, there is a drive, and then pad and so on we collect the entire package. The last set a thick disk.
Package fix the retaining ring. In the end, it turns out.
Parse the inside of the brake. Remove the stopper, my, clean, collect.
Putting the brake. We get the knot. Focus to run away :(
We begin assembly of planetary gears. The scheme is:

Putting the carrier. Fix a retaining ring

Set in the housing, fix the ring
We put a brake lever F in the housing, pre-lubricated AFL. Bolted
Overturn, insert the output shaft
Install the sun gear
Putting it on, put a second sun, fix the ring
Set intermediate shaft

Overturn, finishing output part sets in boxes
Putting the brakes packets DE and clutch C. Insert clip.
Install the shaft assembly planetarki, do not forget for the bearing.
Brake D E in the body
Putting the clutch C and install. Fix a retaining ring.

Putting the input shaft, which I changed.
Putting the clutch B. In the photo he is no clutch package. We collect the package, fix the ring.
As a result, we obtain the node. Again, the focus has departed ...
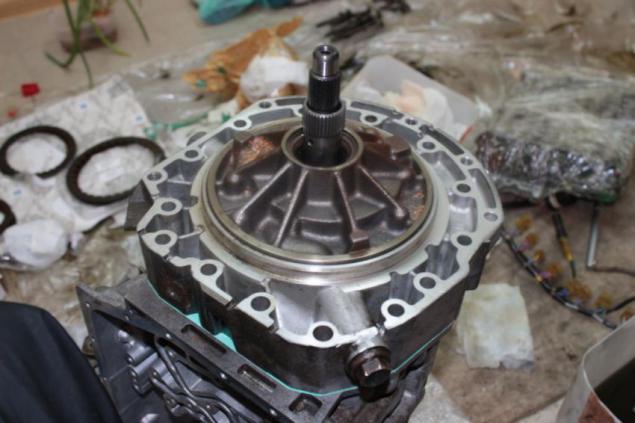
Install the unit in a box. It puts long and dreary. We need to get a bunch of grooves in the heavy part. It turns out so.
Turn off the oil pump from the bell. We disassemble, wash, change the oil seal, collect. We put a new lining of a set. Set on the box. There is a guide. The pump must be easily and firmly stand. If there be a gap, then not quite got the input shaft. Put the bell, all fasten with a torque of a manual.
Purged oil tube put back. Set hydraulic unit. Stretched on a manual
Changing the rear oil seal, set the output portion. Put the lining of the pallet, the pallet fasten with a torque of a manual. Put the position switch. We carry bear-box under the car. Pour in about a liter of ATF torque converter. Very gently inserted into the bell. Gotta get up easily, while rotating the output shaft to spin, but at the same time to stop the hand. Raise the box, tighten the 2 guides, tighten the remaining bolts. Connect connectors control selector cable, fasten the gimbal. Unscrew the filler hole. Fill about 4l suit, as long as it will pour back. When will pour start the engine. Again lёm is poured. When the third man begins to flow several times traversed by D - R with the provisions of the box. Reserve of R and hold. Lёm is poured. Once the screw cap will go back. We check the fact of motion car forward - backward. Rejoice.
Budget: 28t.r. parts, oil 10l tool about 12 (I have almost nothing).
Manual google named 5HP24E.pdf
That's all I wanted to say. Thank you for attention. Ask your answers :)
--img64--
Author: radiskull
--img65--
Source:
And after much deliberation I decided to do himself. I bought the instrument at 12, took off from a friend on the pit together. Supported by a hydraulic jack to prevent damage to the guides. We revert to 20cm, and I pulled out the torque converter. Already 10 pounds lighter, and it may fall out, with a broken oil pump drive automatic transmission. Removed finally brought in a clean, bright and warm room patient.

3 Print books: Corporate rerair manual, spare parts catalog and manual for the hydraulic unit ATSG

Print and glue full automatic transmission scheme. Well, just I did my dad, for which many thanks to him. Then I laid out right on the fine details of the scheme, which is very simplified assembly

Unscrew the drain bolt and the retaining bar connector position switch

Overturn box. Turn off the pallet. Magnets in a sad state

Turn off the filter, remove the clip connector electronic valves and sensors. Turn off the hydraulic unit. Just twist the screws with large heads!

Remove the retaining plate of the output shaft speed sensor and oil pipes. I have these bolts broke. I drill a small hole at the core and tear hammer.

Extract 2 Lock 2 springs under them. Be sure to retrieve the 2 rubber plugs out of the springs. Without this box does not understand. The new hub is in the cushioning package. You can not feel sorry.

So were the oil tube to remember :)

To make it easier to work Turn off the output shaft. No photo, I show an excerpt from the manual

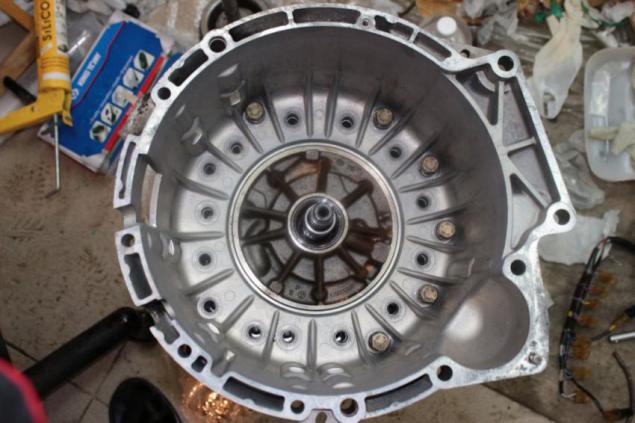
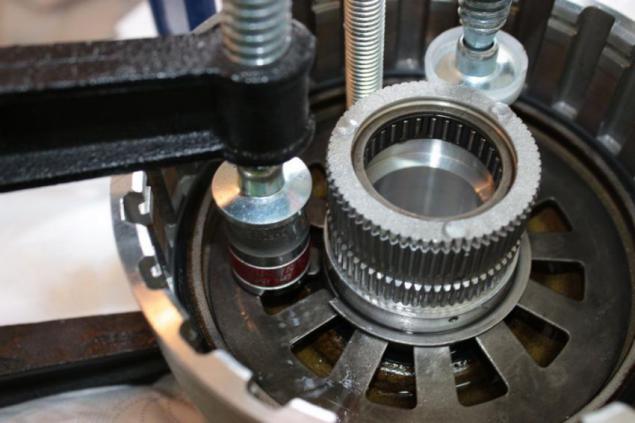
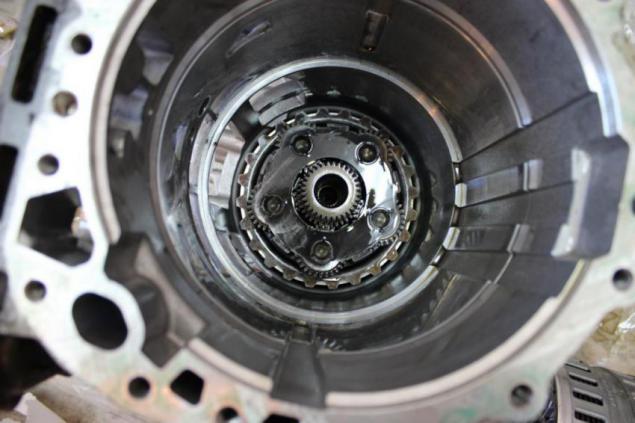
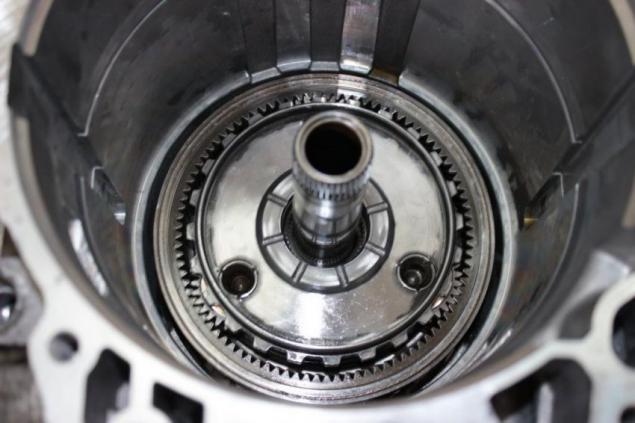
Now you can flip 180 and the box would normally be at the back. Next, unscrew the bell with a pump from the body of the box. To pump remained on the bell reserve the bolas

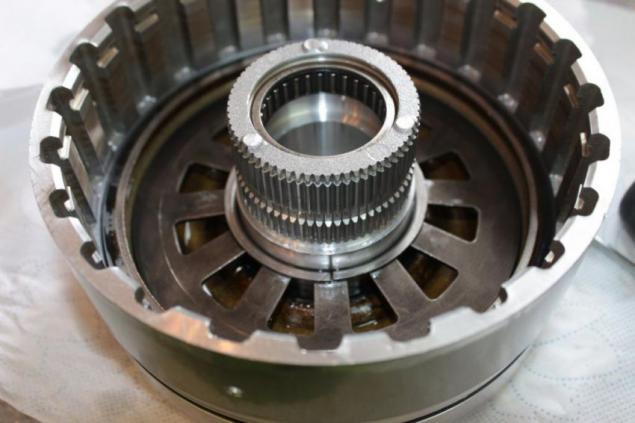
It turns out so. Lay off the node towards

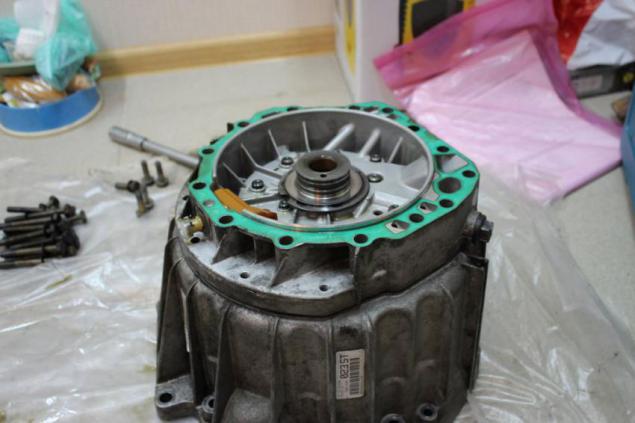
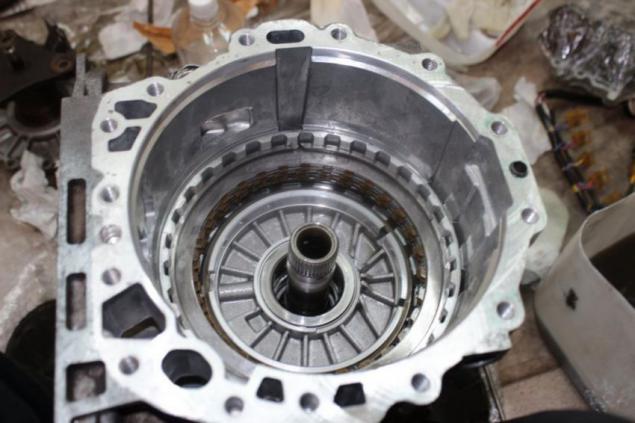
Put a box in the "back", remove the washer underneath the bearing. When assembling do not forget for the puck! I have it was "unnecessary detail" and had to disassemble to deliver. Well it is not far

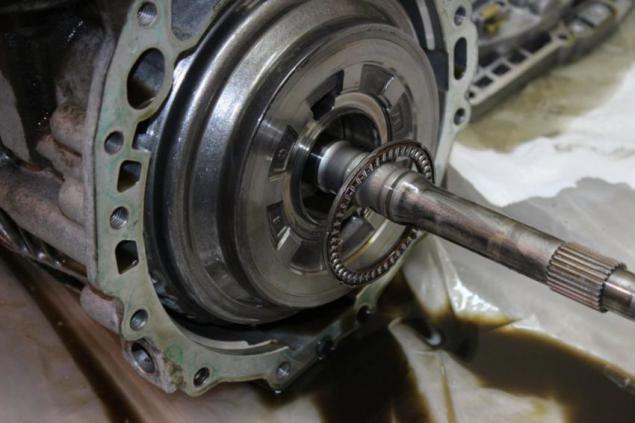
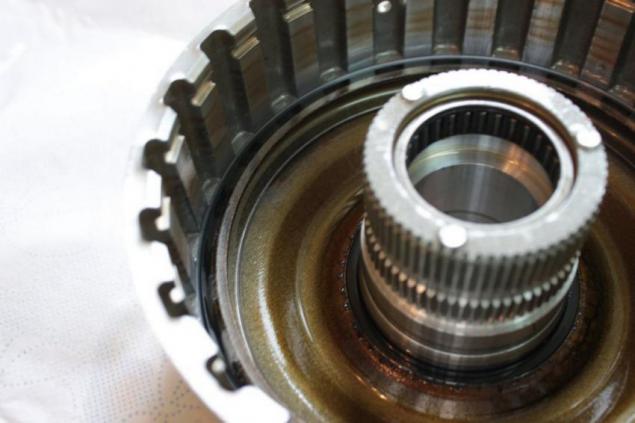
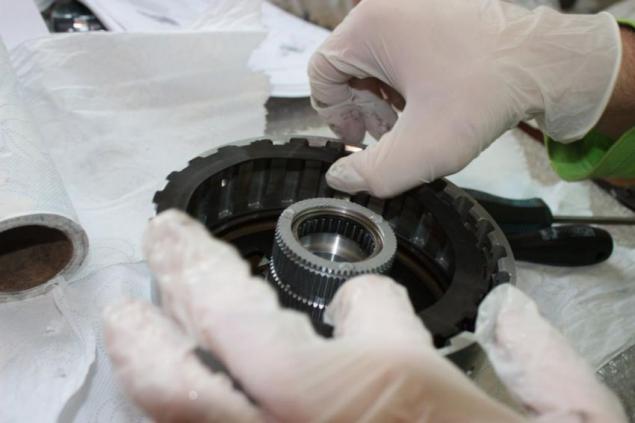
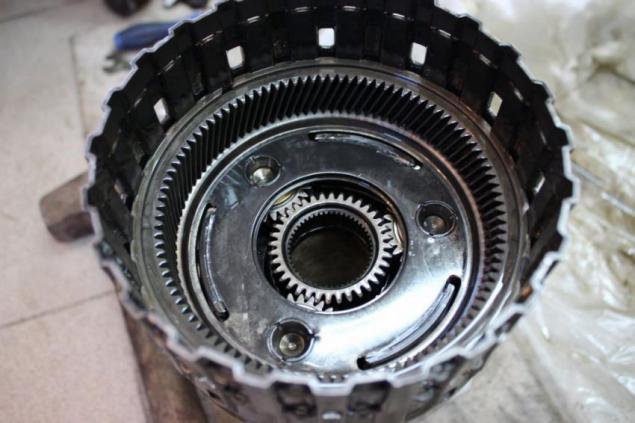
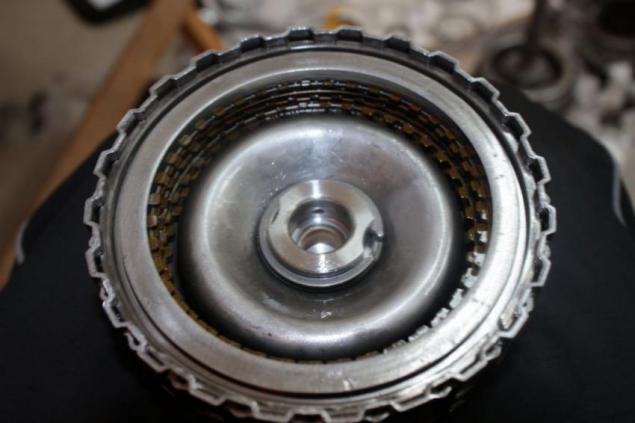
Removing the input shaft

Remove the retaining ring assembly and dismantle

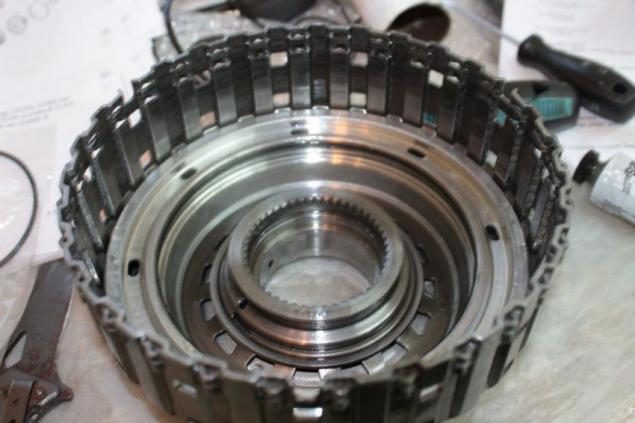
And we see the hero of the festivities! The classic problem of these boxes: crack the input shaft

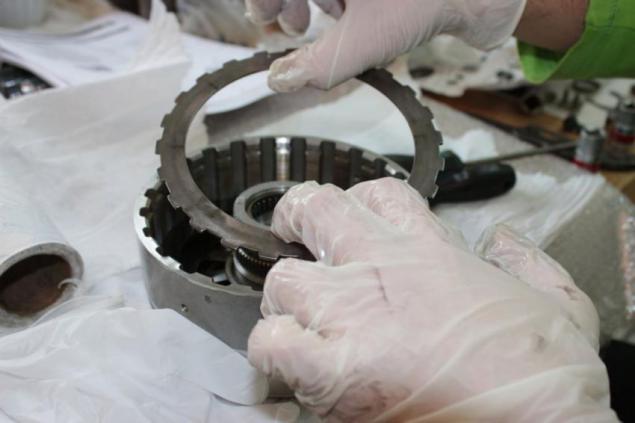
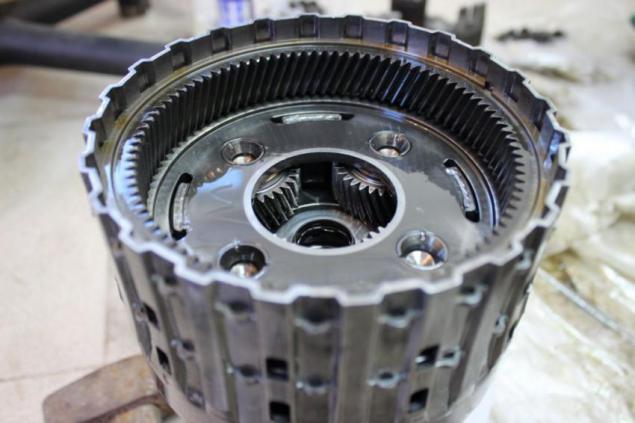
Parse on. Remove bearing

Remove the retaining ring

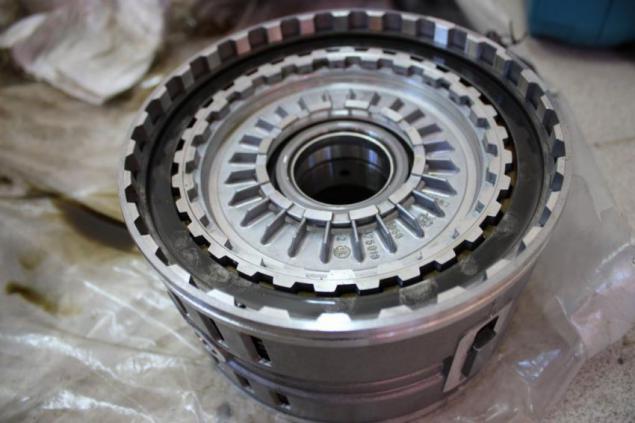
Clings to the wire in the opening of the shaft, remove the brake and clutch C. DE So very tight. Pull slowly, tapping the circle node. It clings to the node rubber bushings, which I wrote above. Do not forget to retrieve.

Removing the planetary transmission. Put the box vertically. Turn off the brake F

My body high pressure washer. Dry them.

Getting a very responsible job. Disassembly and cleaning the hydraulic unit. This image will then tighten bolts necessary.

Remove the node from the speed switch

Turn off the retaining straps valves and springs

Removing the retaining plate from the middle of the channel. All items are carefully and consistently decompose. Snack bananchiki :)

My plate washer, then with diesel fuel. My valves. Check for damage and the integrity of the channels in the plate. ATF lubricates the valves and set back. Trims twirl uniformly to nothing damaging to the point of a manual.

We continue to parse. It begins a responsible part. Under the metal gasket a lot of small elements that it is desirable not to lose. Photo No excerpt from ATSG

All wash, spread a trifle, changing pad (available in the kit), curl up with a point of a manual. Unscrew holder electric valves and pressure regulator. Wash - purged, changing rings. Putting it. Photos not, all the attention was in the unit, so that nothing is forgotten. Lay seal :)

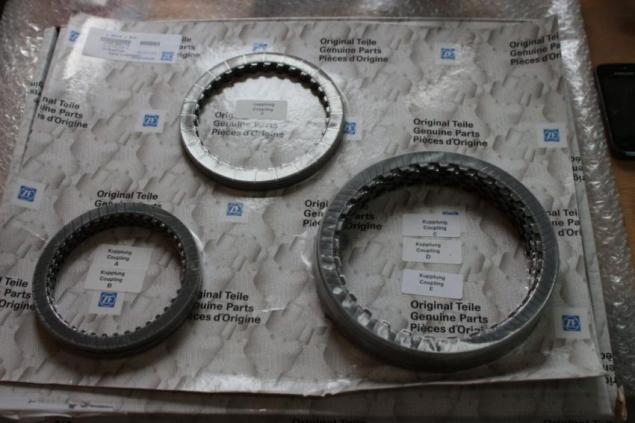
Came parts.
DICHTUNGSSATZ: Overhaul kit 1058 298 022

Filters 2 pieces: Hydraulic Filter 0501 004 925

The input shaft: Input shaft 1058 270 040

Complete clutch: Clutch kit 1058 298 015

Bolt Kit, brake F: COUNTERSUNK SCREW 0736 401 054 12p.

Begin the assembly. Soak in the ATP clutches.

Putting the brake F. Insert the piston F. Before this view it for consistency of rubber. Depreciation in the future will be the cause of failure reverse gear. With my everything was fine.

Install the spring, insert half rings. I'm compressing the spring with the help of the 3 clamps.

It turns out so. A similar procedure is carried out with the other pistons are changing gum from the kit.

Getting clutch assembly package. The first set of Belleville spring. It has a wave-like profile.

During the spring there is a steel disc

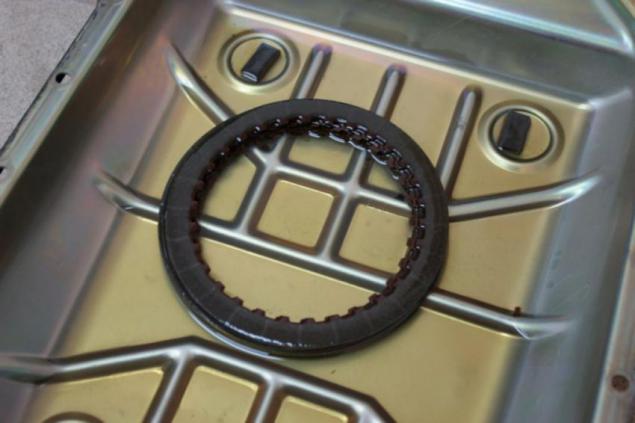
For drive - friction lining

Again, there is a drive, and then pad and so on we collect the entire package. The last set a thick disk.

Package fix the retaining ring. In the end, it turns out.

Parse the inside of the brake. Remove the stopper, my, clean, collect.

Putting the brake. We get the knot. Focus to run away :(

We begin assembly of planetary gears. The scheme is:

Putting the carrier. Fix a retaining ring

Set in the housing, fix the ring

We put a brake lever F in the housing, pre-lubricated AFL. Bolted

Overturn, insert the output shaft

Install the sun gear

Putting it on, put a second sun, fix the ring

Set intermediate shaft

Overturn, finishing output part sets in boxes

Putting the brakes packets DE and clutch C. Insert clip.

Install the shaft assembly planetarki, do not forget for the bearing.

Brake D E in the body

Putting the clutch C and install. Fix a retaining ring.

Putting the input shaft, which I changed.

Putting the clutch B. In the photo he is no clutch package. We collect the package, fix the ring.

As a result, we obtain the node. Again, the focus has departed ...

Install the unit in a box. It puts long and dreary. We need to get a bunch of grooves in the heavy part. It turns out so.

Turn off the oil pump from the bell. We disassemble, wash, change the oil seal, collect. We put a new lining of a set. Set on the box. There is a guide. The pump must be easily and firmly stand. If there be a gap, then not quite got the input shaft. Put the bell, all fasten with a torque of a manual.

Purged oil tube put back. Set hydraulic unit. Stretched on a manual

Changing the rear oil seal, set the output portion. Put the lining of the pallet, the pallet fasten with a torque of a manual. Put the position switch. We carry bear-box under the car. Pour in about a liter of ATF torque converter. Very gently inserted into the bell. Gotta get up easily, while rotating the output shaft to spin, but at the same time to stop the hand. Raise the box, tighten the 2 guides, tighten the remaining bolts. Connect connectors control selector cable, fasten the gimbal. Unscrew the filler hole. Fill about 4l suit, as long as it will pour back. When will pour start the engine. Again lёm is poured. When the third man begins to flow several times traversed by D - R with the provisions of the box. Reserve of R and hold. Lёm is poured. Once the screw cap will go back. We check the fact of motion car forward - backward. Rejoice.
Budget: 28t.r. parts, oil 10l tool about 12 (I have almost nothing).
Manual google named 5HP24E.pdf
That's all I wanted to say. Thank you for attention. Ask your answers :)
--img64--
Author: radiskull
--img65--
Source:


Google Night Walk: night walk to Marcel. Now with sound
Military exploits platoon Smirnov, the same Fyodor from "Operation Y